Table of Contents
Advertisement
Quick Links
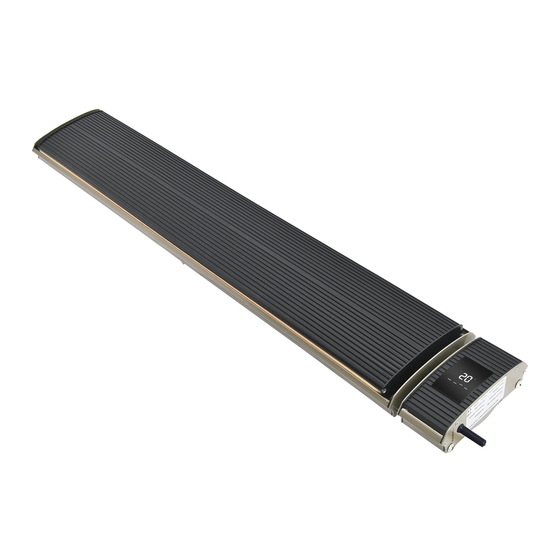
INFRARED HEATER
13W Series
READ AND SAVE THESE INSTRUCTIONS
Read all instructions carefully before setting up and operating this unit.
This manual is designed to provide you with important information needed to setup, operate,
maintain for your radiant heaters.
Failure to follow these instructions may damage and/or impair its operation and void the
warranty.
Advertisement
Table of Contents

Summary of Contents for JH 13W Series
- Page 1 INFRARED HEATER 13W Series READ AND SAVE THESE INSTRUCTIONS Read all instructions carefully before setting up and operating this unit. This manual is designed to provide you with important information needed to setup, operate, maintain for your radiant heaters. Failure to follow these instructions may damage and/or impair its operation and void the...
- Page 2 Health and fresh! 1. SAFETY PRECAUTIONS This appliance is not intended for use by persons (including children) with reduced physical sensory or mental capabilities, or lack of experience and knowledge, unless they have been given supervision or instruction concerning use of the appliance by a person responsible for their safety.
-
Page 3: Performance Features
Health and fresh! explosive,easy to shock. 13. Please do not insert any metal or foreign objects to inside of radiant heater, to avoid accident or personal injury. 14. Radiant heater panel surface with high temperature, the surface temperature can reach to >50℃~386℃,touch is forbidden,beware of scalding accident. -
Page 4: Working Condition
(4) Ground wire should be connected to the grounding device on the building, if not, please consult to professional installer, please do not put ground wire to gas pipe, water pipe, lightning rod or telephone grounding wire. Model No. Power(W) Rated Current(A) Voltage(V) Cable length(mm) JH-NR10-13W 1000 220-240 2000 JH-NR18-13W 1800 220-240 2000... -
Page 5: Installation Instruction
Health and fresh! 7. INSTALLATION INSTRUCTION Model No. Dimension A Dimension B JH-NR10-13W 755mm 200mm JH-NR18-13W 1155mm 700mm JH-NR24-13W 1655mm 1200mm JH-NR32-13W 2155mm 1700mm Step 1:Remove packing of both ends of heater. - Page 6 Health and fresh! Step 2:Connect adjusting bracket to sliding bracket. Step 3:Installation of sliding bracket & heater, as arrow points. Step 4:Fix adjusting bracket into the wall by expansion screws.
- Page 7 Health and fresh! Step 5:Installation of two adjusting brackets; make sure lock brackets tight by butterfly hand screw. 8. INSTALLATION DIAGRAM...
-
Page 8: Display Interface
Health and fresh! 9. DISPLAY INTERFACE Manual Key Press Manual Key button to turn on/off the heater, and set the heating level. Long press Manual Key to pair the Wi-Fi network(details as chapter 11). Indoor temperature sensor Using it to collect indoor temperature. - Page 9 Health and fresh! 10. MANUAL FOR REMOTE CONTROLLER Remote appearance Remote LED display 1. ON/OFF button Press ON/OFF button to turn on/off heater. 2. Clock button Remote is powered on(as show in picture 2-1), present time is 00:00, time setting as follow: 1)Press clock button, the hour will flash(as show in picture 2-2), press up or down button to change hour setting.
- Page 10 Health and fresh! Pic2-1 Pic2-2 Pic2-3 Pic2-4 3. Heat button Press level button to adjust the power when the heater is on(as show in picture 3-1). Pic3-1 4. Fast hot button Press fast hot button to turn on/off fast hot function. Fast hot function is to let the heater run at full power for a certain time, to achieve the purpose of rapid heating.
-
Page 11: Connect To Network
Health and fresh! Pic5-1 Pic5-2 Pic5-3 Pic5-4 6.Timer off 1)Press timer off button, it will show off--:--(as show in picture 6-1). 2)Press up or down to change hour(as show in picture 6-2). 3)Press time off button again, hour stop shining and minute begin to shine, press up or down to change minute(as show in picture 6-3). -
Page 12: Register / Log In
Health and fresh! 2. Register / Log in Register an account via mobile number or email address. Log in with existing account if an account has already been set. 3. Home management 1. Click “Start your smart life” to “Add family” 2. - Page 13 Health and fresh! 3. Click “Add Room” to add another room. By click “Done” to finish the room setting. And click “…” to proceed room management as needed. Click “Home Management” to add family. One account can simultaneously control several families by selecting available devices at the family management page.
-
Page 14: Add Devices
Health and fresh! 4. Add Devices Keep pressing Manual Key over 8 seconds after power on, till heater has beep sounds and icon of Wi-Fi flashing (twice per second). Click “add device” or “+” on the screen, find “Small Home Appliance”—“Heater”... - Page 15 Health and fresh! Press “Confirm indicator rapidly blink” and select a Wi-Fi signal nearby and enter Wi-Fi password to confirm the connection. Once the device added successfully, press “Done” to finish this procedure. If failed, you need to re-add or search for help. 5.
-
Page 16: Inspection Items After Installation
Health and fresh! Switch : Turn on / off heater. Mode : Set Auto / Manual mode. Auto mode: set temperature. Manual mode: Set temperature at 40℃(Unchangeable). Level : Change heating levels. Level_1 : Heating at 25% power. Level_2 : Heating at 50% power. Level_3 : Heating at 75% power. -
Page 17: Packing List
Remote controller 1 pc Adjusting bracket 1 set Fastener 1 set Sliding bracket 1 set 16. SPECIFICATIONS Package Gross Model No. Dimension(mm) size(mm) weight(kg) weight(kg) JH-NR10-13W 755*189*67 820*250*150 JH-NR18-13W 1155*189*67 1220*250*150 JH-NR24-13W 1655*189*67 1720*250*150 11.3 JH-NR32-13W 2155*189*67 2220*250*150 12.3 14.3...

Need help?
Do you have a question about the 13W Series and is the answer not in the manual?
Questions and answers