Subscribe to Our Youtube Channel
Summary of Contents for Soundstream VCD-22B
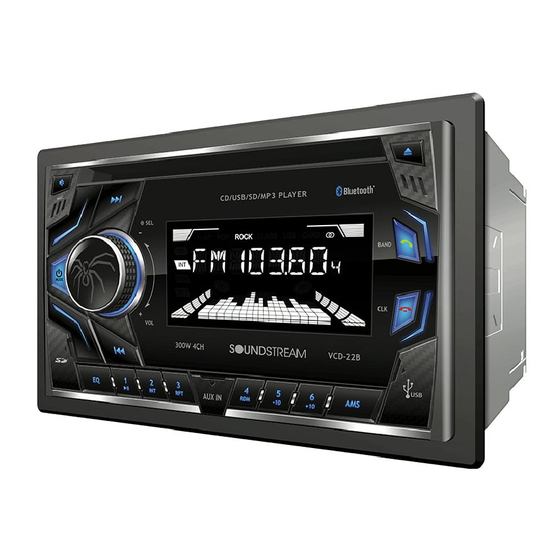
- Page 1 2 Din Car AM/FM Radio, CD/MP3 Player with USB/SD Card Inputs Model No.:VCD-22B USER’S MANUAL...
-
Page 2: Table Of Contents
CONTENTS Precautions........................1 How to Handle Discs....................1 Precautions & Warnings....................1 Lithium Battery Cell Warnings..................1 Drivers and Connections.....................1 Other Warnings......................1 Installation........................2 Installation Procedures....................2 Important........................2 To Install the Car Radio....................2-3 Wiring Connections....................3 Removal of the Main Unit ....................3 Control Panel Button Locations..................4 General Operation......................5 Turn Unit On/Off......................5 Adjust Volume (VOL)....................5 Adjust Menu Options (SEL)..................5... -
Page 3: Precautions
PRECAUTIONS How to Handle Discs • Handle a disc by its edges. Do not touch the playing side • Before inserting a disc, wipe the disc outward from the disc center with a clean, soft, dry and lint-free cloth. Do not use solvents or thinners such a petrol/benzene or cleaners. -
Page 4: Installation
INSTALLATION Installation Procedures First complete the electrical connections and then check for correctness. Installation Opening This unit can be installed in any dashboard Having 103 mm an opening as shown the right figure. 182 mm Important: Remove the transport CD deck screws before use. To Install the Car Radio Be sure you test all connections first, and then follow these steps to install this unit. -
Page 5: Wiring Connections
INSTALLATION(CONT.) INSTALLATION DIAGRAM - Only use speakers with 4 ohms impedance. - Do not attach the control panel to the chassis before wiring is complete. - The maximum current of the auto antenna is 200mA. Wiring Connections WIRING DIAGRAM CAUTION +12V DC NEGATIVE GROUND... -
Page 6: Control Panel Button Locations
CONTROL PANEL BUTTON LOCATIONS CD/USB/SD/MP3 PLAYER 300W 4CH VCD-22B (power)/MODE (source) button 2. SEL (select/menu) button and VOL (volume) knob 3. BAND(band) button (anser call) button 4. AMS (automatic store / preset station scan, automatic music search) button (pause/play), Preset station1 button 6. -
Page 7: General Operation
GENERAL OPERATION Turn Unit On/Off • Press any button on the front panel or on the remote control to turn on the unit. • Press and hold the power ( ) button on the front panel or on the remote control to turn the unit on or off. -
Page 8: Set The Clock (Clk)
GENERAL OPERATION (CONT.) Set the Clock (CLK) 1. To display clock time, press the button. 2. To set clock time, press and hold the button and the hour will flash. 3. Press the button on the front panel or on the remote control to adjust the hour. 4. -
Page 9: Radio Operation
RADIO OPERATION Switch Between USA area and Europe area Frequency In radio mode, press the button to enter the switch state of the EU(USA) and EU(europe) frequency, then rotate it to switch between US(USA) and EU(europe) frequency. The system will change the frequency setting in about 3 seconds. Change Bands (BAND) Press the BAND... -
Page 10: Disc/Usb/Micro Sd Card Operation
DISC / USB / MICRO SD CARD OPERATION To insert DISC / USB / SD CARD • To play files on a disc, insert a disc with the label surface facing upward into the disc slot. Playback will begin automatically. Label surface up •... -
Page 11: Select The Track Or File For Playback In Mp3 Format
DISC / USB / MICRO CARD OPERATION (CONT.) Select the track or file for playback in MP3 format Press the button repeatedly to select one of the following 3 search modes: NUM SCH (Searching by track or file serial number) DIR SCH (Searching by folder serial number) FILE SCH (Searching by track or file name) Searching by track or file serial number:... -
Page 12: Bluetooth Operation
To begin pairing, enable BT mode on your mobile phone. 2. When the phone the car audio system, the “SOUNDSTREAM” name will be displayed. 3. Choose the “SOUNDSTREAM” from the device list to pair and connect with the car audio system. Upon confirming, the BT logo will stop flashing. -
Page 13: Remote Control
REMOTE CONTROL Remove Insulating Sheet The remote control comes with an insulating sheet attached to the underside of the remote control, as illustrated on the right. The remote control will not work until the insulating sheet is removed. Replace Lithium Battery Cell 1. -
Page 14: Specifications
SPECIFICATIONS General Chassis Dimensions.............178(W) x 160(D) x 100(H) mm Power Supply Requirement ..................DC 12V Current Consumption ..................10A (max.) Maximum Power Output ..................25W x 4CH Radio USA/ Europe Frequency Range..........87.5 - 107.9 MHz (200KHz/Step) 87.5 - 108.0 MHz(50KHz/Step) Usable Sensitivity ....................30 dBu I.F. -
Page 15: Tr O U B L E S H O O T I N
TROUBLESHOOTING The following chart will help in solving most problems that may occur. If you still have questions after going through the checklist, please consult your local customer service representative. Before going through this check list, refer the wiring and operating procedures.


Need help?
Do you have a question about the VCD-22B and is the answer not in the manual?
Questions and answers