
Related Manuals for Smeg WDF147X-2


Summary of Contents for Smeg WDF147X-2
- Page 1 WASHER-DRYER KOMBINERAD TVÄTTMASKIN & TORKTUMLARE KOMBIMASKINE INSTRUCTION MANUAL BRUKSANVISNING VEJLEDNING...
-
Page 2: Table Of Contents
Contents 1. PRECAUTIONS FOR SAFETY AND USE ................... 2 2. INSTALLATION INSTRUCTIONS ....................7 3. DESCRIPTION OF CONTROLS ....................12 4. USING THE APPLIANCE FOR WASHING ................13 5. USING THE APPLIANCE FOR DRYING .................. 20 6. CLEANING AND MAINTENANCE ................... 22 7. -
Page 3: Precautions For Safety And Use
READ THE INSTRUCTIONS Attention! You are advised to read all the instructions in this manual carefully; it will inform you about the right conditions for the proper, safe use of your washer-dryer It is very important to keep this instruction manual with the appliance for future ref- erence. - Page 4 WARNING: the higher the spin speed, the higher will be the noise and the lower the remaining moisture content. The lower the amount of residual moisture at the end of the wash, the lower the energy consumption will be during drying.
- Page 5 WARNING: The appliance must not be supplied through an external switch- ing device, such as a timer, or connected to a circuit that is regularly switched on and off by a utility. The appliance must be installed using new sets of hoses (supplied with the appliance).
- Page 6 The appliance is intended for use by adults. Do not allow children to tam- per with the washer-dryer's controls or play with it and do not keep children in the vicinity while the programme is in progress. Young animals or small children might climb into the washer-dryer . ...
- Page 7 The manual provides the correct instructions for installation, use and mainte- nance, as well as giving useful advice. For Great Britain only Warning: this appliance must be earthed. Fuse replacement If the mains lead of this appliance is fit- ted with a BS 1363A 13amp fused plug, to change a fuse in this type of plug use an A.S.T.A.
-
Page 8: Installation Instructions
2. INSTALLATION INSTRUCTIONS Important! The appliance must be installed by a qualified engineer in compliance with the relevant regulations. The washer-dryer is heavy. Take care when lifting it. 2.1 UNPACKING The unit on flexible mounts is fixed in place for transport using the screws (A) on the rear of the washer-dryer, with the relative plastic spacers (B). - Page 9 2.2 POSITIONING AND LEVELLING Place the appli- ance in the chosen position. Level the appli- ance carefully in all directions with the aid of a spirit level, adjusting the height of the feet if neces- sary. Once done, fix the feet in place with the locknuts provided. 3.
- Page 10 Warning! This operation must be carried out with care to prevent the washer- dryer from vibrating, moving or generating excessive noise during use. If the appliance is installed on a carpeted floor, take care to ensure that the openings in the bottom of the washer-dryer are not obstructed. ...
- Page 11 2.4 CONNECTING TO THE DRAIN Insert the end of the drain hose into a drain pipe having inside diameter of at least 4 cm, at least 50 to 90 cm above floor level, or connect it securely (using the plastic fitting on the elbow in the hose) to a sink or bathtub. In all cases, check that the end of the drain hose is securely fixed to prevent the repulsive force of the water from pushing it out of place.
- Page 12 2.5 ELECTRICAL CONNECTION Before connecting the plug to the power socket ensure that: 1. The electrical system voltage is the same as that stated on the nameplate on the front of the appliance, in the zone visible when the door is open. The rated power supply and the fuses required are specified on the name- plate.
-
Page 13: Description Of Controls
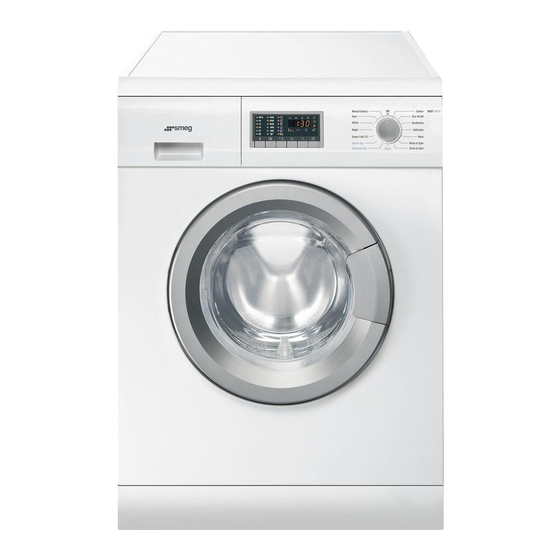
3. DESCRIPTION OF CONTROLS 3.1 CONTROL PANEL All the appliance's control and monitoring devices are placed together on the front panel. Display: shows the settings (washing temperature, spin speed, cycle status, flexi time, maximum recommended weight, drying levels, child lock, clean programme, time drying and automatic drying levels). -
Page 14: Using The Appliance For Washing
4. USING THE APPLIANCE FOR WASHING 4.1 PREPARING THE ITEMS FOR WASHING Subdivide the items for washing by fabric type and colour fastness. Wash white and coloured items separately. New coloured items should be washed separately the first time. Normally, items carry labels with washing instructions. The following is a short description of the symbols used on these labels. - Page 15 4.4 LOADING THE ITEMS FOR WASHING Open the door and load the laundry, distributing it evenly over the drum, with items opened out and not bundled together; if possible, large and small items should be well mixed. The washing machine covered by this manual can be loaded with up to 7kg of laundry for each wash. If this weight is exceeded, the washing results will be poor and the appliance may malfunction.
- Page 16 4.6 POWDER DETERGENT DOSES Laundry with normal dirt Choose a programme without prewash. Pour the total amount of detergent shown on the pack into the main wash compartment of the detergent drawer. Very dirty laundry Choose a programme with prewash. Place ¼...
- Page 17 4.11 SELECTING AND CONFIRMING OPTIONS Options Confirm option Start Pause Option selection The Option Selection button can be used to select the following options in sequence (from the top down): Time to End: key can be pressed repeatedly to select the time after which the washing programme will end.
- Page 18 4.12 TIME TO END Option Time to end Time to symbol Start pause symbol Start Pause Option selection Confirm option To select options “time to end”,press the “Option selection” button, pressing repeatedly the “Confirm option” button options you can select when the wash cycle ends.. The time to end of cycle function calculates the initial duration of the washing/drying cycle, the settings made (temperature, spin speed and options) which may shorten or lengthen the cycle's initial duration, and the delay time the user wishes to add before the cycle starts.
- Page 19 4.14 INTERRUPTING OR CHANGING THE WASHING PROGRAMME The washing programme in progress can be interrupted at any moment: press the “Start/Pause” button for about 3 seconds: the display shows the word PAUS (for 1 second) alternating with the time remaining until the end of the cycle (for 1 second). The Start/Pause light flashes on and off.
- Page 20 4.17 OPENING THE APPLIANCE IN AN EMERGENCY In the event of a power failure, the door is opened using the mechanical release device activated by means of the lever in the bottom of the appliance: Turn the knob to Off and disconnect the power supply plug from the socket.
-
Page 21: Using The Appliance For Drying
5. USING THE APPLIANCE FOR DRYING 5.1 GENERAL During drying cycles, the water tap must be turned on and the drain hose correctly positioned. This appliance can be set to perform wash only, dry only and wash-and-dry programmes. In the wash-and-dry programme, the appliance switches from washing to drying automatically, with no need to use the controls (at the end of the wash) to obtain the complete cycle. - Page 22 Whether drying will be at the normal temperature (90°C) or the delicate fabrics temperature (60°C) depends on the washing programme set previously. Once a drying has been set, the symbol on the display flashes; it remains constantly on once the cycle enters the drying stage.
-
Page 23: Cleaning And Maintenance
6. CLEANING AND MAINTENANCE Important – Before carrying out any cleaning or maintenance procedure, the plug must be disconnected from the power supply socket. 6.1 CLEANING THE OUTSIDE OF THE APPLIANCE Regular, thorough cleaning will keep your appliance looking good. ... - Page 24 6.4 CLEANING THE DRAIN PUMP Only clean the drain pump if it is obstructed by buttons, hairpins and the like and the water cannot drain. In this case, proceed as follows. Remove the plug from the socket to disconnect the machine from the electrical power supply. Pull out the base plate.
- Page 25 6.5 CLEANING THE DETERGENT DRAWER The detergent drawer should be kept clean, removing all solid deposits. To simplify this operation, completely remove the detergent drawer (pull the drawer fully out, press in the zone marked PUSH and then remove completely). Remove the siphon "A"...
-
Page 26: Troubleshooting
7. TROUBLESHOOTING This produce complies with the relevant regulations governing the safety of electrical equipment. For safety reasons, any technical inspections or repairs must be performed by qualified staff, to prevent all hazards for the user. If the appliance does not work, before calling the After-Sales Service, to avoid unnecessary expense, check yourself that the operations listed in this troubleshooting table have been carried out. - Page 27 Appliance does not spin Anti-imbalance safety device tripped because laundry not evenly distrib- uted in drum. If laundry is still wet at end of cycle, rearrange it in the drum by hand and repeat spin programme only. Emptying water from drum In the event of a power blackout or appliance failure, the water can be re- moved from the drum using the emergency procedure.
-
Page 28: Additional Information For The User
8.ADDITIONAL INFORMATION FOR THE USER The following information is provided in accordance with the European Ecodesign regulation (EU) 2019/2023 The values indicated for programmes other than Eco 40-60 are indicative only. Automatic and timed dry washer-dryer Pro- Rated Energy con- Water consu- Programme Temperature... - Page 29 ** Eco 40-60 program Test programme compliant with European Ecodesign regulation (EU 2019/2023) and the European regula- tion on energy labelling using cold water (15°C) (EU 2019/2014). Washing program that is able to clean normally soiled cotton laundry declared to be washable at 40°C or 60°C together in the same washing cycle.
- Page 30 PROGRAM GUIDE Detergent drawer compartments Options Programs Temp. Max. Spin Max. Max. drying Prewash Wash Softner Prewash Intensive Easy Iron Extra rinse Flexi Drying after Wash program description (°C) (rpm) washing load (kg) time wash if load (kg) selected Cotton Delicate coloureds with light dirt / 20°...
- Page 31 GUÍA DEL PROGRAMA Compartimentos del cajón de detergente Opciones Programas Temp. Centrifugado Carga Carga máx. Prelavado Lavado Suavizante Prelavado Intensivo Planchado Enjuague Horario Secado tras Descripción del programa de lavado (°C) máx. máx. de de secado fácil adicional flexible lavado si se (rpm) lavado (kg)
- Page 32 OHJELMATAULUKKO Pesuainelokerot Valinnat Ohjelmat Lämpötila Maksimi Maksimi Maksimi Esipesu Pesu Huuhteluaine Esipesu Intensiivinen Rypistymisen Ylimääräinen Flexi Kuivaus Pesuohjelman kuvaus (°C) linkousno täyttömäärä kuivausmää esto huuhtelu time pesun peus (kg) rä (kg) jälkeen jos (rpm) valittu Kylmäpesu tai pesu 20 °C:ssa, huuhtelu ja loppulinkous valitulla Herkät värit, kevyesti likainen pyykki / 20°...
- Page 33 PROGRAMOVERSIKT Vaskemiddelskuff Alternativer Programmer Temp. Maks. Maks. Maks. Forvask Vask Tøymykner Forvask Intensiv Strykelett Ekstra Tidsforsi Tørking etter Beskrivelse av vaskeprogram (°C) sentrifuge vaskekapa tørkekapasit skylling nkelse vask hvis ring (opm) sitet (kg) et (kg) valgt Vasker i kaldt vann eller ved 20 °C, skyller og sluttsentrifugering Ømfintlig farget tøy som er lite skittent / 20 °...
- Page 34 PROGRAMGUIDE Skuffer til vaskemiddel Valgmuligheder Programmer Temp. Maks. Maks. Maks. Forvask Vask Skyllemiddel Forvask Intensiv Strygelet Ekstra skyl Flex tid Tørring efter Beskrivelse af vaskeprogrammer (°C) centrifugering vaskemæn tørremængde vask, hvis (omdr/min) gde (kg) (kg) valgt Kold vask eller ved 20°C, skyl og centrifugering ved den valgte Sarte, let snavsede, farvede tekstiler / 20°...
- Page 35 PROGRAMGUIDE Tvättmedelsfack Tillval Program Temp. Max. Max. Max. Förtvätt Tvätt Sköljmedel Förtvätt Intensiv Lättstruket Extra Flexi-tid Torkning efter Beskrivning av tvättprogram (°C) centrifugering tvättvolym torkvolym sköljning tvätt om vald (v/min) (kg) (kg) Kalltvätt eller vid 20 °C, sköljningar och avslutande Cotton (Bomull) Lätt nedsmutsat ömtåligt färgat tvättgods / 20°...
Need help?
Do you have a question about the WDF147X-2 and is the answer not in the manual?
Questions and answers