Table of Contents
Advertisement
Quick Links
Advertisement
Table of Contents

Related Manuals for MustHD M702S-4K Series

Summary of Contents for MustHD M702S-4K Series
-
Page 2: Table Of Contents
Contents Welcome………………………………………………………………...03 FCC Notice.………………………….……...…………………………….03 Disposal Notice………………………………………………………….04 Precautions before Use………….……...…………………………….04 Package Contents………………………………………………………...08 Main Features…………………………………………………………….09 Parts & Functions………………..………………………………………10 Get Started……………………..………………….……………………12 Install Sun-Hood………………………….……………………12 Open / Close Sun-Hood……………….………………………12 Install Battery Plate / Battery………………………………….13 Connect AC Power Supply………………………………….15 HDMI Locking Connector………….…………………………16 OSD Menu &... -
Page 3: Welcome
Welcome Thank you for purchasing the MustHD M702 series 7" monitor for the professional cinematographer. We recommend reading this manual first before using it to get the most out of your monitor. There are two models in this series: M702H with HDMI Input / Loop-through M702S with 3G-SDI &... -
Page 4: Disposal Notice
Disposal of Old Electrical & Electronic Equipment (Applicable in the European Union and other European countries with separate collection systems) This symbol on the product or on its packing indicates that this product shall not be treated as household waste. Instead it should be handed over to the applicable collection point for the recycling of electrical and electronic equipment. - Page 5 The power cords must be routed properly to prevent people from stepping on them or objects from resting on them. Check the cords at the outlet and at the product. When using a 12V DC adapter not provided by the manufacturer, please check the proper load capacity (current capacity) and that it has a stable voltage output.
- Page 6 When the product displays an abnormal condition in the product this indicates that the product needs servicing. In case the product needs replacement parts, make sure that the service person uses replacement parts specified by the manufacturer, or those with the same characteristics and performance as the original parts.
- Page 7 The vents and other openings in the cabinet are designed for ventilation. Do not cover or block these vents and openings since insufficient ventilation can cause overheating and shorten the life of the monitor. Do not place the monitor on a bed, sofa, rug, or other similar surface, since it can block the ventilation openings.
-
Page 8: Package Contents
Package Contents M702 Series Monitor Sun-Hood User Manual DC Power Adapter HDMI Cable External Wired Remote Battery Plate Battery Plate Battery Plate F970 LP-E6 (optional) D28S (optional) Screws (8pcs) Carrying Bag Tripod Ball Head (optional) (optional) -
Page 9: Main Features
Main Features Professional Grade Field monitor The M702-4K is a professional field monitor with a 7” IPS panel and a native resolution of 1920x1200 pixels. Multiple battery plate options make it easy to use anywhere. The dual control knobs, multiple function keys, and wired remote allow for quick and easy menu access. -
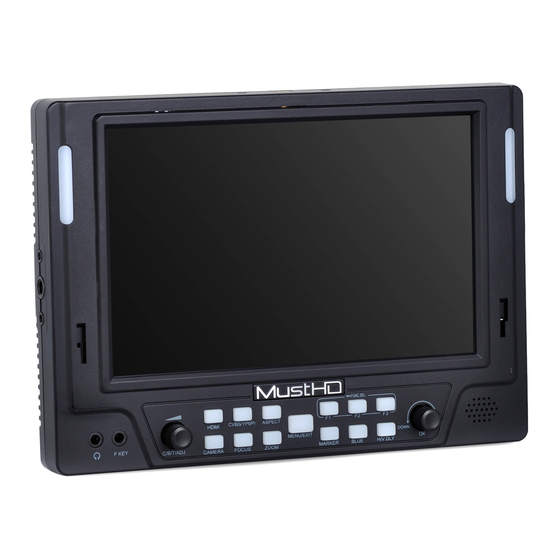
Page 10: Parts & Functions
Parts & Functions FRONT / SIDE / TOP Earphone Jack Fit Marker F Key Jack User-definable function Key#1 Contrast/Brightness Adjustment Exposure Select SDI/HDMI as Input User-definable function Key#2 Camera (see page 24) Histogram Select CVBS as Input User-definable function Key#3 Control Knob (Up/Down/Confirm) Focus Assist Aspect ratio adjustment... - Page 11 Parts & Functions BACK HDMI Input Battery plate lock channel HDMI Output Tally indicator Tally Input 3G-SDI Output (M702S only) Power On/Off switch 3G-SDI Input (M702S only) DC power Input 12V Audio Input DC power Input 14.8V Composite CVBS input Battery plate fixing hole...
-
Page 12: Get Started
Getting Started [1] Install Sun-Hood on the Monitor [2] Open / Close the Sun-Hood Please follow the step sequence to open or close the hood. Open the Sun-Hood Close the Sun-Hood... -
Page 13: Install Battery Plate / Battery
[3] Install Battery Plate on the Monitor The following illustration is based on the optional LP-E6 battery. The standard F970 and optional D28S plates are installed the same way. 1) Put the plate with the tabs in the channel on the monitor back. 2) Slide the plate to lock in into position. - Page 14 [5] Install Battery on the Battery Plate The following illustration is based on the optional LP-E6 battery. The standard F970 and optional D28S plates are installed the same way Position the battery on the plate. 1) Push the battery until it clicks in place. [6] Uninstall Battery from the Battery Plate The following illustration is based on the optional LP-E6 battery.
-
Page 15: Connect Ac Power Supply
[7] Connect AC Adapter to the Monitor The external AC adapter that comes with the monitor may be used to power the monitor. Plug the power plug into the monitor and then plug the AC adapter into a power outlet and turn on the monitor. The AC adapter automatically adjusts from 100-240VAC 50/60Hz and outputs 12VDC. -
Page 16: Hdmi Locking Connector
[8] HDMI Locking Connector The uniquely-designed HDMI locking mechanism helps eliminate accidental disconnection of the cable from the monitor. To use the HDMI lock 1) Pull the locking clip outward from the monitor and insert the cable into the HDMI port. 2) Push the locking clip into the monitor to firmly secure the cable to the monitor. -
Page 17: Osd Menu & Settings
OSD Menu & Settings The OSD (On-Screen Display) Menu helps you use and set various functions and settings. The following picture is the menu structure for M702-4K Series Monitor. The user can control the various functions and settings by using MENU button and control knobs on the front panel of the monitor. -
Page 18: Menu Operations
Menu Operations [1] Picture Menu Brightness: To set the brightness (Offset) level from 0 to 100 Contrast: To set the contrast (Gain) level from 0 to 100 Chroma: To set the chroma level from 0 to 100 Sharpness: To set the sharpness level from 0-100 Backlight: To set the backlight level from 0-100 Audio Column: To set audio column function On / Off Histogram: To set the histogram function On / Off... -
Page 19: Color Menu
[2] Color Menu Color Temp Controls color temperature and allow instant access to preset color temperature settings. Available color temperature settings are: 3200K, 5800K, 6500K, 9300K and User 1/2/3. In User 1, User 2, and User 3 modes, custom RGB GAIN and BIAS (Offset) values can be defined. -
Page 20: Guide Box Menu
[3] Guide Box Menu This menu allows the user to activate or deactivate the Marker functions. When the Marker is activated, a border line of the Safety Area will be displayed inside the marker. The marker type may be set to 15:9, 16:9,16:10, 17:9, 1.85:1, 2.35:1 and 4:3 aspect ratios. -
Page 21: Function Menu
[4] Function Menu 1 of 2 1. Picture Mode In the User 1, User 2, User 3 picture modes, the user can define regularly-used values of brightness, contrast, chroma, sharpness and backlight. User can set the values in the picture mode settings. 2. - Page 22 5. Freeze Freeze or unfreeze the current display by turning the control knob and scrolling up and down. 6. Single Color This is an assistant function to help adjust camera color settings. Under the single-color mode, red, green, blue or mono (gray) pixels are used to generate the image.
- Page 23 [5] Function Menu 2 of 2 9. Exposure This superimposes zebra over the on-screen image, indicating if an area of the shot is overexposed. Note: When the OSD menu or ON/OFF menu is removed from the screen, the exposure function will be activated or deactivated. 10.
- Page 24 11. Focus Color The focus peaking has three color options Red, Green and Blue. Note: When the OSD menu or ON/OFF menu is removed from the screen, the focus color function will be activated or deactivated. 12. Camera Mode The Camera mode (activated by pressing the front panel button) turns on DSLR Scaling.
-
Page 25: F Key Menu
[6] F KEY Menu The F KEY function allows the user to define the functions assigned to the following keys: F1 / F2 / F3 keys on the front panel the monitor F4 / F5 / F6 keys on the external wired remote Steps to define a key function: 1. -
Page 26: System Menu
[7] System Menu Duration: The menu display time can be set at 5 seconds, 10 seconds, 15 seconds, or always (On). When set to On, the menu will stay on the screen until the menu button is pressed. Language: To select the OSD language in the order of: English/Chinese/Germany/French/Spanish/Portuguese/Russian/ Transparency: To set transparency between low, medium and high. -
Page 27: Product Specifications
Product Specifications Model M702-4K Series Size 7-inch IPS Panel Resolution 1920*1200 Pixel Pitch 0.078 (H) x 0.078 (W) mm Viewing Angle H: 178 degrees, V: 178 degrees Color Depth 16.7M (8-bit) Brightness 450 cd/㎡ (Center) Contrast Ratio 1100:1 Display Area 151.2 (H) x 94.5 (W) mm HDMI 3G-SDI... -
Page 28: Trouble Shooting
Trouble Shooting Problem Solution · Ensure the power adaptor connected to the monitor correctly. · Ensure the battery has enough The unit does not turn on and/or the power electricity. · Check if the connecting pins of the indicator is not on. battery plate are in good condition and making solid contact with the monitor. -
Page 29: Weee Directive & Product Disposal
Customer Support For after sales service and tech support, please contact your local distributor or us by the following email: support@musthd.com...
Need help?
Do you have a question about the M702S-4K Series and is the answer not in the manual?
Questions and answers