
Subscribe to Our Youtube Channel
Related Manuals for Time Machines TM2000B


Summary of Contents for Time Machines TM2000B
- Page 1 TM2000B / TM2500B PTP and NTP Time Server GPS Time Sourced Installation and Operation Manual...
-
Page 2: Table Of Contents
Table of Contents 1 Introduction............................1 2 Installation..............................2 2.1 Location............................2 2.2 Connections............................2 2.2.1 Antenna...........................2 2.2.2 Power............................2 2.2.3 Network..........................2 2.2.4 Front Panel Indications......................2 3 Configuration............................3 3.1 Web Page – Default username/password is “admin/tmachine”............3 3.2 Default IP address is 192.168.1.20....................3 3.3 Settings Page..........................3 3.3.1 TM2000 Name........................4 3.3.2 IP Address..........................4 3.3.3 Broadcast..........................4... - Page 3 3.7.5 Remote NTP Servers Enable....................13 3.7.6 Remote NTP Servers List.....................13 3.7.7 Serve Time Only With Authentication..................13 3.7.8 Authentication-Upload Key List...................13 3.7.9 Set TM2000B time manually....................14 3.8 PTP Settings Page.........................15 3.8.1 PTP Update Method One/Two Step..................15 3.8.2 Domain Number........................16 3.8.3 Priority 1 & Priority 2......................16 3.8.4 PTP Transmission Method....................16...
-
Page 4: Introduction
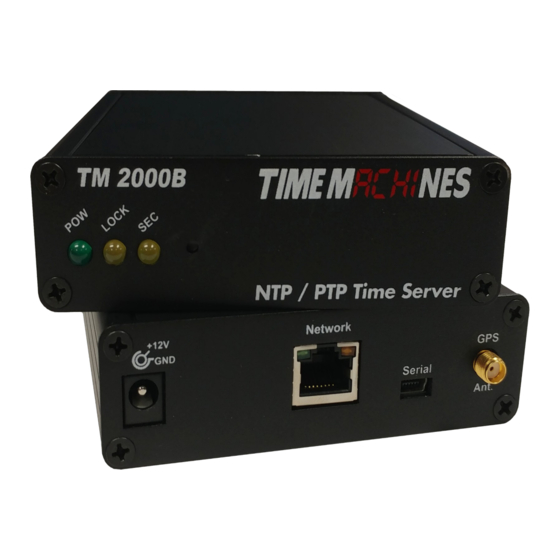
OCXO (Oven controller oscillator) that allows the unit to serve accurate time beyond loss of the GPS antenna signal. The TM2500B differs from the TM2000B in that is has a BNC output to allow for 1PPS or a 10MHz reference signal to be output from the device. -
Page 5: Installation
2 Installation 2.1 Location To receive GPS signals the Time Server's antenna must be located in a location where it can “see” the sky. The GPS module itself is highly sensitive and able to “see” the GPS satellite signals from within many structures. -
Page 6: Configuration
It is also possible for the LOCK LED to turn off, or blink, after a GPS timing lock has occurred and the SEC LED continues to blink. This signifies that the TM2000B has an accurate internal time and is serving time, but is trying to re-establish the timing lock because it was lost for some reason. -
Page 7: Tm2000 Name
3.3.1 TM2000 Name This is a generic entry that has no effect on the TM2000B operation other than to allow the user to enter a name for the device to help recognize it when parameter updates are required. 3.3.2 IP Address The IP address of the unit set to by entering a standard IPv4 dotted quad in this field. -
Page 8: Netmask
The Password of the unit can be changed in this field. The existing password is not displayed for security purposes. Enter the new password and click the “Change Password” button to update. The TM2000B will then prompt for the new password to be entered to continue access to the web pages. * Default Username/Password is “admin”/“tmachine”. -
Page 9: Status Page
3.4 Status Page The status page is an information only page. It shows the various pieces of information about the current working state of the device. 3.4.1 Time Source This field displays the current source of time. It can be GPS, Peer Time Server, or Manually set. 3.4.2 Location Location shows the latitude and longitude of the device itself based on the GPS receiver. -
Page 10: Satellites Used
3.4.4 Satellites Used This shows the current number of satellites that are in view and locked by the GPS receiver. 3.4.5 GPS Fix This displays the level of the current GPS lock. No GPS Fix – Check cable connections. If connected correctly, likely the antenna needs a better view of the sky. -
Page 11: Ntp Peers
3.4.14 Clients This area is used to show the current PTP clients. This will display entries only if the TM2000B is in Unicast PTP mode. In multicast mode, the TM2000B isn't aware of all clients getting time from it. -
Page 12: Update Page
3.5 Update Page The update page is used to update firmware of the unit. The firmware updates will be archived and available for download from the timemachinescorp.com website. Save the file to the local computers drives. Most likely the file will need to be unzipped. The file type that is used for the update is a .img file. -
Page 13: Snmp Setup
3.6 SNMP Setup 3.6.1 MIB File-Download TMI-COMMON-SHI.txt At the top of the page, is the option to download the MIB file for the TM2000B. This is useful in many monitoring systems. It will download to the browsers default download directory. -
Page 14: Trap Receiver Ip Address
TM2000B as the sender. This entry specifically allows setting of the SNMP engineID. This is handled in this way because the bulk of the file system for the TM2000B is not R/W and parameters that are updated by the SNMP daemon are stored in RAM and lost on a power cycle/reboot. A reboot may be required when setting up Trap messages. -
Page 15: Ntp Settings Page
The NTP daemon can be started and stopped from this page. By default, NTP support is enabled once 3D lock is achieved. Click the desired option and then click the Submit button. Once a time source is available, GPS, Peer, or Manually Set, the TM2000B will enable the NTP server service and NTP requests will be allowed. -
Page 16: Allow 2D Fix For Ntp
GPS to lock. It will also allow the TM2000B to operate without a GPS at all if desired. If at some point after boot up, GPS lock is obtained, then the GPS becomes the time source and Peer NTP lookups are stopped. -
Page 17: Set Tm2000B Time Manually
3.7.9 Set TM2000B time manually This set of fields allows the TM2000B to have its time set manually from the web page. Entering the UTC time of day, 24 hour mode, and clicking the Set Time button below the fields will set the time of the TM2000B accordingly and enable the NTP server software to responds to requests from clients. -
Page 18: Ptp Settings Page
3.8.1 PTP Update Method One/Two Step This setting controls the Sync packet generation mode of the TM2000B. Default normal operation is to use 1 Step. In this mode, a single Sync packet is generated at the requested/setup rate and HW time stamping is applied to the packet just before it goes onto the Ethernet wire. -
Page 19: Domain Number
Class 52 shall not be a slave to another clock in the domain.” If set to Faulty, it will report as Faulty and should not be synced to by a client. Holdover time limits for the TM2000B are set in the NTP settings page. -
Page 20: About Page
HTTP download. The binary log can be used by TimeMachines as an aid in troubleshooting. 3.9.2 Reboot System Clicking the Reboot button will cause the TM2000B to do a software based reset. This is a full kernel reset of the unit and takes 20-30 seconds to complete. -
Page 21: Troubleshooting
The front panel button, accessible with a paperclip or other small object, accessible from the front panel of the TM2000B is used to reset the units software settings to factory original. This is useful when a password is forgotten or the IP address cannot be determined. To do this, insert a paperclip or ball point pen end through the hole in the front of the unit until you feel the button depress. -
Page 22: Locator Data Query
Starting in version 0.3.3, the Locator service employed by TimeMachines clock products is also included in the TM2000B. This makes it easier to manage and monitor a time system on a local network using the TM-Manger software. See the TM-Manager documentation for more information on this feature. -
Page 23: Specifications
6 Specifications 6.1 Time Server Features and Specifications Receive time information from GPS satellites anywhere on the surface of the earth • RFC1119/1305 NTP Protocol to serve time (Network Time Protocol) • RFC1769/2030/4330 SNTP Protocol (Simple Network Time Protocol) • IEEE 1588:2008 Version 2 PTP protocol •... -
Page 24: Antenna Specifications
GPS Time Precision: +/- 10ns RMS jitter. • Antenna Connection: 1575.42MHz (L1 Band) • TTFF (Time To First Fix) • Cold start @-125dBm typically 33 seconds • Re-acquisition (<10s obstruction) typically 1 second • 6.3 Antenna Specifications Active patch antenna with magnetic base. •...
Need help?
Do you have a question about the TM2000B and is the answer not in the manual?
Questions and answers