
Related Manuals for Coolzone CZ51064

Summary of Contents for Coolzone CZ51064
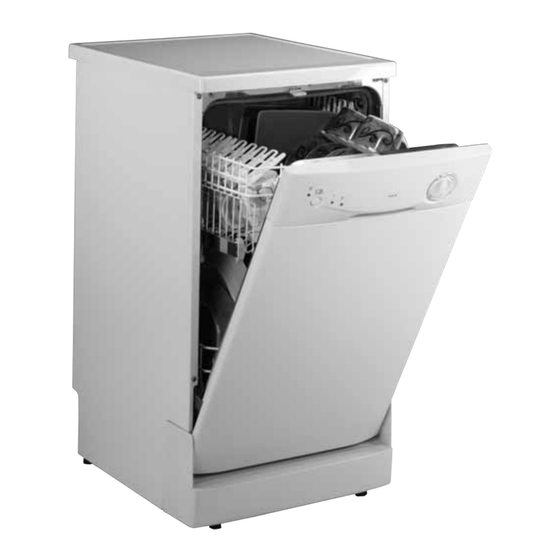
- Page 1 CZ51064 Slimline dishwasher U U S S E E R R I I N N S S T T R R U U C C T T I I O O N N S S Please read these instructions carefully before using this product and keep them safe for...
-
Page 2: Table Of Contents
Page contents Before use ..............3 Do and don’t . -
Page 3: Before Use
Before use Packaging The packaging is recyclable so dispose of it according to local regulations. Keep the packaging materials out of reach of young children. Warning The dishwasher is heavy and care is needed when unpacking and moving it. Get extra help and only hold it by the casing – not the door or trim. Check the contents Check the following contents are included with the product and inspect the casing for any damage. -
Page 4: Installation
Installation Positioning the appliance FIGURE 2 When deciding on a location for the appliance, please bear the following points in mind: • The depth of the unit from front to back is roughly the same as the majority of work surfaces. This means there is not enough room for any pipes etc. -
Page 5: Salt
Salt Salt Periodically check and fill the container with fresh salt. The hardness of the water varies depending upon where you live. If hard water is used in the To prevent the formation of rust, load the salt dishwasher, deposits will form on the dishes and just before beginning a wash cycle. -
Page 6: Detergent And Rinse Aid
Detergent and rinse aid Detergent Rinse aid Detergent specifically intended for use with This product makes dishes sparkle and helps them dishwashers must be used. The dispenser must be to dry without spotting. The dispenser is located on filled before the start of each wash cycle following the inside panel of the door and should be filled the instructions provided in the "Wash Cycle Table"... -
Page 7: Loading The Dishwasher
Loading the dishwasher Before placing the dishes in the dishwasher How to use the upper rack remove the larger food debris. This prevents the The upper rack is designed to hold delicate and filter from becoming clogged which can result in lighter dishware such as glasses, coffee and tea reduced performance. -
Page 8: Control Panel
Control panel FIGURE 14 POWER BUTTON CONTROL KNOB POWER ON RINSE SALT RELEASE INDICATOR CATCH Starting the dishwasher Cancelling or modifying a cycle while FIGURE 15 NORMAL underway WASH SOAK If the wash programme is modified after it has STOP POSITIONS started the detergent may have already been ECONOMY WASH... -
Page 9: Wash Cycle Table
Wash cycle table Cycle Cycle Selection Description Detergent Rinse Aid Information of Cycle Pre-wash Normally dirty dishes, Wash 52°C pots and pans. Rinse 70° Standard daily cycle. Drying. Normal wash (IEC-EN50242) Lightly soiled dishes, Wash 52°C plates, glasses and Rinse 70° pans Drying. -
Page 10: How To Keep Your Dishwasher In Shape
How to keep your dishwasher in shape When you go on holiday After every wash When you go on holiday it is recommended that After every wash it is advisable to turn off the you run a wash cycle with the dishwasher empty water supply to the appliance and leave the door slightly ajar so that moisture and odours are not and then remove the plug from the socket. -
Page 11: Troubleshooting
Troubleshooting If the dishwasher is not functioning properly, before The dishwasher does not drain calling the Helpline, please check the following: properly Ensure that the drain hose is not crimped or bent. The dishwasher does not start Note: The dishwasher is designed to detect an Have you checked whether: overflow. -
Page 12: Fuse And Mains Plug Replacement
Fuse and mains plug replacement This product is supplied with a fitted plug which FIGURE 17 contains a 13A fuse. If you are simply replacing the fuse, you must use a 13A fuse which has been approved by ASTA to BS1362. If the plug does not fit the socket or becomes damaged, a new plug must be fitted. -
Page 13: Specification
Specification Dimensions: HxWxD cm: 85 x 45 x 58 Capacity: 8 standard place settings Mains water pressure: 0.04-1.0MPa Power supply 220/240V ~ 50Hz Total power 1930W Energy efficiency Washing efficiency Drying efficiency This apparatus complies with EEC directives for radio interference; it also meets the essential requirements of European Council directives: 73/23/EEC for low voltage and 89/336/EEC for electromagnetic compliance. - Page 14 Page 14...
- Page 15 Page 15...
- Page 16 This appliance/fitting is marked according to the European directive 2002/96/EC on Waste Electrical and Electronic Equipment (WEEE). By ensuring this product is disposed of correctly, you will help prevent potential negative consequences for the environment and human health, which could otherwise be caused by inappropriate waste handling of this product.
Need help?
Do you have a question about the CZ51064 and is the answer not in the manual?
Questions and answers