Table of Contents
Advertisement
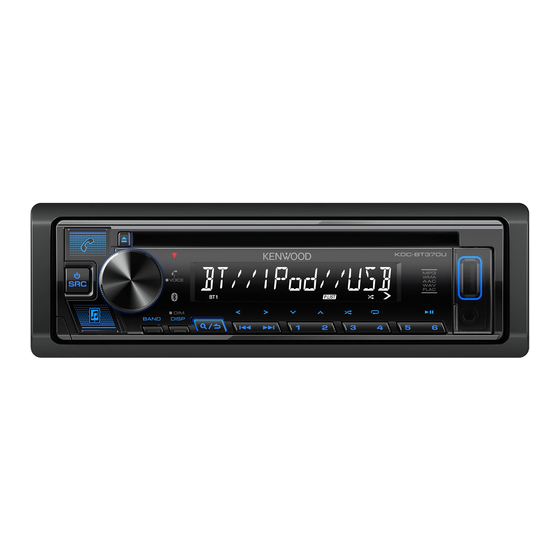
KDC-BT370U
KMR-D382BT
KDC-BT282U
KDC-MP382BT
CD-RECEIVER
INSTRUCTION MANUAL
AUTORADIO CD
MODE D'EMPLOI
RECEPTOR CD
MANUAL DE INSTRUCCIONES
For your records
Record the serial number, found on the back of the unit, in the spaces designated on the warranty card, and in the space provided below. Refer to the model and serial
numbers whenever you call upon your Kenwood dealer for information or service on the product.
Model KDC-BT370U/KDC-BT282U/KDC-MP382BT/KMR-D382BT
Serial number
US Residents Only
Register Online
Register your Kenwood product at https://www.kenwood.com/usa/
© 2021 JVCKENWOOD Corporation
B5A-3839-00 (KN)
Advertisement
Table of Contents

Subscribe to Our Youtube Channel
Related Manuals for Kenwood KDC-BT370U


Summary of Contents for Kenwood KDC-BT370U
- Page 1 Record the serial number, found on the back of the unit, in the spaces designated on the warranty card, and in the space provided below. Refer to the model and serial numbers whenever you call upon your Kenwood dealer for information or service on the product.
- Page 2 útil, deberán ser reciclados en instalaciones que puedan dar el tratamiento Products: CD-RECEIVER adecuado a estos productos y a sus subproductos residuales correspondientes. Model Name: KDC-BT370U/KDC-BT282U/KDC-MP382BT/KMR-D382BT Póngase en contacto con su administración local para obtener información sobre el Responsible Party: JVCKENWOOD USA CORPORATION punto de recogida más cercano.
- Page 3 ISED Caution CAUTION This device contains licence-exempt transmitter(s)/receiver(s) that comply with Innovation, Science This equipment complies with FCC/ISED radiation exposure limits set forth for an uncontrolled and Economic Development Canada’s licence-exempt RSS(s). Operation is subject to the following two environment and meets the FCC radio frequency (RF) Exposure Guidelines and RSS-102 of the ISED radio conditions: frequency (RF) Exposure rules.
- Page 4 SOFTWARE LICENSE AGREEMENT Article 4 Right pertaining to the Licensed Software The software embedded in the Product (hereinafter the "Licensed Software") provided by Licensor is Any and all copyrights and other rights pertaining to the Licensed Software and related documents copyrighted to or sublicensable by the Licensor, and this Agreement provides for the terms and conditions shall belong to the Licensor or the original holder of the right who granted to the Licensor the license or which Users shall follow in order to use the Licensed Software.
- Page 5 Important Notice concerning the Software Article 9 Destruction of the Licensed Software If this Agreement is terminated pursuant to the provision of Article 8, the User shall destroy the Licensed Software, any related documents and copies thereof within two (2) weeks from such date of termination. -jansson Copyright (c) 2009-2012 Petri Lehtinen <petri@digip.org>...
- Page 6 -CMP sha2 AUTHOR: Aaron D. Gifford - http://www.aarongifford.com/ The MIT License (MIT) Copyright (c) 2014 Charles Gunyon Copyright (c) 2000-2001, Aaron D. Gifford All rights reserved. Permission is hereby granted, free of charge, to any person obtaining a copy of this software and associated documentation files (the "Software"), to deal in the Software without restriction, including without You may obtain a copy of the license at limitation the rights to use, copy, modify, merge, publish, distribute, sublicense, and/or sell copies of the...
- Page 7 Copyright (c) 1995, 1996 Carnegie-Mellon University. All rights reserved. T-Kernel 2.0 This product uses the source code of T-Kernel 2.0 under T-License 2.0 granted by T-Engine Forum Author: Chris G. Demetriou (www.tron.org) Permission to use, copy, modify and distribute this software and its documentation is hereby granted, BSD-3-Clause provided that both the copyright notice and this permission notice appear in all copies of the software, Copyright (c) 2000-2001, Aaron D.
-
Page 8: Table Of Contents
AUX......................15 provide clear explanations of the operations. For this reason, they may be different from the actual displays or faceplates. KENWOOD Remote Application ............15 • Operations are explained mainly using buttons on the faceplate of Bluetooth® ....................17 •... -
Page 9: Before Use
Before Use IMPORTANT • If a disc error occurs due to condensation on the laser lens, eject the disc and wait for the moisture to evaporate. • To ensure proper use, please read through this manual before using this • USB rating is indicated on the main unit. To view, detach the faceplate. product. -
Page 10: Basics
Basics Faceplate Attach Volume knob Loading slot Detach How to reset Reset the unit within 5 seconds after detaching the faceplate. Detach button Display window*1 On the faceplate Turn on the power Press B SRC. • Press and hold to turn off the power.*2 Adjust the volume Turn the volume knob. -
Page 11: Getting Started
Getting Started Basics Remote control (RC-406) : Can be remotely controlled with an optionally purchased remote control. : Remote control functions are not available. Remote sensor (Do not expose to bright sunlight.) Select the display language and cancel the demonstration When you turn on the power for the first time (or [FACTORY RESET] is set to [YES], see page 7), the display shows: “SEL LANGUAGE” ... -
Page 12: Set The Other Optional Settings
Getting Started To set the date [DISPLAY] Turn the volume knob to select [DATE FORMAT], then press the knob. [EASY MENU] (For Turn the volume knob to select [DD/MM/YY] or [MM/DD/YY], then press When entering [FUNCTION]... the knob. [ON]: [ZONE 1] illumination changes to white color. ; Turn the volume knob to select [DATE SET], then press the knob. - Page 13 • For connection, see “Connect external components” on page 32. • To exit, press and hold • Refer also to the supplied instruction manual of the KENWOOD Marine • To return to the previous setting item, press Remote Control unit for more information.
-
Page 14: Radio
Radio Other settings Press the volume knob to enter [FUNCTION]. Turn the volume knob to select an item (see the following table), then press the knob. Repeat step 2 until the desired item is selected/activated or follow the instructions stated on the selected item. Press and hold to exit. -
Page 15: Cd/Usb/Ipod
CD/USB/iPod Radio Insert a disc [TI] [ON]: Allows the unit to temporarily switch to Traffic Information if available (“TI” indicator lights up) while listening to all sources except in Eject disc Label side AM. ; [OFF]: Cancels. [PTY SEARCH] (For Select the available Program Type (for Radio Broadcast Data System, see page 34), then press S / T to start. - Page 16 CD/USB/iPod Basic operations Select music drive While in USB source, press 5 repeatedly. Stored songs in the following drive will be played back. • Selected internal or external memory of a smartphone (Mass Storage Class). • Selected drive of a multiple drive device. (This unit can support multiple drive device of up to 4 drives.
- Page 17 CD/USB/iPod [SKIP SEARCH] setting Select a file to play Press the volume knob to enter [FUNCTION]. From a folder or list Turn the volume knob to select [USB], then press the knob. Turn the volume knob to select [SKIP SEARCH], then press the knob. Press Turn the volume knob to select the skip search ratio, then press the Turn the volume knob to select a folder/list, then press the knob.
-
Page 18: Siriusxm® Radio
SiriusXM® Radio (for Only SiriusXM® brings you more of what you love to listen to, all in one place. Start listening Get over 140 channels, including commercial-free music plus the best sports, news, talk, comedy and entertainment. Welcome to the world of satellite Press B SRC repeatedly to select SIRIUS XM. - Page 19 SiriusXM® Radio (for SiriusXM Keymode SmartFavorites and TuneStart™ User stored channels are recognized as SmartFavorite channels*. The Press and hold the volume knob to change the keymode (channel or SiriusXM Vehicle Tuner automatically buffers the broadcast content in the replay). (Default: Channel keymode) background.
- Page 20 SiriusXM® Radio (for SiriusXM settings [LOCK SETTING] [MATURE CH]: Selects the SiriusXM-defined lock setting. ; [USER DEFINED]: Selects the individual channels the user wants to Press the volume knob to enter [FUNCTION]. lock. ; [OFF]: Cancels. Turn the volume knob to select an item (see the following table), then [CHANNEL EDIT]*1 1 Turn the volume knob to select a category, then press the knob.
-
Page 21: Aux
KENWOOD Remote Application You can listen to music from a portable audio player via the auxiliary input You can control the KENWOOD car receiver from iPhone/iPod touch (via jack. Bluetooth or via USB input terminal) or Android device (via Bluetooth) using KENWOOD Remote application. - Page 22 KENWOOD Remote Application Settings to use KENWOOD Remote application [STATUS] Shows the status of the selected device. [IOS CONNECTED]: You are able to use the application using the iPhone/ Press the volume knob to enter [FUNCTION]. iPod touch connected via Bluetooth or USB input terminal.
-
Page 23: Bluetooth
Bluetooth features may not work with this Press B SRC to turn on the unit. unit. Search and select the name of your receiver (“KDC-BT370U”/ • Be sure to turn on the Bluetooth function of the device to make the “KDC-BT282U”/“KDC-MP382BT”/“KMR-D382BT”) on the Bluetooth following operations. -
Page 24: Bluetooth - Mobile Phone
Bluetooth® The following operations may differ or be unavailable depending on the Auto Pairing connected phone. When you connect iPhone/iPod touch to the USB input terminal, pairing request (via Bluetooth) is automatically activated if [AUTO PAIRING] is set to On the faceplate On the remote control [ON]. - Page 25 Bluetooth® Make the setting for answering a call On the faceplate On the remote control Press to enter Bluetooth mode. Press 6 IW during Switch between hands- ( Not available ) Turn the volume knob to select [SETTINGS], then press the knob. free and private talk a call.
- Page 26 Bluetooth® [CALL HISTORY] (Applicable only if the phone supports PBAP.) [VOICE] Speak the name of the contact you want to call or the voice command to 1 Press the volume knob to select a name or a phone number. control the phone functions. (See also the following “Make a call using voice •...
- Page 27 To return to the previous setting item, press Press and hold “PLEASE PAIR YOUR PHONE PIN 0000” appears on the display. Default: [XX] Search and select the name of your receiver (“KDC-BT370U”/ [BT MODE] “KDC-BT282U”/“KDC-MP382BT”/“KMR-D382BT”) on the Bluetooth device. [PHONE SELECT] Selects the phone or audio device to connect or disconnect.
-
Page 28: Bluetooth - Audio
Bluetooth® Bluetooth — Audio On the faceplate • Operations and display indications may differ according to their availability Repeat play Press 4 repeatedly. on the connected device. • Depending on the connected device, some features may not work with [ALL REPEAT], [FILE REPEAT], [GROUP REPEAT], your device. -
Page 29: Audio Settings
Audio Settings [MANUAL EQ] Adjusts your own sound settings for each source. • The settings are stored to [USER] in [PRESET EQ]. • The settings made may affect the current settings of [EASY EQ]. [62.5HZ] [LEVEL] [LEVEL –9] to [LEVEL +9] ([LEVEL 0]): Adjusts the level to memorize for each source. - Page 30 Audio Settings [FADER] [R15] to [F15] ([0]): Adjusts the front and rear speaker output balance. [REAR] [3.5”]/[4”]/[4.75”]/[5”]/[6.5”]/[6.75”]/[7”]/[4×6]/[5×7]/[6×8]/ [6×9]/[7×10]: Selects according to the connected speaker size for [BALANCE] [L15] to [R15] ([0]): Adjusts the left and right speaker output balance. optimum performance. ; [NONE]: Not connected. [VOLUME OFFSET] [–15] to [+6] ([0]): Presets the initial volume level of each source by [SUBWOOFER]...
- Page 31 Audio Settings • The following item is selectable only if a setting other than [NONE] is [SUBWOOFER LPF] [SW LPF FRQ] [30HZ]/[40HZ]/[50HZ]/[60HZ]/[70HZ]/[80HZ]/ selected for [TWEETER], [REAR] and [SUBWOOFER] of [SPEAKER SIZE]: [90HZ]/[100HZ]/[120HZ]/[150HZ]/[180HZ]/ – [TWEETER], [REAR HPF], [SUBWOOFER LPF] of [X ‘ OVER] [220HZ]/[250HZ]: Adjusts the crossover frequency for the subwoofer (low pass filter).
-
Page 32: Display Settings
Display Settings Audio Settings • Before making an adjustment for [DISTANCE] and [GAIN] of [DTA SETTINGS], Zone identification for brightness setting select the speaker you want to adjust: [FRONT LEFT]/[FRONT RIGHT]/[REAR LEFT]/[REAR RIGHT]/[SUBWOOFER] – You can only select [REAR LEFT], [REAR RIGHT] and [SUBWOOFER] if a setting other than [NONE] is selected for [REAR] and [SUBWOOFER] of [SPEAKER SIZE]. - Page 33 Display Settings Change the display settings [BRIGHTNESS] Sets the brightness for day and night separately. 1 [DAY]/[NIGHT]: Select day or night. Press the volume knob to enter [FUNCTION]. 2 Select a zone. (See the illustration on page 26.) Turn the volume knob to select an item (see the following table), then 3 [LVL00] to [LVL31]: Set the brightness level.
-
Page 34: Learning Steering Remote Control
Press B SRC repeatedly to enter STANDBY. Connect to your vehicle’s steering remote harness. Press the volume knob to enter [FUNCTION]. Contact your KENWOOD dealer for details. Rear panel Turn the volume knob to select [SYSTEM], then press the knob. -
Page 35: Installation/Connection
Installation/Connection Part list for installation This section is for the professional installer. For safety’s sake, leave wiring and mounting to professionals. Consult the (A) Faceplate (×1) (B) Trim plate (×1) car audio dealer. WARNING • The unit can only be used with a 12 V DC power supply, negative ground. •... - Page 36 Installation/Connection Installing the unit (in-dash mounting) Installing the unit (without mounting sleeve) Remove the mounting sleeve and trim plate from the unit. Align the holes in the unit (on both sides) with the vehicle mounting bracket and secure the unit with screws (supplied/commercially available).
- Page 37 Red (Ignition wire) To the steering wheel remote control adapter Light blue/yellow (For (Steering remote control wire) Yellow (Battery wire) To KENWOOD Marine Remote Control unit (optional Car fuse accessory) For the latest information on marine accessories, visit Black (Ground wire) <https://www.kenwood.com/usa/car/marine/>...
- Page 38 Rear/subwoofer output Part : Learning steering remote control (Page 28) REAR: Rear output : To KENWOOD Marine Remote Control unit, KCA-RC55MR (optional FRONT: Front output accessory) (Page 7) Output terminals (See the following “Connect external amplifiers via output terminals”.) Subwoofer output...
-
Page 39: References
• Connecting a cable whose total length is longer than 5 m may result in abnormal playback. – KENWOOD original application • This unit cannot recognize a USB device whose rating is other than 5 V and exceeds 1.5 A. -
Page 40: Change The Display Information
References About Program Type Source name Display information: Main display For Radio Broadcast Data System: STANDBY Source name/Clock Clock Turns off the display* back to the [SPEECH]: beginning [NEWS], [INFORM] (information), [SPORTS], [TALK], [LANGUAGE], [REL TALK] (religious talk), [PERSNLTY] (personality), [PUBLIC], [COLLEGE], [HABL ESP] (spanish talk), [WEATHER] RADIO Source name/Clock Frequency... -
Page 41: Troubleshooting
Troubleshooting References (For Symptom Remedy Each time you press DISP, the display information changes. Sound cannot be heard. • Adjust the volume to the optimum level. • If the information is unavailable or not recorded, “NO TEXT”, “NO INFO”, or other information •... - Page 42 Troubleshooting Symptom Remedy Symptom Remedy Disc cannot be ejected. Press and hold to forcibly eject the disc. Be careful not • The source does not The USB port is drawing more power than the design to drop the disc when it is ejected. If this does not solve change to “USB”...
- Page 43 Troubleshooting Symptom Remedy Symptom Remedy “CH UNAVAIL” The selected channel is unavailable. For more Voice calling method is not • Use voice calling method in a more quiet environment. information about the SiriusXM channel lineup, visit successful. • Reduce the distance from the microphone when you speak <www.siriusxm.com>.
-
Page 44: Specifications
Specifications Frequency Range Channel Separation 86 dB MP3 Decode Compliant with MPEG-1/2 Audio Layer-3 87.9 MHz — 107.9 MHz (200 kHz step) WMA Decode Compliant with Windows Media Audio AAC Decode AAC-LC “.aac” files 87.5 MHz — 108.0 MHz (50 kHz step) Usable Sensitivity 8.2 dBf (0.71 μV/75 Ω) USB Standard... - Page 45 Specifications Version Bluetooth 4.2 Preout Level/Load Frequency Range 2.402 GHz — 2.480 GHz 2 500 mV/10 kΩ RF Output Power (E.I.R.P.) +4 dBm (MAX), Power Class 2 Maximum Communication Range Line of sight approx. 10 m (32.8 ft) 4 000 mV/10 kΩ Profile HFP 1.7.1 (Hands-Free Profile) Preout Impedance...
- Page 46 • Windows Media is a registered trademark or trademark of Microsoft Corporation in the United States and/or other countries. This product is protected by certain intellectual property rights of Microsoft. Use or distribution of such technology outside of this product is prohibited without a license from Microsoft. •...
- Page 47 Record the serial number, found on the back of the unit, in the spaces designated on the warranty card, and in the space provided below. Refer to the model and serial numbers whenever you call upon your Kenwood dealer for information or service on the product.
- Page 48 útil, deberán ser reciclados en instalaciones que puedan dar el tratamiento Products: CD-RECEIVER adecuado a estos productos y a sus subproductos residuales correspondientes. Model Name: KDC-BT370U/KDC-BT282U/KDC-MP382BT/KMR-D382BT Póngase en contacto con su administración local para obtener información sobre el Responsible Party: JVCKENWOOD USA CORPORATION punto de recogida más cercano.
- Page 49 ISED Caution CAUTION This device contains licence-exempt transmitter(s)/receiver(s) that comply with Innovation, Science This equipment complies with FCC/ISED radiation exposure limits set forth for an uncontrolled and Economic Development Canada’s licence-exempt RSS(s). Operation is subject to the following two environment and meets the FCC radio frequency (RF) Exposure Guidelines and RSS-102 of the ISED radio conditions: frequency (RF) Exposure rules.
- Page 50 SOFTWARE LICENSE AGREEMENT Article 4 Right pertaining to the Licensed Software The software embedded in the Product (hereinafter the "Licensed Software") provided by Licensor is Any and all copyrights and other rights pertaining to the Licensed Software and related documents copyrighted to or sublicensable by the Licensor, and this Agreement provides for the terms and conditions shall belong to the Licensor or the original holder of the right who granted to the Licensor the license or which Users shall follow in order to use the Licensed Software.
- Page 51 Important Notice concerning the Software Article 9 Destruction of the Licensed Software If this Agreement is terminated pursuant to the provision of Article 8, the User shall destroy the Licensed Software, any related documents and copies thereof within two (2) weeks from such date of termination. -jansson Copyright (c) 2009-2012 Petri Lehtinen <petri@digip.org>...
- Page 52 -CMP sha2 AUTHOR: Aaron D. Gifford - http://www.aarongifford.com/ The MIT License (MIT) Copyright (c) 2014 Charles Gunyon Copyright (c) 2000-2001, Aaron D. Gifford All rights reserved. Permission is hereby granted, free of charge, to any person obtaining a copy of this software and associated documentation files (the "Software"), to deal in the Software without restriction, including without You may obtain a copy of the license at limitation the rights to use, copy, modify, merge, publish, distribute, sublicense, and/or sell copies of the...
- Page 53 Copyright (c) 1995, 1996 Carnegie-Mellon University. All rights reserved. T-Kernel 2.0 This product uses the source code of T-Kernel 2.0 under T-License 2.0 granted by T-Engine Forum Author: Chris G. Demetriou (www.tron.org) Permission to use, copy, modify and distribute this software and its documentation is hereby granted, BSD-3-Clause provided that both the copyright notice and this permission notice appear in all copies of the software, Copyright (c) 2000-2001, Aaron D.
- Page 54 Installation/Connection Basic procedure Remove the key from the ignition switch, then disconnect the terminal of the car battery. This section is for the professional installer. Connect the wires properly. See “Wiring connection” on page 3. For safety’s sake, leave wiring and mounting to professionals. Consult the Install the unit to your car.
- Page 55 (B) Trimplate (×1) j Purple ª, Purple/black ·: steering wheel remote control (C) Mounting sleeve (×1) M5 × 7 mm (×4) adapter or to KENWOOD Rear speaker (right) (D) Wiring harness (×1) M5 × 6 mm (×4) Marine Remote Control (E) Extraction key (×2)
- Page 56 Before Use Basics IMPORTANT Faceplate • To ensure proper use, please read through this Guide before using Volume knob Loading slot USB input terminal this product. It is especially important that you read and observe Warnings and Cautions in this Guide. •...
- Page 57 Getting Started Turn the volume knob to make the settings, then press the knob. Set the date in the order of “Day” “Month” “Year” or “Month” “Day” “Year”. Select the display language and cancel the Press and hold to exit. demonstration To return to the previous setting item, press When you turn on the power for the first time (or [FACTORY RESET] is set to...
- Page 58 Radio CD/USB/iPod Selectable sources: Search for a station CD/USB/iPod USB or iPod BT Press B SRC repeatedly to select RADIO. Press BAND repeatedly to select FM1/FM2/FM3/AM. Start playback Press S / T to search for a station. The source changes automatically and playback starts when you load a disc or attach a device (USB device/ iPod/iPhone) to the USB input terminal.
- Page 59 To return to the previous setting item, press • Refer to the INSTRUCTION MANUAL on the following website for the detailed explanation of each item: <https://www.kenwood.com/cs/ce/> Turn the volume knob to select [SUBWOOFER SET], then press the knob. • The availability of each item vary depending on the model.
- Page 60 For playback operations of AUX and SiriusXM® Radio sources, refer to the INSTRUCTION MANUAL on the following website: <https://www.kenwood.com/cs/ce/> • The availability of each source vary depending on the model. Turn the volume knob to select [COLOR SELECT], then press the knob.
- Page 61 Pair and connect a Bluetooth device for the first time Play back/pause Press 6 IW. Press B SRC to turn on the unit. Select group or folder Press 2 Search and select the name of your receiver (“KDC-BT370U”/ “KDC-BT282U”/“KDC-MP382BT”/“KMR-D382BT”) on the Bluetooth Reverse skip/Forward skip Press device. Reverse/Fast-forward Press and hold “PAIRING”...
- Page 62 • Windows Media is a registered trademark or trademark of Microsoft Corporation in the United States and/or other countries. This product is protected by certain intellectual property rights of Microsoft. Use or distribution of such technology outside of this product is prohibited without a license from Microsoft. •...
Need help?
Do you have a question about the KDC-BT370U and is the answer not in the manual?
Questions and answers
How do you change the day from Sunday to Saturday