Table of Contents
Advertisement
Advertisement
Table of Contents

Subscribe to Our Youtube Channel
Related Manuals for Arris DCX3510


Summary of Contents for Arris DCX3510
- Page 1 User Guide DCX3510-M High-Definition All-Digital Dual Tuner DVR Set-top...
- Page 2 ©ARRIS Enterprises, Inc. 2014 All rights reserved. No part of this publication may be reproduced in any form or by any means or used to make any derivative work (such as translation, transformation, or adaptation) without written permission from ARRIS Enterprises, Inc.
- Page 3 IMPORTANT SAFETY CONSIDERATIONS The DCX3510-M set-top requires careful handling to avoid potential damage to its internal hard disk drive or the loss of recorded data. Be sure to follow these requirements during transportation and installation.
- Page 4 • Consult the dealer or an experienced radio/TV technician for help. Caution: Changes or modifications not expressly approved by ARRIS for compliance could void the user’s authority to operate the equipment. High-Definition All-Digital Dual Tuner DVR Set-top DCX3510-M • User Guide...
- Page 5 FCC Declaration Of Conformity ARRIS Enterprises, Inc. 3871 Lakefield Drive, Suwanee, GA 30024, 1-215-323-1000, declares that the DCX3510-M set-top complies with 47 CFR Parts 2 and 15 of the FCC rules as a Class B digital device. Canada Industry Canada (IC) This Class B digital device complies with Canadian ICES-003.
-
Page 6: Software License
ARRIS and its third party licensors. ARRIS retains all rights not expressly licensed under this License. The Software, including any images, graphics, High-Definition All-Digital Dual Tuner DVR Set-top DCX3510-M •... - Page 7 TERMINATE AUTOMATICALLY if you fail to comply with the terms of this License. ARRIS is not responsible for any third party software that is provided as a bundled application, or otherwise, with the Software or that is downloaded to, or otherwise installed on, the Product.
-
Page 8: Table Of Contents
Component Video (YPbPr) ......................12 Audio ............................12 Connecting an A/V Receiver — Audio ....................14 Connecting an SDTV ........................16 Connecting a Standard-Definition TV (SDTV) and VCR/DVD Recorder ..........17 High-Definition All-Digital Dual Tuner DVR Set-top DCX3510-M • User Guide viii 365-095-25384-x.1... - Page 9 Figure 11: Default User Settings Menu when no HDMI connection is in place ........26 Figure 12: Default User Settings Menu when an HDMI connection is in place ........27 Figure 13: User Settings Menu—Main Menu Screen ................28 High-Definition All-Digital Dual Tuner DVR Set-top DCX3510-M • User Guide 365-095-25384-x.1...
- Page 10 Figure 16: Additional Closed Caption Settings menu screen .............. 37 Figure 17: Subtitle and DVS Settings Menu Screen ................39 Figure 18: Advanced Audio/Video Settings Menu Screen ..............41 High-Definition All-Digital Dual Tuner DVR Set-top DCX3510-M • User Guide 365-095-25384-x.1...
-
Page 11: Introduction
Congratulations on receiving an ARRIS DCX3510-M Series High-Definition All-Digital Dual Tuner Cable Set-top, one of the most advanced interactive digital cable set-tops available today. ARRIS has merged the extraordinary features of digital cable — the seemingly endless programming options, interactive program guides, Video on Demand (VOD), and commercial- free, CD quality music —... -
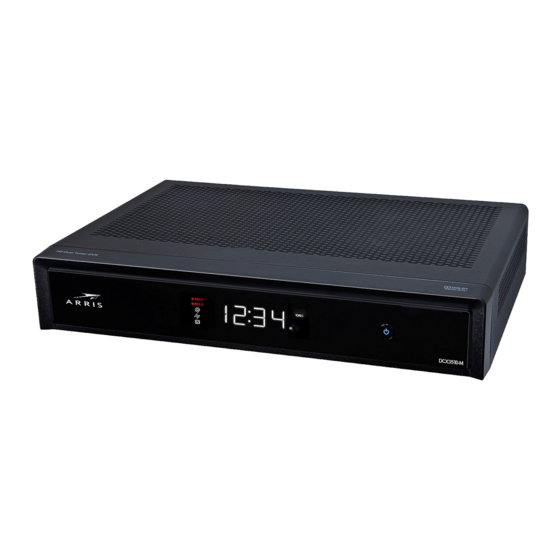
Page 12: Front Panel
Introduction Front Panel Figure 1: Front Panel Number Description Power — Turns the set-top on and off (standby) High-Definition All-Digital Dual Tuner DVR Set-top DCX3510-M • User Guide 365-095-25384-x.1... -
Page 13: Rear Panel
External IR Input — Connects to a remote control set-top accessory cable Data test connector (service personnel only) IEEE-1394 — Audio and video device connection Power connector * Availability of certain features is dependent upon application support. High-Definition All-Digital Dual Tuner DVR Set-top DCX3510-M • User Guide 365-095-25384-x.1... -
Page 14: Operation
Parental Control or Pay-Per-View. Interactive program guides can vary with each cable service provider. Refer to the Interactive Program Guide’s instruction manual for detailed instructions. High-Definition All-Digital Dual Tuner DVR Set-top DCX3510-M • User Guide 365-095-25384-x.1... -
Page 15: Video Format Indicators (Front Panel Display)
Operation Video Format Indicators (Front Panel Display) The front panel display of the DCX3510-M set-top is equipped with indicators to the right hand side of the display that are used to indicate the currently-selected video output format on the component video (YPbPr) and HDMI outputs. -
Page 16: Digital Video Recorder (Dvr)
High Definition TV (HDTV) programs. Storage time varies based on the video format and specific channel. The DCX3510-M set-top is also equipped with an eSATA interface on the rear panel. This interface allows the connection of an external hard disk drive to increase the DVR storage capacity of the DCX3510-M. -
Page 17: Using The External Dvr Expansion Feature
During formatting of the external hard disk drive, the DCX3510-M will perform several tests to determine if the hard drive’s performance is acceptable for DVR functionality. If the hard drive is unable to pass these performance tests, the DCX3510-M will alert you that the external drive is not compatible for DVR use. -
Page 18: Connecting Your Dcx Set-Top
• On-screen graphics will not be displayed when you are using the IEEE-1394 connection on the rear panel of the DCX set-top. Refer to Section 6 for more information. High-Definition All-Digital Dual Tuner DVR Set-top DCX3510-M • User Guide 365-095-25384-x.1... -
Page 19: Component Video (Ypbpr) - Hdtv And Sdtv
Composite Video — SDTV The Composite Video connector on your DCX set-top provides an SDTV Video connection. Note: Composite video does not provide audio. A separate audio connection must be made. High-Definition All-Digital Dual Tuner DVR Set-top DCX3510-M • User Guide 365-095-25384-x.1... -
Page 20: Connecting An Hdtv - Single Connection For Video/Audio
DCX set-top. Refer to On-Screen Graphics for more information. If you have an audio/video receiver and are not using your TV’s speakers, go to Connecting an A/V Receiver — Audio. High-Definition All-Digital Dual Tuner DVR Set-top DCX3510-M • User Guide 365-095-25384-x.1... -
Page 21: Figure 3: Connecting An Hdtv - Single Connection For Video/Audio
Note: On-screen graphics will not be displayed when using IEEE-1394 connection. Refer to Screen Graphics for more information. Note: Solid lines indicate optimum connections. Note: Optional HDMI connection to A/V Receiver shown but not required. High-Definition All-Digital Dual Tuner DVR Set-top DCX3510-M • User Guide 365-095-25384-x.1... -
Page 22: Connecting An Hdtv - Separate Video/Audio Connections
If your TV does not have digital audio inputs, connect the stereo audio cable to the audio L/R connectors on the DCX3510-M set-top and the Audio L/R connectors on the HDTV. If your TV supports digital audio inputs, use the digital audio optical S/PDIF outputs instead of the audio L/R outputs. -
Page 23: Figure 4: Connecting An Hdtv - Separate Video/Audio Connections
Note: Only one video connection and one audio connection need to be made to an HDTV. Note: HDMI-to-DVI adapter is not included with the set-top. Note: Solid lines indicate optimum connections. High-Definition All-Digital Dual Tuner DVR Set-top DCX3510-M • User Guide 365-095-25384-x.1... -
Page 24: Connecting An A/V Receiver - Audio
Stereo audio—Connect the stereo audio cable to the audio L/R connectors on the DCX set-top and the audio L/R connectors on the A/V receiver. For information on configuring your DCX set-top settings, see Configuring the User Settings. High-Definition All-Digital Dual Tuner DVR Set-top DCX3510-M • User Guide 365-095-25384-x.1... -
Page 25: Figure 5: Connecting An A/V Receiver - Audio
Connecting Your DCX Set-top Figure 5: Connecting an A/V Receiver — Audio Note: Only one audio connection needs to be made to an HDTV. Note: Solid lines indicate optimum connections. High-Definition All-Digital Dual Tuner DVR Set-top DCX3510-M • User Guide 365-095-25384-x.1... -
Page 26: Connecting An Sdtv
Figure 6: Connecting an SDTV Note: Composite video requires separate audio connections. Note: Only one video connection and one audio connection is required. Note: Solid lines indicate optimum connections. High-Definition All-Digital Dual Tuner DVR Set-top DCX3510-M • User Guide 365-095-25384-x.1... -
Page 27: Connecting A Standard-Definition Tv (Sdtv) And Vcr/Dvd Recorder
Connecting a Standard-Definition TV (SDTV) and VCR/DVD Recorder 1. Connect a stereo audio cable to the AUDIO OUT L and R connectors on the DCX3510-M Series set-top and the INPUT AUDIO L and R connectors on the VCR/DVD Recorder. 2. Connect a video cable to the VIDEO OUT connector on the DCX3510-M Series set-top and the INPUT VIDEO connector on the VCR/DVD Recorder. -
Page 28: Figure 7: Connecting A Standard-Definition Tv (Sdtv) And Vcr/Dvd Recorder
Connecting Your DCX Set-top Figure 7: Connecting a Standard-Definition TV (SDTV) and VCR/DVD Recorder High-Definition All-Digital Dual Tuner DVR Set-top DCX3510-M • User Guide 365-095-25384-x.1... -
Page 29: Connecting An A/V Receiver, Sdtv, And Vcr/Dvd Recorder
(audio L/R). Optical S/PDIF offers a higher level of audio quality, including support for Dolby Digital audio. These video connection methods do not support HD video. If you have an HDTV, see Connecting an HDTV — Single Connection for Video/Audio. High-Definition All-Digital Dual Tuner DVR Set-top DCX3510-M • User Guide 365-095-25384-x.1... -
Page 30: Figure 8: Connecting An A/V Receiver, Sdtv, And Vcr/Dvd Recorder
Figure 8: Connecting an A/V Receiver, SDTV, and VCR/DVD Recorder Note: Solid lines indicate optimum connections. Note: Consult your A/V receiver manual for additional wiring options or constraints when including a VCR/DVD Recorder in your configuration. High-Definition All-Digital Dual Tuner DVR Set-top DCX3510-M • User Guide 365-095-25384-x.1... -
Page 31: Connecting Your Set-Top To An External Esata Dvr
5. Connect the other end of the eSATA cable to the external drive. 6. Follow the on-screen instructions. Note: Only connect external hard drives that have been approved by ARRIS for external DVR service. Connecting an external drive that has not been approved could result in poor DVR performance. -
Page 32: Data Devices
Internet access, e-mail, IP telephony, e-commerce, and home banking. Note: Your DCX set-top may be equipped with the interface connections illustrated, but their functionality depends on the services offered by your service provider. High-Definition All-Digital Dual Tuner DVR Set-top DCX3510-M • User Guide 365-095-25384-x.1... -
Page 33: On-Screen Graphics
On-screen graphics are not available on all video output combinations. • On-screen graphics will not be displayed when you are using the IEEE-1394 connection on the rear panel of the DCX set-top. High-Definition All-Digital Dual Tuner DVR Set-top DCX3510-M • User Guide 365-095-25384-x.1... -
Page 34: Recording Your Connections
Disconnect the power from the DCX set-top before connecting or changing cable connections. Do not place another component or object on top of the DCX set-top. High-Definition All-Digital Dual Tuner DVR Set-top DCX3510-M • User Guide 365-095-25384-x.1... -
Page 35: Configuring The User Settings
3. Initialize the DCX3510-M and authorize it for services. 4. Turn the TV on. Note: When using an HDMI connection between the DCX3510-M and the television, be sure to have the cable connected and the TV powered on before adjusting the video settings. -
Page 36: User Settings Menu Main Screen
DCX3510-M using either the remote control or the Power button and then press the MENU key on the remote control. If the TV is on, the on-screen User Settings menu lists the DCX3510- M settings that can be adjusted. -
Page 37: Figure 12: Default User Settings Menu When An Hdmi Connection Is In Place
Press the ▲ and ▼ keys to highlight the setting you wish to change. • Press the ► key to select an option. • To exit the setting and move to another setting, press the ▲ or ▼ key. High-Definition All-Digital Dual Tuner DVR Set-top DCX3510-M • User Guide 365-095-25384-x.1... -
Page 38: Table 1: User Settings Main Menu Field Descriptions
Setting Description TV Type Allows you to specify the style of television connected to the DCX3510-M. The 16:9 option is the default. • 16:9— A widescreen television is connected to the DCX3510-M. • 4:3 Letterbox — A standard-screen television is connected to the DCX3510-M and widescreen programs should be scaled to fit the screen with black bars above and below the picture. - Page 39 Note : Not all televisions will support all available video formats. Consult the television’s user manual for more information on video format compatibility. The DCX3510-M can detect when the HDMI connection is in use. If you are not using the HDMI connection on the DCX3510-M, the HDMI/YPbPr Output setting will display as YPbPr Output in the User Settings Menu.
- Page 40 Setting Description 4:3 Override Allows you to select the video output format of the DCX3510-M when it is tuned to a Standard-Definition program or playing back a Standard- Definition program from the DVR. The 480i option is the default. • 480i—Standard-Definition 480i format (720 x 480 pixels).
-
Page 41: Native Mode Settings Screen
When using the native mode feature of the DCX3510-M, please exercise caution when selecting the formats from the checklist. If a format is selected that is not compatible with the television, there may be a loss of video whenever the DCX3510-M is tuned to a channel that is broadcast in that format. -
Page 42: Table 2: Native Mode Settings Field Definitions
1080p60 is a high-definition video image with 1920 x 1080 pixels, progressive scanning, and a frame rate of 60 frames per second. This option is only available if the DCX3510-M is connected to an HDMI display device. If no HDMI connection is detected, this option is disabled and can’t be selected in the menu. - Page 43 1080p24 is a high-definition video image with 1920 x 1080 pixels, progressive scanning, and a frame rate of 24 frames per second. This option is only available if the DCX3510-M is connected to an HDMI display device. If no HDMI connection is detected, this option is disabled and can’t be selected in the menu.
-
Page 44: Additional Hdmi Settings Screen
Additional HDMI Settings Screen The Additional HDMI Settings menu configures advanced options that affect the operation of the DCX3510-M with other HDMI and DVI display devices. Adjustable options include display mode, color space, audio output mode, and audio lip sync delay. -
Page 45: Table 3: Additional Hdmi Settings Field Definitions
• DVI—Optimized to work with a DVI television or display device (connected via an HDMI-to-DVI adapter). Allows you to adjust the color space used by the DCX3510-M to generate the video Color Space signals on the HDMI output. YCC 4:4:4 is the default setting. - Page 46 Restores all of the settings on this screen (HDMI/DVI Mode, Color Space, Audio Output, Restore Default and Lip Sync) to their default values. HDMI Settings Use this option if you lose audio and/or video after changing these settings from their default values. High-Definition All-Digital Dual Tuner DVR Set-top DCX3510-M • User Guide 365-095-25384-x.1...
-
Page 47: Additional Closed Caption Settings Screen
Customizable options include font size, font style, font color, and font opacity. You may also select to view different closed caption services if these are included within the broadcast program. Figure 16: Additional Closed Caption Settings menu screen High-Definition All-Digital Dual Tuner DVR Set-top DCX3510-M • User Guide 365-095-25384-x.1... -
Page 48: Table 4: Additional Closed Caption Settings Field Definitions
Table 4: Additional Closed Caption Settings Field Definitions Setting Description Sets the service used by the DCX3510-M to render (draw) the closed captions: Service Selection • Analog—Affects closed captions for analog and digital standard definition services. Available options are: CC1, CC2, CC3, CC4, T1, T2, T3, or T4. The default setting is CC1. -
Page 49: Subtitle And Dvs Settings Screen
The Subtitle and DVS Settings menu customizes the language and appearance of subtitles and turns the descriptive video service feature on and off on the DCX3510-M. Subtitles allow a viewer to watch television programs and movies that contain dialogue that is not in the viewer’s native language. -
Page 50: Advanced Audio/Video Settings Screen
Service • Off—The DVS audio track is not played by the DCX3510-M. • On—The DVS audio track is played by the DCX3510-M if it is included in the program. Note: If the DVS setting is disabled and can’t be selected from the menu, the software installed on the DCX3510-M can’t support the DVS feature. -
Page 51: Figure 18: Advanced Audio/Video Settings Menu Screen
Configuring the User Settings sudden volume changes are reduced and the overall volume output of the DCX3510-M is more consistent. The Video Sharpness feature softens or sharpens Standard Definition (SD) programs when viewed on either the HDMI or Component Video (YPbPr) outputs. When SD programs are viewed on a large screen television, picture quality can suffer because noise and other imperfections in the picture can be magnified on the large display. -
Page 52: Table 6: Advanced Audio/Video Settings Field Definitions
The Video Sharpness setting affects the HDMI and Component Video (YPbPr) outputs .Level of 3 is the default value. The DCX3510-M supports five distinct levels of analog video picture sharpness. A value of 1 corresponds to a “softer” picture while a value of 5 corresponds to a “sharper”... -
Page 53: Troubleshooting
Pro Logic , Dolby Pro Logic II , Dolby Pro Logic IIx ® ® ® • Verify that the receiver is properly configured to work with all connected speakers. High-Definition All-Digital Dual Tuner DVR Set-top DCX3510-M • User Guide 365-095-25384-x.1... - Page 54 Many HD programs are broadcast in pillar-box format with black bars to the left and right of the picture. These programs are broadcast in 16:9 HD formats even though the video is not 16:9. High-Definition All-Digital Dual Tuner DVR Set-top DCX3510-M • User Guide 365-095-25384-x.1...
- Page 55 Colors do not appear Be sure to match up each signal to the same YPbPr connection on the TV, otherwise the correctly colors will not appear correctly on your TV. High-Definition All-Digital Dual Tuner DVR Set-top DCX3510-M • User Guide 365-095-25384-x.1...
- Page 56 ARRIS Enterprises, Inc. 3871 Lakefield Drive, Suwanee, GA 30024 www.arris.com 365-095-25384 x.1 01/14...
Need help?
Do you have a question about the DCX3510 and is the answer not in the manual?
Questions and answers
What does the flashing icon that looks like two arrows pointing in opposite directions and located to the left of the time display mean ??
There is a small white light flashing just before the channel displayed