Delta MultiChoice T27867 Series Installation Instructions Manual
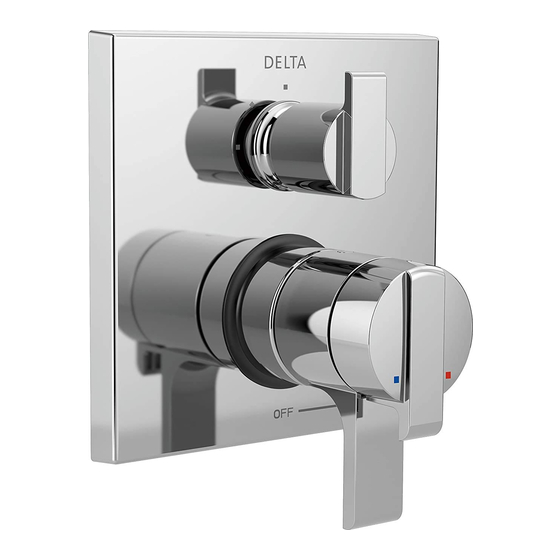
Valve trim with diverter
Hide thumbs
Also See for MultiChoice T27867 Series:
- Manual (58 pages) ,
- Owner's manual (53 pages) ,
- Installation instructions manual (42 pages)
Table of Contents
Advertisement
Available languages
Available languages
Write purchased model number here.
Table of Contents:
Warranties ............................................................................... P age 2
Installation Instructions ........................................................... P ages 3 - 7
Clean and care......................................................................... P age 9
Maintenance ............................................................................ Page 9
Cartridge Summary Reference Sheet ..................................... P age 9
Classic Series Replacement Parts .......................................... P age 10-12
For additional replacement parts, visit www.deltafaucet.com
THIS VALVE MEETS OR EXCEEDS THE
FOLLOWING STANDARDS: ASME A112.18.1/
CSA B125.1 and ASSE 1016 (Type -P- or -T-).
CAUTION: This system/device must be set by the
installer to ensure safe, maximum temperature.
Any change in the setting may raise the discharge
temperature above the limit considered safe and
may lead to hot water burns.
NOTICE TO INSTALLER: CAUTION!–As the
installer of this valve, it is your responsibility
to properly INSTALL and ADJUST this valve
per the instructions given. This valve does
not automatically adjust for inlet temperature
changes, therefore, someone must make the
necessary Rotational Limit Stop adjustments
at the time of installation and further adjustments
may be necessary due to seasonal water
temperature change. YOU MUST inform the
owner/user of this requirement by following
the instructions. If you or the owner/user are
unsure how to properly make these adjustments
please refer to page 7 and if still uncertain, call
us at 1-800-345-DELTA.
After installation and adjustment, you must affix
your name, company name and the date you
05/09/2016
®
MultiChoice
Installation Instructions
Owners Manual
T27859, T27867, T27897,
T27959, T27967 & T27997
Series
You May Need
adjusted the Rotational Limit Stop to the caution
label provided and apply or attach the label to
the back side of the closest cabinet door and the
warning label to the water heater. Leave this
Instruction Sheet for the owner's/user's
reference.
WARNING: This pressure balanced or
thermostatic bath valve is designed
to minimize the effects of outlet water
temperature changes due to inlet pressure
changes, commonly caused by dishwashers,
washing machines, toilets and the like. It may
not provide protection from hot water burns
when there is a failure of other temperature
controlling devices elsewhere in the
plumbing system, if the rotational limit stop
is not properly set or if the hot water
temperature is changed after the settings are
made or if the water inlet changes
due to seasonal changes.
WARNING: Do not install a shut-off device on
either outlet of this valve. When this type of
device shuts off the water flow, it can defeat
the ability of the valve to balance the hot and
cold water pressures.
1
Valve Trim with Diverter
82667 Rev. B
Advertisement
Table of Contents

Related Manuals for Delta MultiChoice T27867 Series


Summary of Contents for Delta MultiChoice T27867 Series
- Page 1 WARNING: Do not install a shut-off device on please refer to page 7 and if still uncertain, call either outlet of this valve. When this type of us at 1-800-345-DELTA. device shuts off the water flow, it can defeat After installation and adjustment, you must affix...
- Page 2 Delta® replacement parts. have other rights which vary from state/province to state/province. Delta Faucet Company shall not be liable for any damage to the faucet resulting from misuse, abuse, neglect or improper This is Delta Faucet Company’s exclusive written warranty or incorrectly performed installation, maintenance or repair, and the warranty is not transferable.
-
Page 3: Cartridge Installation
Installation Cartridge Installation Turn off water supplies. Remove cover (1), nsert adapter assembly (1) into rough-in bonnet nuts (2) and test caps (3) from the body (2). Make sure the adapter assembly rough-in body (4). is correctly positioned and is pressed all Place a bucket or small container over the front the way down inside rough-in body. - Page 4 Installation Diverter Cartridge Installation For Bonnet Installation Slide bonnet nut (1) over diverter sleeve (2) and FOR DIVERTER CARTRIDGE INSTALLATION: Apply silicone lube to the o-ring (2) to make thread into rough-in body. the diverter sleeve (3) easier to install diverter Hand tighten securely.
-
Page 5: Trim Installation
Installation Trim Installation Trim Sleeve Installation Escutcheon Installation Slide trim sleeve (1) over the bonnet (2), cartridge For finished wall thickness up to 1 1/8". Secure and rough-in body. the backplate (1) to the rough-in body (2) using 4 Ensure sleeve is properly positioned over the front screws (3) provided. - Page 6 Installation Installation and Adjustment of the Rotational Limit Stop Place the temperature control knob (1) on volume handle and rotate to the mixed position (if required). DO NOT SECURE WITH SCREW. Turn on water supplies; let the water Hotter run until both hot and cold water is as hot/cold as possible.
- Page 7 Installation Diverter handle Installation Diverter Handle Installation Slide diverter handle (1) onto trim sleeve (2). Using a allen wrench, insert set screw (3) into handle (1). Applying pressure, insert set screw cover (4) until properly seated. 82667 Rev. B...
- Page 8 Diverter Handle Reference Sheet Water Flow For 3 Function Diverter / Flujo de agua para Desviadores de 3 posiciones / Écoulement de l’eau pour les inverseurs à 3 positions 1st Position 3rd Position 2nd Position ✱ 1 ª posición Outlet 1 2 ª...
-
Page 9: Clean And Care
Clean and Care Care should be given to the cleaning of this product. Although its finish is extremely durable, it can be damaged by harsh abrasives or polish. To clean, simply wipe gently with a damp cloth and blot dry with a soft towel. - Page 10 82667 Rev. B...
- Page 11 7 y si aún tiene duda, llámenos al 1-800-345-DELTA. Después de la instalación y el ajuste, debe colocar su nombre, nombre de la empresa y la fecha en que ajustó...
- Page 12 En los Estados Unidos y Mexico: Delta Faucet Company Todas las piezas (menos las piezas electrónicas y las pilas) Product Service y acabados de esta Llave de agua – grifo Delta están ® 55 E. 111th Street garantizados al consumidor comprador original, de estar...
-
Page 13: Instalación
Instalación Instalación del cartucho Cierre los suministros de agua. Quite la tapa (1), tuercas Introduzca el ensamble del adaptador (1) en el cuerpo tapas (2) y las tapas de prueba (3) del cuerpo de la tubería de la tubería preliminar interna (2). Asegúrese de que el ensamble del adaptador está... - Page 14 Instalación Instalación del cartucho de desvío Para la instalación del casquete Deslice la tuerca tapa (1) sobre el casquillo desviador (2) PARA LA INSTALACIÓN DEL CARTUCHO DE DESVÍO: y enrosque en el cuerpo de la tubería preliminar. Aplique lubricante de silicona a la junta tórica (2) para Apriete a mano de forma segura.
-
Page 15: Instalación Del Accesorio
Instalación Instalación del accesorio Instalación del casquillo del accesorio Instalación del chapetón Deslice el casquillo del accesorio (1) sobre el Para paredes acabadas de un grosor hasta 1 1/8". casquete (2), el cartucho y el cuerpo de la tubería Fije la placa posterior (1) al cuerpo de la unidad de preliminar. - Page 16 Instalación Instalación y ajuste del tope del límite rotacional Coloque la perilla para el control de temperatura (1) en la palanca de volumen y gire a la posición mixta (si es necesario). NO FIJE CON EL TORNILLO. Abra los suministros de agua; deje que el agua fluya hasta que esté Hotter lo más caliente/fría posible.
- Page 17 Instalación Instalación del desviador de la manija Instalación del desviador de la manija Inserte la manija del desviador (1) sobre el casquillo del accesorio (2). Usando una llave allen, inserte el tornillo de fijación/ajuste (3) en la manija (1). Aplicando presión, inserte la tapa del tornillo de ajuste (4) hasta que esté...
- Page 18 Water Flow For 3 Function Diverter / Flujo de agua para Desviadores de 3 posiciones / Écoulement de l’eau pour les inverseurs à 3 positions 1st Position 3rd Position 2nd Position ✱ 1 ª posición Outlet 1 2 ª Posición ✱ 3 ª...
-
Page 19: Limpieza Y Cuidado
Limpieza y Cuidado Se debe tener cuidado con la limpieza de este producto. Aunque su acabado es extremadamente resistente, puede ser dañado por abrasivos o pulimentos ásperos. Para limpiar, simplemente frote con un paño húmedo y seque con una toalla suave. Mantenimiento Retire los asientos y resortes y reemplácelos. - Page 21 7. Si vous avez encore des empêcher la soupape d’équilibrer les pressions d’eau doutes, veuillez appeler au 1-800-345-DELTA. chaude et d’eau froide. Après avoir terminé l’installation et le réglage, vous devez inscrire, sur l’étiquette de mise en garde fournie, votre nom,...
- Page 22 La preuve d’achat (reçu original) du premier acheteur doit être acheteur qui est d’une durée de 5 ans à compter de la présentée à Delta Faucet Company pour toutes les demandes date d’achat. Dans le cas d’une utilisation commerciale, la en vertu de la garantie, sauf si le produit a été...
- Page 23 Installation Installation de la cartouche Fermez les robinets d’alimentation. Retirez le capuchon Introduisez l’adaptateur (1) dans le corps de robinetterie (1), les écrous-chapeaux (2) et les capuchons d'essai (3) du brute (2). Assurez-vous que l'adaptateur est positionné corps de robinetterie brute (4). correctement et bien calé...
- Page 24 Installation Installation de la cartouche de l’inverseur Installation du chapeau Glissez l'écrou-chapeau (1) sur le manchon de INSTALLATION DE LA CARTOUCHE DE L'INVERSEUR l'inverseur (2) et vissez-le sur le corps de robinetterie Ajoutez du lubrifiant à base de silicone au joint torique brute.
- Page 25 Installation Installation de la pièce de finition Installation du manchon de finition Installation de la plaque de finition Glissez le manchon de finition (1) sur le chapeau (2), la Installation dans un mur fini d’une épaisseur maximale de 1 cartouche et le corps de robinetterie brute. 1/8 po.
- Page 26 Installation Installation et réglage de la butée de température maximale Placez le bouton de réglage de température (1) sur la manette de réglage de débit et tournez-le jusqu’à la position de mélange (au besoin). NE LE FIXEZ PAS AVEC LA VIS. Rétablissez l’alimentation en eau.
- Page 27 Installation Installation de la manette de l'inverseur Installation de la manette de l'inverseur Glissez la manette de l'inverseur (1) sur le manchon de finition (2). Au moyen d'une clé Allen, insérez la vis de calage (3) dans la manette (1). En exerçant une pression, insérez le capuchon de la vis de calage (4) jusqu'à...
- Page 28 Water Flow For 3 Function Diverter / Flujo de agua para Desviadores de 3 posiciones / Écoulement de l’eau pour les inverseurs à 3 positions 1st Position 3rd Position 2nd Position ✱ 1 ª posición Outlet 1 2 ª Posición ✱ 3 ª...
-
Page 29: Nettoyage Et Entretien
Nettoyage et entretien Ce produit doit être nettoyé avec soin. Bien que le fini soit extrêmement durable, il peut être abîmé par des agents de polissage puissants ou des nettoyants fortement abrasifs. Pour le nettoyer, il suffit de le frotter doucement avec un chiffon humide, puis de l’éponger avec une serviette douce. - Page 30 For illustrative purposes, the replacement parts for the T27 Series Classic Collection are shown on the following page. For replacement parts on all other collections, please refer to the parts diagrams available on www.deltafaucet.com. Para los fines ilustrativos, las piezas de repuesto para la Colección Clásica de la Serie T27 se muestran en la siguiente página.
- Page 31 RP90543 Thick Wall Installation Kit Juego de piezas para la instalación en paredes gruesas Trousse d’installation pour mur épais For finished wall thickness over 1 1/8” up to 2 1/8” (Order Separately) Para paredes acabadas de un grosor mayor de 1 1/8” hasta 2 1/8”...
- Page 32 T27859, T27959 Models / Modelos / Modèles RP84928 Escutcheon Assembly & Screws Ensamble de la chapa y tornillos Plaque de finition et vis RP84932s Trim Nut Tuerca del accesorio Écrou de finition RP84925 Valve Seal Sello de la válvula RP84973s Garniture d’étanchéité...
- Page 33 T27867, T27967 Models / Modelos / Modèles RP84928 Escutcheon Assembly & Screws Ensamble de la chapa y tornillos Plaque de finition et vis RP84932s Trim Nut RP84925 Tuerca del accesorio Valve Seal Écrou de finition Sello de la válvula RP84985s Garniture d’étanchéité...
- Page 34 T27897, T27997 Models / Modelos / Modèles RP84928 Escutcheon Assembly & Screws Ensamble de la chapa y tornillos Plaque de finition et vis RP84932s RP84925 Trim Nut Valve Seal Tuerca del accesorio Sello de la válvula Écrou de finition Garniture d’étanchéité RP84931s Diverter Handle, Set Screw &...
- Page 35 Notes/Notas/Notes 82667 Rev. B...
- Page 36 Delta Faucet Company Product Service 55 E. 111th Street Indianapolis, IN 46280 82667 Rev. B...
Need help?
Do you have a question about the MultiChoice T27867 Series and is the answer not in the manual?
Questions and answers