
Related Manuals for Angelo Po BC51MU

Summary of Contents for Angelo Po BC51MU
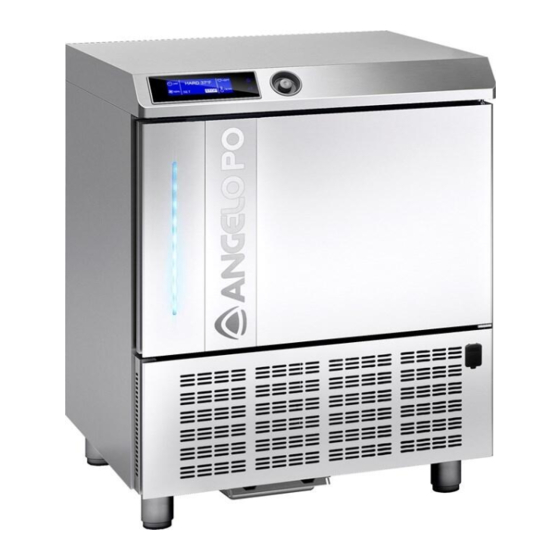
- Page 1 3283430 BLAST CHILLERS/FREEZERS CELLULES DE REFROIDISSEMENT RAPIDE/CELLULES MIXTES USE AND INSTALLATION MANUAL MANUEL D’UTILISATION ET D’INSTALLATION Rev.4 02/2018...
- Page 2 Carefully read the instructions contained in the handbook. You may find important safety instructions and recommendations for use and maintenance. Please retain the handbook for future reference. The Manufacturer is not liable for any changes to this handbook, which may be altered without prior notice.
-
Page 3: Table Of Contents
INDEX GENERAL INSTRUCTIONS ON DELIVERY ............... 5 GENERAL WARNINGS ..........................5 LIST OF RULES ............................. 5 TRANSPORT AND HANDLING ........................5 UNPACKING ..............................5 GENERAL SAFETY WARNINGS ........................6 INSTALLATION ......................7 PLATE DATA ..............................7 MAX ROOM TEMPERATURE ........................7 INSTALLATION ............................. - Page 4 HACCP ............................... 42 SETTINGS ..............................51 LANGUAGE ..................................51 SET DATE/CLOCK ................................52 SECTOR ................................... 53 MULTY .................................... 54 CYCLE CONTROL - AUTO OR MANUAL ........................... 55 SERVICE ..............................56 ALARMS ..................................56 ALARMS TABLE ................................57 RESET ALARMS ................................58 INPUTS OUTPUTS ................................
-
Page 5: General Instructions On Delivery
GENERAL INSTRUCTIONS ON DELIVERY GENERAL WARNINGS We assure you have made the best choice in purchasing our products and hope you will be fully satisfied with the performance. To this purpose, we recommend you strictly comply with the instructions and regulations contained in this handbook.. -
Page 6: General Safety Warnings
GENERAL SAFETY WARNINGS The user is responsible for operations carried out on the equipment which do not comply with the indications in this manual, and periodic training of all personnel to work on the equipment is recommended. List of some general warnings: do not touch the equipment with moist or wet hands or feet do not insert screwdrivers or kitchen tools or anything else between the guards and the parts in motion... -
Page 7: Installation
H) Defrost heater MAX ROOM TEMPERATURE Air-condenser units should not operate if room temperature is over 100°F. Above 90°F maximum output is not guaranteed. Min. air circulation Air q.ty Model [cfm] BC51MU BF51MU BF52MU BC101LU BF101LU 2.060 BC101SU BF101SU BC72SU 2.530... -
Page 8: Installation
INSTALLATION The appliance must be installed and tested in full compliance with accident-prevention regulations contained in national law and current guidelines. Installers are to comply with any current local regulations. Place the appliance onto the required working site. Avoid locations with exposure to direct sunlight. ... -
Page 9: Dimensions
DIMENSIONS Please refer to the dimensions of your own appliance. BC51MU BF51MU 1407 (55,39") 746,5 (29,38") 721 (28,38") 80 (3,15") (23,62") (2,36") (24,6") (2,36") 740 (29,13) 970 (38,19") 150 (5,9") 56,5 56,5 61,7 (24,88") (2,22") (2,22") (2,43") (21,06") (5,7") BF52MU 1713 (67,44") - Page 10 1565 (61,61") BC101SU 800 (31,49") BF101SU 848 (33,39") 700 (27,56") (2,95") (25,59") (2,95") (16,34") (9,25") 1710 1860 (67,3") (73,23") 150 (5,9") 105,5 125,3 (2,36") (26,77") (2,36") (4,15") (23,62") (4,93") BC72SU 1980 (78") BF72SU 1040 (40,9") 1023,5 (40,3") BF102SU 875 (34,45") (2,95") (35") (2,95")
-
Page 11: Technical Data
TECHNICAL DATA Please refer to the technical data of your own appliance. Model BC51MU BC101LU BC101SU BC72SU Gross weight [lb] Net weight [lb] 29,38”x29,19” 31,49”x33,39” 31,49”x33,39” Dimensions 40,9”x40,3”x78” x38,19” x73,23” x73,23” Capacity Mass /cycle [lb] (+194°F+37°F) Net internal volume [cuft]... -
Page 12: Wiring
WIRING Mod. …51MU – …52MU The connection to power supply may be carried out at the back of the appliance after removing the protection grid and the box cover. Mod. …101LU – …101SU – …72SU – …102SU The connection to power supply may be carried out in the upper part of the appliance after removing the protection panel and the box cover. -
Page 13: Control And Safety Systems
2) Turn on the appliance and wait 30 minutes before the use if the external temperature is “low”. 3) Check power input 4) Carry out at least one full quick cooling cycle CONTROL AND SAFETY SYSTEMS The following information concerns skilled staff only. ... -
Page 14: Disposal
DISPOSAL WASTE STORAGE At the end of the product life, avoid release to the environment. The doors should be removed before disposal. Temporary storage of special waste is permitted while waiting for disposal by treatment and/or final collection. Dispose of special waste in accordance with the laws in force with regard to protection of the environment in the country of the user. -
Page 15: Operation
+37°F during positive quick cooling and 0°F during negative quick cooling. Tab.2 Standard of Model Max. output/cycle Capacity shelves n° max +194[°F]+37[°F] +194[°F]0[°F] 12“x20“ BC51MU 48[lb] 1,5“ 12“x20“ BF51MU 48[lb] 28[lb] 1,5“ BF52MU 55[lb] 33[lb] 18“x26“... -
Page 16: Machine Loading
MACHINE LOADING Do not pile up foodstuffs to be cooled. Thickness should be lower than 2” in negative quick cooling and lower than 3” in positive quick cooling. 0,19”-0,79” Make sure air circulation is not hampered between food trays. The grid-holding frame (included in those models which include trolleys) is to be located at the centre of the cabinet. -
Page 17: Temperatures
TEMPERATURES Do not leave the cooked products that are to be chilled/frozen at room temperature. Avoid humidity losses, which will be detrimental to the conserved fragrance of the product. We recommend beginning the chilling/freezing program as soon as the preparation or cooking phase has ended, being careful to insert the product into the equipment at a temperature no lower than +160°F. -
Page 18: Control Panel
CONTROL PANEL The illustration shows the equipment control panel, while the list indicates the description and functionality of the individual commands. SOFT+37°F SOFT 0°F HARD +37°F HARD 0°F INFINITY MENU A–Display: Displays all the information relative to the menus on the board and the application in progress. B–... -
Page 19: First Start-Up
FIRST START-UP At the first start-up the operator will be asked to choose the language and the sector. LANGUAGE SETTING 1. Select LANGUAGE by rotating the knob ITALIANO DUTCH ENGLISH DANSK FRANCAIS SVENSKA DEUTSCH NORSK ESPANOL 2. Press the knob to confirm the selected language ITALIANO DUTCH... -
Page 20: Program
PROGRAM PROGRAM DESCRIPTIONS PROGRAM DESCRIPTION STANDARD PROGRAMS Cycle carried out through probe at the core or time, suitable for chilling foods up to +37°F, using a chamber temperature of about 34°F. SOFT +37°F Cycle suitable for delicate products such as mousse, creams, desserts, vegetables or foods that are not very thick Cycle carried out through probe at the core or time, suitable for chilling foods up to +37°F, using a chamber temperature varying from 5°F to 34°F. - Page 21 AUTOMATIC PROGRAMS +37°F - PASTRY SHOP DOUGH SHEETING Cycle dedicated to chilling of sheet dough MIXING IN DIE Cycle dedicated to chilling of moulded dough CREAM Cycle dedicated to chilling of creams LEAVENED Cycle dedicated to chilling of leavened products LEAVENED +50°F Cycle dedicated to chilling of leavened products +50°F SHORT PASTRY...
-
Page 22: Standard Programs
STANDARD PROGRAMS Chilling/freezing cycles pre-set by the manufacturer which can be activated by selecting them directly from the initial screen, SOFT +37°F, HARD +37°F, SOFT 0°F and HARD 0°F. During execution of the cycle the parameters can be viewed and modified temporarily. The new values will be valid exclusively for the cycle in progress. -
Page 23: Program I.f.r
PROGRAM I.F.R. The IFR is an innovative patented system of positive quick cooling which allows the cycle optimized for each type of foodstuffs by preventing superficial freezing. Temperatures are detected by a three-sensor multipoint needle probe. The position inside the foodstuff is determined univocally by a reference disk located along the needle. (ref. par. “Core probe”). -
Page 24: Program Infinity
PROGRAM INFINITY Time chilling/freezing cycle with infinite duration, suitable for cooling various type food pans. The temperature at the core can be checked. 1. Select the desired cycle by rotating the knob SOFT +37°F SOFT 0°F HARD +37°F HARD 0°F INFINITY MENU 4. -
Page 25: Favorite Programs
FAVORITE PROGRAMS A library consisting in 10 cycles selected from those stored and labelled as favorites (see page 28) 1. Select by rotating the knob SOFT +37°F SOFT 0°F HARD +37°F HARD 0°F INFINITY MENU 2. Press the knob to enter section FAVORITE PROGRAMS SOFT +37°F SOFT 0°F... -
Page 26: Automatic Programs
AUTOMATIC PROGRAMS These programs are manufacturer recommended work cycles. During the cycle the parameters can be viewed, but not modified. 1. Select MENU by rotating the knob SOFT +37°F SOFT 0°F HARD +37°F HARD 0°F INFINITY MENU 2. Press the knob to enter section MENU SOFT +37°F SOFT 0°F HARD +37°F... - Page 27 10. Press the knob to activate the selected cycle During the cycle it is possible: RICE AND PASTA - to view the default parameters by selecting INFO to stop the cycle by selecting STOP Note: the parameters cannot be modified AUTO +37°F +80°F RICE AND...
-
Page 28: Stored Programs
STORED PROGRAMS These are 10 chilling cycles and 10 freezing cycles that can be configured based on the needs of the user, the names of which can be freely set. These cycles already have default settings set up by the manufacturer: once modified by the user the new values can be saved in the memory and recalled at a subsequent start of that cycle. - Page 29 If the modifications are saved the user will be asked to assign a name to the cycle. use the knob STOR. +37°F +80°F CICLO 3 to enter the name and press to save it. +75°F 100% STOP To make a cycle a favorite, select MAKE FAVORITE, found at the end of the parameters list, and enter the desired position.
-
Page 30: Multy
MULTY Chilling/freezing cycle by time organized by load levels. The number of levels available varies depending on the equipment. 1. Select MENU by rotating the knob SOFT +37°F SOFT 0°F HARD +37°F HARD 0°F INFINITY MENU 2. Press the knob to enter section MENU SOFT +37°F SOFT 0°F HARD +37°F... -
Page 31: Cooling
COOLING It is advisable to run a cooling cycle prior to selecting any chilling cycle. 1. Select MENU by rotating the knob SOFT +37°F SOFT 0°F HARD +37°F HARD 0°F INFINITY MENU 2. Press the knob to enter section MENU SOFT +37°F SOFT 0°F HARD +37°F... -
Page 32: Functions
FUNCTIONS DEFROST If not required, the function will not be activated and the display will alternate between showing the defrosting and the message “NOT REQUIRED”, accompanied by the sound of the buzzer. symbol 1. Select MENU by rotating the knob SOFT +37°F SOFT 0°F HARD +37°F... -
Page 33: Sanitation
SANITATION NOTE: the germicidal lamp kit is not supplied as standard equipment. It is an optional item. Should you purchase the kit, please follow the maintenance instructions to maintain. 1. Select MENU by rotating the knob SOFT +37°F SOFT 0°F HARD +37°F HARD 0°F INFINITY... -
Page 34: Storage
STORAGE Storing cycles and quick cooling cycles can be started separately. 1. Select MENU by rotating the knob SOFT +37°F SOFT 0°F HARD +37°F HARD 0°F INFINITY MENU 2. Press the knob to enter section MENU SOFT +37°F SOFT 0°F HARD +37°F HARD 0°F INFINITY... -
Page 35: Thawing
THAWING The defrost cycles with probe or by time are automatic. During the cycle the parameters can be modified and the temperature can be selected or the time at which the food should be defrosted and ready for use. In the event of time defrosting the operator can decide to change only the cycle end date acting on the date on the screen of the cycle in progress. - Page 36 Rotate the knob to select the date and time 02/10/2013 17:28 +80°F 12:56 +75°F 100% STOP - Press the knob to enter the date and time value change mode 02/10/2013 17:28 +80°F 12:56 +75°F 100% STOP Select the new value by rotating the knob : 28 SCONG 02 OTT 2013...
-
Page 37: Proving
PROVING The leavening and retarding cycles are automatic. During the cycle the parameters can be modified to select the temperature or the time at which the food should be leavened and ready for use. The operator can decide to change only the end cycle date by acting on the date shown on the screen of the cycle in progress, but only during the first phase (preservation), easily scheduling the moment at which the product should be perfectly leavened. - Page 38 Rotate the knob to select the date and time 02/10/2013 17:28 +80°F 05:59 +75°F 100% STOP - Press the knob to enter the date and time value change mode 02/10/2013 17:28 +80°F 05:59 +75°F 100% STOP Select the new value by rotating the knob 02/10/2013 17:28 +80°F 05:59...
-
Page 39: Probe Heating
PROBE HEATING Heating of the needle probe is activated automatically, only on a cycle with needle and negative temperature probe core, after the cycle in progress stops, selecting STOP, and after the subsequent opening of the door by the operator. 1. - Page 40 7. Please wait PROBE HEATING PLEASE WAIT .. 8. Remove the probe REMOVE THE PROBE In the event that the temperature read by the needle core sensor is not negative, the function will not be activated. 1. Not needed NOT NEEDED 3283430_GB...
-
Page 41: View / Edit Parameters Cycle
** VIEW / EDIT PARAMETERS CYCLE 1. During the cycle, select SET by rotating the knob +80°F HARD +37°F +75°F 100% STOP 2. Press the knob to enter the parameters list +80°F HARD +37°F +75°F 100% STOP 3. Select the parameter to be modified by rotating the knob END CYCLE NEEDLE 37°F... -
Page 42: Haccp
HACCP Lines in print run time = end less. Storage of 100 log/lines. If a cycle is made up of 5 log (lines/cycles name, date/time cycle start, cycle end, time of storage start, defrosting) can store 20 cycles. The twenty-first cycle overwrite the oldest cycle in memory. ... - Page 43 9. Enter the data by turning the knob and press to confirm the value and move to FROM 01/03/2010 the next one until ENTER is selected 02/03/ 2010 MENU HACCP VIEW ENTER 10. Press the knob to view the desired cycles FROM 01/03/2010...
- Page 44 10. Press the knob to view the selected cycle FREEZER 1 01/03/2010 14:00 MENU LASAGUE 0°F HACCP VIEW 01/03/2010 19:00 PASTA +37°F 11. The parameters list is displayed PASTA +37°F 01/03/2010 19:00 MENU NEEDLE +70°F AIR +70°F HACCP VIEW PRINT BY DATE NOTE: the printer is not supplied as standard equipment.
- Page 45 6. Press the knob to enter the selected function VIEW PRINT MENU HACCP DELETE 7. Select the chosen function by rotating the knob BY DATE BY CYCLE MENU HACCP PRINT 8. Press the knob to enter the selected function BY DATE BY CYCLE MENU HACCP...
- Page 46 8. Press the knob to enter the selected function BY DATE BY CYCLE MENU HACCP PRINT 9. Press the knob to start printing MENU HACCP PRINT ENTER 10. Printing in progress MENU IN PROGRESS HACCP PRINT DOWNLOAD DATA BY DATE Insert a USB flash drive (not supplied) into the USB port “Type A”...
- Page 47 DOWNLOAD DATA BY CYCLE Insert a USB flash drive (not supplied) into the USB port “Type A” on the dashboard. 6. Press the knob to enter the selected function VIEW USB memory presence is checked PRINT MENU HACCP DELETE 7. Select the chosen function by rotating the knob BY DATE BY CYCLE...
- Page 48 7. Select the chosen function by rotating the knob BY DATE BY CYCLE MENU HACCP 8. Press the knob to enter the selected function BY DATE BY CYCLE MENU HACCP 9. Press the knob to start downloading data MENU HACCP ENTER 10.
- Page 49 11. Data deletion in progress MENU IN PROGRESS HACCP DELETE DELETE DATA BY CYCLE 6. Press the knob to enter the selected function VIEW PRINT MENU HACCP DELETE 7. Select the chosen function by rotating the knob BY DATE BY CYCLE MENU HACCP DELETE...
- Page 50 7. Select the chosen function by rotating the knob BY DATE BY CYCLE MENU HACCP DELETE 8. Press the knob to enter the selected function BY DATE BY CYCLE MENU HACCP DELETE 9. Press the knob to start the procedure MENU HACCP DELETE...
-
Page 51: Settings
SETTINGS LANGUAGE 1. Select MENU by rotating the knob SOFT +37°F SOFT 0°F HARD +37°F HARD 0°F INFINITY MENU 2. Press the knob to enter section MENU SOFT +37°F SOFT 0°F HARD +37°F HARD 0°F INFINITY MENU 3. Select SETTING by rotating the knob AUTOMATIC FUNCTIONS STORED... -
Page 52: Set Date/Clock
SET DATE/CLOCK 1. Select MENU by rotating the knob SOFT +37°F SOFT 0°F HARD +37°F HARD 0°F INFINITY MENU 2. Press the knob to enter section MENU SOFT +37°F SOFT 0°F HARD +37°F HARD 0°F INFINITY MENU 3. Select SETTING by rotating the knob AUTOMATIC FUNCTIONS STORED... -
Page 53: Sector
SECTOR 1. Select MENU by rotating the knob SOFT +37°F SOFT 0°F HARD +37°F HARD 0°F INFINITY MENU 2. Press the knob to enter section MENU SOFT +37°F SOFT 0°F HARD +37°F HARD 0°F INFINITY MENU 3. Select SETTING by rotating the knob AUTOMATIC FUNCTIONS STORED... -
Page 54: Multy
MULTY The number of levels available varies depending on the equipment. 1. Select MENU by rotating the knob SOFT +37°F SOFT 0°F HARD +37°F HARD 0°F INFINITY MENU 2. Press the knob to enter section MENU SOFT +37°F SOFT 0°F HARD +37°F HARD 0°F INFINITY... -
Page 55: Cycle Control - Auto Or Manual
CYCLE CONTROL - AUTO OR MANUAL You can choose to control the cycle in automatic mode (AUTO) or by means of operator choice, timed or using the probe in the core (MANUAL). The default cycle control setting is automatic mode (AUTO). 1. -
Page 56: Service
SERVICE ALARMS The presence of an active alarm is signalled by the buzzer and the display shows the event alternating with the screen showing the process in progress. The RGB bar turns yellow. The alarms are recorded on a list. The presence of an alarm stored on the list is indicated by the symbol You can record up to a maximum of 42 alarms. -
Page 57: Alarms Table
ALARMS TABLE FAULT CAUSE REMEDY No power supply Check the connection to the power mains The display board does not Blown fuse Replace fuses qualified technician switch on Loosened connections Check connection fitting High and Low-pressure pressureswitch on Qualified technician required Clicker on Qualified technician required Compressor failure... -
Page 58: Reset Alarms
RESET ALARMS 1. Select MENU by rotating the knob SOFT +37°F SOFT 0°F HARD +37°F HARD 0°F INFINITY MENU 2. Press the knob to enter section MENU SOFT +37°F SOFT 0°F HARD +37°F HARD 0°F INFINITY MENU 3. Select SERVICE by rotating the knob AUTOMATIC FUNCTIONS STORED... -
Page 59: Inputs Outputs
INPUTS OUTPUTS 1. Select MENU by rotating the knob SOFT +37°F SOFT 0°F HARD +37°F HARD 0°F INFINITY MENU 2. Press the knob to enter section MENU SOFT +37°F SOFT 0°F HARD +37°F HARD 0°F INFINITY MENU 3. Select SERVICE by rotating the knob AUTOMATIC FUNCTIONS STORED... -
Page 60: Restore
RESTORE This function restores the original parameters. ATTENTION: in case of use of this function as a user, contact the manufacturer for the exact settings of the configuration parameters. 1. Select MENU by rotating the knob SOFT +37°F SOFT 0°F HARD +37°F HARD 0°F INFINITY... -
Page 61: Parameters
PARAMETERS ATTENTION: in case of use of this function as a user, contact the manufacturer. 1. Select MENU by rotating the knob SOFT +37°F SOFT 0°F HARD +37°F HARD 0°F INFINITY MENU 2. Press the knob to enter section MENU SOFT +37°F SOFT 0°F HARD +37°F... -
Page 62: Maintenance
MAINTENANCE MAINTENANCE AND CLEANING CLEANING THE CABINET Clean inside the cooling cabinet daily. Both the cabinet and all the internal components have been designed and shaped to allow washing and cleaning all parts easily. Before cleaning, defrost the appliance and remove the internal drain. Disconnect the master switch. -
Page 63: Cleaning The Air Condenser
Hand-wash the probe using lukewarm water and a mild detergent or products with biodegradability higher than 90%. Rinse with water and sanitary solution. Do not use detergents containing solvents (such as trichloroethylene, etc) or abrasive powders ATTENTION: do not use hot water to wash the probe. CLEANING THE AIR CONDENSER The air condenser should be kept clean to ensure the appliance's performance and efficiency, as air should freely circulate inside the appliance. -
Page 64: Discontinued Use
DISCONTINUED USE Should the machine be disconnected over long periods, follow the instructions below to maintain the appliance in good condition: Turn the mains switch OFF. Disconnect the plug. Empty the appliance and clean it in accordance with the instructions given in the chapter "CLEANING". -
Page 65: Maintenance Of Panel Board
Mod. …52MU Unhook the front guard, pulling it towards you. Undo the guard screws and remove the cover to access to the video card and to the encoder. Mod. …101LU – …101SU – …72SU – …102SU Undo the screw under the dashboard. Unhook the dashboard, pulling it forward. -
Page 66: Condensing System Maintenance
Mod. …101LU – …101SU - …72SU – …102SU Remove the protection panel out in the upper part of the appliance. CONDENSING SYSTEM MAINTENANCE To access the condensing system, remove the rear protective grille, undoing the screws. REPLACEMENT CORE PROBE Turn left completely unscrewing the connector to disconnect the cable of the core probe. -
Page 67: Wiring Diagram Plate
WIRING DIAGRAM PLATE The electrical diagram is shown on the last page of the booklet. N° DESCRIPTION N° DESCRIPTION COMPRESSOR HIGH PRESSURE PRESSOSTAT CONDENSER FAN ELECTRONIC DATA CARD LCD THERMOSTATED CONDENSER FAN FUSE-HOLDER WITH UNIPOLAR FUSE GENERAL TERMINAL BOARD ELECTROVALVE GENERAL TERMINAL BOARD MAGNETIC MICRO-SVWITCH GENERAL TERMINAL BOARD... - Page 69 INDEX DONNEES GENERALES A LA REMISE ................5 AVERTISSEMENTS GÉNÉRAUX ........................5 LISTE DES RÉFÉRENCES NORMATIVES ......................5 TRANSPORT ET DÉPLACEMENT ........................5 DÉBALLAGE ..............................5 AVERTISSEMENTS GÉNÉRAUX DE SÉCURITÉ ....................6 INSTALLATION ......................7 DONNÉES DE LA PLAQUE ..........................7 TEMPERATURE MAX DU LOCAL D’UTILISATIN ....................
- Page 70 POSITIONS ..............................51 LANGUE ..................................51 SET DATA/MONTRE ................................ 52 SECTEUR ..................................53 MULTY .................................... 54 CONTROLE CYCLE - AUTO OU MANUEL ......................... 55 SERVICE ..............................56 ALARMES ..................................56 TABLEAU DES ALARMES ..............................57 RESET ALARMES ................................58 ENTREES SORTIES ................................59 RETABLISSEMENT ................................
- Page 71 DONNEES GENERALES A LA REMISE AVERTISSEMENTS GÉNÉRAUX Nous vous félicitons pour votre choix et nous vous souhaitons de pouvoir utiliser au mieux nos appareils suivant les instructions et les précautions nécessarires contenues dans ce manuel. Il est obligatoire, de la part de l'utilisateur, de lire attentivement le manuel et d'y faire toujours référence ; il doit être conservé...
- Page 72 AVERTISSEMENTS GÉNÉRAUX DE SÉCURITÉ Toute opération effectuées sur l'appareil et qui ne respecte pas les indications de ce manuel doivent être de la responsabilité de l'utilisateur, et nous recommandons une formation périodique de tout le personnel à travailler sur l'appareil. Liste de quelques avertissements généraux: ne pas toucher l'appareil avec les mains ou les pieds mouillées ou humides ne pas insérer de tournevis ou ustensile de cuisine ou autre entre les protections et les pièces en...
- Page 73 TEMPERATURE MAX DU LOCAL D’UTILISATIN Pour les groupes condenseur à air, la température ambiante de fonctionnement ne doit jamais dépasser les 100°F. Au-dessus de 90°F les rendements déclarès ne sont pas garantis. Circulation air min Modèle Quantité air BC51MU BF51MU BF52MU BC101LU BF101LU 2.060...
- Page 74 MISE EN PLACE L'appareil doit être installé et les essais effectués en respectant complètement les exigences de sécurité préconisées par la réglementation et les normes nationales. Disposez l'appareil à sa place de travail. Evitez de placer l'appareil où il pourrait être exposé aux rayons du soleil ...
- Page 75 DIMENSIONS D’ENCOMBREMENT Se référer aux dimensions de votre appareil. BC51MU BF51MU 1407 (55,39") 746,5 (29,38") 721 (28,38") 80 (3,15") (23,62") (2,36") (24,6") (2,36") 740 (29,13) 970 (38,19") 150 (5,9") 56,5 56,5 61,7 (24,88") (2,22") (2,22") (2,43") (21,06") (5,7") BF52MU 1713 (67,44") 871 ( 34,29")
- Page 76 1565 (61,61") BC101SU 800 (31,49") BF101SU 848 (33,39") 700 (27,56") (2,95") (25,59") (2,95") (16,34") (9,25") 1710 1860 (67,3") (73,23") 150 (5,9") 105,5 125,3 (2,36") (26,77") (2,36") (4,15") (23,62") (4,93") BC72SU 1980 (78") BF72SU 1040 (40,9") 1023,5 (40,3") BF102SU 875 (34,45") (2,95") (35") (2,95")
- Page 77 DONNÉES TECHNIQUES Se référer aux données techniques de votre appareil. Modéle BC51MU BC101LU BC101SU BC72SU Poids brut [lb] Poids net [lb] 29,38”x29,19” 31,49”x33,39” 31,49”x33,39” Dimensions 40,9”x40,3”x78” x38,19” x73,23” x73,23” Capacité Masse/cycle [lb] (+194°F+37°F) Volume net intérieur [cuft] 2,55 5,52 5,52...
- Page 78 BRANCHEMENT ELECTRIQUE Mod. …51MU – …52MU On réalise le branchement électrique à l'arrière de l'appareil en enlevant la grille de protection et le couvercle de la boîte. Mod. …101LU – …101SU – …72SU – …102SU On réalise le branchement électrique dans la partie supérieure de l'appareil en enlevant le panneau de protection et le couvercle de la boîte.
- Page 79 2) Mettre l’appareil sous tension et attendre 30 minutes avant l’utilisation au cas où la température externe était trop basse 3) Vérifier le absorptions 4) Exécuter au moins un cycle complet de réfrigération rapide SYSTÉMES DE CONTRÔLE ET TÉMOINS Ces instructions concernent le personnel spécialisé. ...
- Page 80 HFC 134a: Se décompose avec relative rapidité dans l'atmosphère inférieure (troposphère). Sa durée dans l'atmosphère est de 15,6 ans. HFC 143a, 125, 134a: N'influencent pas le smog photochimique (c'est à dire n'appartient pas aux composants organiques volatiles - VOC - conformément à ce convenu par l'accord UNECE). Ne provoque pas la raréfaction de l'ozone.
- Page 81 +37°F en réfrigération rapide positive et 0°F en réfrigération rapide négative. Tab.2 Standard Modéle Rendu max/cycle Capacité niveaux n° max +194[°F]+37[°F] +194[°F]0[°F] 12“x20“ BC51MU 48[lb] 1,5“ 12“x20“ BF51MU 48[lb] 28[lb] 1,5“ BF52MU 55[lb] 33[lb] 18“x26“...
- Page 82 CHARGEMENT DE LA CELLULE Faire attention à ce que les produits à réfrigérer rapidement ne soient pas superposés. Les épaisseurs doivent être inférieures à 2” en réfrigération rapide négative et 3” en réfrigération rapide positive. 0.5 - 2 cm. S'assurer que l'air circule suffisamment entre les contenants. Si l’on utilise un chariot pour charger la cellule, il faut placer la structure porte-clayettes au centre de l'enceinte.
- Page 83 TEMPÉRATURES Ne pas laisser à température ambiante les produits cuits et à abattre/congeler. Éviter la perte d'humidité, sous peine de perdre la fragrance conservée du produit. Il est conseillé de commencer le programme de réfrigération/congélation juste après avoir terminé la phase de préparation ou de cuisson, en prenant soin d'insérer le produit dans l'appareil à...
- Page 84 PANNEAU DE COMMANDE L'illustration présente le panneau de commande de l'appareil, alors que la liste indique la description et la fonction de chaque commande. SOFT+37°F SOFT 0°F HARD +37°F HARD 0°F INFINITY MENU A–Écran: il affiche toutes les informations relatives aux menus présents sur la fiche et aux applications en cours.
- Page 85 PREMIER DÉMARRAGE Lors du premier allumage, il vous sera demander de choisir la langue et le secteur. RÉGLAGE LANGUE 1. Sélectionner la langue en tournant la molette ITALIANO DUTCH ENGLISH DANSK FRANCAIS SVENSKA DEUTSCH NORSK ESPANOL 2. Appuyer sur la molette pour confirmer la langue sélectionnée ITALIANO DUTCH...
- Page 86 PROGRAMMES DESCRIPTION DES PROGRAMMES PROGRAMME DESCRIPTION PROGRAMMES STRANDARDS Cycle réalisé à l'aide d'une sonde au cœur ou à temps, idéal pour refroidir des aliments jusqu'à +37°F, en utilisant une température de chambre autour de 0°F. Cycle indiqué pour SOFT +37°F des produits délicats tels que mousses, crèmes, desserts, légumes ou aliments ayant une épaisseur réduite Cycle réalisé...
- Page 87 PROGRAMMES AUTOMATIQUES +37°F - PÂTISSERIE PETRISSAGE IN FEUILLES Cycle pour la réfrigération de riz et de pâte en feuille PETRISSAGE IN MOULE Cycle pour la réfrigération de pâtes moulées CREMES Cycle pour la réfrigération de crèmes LEVES Cycle pour la réfrigération de produits au levain LEVES +50°F Cycle pour la réfrigération de produits au levain +50°F PATE BRISEE...
- Page 88 PROGRAMMES STRANDARDS Cycles de réfrigération/congélation préréglés par le constructeur et qui peuvent être activés en les sélectionnant directement depuis la page vidéo initiale, SOFT +37°F, HARD +37°F, SOFT 0°F et HARD 0°F. Pendant l'exécution du cycle, il est possible de visualiser les paramètres et de les modifier de manière temporaire, les nouvelles valeurs auront validité...
- Page 89 PROGRAMME I.F.R. I.F.R. est un système révolutionnaire breveté de réfrigération rapide positive qui de manière automatique optimise le cycle pour chaque typologie d’aliment en en prévenant sa congélation superficielle. Les températures sont relevées grâce à la présence d’une sonde à piquer multipoint à trois senseurs. Le positionnement à...
- Page 90 PROGRAMME INFINITY Cycle de réfrigération / congélation à temps dont la durée est infinie, idéal pour refroidir des plats d'aliments de typologie différente. Il est possible de contrôler la température au cœur. 1. Sélectionner le cycle désiré en tournant la molette SOFT +37°F SOFT 0°F HARD +37°F...
- Page 91 PROGRAMMES FAVORIS Bibliothèque composée de 10 cycles sélectionnés parmi ceux enregistrés et étiquetés comme favoris (voir pag.28) 1. Sélectionner en tournant la molette SOFT +37°F SOFT 0°F HARD +37°F HARD 0°F INFINITY MENU 2. Appuyer sur la molette pour entrer dans la section FAVORIS SOFT +37°F SOFT 0°F...
- Page 92 PROGRAMMES AUTOMATIQUES Ces programmes sont des cycles de travail conseillés par le constructeur. Il est possible, pendant le cycle, de visualiser les paramètres, mais pas de les modifier. 1. Sélectionner MENU en tournant la molette SOFT +37°F SOFT 0°F HARD +37°F HARD 0°F INFINITY MENU...
- Page 93 10. Appuyer sur la molette pour activer le cycle Pendant le cycle, il est possible de: ET PATES - visualiser les paramètres, en sélectionnant INFO d'arrêter le cycle en sélectionnant STOP Remarque: les paramètres ne sont pas modifiables AUTO +37°F +80°F ET PATES +75°F...
- Page 94 PROGRAMMES ENREGISTRÉS Il s'agit de 10 cycles de réfrigération et 10 cycles de congélation qui peuvent être réglés en fonction des exigences de l'utilisateur et dont le nom peut être réglé à discrétion. Ces cycles possèdent déjà des réglages par défaut, effectués par le constructeur : une fois modifiées par l'utilisateur, les nouvelles valeurs peuvent être enregistrées en mémoire et rappelées lors d'un démarrage successif à...
- Page 95 8. Appuyer sur la molette pour activer le cycle sélectionné Pendant le cycle, il est possible de: - Visualiser, modifier les paramètres par défaut et faire devenir favoris en appuyant sur SET 1 CICLO 1 - d'arrêter le cycle en sélectionnant STOP 2 CICLO 2 MENU STOCK.
- Page 96 MULTY Cycle de réfrigération/congélation à temps organisé pour les niveaux de charge. Le nombre de niveaux disponibles varie en fonction de l'appareil. 1. Sélectionner MENU en tournant la molette SOFT +37°F SOFT 0°F HARD +37°F HARD 0°F INFINITY MENU 2. Appuyer sur la molette pour entrer dans la section MENU SOFT +37°F SOFT 0°F...
- Page 97 REFROIDISSEMENT On conseille de démarrer un cycle de refroidissement avant de sélectionner toute sorte de cycle de refroidissement rapide. 1. Sélectionner MENU en tournant la molette SOFT +37°F SOFT 0°F HARD +37°F HARD 0°F INFINITY MENU 2. Appuyer sur la molette pour entrer dans la section MENU SOFT +37°F SOFT 0°F...
- Page 98 FUNCTIONS DEGIVRAGE Si cela n'est pas nécessaire, la fonction ne sera pas activée et sur l'écran apparaîtra de façon alternée le symbole de dégivrage et l'inscription « NON NÉCESSAIRE », accompagnés du son du bipeur. 1. Sélectionner MENU en tournant la molette SOFT +37°F SOFT 0°F...
- Page 99 STERILISATION NOTE: Le kit lampe germicide n’est pas fourni de série; il s’agit d’un accessoire en option à installer. Si l’on désire acheter le kit, suivre les instructions reportées dans le manuel d’instruction relatif pour son entretien 1. Sélectionner MENU en tournant la molette SOFT +37°F SOFT 0°F...
- Page 100 CONSERVATION Il est possible d’activer un cycle de conservation indépendamment d’un cycle de réfrigération rapide. 1. Sélectionner MENU en tournant la molette SOFT +37°F SOFT 0°F HARD +37°F HARD 0°F INFINITY MENU 2. Appuyer sur la molette pour entrer dans la section MENU SOFT +37°F SOFT 0°F...
- Page 101 DECONGELATION Les cycles de décongélation, avec sonde ou par temps, sont automatiques. Durant le cycle, il est possible de modifier les paramètres et de choisir la température ou l'heure à laquelle vous souhaitez trouver les aliments décongelés et prêts à utiliser. En cas de décongélation par temps, l'utilisateur a la possibilité...
- Page 102 02/10/2013 17:28 +80°F 12:56 +75°F 100% STOP - Sélectionnez la date et l'heure, en tournant le bouton 02/10/2013 17:28 +80°F 12:56 +75°F 100% STOP - Appuyez sur le bouton pour entrer dans la modification des valeurs de date et heure 02/10/2013 17:28 +80°F 12:56...
- Page 103 FERMENTATION Les cycles de levage et d'arrêt de levage sont automatiques. Durant le cycle, il est possible de modifier les paramètres pour choisir la température ou l'heure à laquelle vous souhaitez trouver les aliments levés et prêts à utiliser. L'utilisateur a la possibilité de modifier uniquement la date de fin de cycle en intervenant sur la date affichée sur la page-écran du cycle en cours, mais seulement durant la première phase (maintien), en programmant tout simplement le moment où...
- Page 104 - Sélectionnez la date et l'heure, en tournant le bouton 02/10/2013 17:28 +80°F 05:59 +75°F 100% STOP - Appuyez sur le bouton pour entrer dans la modification des valeurs de date et heure 02/10/2013 17:28 +80°F 05:59 +75°F 100% STOP Sélectionner la nouvelle valeur avec la molette 02/10/2013 17:28...
- Page 105 CHAUFFAGE DE SONDE Le chauffage de la sonde à piquer est activé automatiquement, uniquement pour un cycle avec sonde et une température de sonde au cœur négative, après l'arrêt du cycle en cours en sélectionnant STOP puis l'ouverture de la porte par l'opérateur. 1.
- Page 106 7. Attendre CHAUFFAGE DE SONDE ATTENDRE S'IL VOUS PLAIT .. 8. Extraire la sonde EXTRAIRE LA SONDE Si la température lue par le capteur cœur de la sonde n'est pas négative, la fonction ne sera pas activée. 1. Pas necessaire PAS NECESSAIRE 3283430_FR...
- Page 107 ** VISUALISATION/MODIFICATION PARAMÈTRES CYCLE 1. Au cours du cycle, sélectionner SET, en tournant la molette +80°F HARD +37°F +75°F 100% STOP 2. Appuyer sur la molette pour entrer dans la liste des paramètres +80°F HARD +37°F +75°F 100% STOP 3. Sélectionner le paramètre à modifier, en tournant la molette COEUR FIN CYCLE 37°F...
- Page 108 HACCP Lignes imprimées pendant l’exécution = infini. Stockage des 100 log / lignes. Si un cycle est composé de 5 log (lignes / cycles nom, la date / l'heure de début du cycle, la fin du cycle, le temps de démarrage de stockage, dégivrage) peut memoriser 20 cycles. Au prochain cycle sera écrasé...
- Page 109 9. Insérer la date en tournant la molette et en appuyant pour confirmer la valeur, 01/03/2010 puis passer à la valeur suivante jusqu'à 02/03/ 2010 MENU HACCP ce que s'affiche EXÉCUTER AFFICHAGE EXÉCUTER 10. Appuyer sur la molette pour afficher les cycles souhaités 01/03/2010 02/03/2010...
- Page 110 10. Appuyer sur la molette pour afficher le cycle sélectionné CELLULE DE REFR.1 01/03/2010 14:00 MENU LASAGNE 0°F HACCP AFFICHAGE 01/03/2010 19:00 PASTA +37°F 11. La liste des paramètres s'affiche PASTA +37°F 01/03/2010 19:00 MENU COEUR +70°F AIR +70°F HACCP AFFICHAGE IMPRESSION PAR DATE NOTE: l’imprimante n’est pas fournie de série;...
- Page 111 IMPRESSION PAR CYCLE NOTE: l’imprimante n’est pas fournie de série; il s’agit d’un accessoire en option à installer Brancher l'imprimante à l'arrière de l'appareil, en utilisant les connecteurs MATE-N-LOK présents sur le panneau électrique, identifiés par les lettres R (alimentation) et S (signal). 6.
- Page 112 7. Sélectionner la fonction choisie en tournant la molette PAR DATE PAR CYCLE MENU HACCP TOUT IMPRIME 8. Appuyer sur la molette pour entrer dans la fonction choisie PAR DATE PAR CYCLE MENU HACCP TOUT IMPRIME 9. Appuyer sur la molette pour démarrer l’imprimante MENU TOUT...
- Page 113 11. Téléchargement des données en cours EN COURS MENU HACCP TÉLÉCHARGEMENT DES DONNÉES PAR CYCLE Insérer une clé USB (non fournie) dans le port USB “Type A” présent sur le tableau de bord. 6. Appuyer sur la molette pour entrer dans la fonction choisie AFFICHAGE La présence de la mémoire USB est...
- Page 114 TÉLÉCHARGEMENT DE TOUTES LES DONNÉES Insérer une clé USB (non fournie) dans le port USB “Type A” présent sur le tableau de bord. 6. Appuyer sur la molette pour entrer dans la fonction choisie AFFICHAGE La présence de la mémoire USB est IMPRIME MENU HACCP...
- Page 115 10. Appuyer sur la molette pour démarrer la procédure 01/03/2010 02/03/2010 MENU HACCP SUPPRIME EXÉCUTER 11. Suppression des données en cours EN COURS MENU HACCP SUPPRIME SUPPRESSION DES DONNÉES PAR CYCLE 6. Appuyer sur la molette pour entrer dans la fonction choisie AFFICHAGE IMPRIME MENU...
- Page 116 SUPPRESSION DE TOUTES LES DONNÉES 6. Appuyer sur la molette pour entrer dans la fonction choisie AFFICHAGE IMPRIME MENU HACCP SUPPRIME 7. Sélectionner la fonction choisie en tournant la molette PAR DATE PAR CYCLE MENU HACCP TOUT SUPPRIME 8. Appuyer sur la molette pour entrer dans la fonction choisie PAR DATE PAR CYCLE...
- Page 117 POSITIONS LANGUE 1. Sélectionner MENU en tournant la molette SOFT +37°F SOFT 0°F HARD +37°F HARD 0°F INFINITY MENU 2. Appuyer sur la molette pour entrer dans la section MENU SOFT +37°F SOFT 0°F HARD +37°F HARD 0°F INFINITY MENU 3.
- Page 118 SET DATA/MONTRE 1. Sélectionner MENU en tournant la molette SOFT +37°F SOFT 0°F HARD +37°F HARD 0°F INFINITY MENU 2. Appuyer sur la molette pour entrer dans la section MENU SOFT +37°F SOFT 0°F HARD +37°F HARD 0°F INFINITY MENU 3.
- Page 119 SECTEUR 1. Sélectionner MENU en tournant la molette SOFT +37°F SOFT 0°F HARD +37°F HARD 0°F INFINITY MENU 2. Appuyer sur la molette pour entrer dans la section MENU SOFT +37°F SOFT 0°F HARD +37°F HARD 0°F INFINITY MENU 3. Sélectionner POSITIONS en tournant la molette AUTOMATIQUES FUNCTIONS...
- Page 120 MULTY Le nombre de niveaux disponibles varie en fonction de l'appareil. 1. Sélectionner MENU en tournant la molette SOFT +37°F SOFT 0°F HARD +37°F HARD 0°F INFINITY MENU 2. Appuyer sur la molette pour entrer dans la section MENU SOFT +37°F SOFT 0°F HARD +37°F HARD 0°F...
- Page 121 CONTROLE CYCLE - AUTO OU MANUEL Il est possible de choisir de gérer le contrôle du cycle en modalité automatique (AUTO) ou en modalité manuelle (MANUEL) en choisissant entre l'option temps ou l'option avec sonde au cœur. L'appareil gère par défaut le contrôle du cycle en modalité automatique (AUTO). 1.
- Page 122 SERVICE ALARMES La présence d'une alarme activée est signalée par le bipeur et par l'affichage à l'écran de l'événement, alterné avec la page-écran de l'alarme en cours. La barre rgb devient jaune. Les alarmes sont enregistrées dans une liste. La présence d'une alarme enregistrée dans la liste est indiquée par le symbole Il est possible d'enregistrer un nombre max de 42 alarmes.
- Page 123 TABLEAU DES ALARMES PANNE CAUSE SOLUTION Pas d'alimentation électrique Vérifier le branchement au réseau électrique La carte écran ne s'allume pas Fusible claqué Remplacer les coupe-circuits (technique spécialisé) Connexions desserrées Vérifier le serrage des connexions Pressostat de haute ou basse pression actionné Appeler le service technique spécialisé...
- Page 124 RESET ALARMES 1. Sélectionner MENU en tournant la molette SOFT +37°F SOFT 0°F HARD +37°F HARD 0°F INFINITY MENU 2. Appuyer sur la molette pour entrer dans la section MENU SOFT +37°F SOFT 0°F HARD +37°F HARD 0°F INFINITY MENU 3.
- Page 125 ENTREES SORTIES 1. Sélectionner MENU en tournant la molette SOFT +37°F SOFT 0°F HARD +37°F HARD 0°F INFINITY MENU 2. Appuyer sur la molette pour entrer dans la section MENU SOFT +37°F SOFT 0°F HARD +37°F HARD 0°F INFINITY MENU 3.
- Page 126 RETABLISSEMENT Cette fonction permet de retourner aux paramètres d’origine. ATTENTION : dans le cas d'une utilisation avec usagers de cette fonction, contacter le constructeur pour effectuer un réglage exacte des paramètres de configuration. 1. Sélectionner MENU en tournant la molette SOFT +37°F SOFT 0°F HARD +37°F...
- Page 127 PARAMETRES ATTENTION: dans le cas d'une utilisation avec usagers de cette fonction, contacter le constructeur. 1. Sélectionner MENU en tournant la molette SOFT +37°F SOFT 0°F HARD +37°F HARD 0°F INFINITY MENU 2. Appuyer sur la molette pour entrer dans la section MENU SOFT +37°F SOFT 0°F...
- Page 128 ENTRETIEN NETTOYAGE ET ENTRETIEN NETTOYAGE ENCEINTE On doit nettoyer l’intérieur de l’enceinte de refroidissement rapide claque jour. L’enceinte et ses éléments sont concus pour permettre de laver et nettoyer tous les éléments. Avant le nettoyage on doit dégivrer l’appareil et enlever le bassin de décharge à l’intérieur de l’appareil.
- Page 129 La sonde doit être nettoyée à la main, avec de l’eau tiède et du détergent neutre ou des produits ayant une biodégradabilité supérieure à 90% ; la sonde doit être rincée avec de l’eau propre et une solution hygiénique. Ne pas utiliser des détergents à...
- Page 130 INTERRUPTION D’UTILISATION En cas de longues périodes d'inactivité de l'appareil et pour le maintenir dans les meilleures condition-s, agissez de la manière suivante: Portez l'interrupteur du courant en position OFF. Enlevez la fiche de la prise. Videz l'appareil et nettoyez-le comme décrit au chapitre "NETTOYAGE”.
- Page 131 Mod. …52MU Décrocher la protection frontale en la tirant vers soi. Desserrer les vis de la protection et la retirer le couvercle pour accéder la carte vidéo et le encodeur. Mod. …101LU – …101SU …72SU – …102SU Desserrer les vis sous le tableau des instruments.
- Page 132 Mod. …101LU – …101SU - …72SU – …102SU Retirer le panneau de protection dans la partie supérieure de l'appareil. ENTRETIEN DE L'INSTALLATION DE CONDENSATION Pour accede à l'installation de condensation, retirer la grille de protection postérieure en desserrant les vis. ENTRETIEN DE LA SONDE À...
- Page 133 PLAQUETTE SCHÉMA ÉLECTRIQUE Le schéma électrique se trouve à la dernière page du manuel. N° DESCRIPTION N° DESCRIPTION CARTE ELECTRONIQUE TABLEAU ÉLECTRIQUE COMPRESSEUR CARTE ELECTRONIQUE LCD VENTILATEUR CONDENSATEUR VENTILATEUR CONDENSATEUR THERMOSTATÉ PORTE FUSIBILE AVEC FUSIBILE UNIPOLAIRE BORNIER ELETCTROVANNE BORNIER MICRO NTERRUPTEUR MAGNETIQUE BORNIER SONDE CHAMBRE VENTILATEUR EVAPORATEUR...
Need help?
Do you have a question about the BC51MU and is the answer not in the manual?
Questions and answers