Table of Contents
Advertisement
Quick Links
Advertisement
Table of Contents

Related Manuals for Ninja Foodi OP350SM


Summary of Contents for Ninja Foodi OP350SM
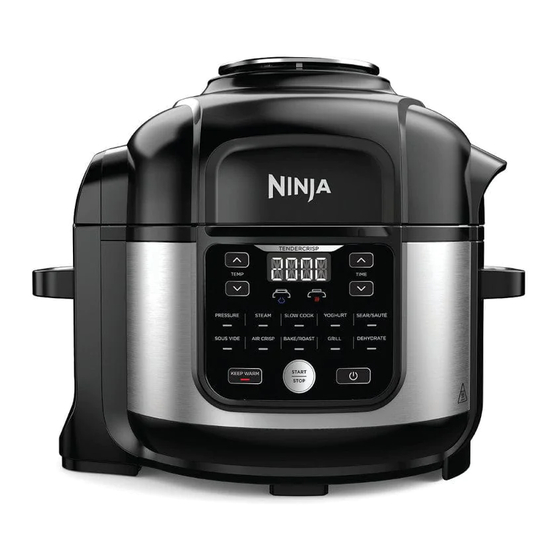
- Page 1 OP350SM INSTRUCTIONS ninjakitchen.sg ninjakitchen.my...
- Page 2 THANK YOU for purchasing the Ninja™ Foodi™ 9–in–1 Multi-Cooker REGISTER YOUR PURCHASE Singapore ninjakitchen.sg Malaysia ninjakitchen.my RECORD THIS INFORMATION TIP: You can find the model and serial numbers on the back of the unit by the Model Number: ����������������� power cord.
-
Page 3: Table Of Contents
Installing the Condensation Collector ..... . 9 Removing & Reinstalling the Anti-Clog Cap ....9 Using Your Ninja Foodi Multi-Cooker . -
Page 4: Important Safeguards
NEVER connect this appliance pressure cooker, except when to an external timer switch or following a Ninja™ Foodi™ recipe. separate remote-control system. 15 DO NOT cover the air intake vent, 10 DO NOT use an extension cord. - Page 5 DO NOT NOT use outdoors. Misuse may fill pot more than halfway, or as cause injury. otherwise instructed in a Ninja ™ 19 Intended for worktop use only. Foodi™ recipe. Ensure the surface is level, clean 29 DO NOT use this unit to cook and dry.
- Page 6 IMPORTANT SAFEGUARDS HOUSEHOLD USE ONLY • READ ALL INSTRUCTIONS BEFORE USE 34 DO NOT touch hot surfaces. 39 DO NOT attempt to open the Appliance surfaces are hot lid during or after pressure during and after operation. To cooking until all internal pressure prevent burns or personal injury, has been released through ALWAYS use protective hot pads...
- Page 7 44 Spilled food can cause serious 49 Removable cooking pot can be burns. Keep appliance and cord extremely heavy when full of away from children. DO NOT let ingredients. Care should be taken cord hang over edge of tables or when lifting pot from cooker base.
-
Page 8: Parts & Accessories
PARTS & ACCESSORIES PARTS Reversible Rack Cook & Crisp Basket ™ Detachable Diffuser 6L Removable Cooking Pot Crisping Lid Heat Shield Control Panel Cooker Base Pressure Lid Pressure Release Valve Float Valve Silicone Ring Anti-Clog Cap Air Outlet Vent Condensation Collector To order additional parts and accessories, visit ninjakitchen.sg or ninjakitchen.my or contact Customer Service at... - Page 9 ACCESSORY ASSEMBLY INSTRUCTIONS COOK & CRISP BASKET To remove diffuser for cleaning, pull 2 diffuser fins off the groove on the basket, then pull down firmly. 2 To assemble the Cook & Crisp Basket, place basket on top of diffuser and press down firmly.
-
Page 10: Using The Control Panel
USING THE CONTROL PANEL TEMP HH:MM NOTE: Control panel may differ per model. COOKING FUNCTIONS OPERATING BUTTONS PRESSURE: Use to cook food quickly FUNCTION: Press FUNCTION, then use while maintaining tenderness. the START/STOP dial to choose a cooking function. STEAM: Use to gently cook delicate TEMP: Press TEMP, then use the foods at a high temperature. -
Page 11: Before First Use
BEFORE FIRST USE REMOVING & REINSTALLING Remove and discard any packaging material, promotional labels, and tape THE ANTI-CLOG CAP from the unit. Make sure your anti-clog cap is in the 2 Please pay particular attention to correct position before using the pressure operational instructions, warnings, lid. -
Page 12: Multi-Cooker
USING YOUR NINJA™ FOODI™ 9–IN–1 MULTI-COOKER 3 With the pot installed, place either the SWAP THE TOP Cook & Crisp™ Basket or reversible rack The two lids allow you to seamlessly in the pot. Basket must have the diffuser transition between all your favourite attached. -
Page 13: Grill
4 Place ingredients on the rack, then close Grill the lid. Press the GRILL button. 5 Press the START/STOP button to begin cooking. NOTE: There is no temperature adjustment available or necessary when using the Grill function. 2 Use the up and down TIME arrows to set the cook time in minute increments up to 30 minutes. -
Page 14: Bake/Roast
USING YOUR NINJA™ FOODI™ 9–IN–1 MULTI-COOKER – CONT . Bake/Roast Press the BAKE/ROAST button. The default temperature setting will display. Use the up and down TEMP arrows to choose a temperature between 150˚C and 200˚C. 2 Use the up and down TIME arrows to... -
Page 15: Dehydrate
Dehydrate 3 Press TIME, then turn the dial to adjust the cook time in 15-minute increments Place the 2 tier reversible rack in the pot up to 12 hours. in the lower position, then place a layer of ingredients on the rack. 4 Close the lid and press START/STOP to begin dehydrating. -
Page 16: Get Started Pressure Cooking
USING YOUR NINJA™ FOODI™ 9–IN–1 MULTI-COOKER – CONT . PRESSURE TEST 4 Turn the unit on. Press the PRESSURE button, the unit will default to high (HI) GET STARTED PRESSURE COOKING pressure. Set the time to 2 minutes. Press the START/STOP button to begin. -
Page 17: Natural Pressure Release Vs. Quick Pressure Release
NATURAL PRESSURE RELEASE INSTALLING & REMOVING VS . QUICK PRESSURE RELEASE THE PRESSURE LID Natural Pressure Release: When pressure Place the pressure lid on top of the unit with cooking is complete, steam will naturally on the lid and the on the base lined release from the unit as it cools down. -
Page 18: Using The Cooking Functions With The Pressure Lid
USING YOUR NINJA™ FOODI™ 9–IN–1 MULTI-COOKER – CONT . USING THE COOKING FUNCTIONS 4 Use the up and down TIME arrows to set the cook time in minute increments up WITH THE PRESSURE LID to 1 hour, and in 5-minute increments To turn on the unit, plug the power cord into from 1 hour to 4 hours. -
Page 19: Steam
Steam 4 Press the START/STOP button. 5 The unit will automatically preheat to bring Add 240ml of liquid (or amount of liquid the steaming liquid to a boil. The display the recipe specifies) to the pot, then will show rotating lights during this place the reversible rack or Cook &... -
Page 20: Slow Cook
USING YOUR NINJA™ FOODI™ 9–IN–1 MULTI-COOKER – CONT . Slow Cook Yoghurt Add ingredients to the pot. DO NOT Add desired amount of milk to the pot. exceed the line marked MAX when slow cooking. NOTE: If you prefer to pasteurise, cool,... -
Page 21: Sear/Sauté
5 Press START/STOP to begin pasteurisation. Sear/Sauté Insert the pot. 6 Unit will display BOIL while pasteurising. When pasteurisation temperature is reached, the unit will beep and display COOL. 2 Press the SEAR/SAUTÉ button. The default temperature setting will display. Use the up and down TEMP arrows to select one of the setting options (low, medium-low, medium, 7 Once the milk has cooled, the unit will... -
Page 22: Accessories For Purchase
ADDITIONAL ACCESSORIES AVAILABLE FOR PURCHASE We offer a range of accessories custom made for your Ninja™ Foodi™ 9–in–1 Multi-Cooker. Visit ninjakitchen.co.uk to expand your capabilities and take your cooking to the next level. Extra Pack of Silicone Rings Cooking Pot... -
Page 23: Cleaning & Maintenance
CLEANING & MAINTENANCE Cleaning: Dishwasher & Hand-Washing Removing & Reinstalling the Silicone Ring The unit should be cleaned thoroughly after every use. Unplug the unit from the wall socket before cleaning. 2 To clean the cooker base and the control panel, wipe them clean with a damp cloth. -
Page 24: Troubleshooting Guide
TROUBLESHOOTING GUIDE Why is my unit taking so long to come to pressure? How long does it take to come to pressure? • Cooking times may vary based on the selected temperature, current temperature of the cooking pot, and temperature or quantity of the ingredients. •... - Page 25 “ADD POT” error message appears on display screen . • Cooking pot is not inside the cooker base. Cooking pot is required for all functions. “OTHR LID” error message appears on display screen and lid icon flashes . • The incorrect lid is installed for your desired cooking function. Install the pressure lid to use the Pressure, Slow Cook, Yoghurt, Steam, or Keep Warm functions.
-
Page 26: Helpful Tips
HELPFUL TIPS For consistent browning, make sure ingredients are arranged in an even layer on the bottom of the cooking pot with no overlapping. If ingredients are overlapping, make sure to shake half way through the set cook time. 2 For smaller ingredients that could fall through the reversible rack, we recommend first wrapping them in a parchment paper or foil pouch. -
Page 27: Warranty
• Accidental damage • Damage as a result of use not in accordance with the rating plate • Use of parts and accessories that are not genuine Ninja components CUSTOMER COSTS WITHIN WARRANTY • The customer is responsible for any inwards freight charge to return a product for warranty if requested, and outward freight charge for warranty parts and or replacement unit. - Page 28 Illustrations may differ from actual product. We are constantly striving to improve our products, therefore the specifications contained herein are subject to change without notice. COOK & CRISP, FOODI, NINJA, and THE PRESSURE COOKER THAT CRISPS are trademarks of SharkNinja Operating LLC.
Need help?
Do you have a question about the Foodi OP350SM and is the answer not in the manual?
Questions and answers