Table of Contents
Advertisement
Available languages
Available languages
Quick Links
Advertisement
Chapters
Table of Contents

Related Manuals for Coltene SCICAN HYDRIM L110w G4


Summary of Contents for Coltene SCICAN HYDRIM L110w G4
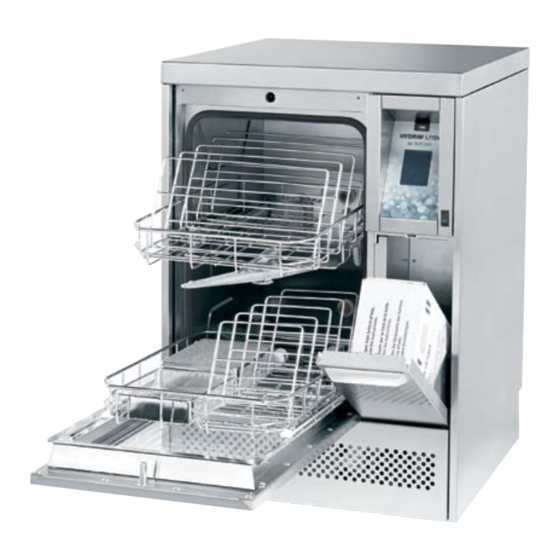
- Page 1 HYDRIM L110w G4 ® INSTRUMENT WASHER Operator’s Manual Manuel de l’utilisateur Manual de usuario (www.scican.com) 95-113645 CA ML R5 HYDRIM L110w G4 Operator’s Manual Copyright 2021 SciCan Ltd. All rights reserved.
-
Page 2: Table Of Contents
Table of Contents 6. Care and Maintenance ... 30 1. Introduction ..... .1 2. -
Page 3: Introduction
1. Introduction Thank you for selecting the HYDRIM L110w G4 instrument washer. The HYDRIM complements the STATIM and BRAVO™ autoclaves by quickly and hygienically ® preparing soiled instruments for sterilization. To ensure years of safe, trouble-free service, carefully review this Operator’s Manual before operating the unit. The HYDRIM L110w G4 is suitable only for the applications listed in this manual. -
Page 4: Important Information
2. Important Information The following symbols appear in this book. Caution, there is a potential hazard to the operator. This situation may lead to a mechanical failure. This is important information. -
Page 5: Disclaimers
3. Disclaimers Do not permit any person other than authorized personnel to supply parts for service or maintenance for your HYDRIM. SciCan is not liable for incidental, special or consequential damages caused by any maintenance or services performed on the HYDRIM by unauthorized personnel, or for the use of equipment or parts manufactured by a third party, including lost profits, any commercial loss, economic loss, or loss arising from personal injury. -
Page 6: Installation Instructions
4. Installation Instructions Installation: To open the wash chamber door, plug in the unit, turn it on and press the unlock symbol. Installation should be undertaken by a SciCan approved technician. The use of Alternatively, remove the screw in the kickplate an unapproved installer may invalidate and pull the ring. - Page 7 4. Installation Instructions Connecting the water inlet hoses: Connect the hot and cold water inlet hoses to the hot and cold water supply. Drain requirements: Connect the drain hose to the drain outlet. The drain hose can be attached to existing drain lines using a 3.5 cm / 1.5”...
- Page 8 4. Installation Instructions Recommended precautionary measures with regard to safe handling of HIP™ cleaning solution. • Always wear undamaged gloves made of natural or butyl rubber, nitrile, or neoprene (Surgical gloves are ideal). • Always wear eye protection. • Protect exposed skin on arms. •...
- Page 9 4. Installation Instructions Water quality The quality of the water being used in the HYDRIM to clean the instruments is very critical to achieving satisfactory cleaning results and to protecting the instruments and the internal parts of the unit from deterioration. Drinking water typically contains many dissolved solids.
- Page 10 4. Installation Instructions NOTE: Values listed below are only valid if a flow restrictor is installed in HYDRIM L110w G4. Please Testing water quality verify with your authorized dealer if your HYDRIM L110w G4 has a flow restrictor installed. The HYDRIM L110w G4 is equipped with Water Hardness Conversion and salt regeneration levels a built-in water softening system that must be adjusted according to the local water...
-
Page 11: Instructions For Use
5. Instructions for Use 5.1 Instrument Reprocessing Recommendations The HYDRIM L110w G4 is designed to clean general dental and medical instruments. Terminal sterilization MUST follow processing in the HYDRIM L110w G4. Prior to placing instruments in the HYDRIM, consult the instrument manufacturer’s reprocessing instructions. -
Page 12: Cycle Description Chart
5. Instructions for Use 5.2 Cycle Description Chart Total Time ** Intermediate Water Cycle Prewash Wash Rinse Rinse w/o Drying Consumption P0 – Machine <30ºC/86°F <30ºC (cold) 16 L (cold) Cleaning Cycle 2 minutes minutes 4.23 Gal 3 minutes No initial draining. P1 –... -
Page 13: Hints And Tips For Best Cleaning Results
5. Instructions for Use 5.3 Hints and tips for best cleaning results Remove all cement, composite material and amalgam from instruments at chairside prior to processing in the Hydrim. • Use only accessories, such as baskets, cassettes, trolleys and racks to hold instruments that are designed for the HYDRIM L110w G4. -
Page 14: Recommended Load Configurations
5. Instructions for Use 5.4 Recommended load configurations The intended purpose of the L110w G4 washer is a clinical general instrument washer, predominantly aimed at the general dental and medical markets. There will be many combinations of instruments that can be processed in the L110w G4 unit depending on: •... - Page 15 5. Instructions for Use Example 3 – hinged instruments, solid instruments and open hollow instruments For example: For example: Scalers, curettes, Rongeurs, forceps, dental elevators, scissors etc. single part mirrors, suction tubes etc. Example 4 – small & disassembled instruments For example: Two piece mirrors, scalpel knife handles, etc.
-
Page 16: Baskets And Accessories
5. Instructions for Use 5.5 Baskets and Accessories The following are included with the HYDRIM: Rack for five 8” x11” Basket with lid. cassettes, for upper Quarter size (1/4). or lower trolley. Full size (1/1). Part-number Part-number 01-109966S 01-109963S Rack for five medium Hygiene basket for size cassettes, for upper loose instruments. -
Page 17: Touchscreen Overview
5. Instructions for Use 5.6 Touchscreen overview Programs Unlock door Network connectivity (green when active) Settings USB status (green when active) Water softener, detergent level, and door status... -
Page 18: Set Up Menu Overview
5. Instructions for Use 5.7 Set up menu overview User Technician Setup Cleaning Language Baud Rate Set Drying Time Country Set EOL CR/LF Set Wash Time Date/Time Set Regeneration Cycle Count Unit No. LCD Contrast Process Enforced Network Setup Theme User Screen Saver Remote Screen... - Page 19 5. Instructions for Use 5.8 Setting the language The messages displayed by your HYDRIM can be presented in a number of different languages. To change the current language, follow these steps: Language Scroll to and select. From the LANGUAGE screen, press to scroll through the list of languages.
- Page 20 5. Instructions for Use 5.11 Setting the date Scroll to and select DATE. Date / Time From the DATE screen, use the keypad to set the date. Press to save and to return to the Setup menu. To change the format in which the date appears, return to the Setup menu and use to scroll to DATE FORMAT.
- Page 21 5. Instructions for Use 5.15 Turning the button sound ON or OFF The HYDRIM is preset to beep when a button is pressed. If you would like to turn the button sound off, follow these steps: NOTE: Turning OFF the button sound does NOT turn off other alarms and cycle notification beeps.
- Page 22 5. Instructions for Use 5.18 Adjusting the screen contrast The touchscreen is calibrated for the lighting condition of most sterilization centers. Should you need to adjust the contrast for your office, follow these steps: LCD Contrast Scroll to and select. to scroll through your contrast options.
- Page 23 5. Instructions for Use 5.21 Creating a User PIN From the User PIN screen, you can assign up to four PINs. To assign a PIN, follow these steps: Scroll to User and select. User PIN To assign a user PIN, select and use the numeric keypad to enter a number (up to 4 digits) and select to save and...
-
Page 24: Connecting To A Network
5. Instructions for Use 5.23 Connecting to a network The HYDRIM L110w G4 has a 10/100Base-T Ethernet port located at the back of the unit. To connect your HYDRIM to a network using a router, follow these steps: 1. Connect your network cable to the Ethernet port at the back of the unit. If your office uses a router, the router should automatically assign the unit an IP address. -
Page 25: Activating The Hydrim L110W G4
5. Instructions for Use 5.25 Activating the HYDRIM L110w G4 Prior to activating the washer, check that the water supply is on and follow these steps: Open the chemical door and ensure that a box of HIP™ Cleaning Solution has been installed. -
Page 26: Interrupting / Aborting A Cycle
5. Instructions for Use 7. The cycle will begin. The cycle will start by draining the unit. The bar on the screen indicates the progression of the cycle. The stage within the cycle is shown beneath the bar (e.g. Filling, Rinsing). The estimated time remaining (in minutes) is always displayed. -
Page 27: Additional User
5. Instructions for Use 5.27 Additional user and setup menu functions To access the user or setup menus, follow these steps: Chamber cleaning This cycle is used to periodically remove hardwater deposits from the chamber walls and racks. Pour 1.0 litres (0.26 gal) of vinegar into the chamber before starting the cycle. -
Page 28: Opening The Door In Case Of Power Failure
5. Instructions for Use 5.28 Opening the Door in Case of Power Failure If there is a power failure, remove the kickplate of the HYDRIM. Remove the screw with a screwdriver and lift the kickplate up and toward you. Locate the ring and pull it to open the door. -
Page 29: Cycle Information
5. Instructions for Use – 5.29 Storing and Retrieving Cycle Information The HYDRIM L110w G4 has an internal Data Logger capable of storing all the data on every cycle, whether successful or incomplete, for the lifetime of the unit. You can access this information through the touchscreen, through the web portal or by using a USB storage device. - Page 30 5. Instructions for Use – Retrieving cycle information using the USB data back up The USB storage device can be used to transfer cycle information stored in the unit to a computer. Best practice suggests this should be done once a week. To transfer data using the USB port, follow these steps: 1.
-
Page 31: Printer / Data Logger Setup
5. Instructions for Use – 5.30 Printer / Data Logger Setup The HYDRIM L110w G4 has an RS-232 port at the back, and can be used with an external printer or the SciCan Data Logger. The printers in the chart below have been tested with the HYDRIM. -
Page 32: Care And Maintenance
6. Care and Maintenance 6.1 Replacing the HIP™ Cleaning Solution The HYDRIM L110w G4 uses a 3.8L / 1 gallon container of HIP™ Cleaning Solution (Part number CS-HIPL). Use only the recommended cleaning solution and read the MSDS before inserting into the unit. HIP™... - Page 33 6. Care and Maintenance Connect new container and insert into the cleaning solution compartment. Follow the instructions printed on each cleaning solution container. Close the door. Turn the power switch ON To prime the cleaning solution dosing pump, press the water softener/detergent icon on the main screen.
-
Page 34: Salt Reservoir
6. Care and Maintenance 6.2 Refilling the Water Softening Salt Reservoir When a red X appears on the detergent and water softener level indicator, press on the icon to deter- mine if the problem lies with the water softener or cleaning solution level. -
Page 35: Filter And Wash Arm Maintenance
6. Care and Maintenance 6.4 Filter and Wash Arm Maintenance Filter Maintenance: Inspect the filter in the bottom of the chamber daily for debris and clean if necessary. To clean, remove the filter, rinse under a tap and replace. Ensure that the filter is firmly locked into position when replaced. -
Page 36: Annual Maintenance
6. Care and Maintenance 6.6 Annual maintenance If the message “Preventative Maintenance Required. Call for Service” appears, the annual maintenance is required. To continue using the HYDRIM, press OK. Call for service as soon as possible. The annual maintenance should be done after 365 days have elapsed since the initial installation or since the last service call was performed. - Page 37 6. Care and Maintenance Tests to be performed by the user: Door lock check This test is to ensure that the door cannot be opened while a cycle is running or a cycle will not start with the door open. To check that these features are working correctly, attempt to open the door using the handle immediately after a cycle has started.
-
Page 38: Troubleshooting
7. Troubleshooting Problem Possible Causes and Solutions Instruments are • Do not overload cassettes or instrument baskets. not clean • Do not load too many cassettes into the HYDRIM. • Use the Heavy Duty cycle for cassettes and hinged instruments. •... - Page 39 7. Troubleshooting Error Messages Error Cause Solution CF1 Water Heating The water does not reach the Call for service. failure required temperature in the specified time Check that the water hoses The water does not fill the CF2 Chamber are not kinked. Open the chamber within the specified time.
-
Page 40: Specifications
8. Specifications Full Unit Height: 850 mm / 33.5” Low Profile Unit Height: 820 mm/32.3” Width: 598 mm / 23.54” Depth: 600 mm / 23.75” Depth with door open: 1200 mm / 47” Weight: 80 kg / 176 lbs. Maximum Running Noise: 78 dB(A) Hot and cold water connections: 3/4”... -
Page 41: Warranty
10. Warranty Limited Warranty For a period of one year, SciCan guarantees that the HYDRIM L110w G4, when manufactured in new and unused condition, will not fail during normal service due to defects in material and workmanship that are not due to apparent abuse, misuse, or accident. - Page 42 Table des matières 1. Introduction ..... .1 5.28 Ouvrir la porte lors d’une panne de courant ..... . . 26 2.
-
Page 43: Introduction
1. Introduction Merci d’avoir choisi le lave-instruments HYDRIM L110w G4. Le HYDRIM est un appareil complémentaire aux autoclaves STATIM et BRAVO ; il permet de préparer de façon salubre les instruments souillés pour la stérilisation. . Afin d’assurer un fonctionnement sécuritaire et sans problème de l’appareil à... -
Page 44: Informations Importantes
2. Informations importantes Les symboles suivants sont utilisés dans ce manuel. Attention, danger potentiel pour l’utilisateur. Cette situation pourrait entraîner une défaillance mécanique. Information importante. -
Page 45: Avertissements
3. Avertissements Permettre exclusivement à du personnel autorisé de fournir les pièces, d’entretenir ou de réparer le HYDRIM. SciCan n’est pas responsable des dommages accessoires, spéciaux ou indirects causés par des travaux de maintenance ou de réparation effectués sur le HYDRIM par du person- nel non autorisé... -
Page 46: Instructions D'installation
4. Instructions d’installation Installation : Pour ouvrir la porte de la chambre de lavage, brancher l’appareil, le mettre en marche et L’installation devrait être effectuée par un tech- appuyer sur le symbole de déverrouillage. nicien approuvé par SciCan. L’installation faite par un installeur non approuvé... - Page 47 4. Instructions d’installation Raccordement des tuyaux d’alimentation en eau : Raccorder les tuyaux d’alimentation en eau chaude et froide à l’alimentation d’eau chaude et d’eau froide. Exigences concernant la vidange : Raccorder le tuyau de vidange à la sortie du drain. Le tuyau de vidange peut être fixé aux conduites de drain existantes à...
- Page 48 4. Instructions d’installation Mesures de sécurité recommandées pour manipuler la solution nettoyante HIP 1. Toujours porter des gants, non endommagés, en caoutchouc naturel ou en butylcaou- tchouc, en nitrile, ou en néoprène (les gants chirurgicaux sont idéals). 2. Toujours porter un dispositif de protection oculaire. 3.
- Page 49 4. Instructions d’installation Qualité de l’eau La qualité de l’eau utilisée par le HYDRIM pour nettoyer les instruments médicaux est primordiale pour obtenir des résultats satisfaisants et pour protéger les instruments et les pièces internes du HYDRIM contre la détérioration. L’eau potable contient généralement des particules solides dissoutes dans l’eau.
- Page 50 NOTE : Les valeurs indiquées ci-dessous ne sont valides que 4. Instructions d’installation si un réducteur de débit est installé dans le HYDRIM L110w G4. Veuillez vérifier auprès de votre détaillant autorisé pour savoir si votre appareil HYDRIM L110w G4 est déjà muni d’un réducteur de débit.
-
Page 51: Mode D'emploi
5. Mode d’emploi 5.1 Recommandations pour le retraitement des instruments Le HYDRIM L110w G4 est conçu pour nettoyer les instruments médicaux et dentaires généraux. La stérilisation terminale DOIT être effectuée après le processus de lavage dans le HYDRIM L110w G4. Avant de placer les instruments dans le HYDRIM, consulter les instructions de retraitement des instruments du fabricant. -
Page 52: Des Instruments
5. Mode d’emploi 5.2 Tableau descriptif des cycles Durée totale** Rinçage Consommation Cycle Prélavage Lavage Rinçage Séchage sans séchage immédiat en eau P0 – Cycle <30ºC/86°F 16 L de nettoyage <30ºC (cold) (eau froide) S.O. S.O. S.O. 4,23 de la machine 2 minutes minutes 3 minutes... - Page 53 5. Mode d’emploi 5.3 Conseils pour de meilleurs résultats de nettoyage Remove all cement, composite material and amalgam from instruments at chairside prior to processing in the HYDRIM. • Enlever tout ciment, composite et amalgame des instruments au fauteuil avant de les mettre dans le HYDRIM.
-
Page 54: Configurations Recommandées Pour
5. Mode d’emploi 5.4 Configurations recommandées pour le chargement Le lave-instruments L110w G4 se veut un appareil général destiné aux cliniques, plus particulièrement dans les marchés dentaire et médical. Plusieurs configurations de chargement d’instruments peuvent être traitées dans l’appareil L110w G4, selon : •... - Page 55 5. Mode d’emploi Exemple 3 – Instruments à charnière, instruments pleins et instruments avec cavités Par exemple : Par exemple : Instruments à détartrer, Pinces-gouges, curettes, élévateurs forceps, ciseaux, etc. dentaires, miroirs monopièces, tubes d’aspiration, etc. Exemple 4 – Petits instruments et instruments désassemblés Par exemple : Miroirs démontables, manches de scalpels et de couteaux, etc.
-
Page 56: Paniers Et Accessoires
5. Mode d’emploi 5.5 Paniers et accessoires Voici une liste des éléments inclus avec le HYDRIM: Support pour cinq cassettes Panier avec couvercle. de 8 po x 11 po, pour le chariot Quart de format (1/4). supérieur ou inférieur. Pleine Numéro de pièce : 01-109966S grandeur (1/1). -
Page 57: Aperçu De L'écran Tactile
5. Mode d’emploi 5.6 Aperçu de l’écran tactile Programmes Déverrouiller la porte Connectivité du réseau (vert = actif) Réglages des paramètres Statut du port USB (vert = actif) Statut de l’adoucisseur d’eau, du niveau de détergent et de la porte... -
Page 58: Aperçu Du Menu Configuration
5. Mode d’emploi 5.7 Aperçu du menu Configuration Utilisateur Technicien Configuration Nettoyage Selection langue Deb bauds Regl temps sech Pays Set EOL CR/LF Regl temp lav Date / Heure Regler regenerat Compt. Cycl Unit n° Contraste ACL Processus forcees Config. du réseau Thèmes Utilisateur Econ d’ecran... - Page 59 5. Mode d’emploi 5.8 Sélection de la langue Les messages affichés sur votre HYDRIM peuvent être présentés en diverses langues. Pour modifier la langue actuelle, procéder comme suit : Faire défiler jusqu’à et sélectionner. Selection langue Une fois sur l’écran SELECTION LANGUE, appuyer sur pour faire défiler la liste des langues disponibles.
- Page 60 5. Mode d’emploi 5.11 Réglage de la date Faire défiler jusqu’à Date / Heure et sélectionner DATE. Une fois sur l’écran DATE, utiliser le pavé numérique pour régler la date. Appuyer sur pour sauvegarder et sur pour revenir au menu Configuration. Pour changer le format de présentation de la date, revenir au menu Configuration et utiliser pour accéder à...
- Page 61 5. Mode d’emploi 5.15 Activation/désactivation du signal sonore des touches Le HYDRIM est configuré par défaut pour émettre un son lorsqu’on appuie sur une touche. Pour désactiver le signal sonore des touches, procéder comme suit : NOTE: La désactivation du signal sonore des touches ne désactive pas les autres signaux sonores d’alarme et de notification de cycle.
- Page 62 5. Mode d’emploi 5.18 Réglage du contraste de l’écran L’écran tactile est initialement calibré pour les conditions d’éclairage de la plupart des centres de stérilisation. Pour régler le contraste de votre écran selon les conditions d’éclairage de votre cabinet, procéder comme suit : Faire défiler jusqu’à...
- Page 63 5. Mode d’emploi 5.21 Création d’un NIP À partir de l’écran NIP de l’utilisateur, il est possible d’attribuer jusqu’à quatre NIP. Pour assigner un NIP, procéder comme suit : Faire défiler jusqu’à Utilisateur et sélectionner. Pour assigner un NIP à un utilisateur, sélectionner PIN utilisateur et utiliser le pavé...
-
Page 64: Connexion À Un Réseau Sans Fil
5. Mode d’emploi 5.23 Connecting to a network Le HYDRIM L110w G4 dispose d’un port Ethernet 10/100 Base T situé à l’arrière de l’appareil. Pour connecter votre HYDRIM à un réseau muni d’un routeur, procéder comme suit : 1. Brancher votre câble réseau au port Ethernet situé à l’arrière de l’appareil. Si votre cabinet utilise un routeur, celui-ci devrait assigner automatiquement une adresse IP à... -
Page 65: Mise En Marche
5. Mode d’emploi 5.25 Mise en marche du HYDRIM L110w G4 Avant de mettre le lave-instruments en marche, s’assurer que l’alimentation d’eau est ouverte et suivre les étapes suivantes : Ouvrir la porte pour produits chimiques et s’assurer qu’un contenant de solution nettoyante HIP a été... -
Page 66: Interrompre/Annuler Un Cycle
5. Mode d’emploi 7. Le cycle se met en marche. Le cycle commencera par vidanger l’appareil. La barre à l’écran indique la progression du cycle. La phase du cycle est indiquée sous la barre (p. ex., Remplissage, Rinçage). Le temps restant estimé (en minutes) est toujours affiché. -
Page 67: Fonctions Supplémentaires Des Menus Utilisateur Et Configuration
5. Mode d’emploi 5.27 Fonctions supplémentaires des menus Utilisateur et Configuration Pour accéder aux menus Utilisateur et Configuration, procéder comme suit : Nettoyage de la chambre Ce cycle est utilisé pour enlever périodiquement les dépôts lais- sés par une eau dure sur les parois de la chambre et les supports. Verser 1.0 litre (0,26 gallon) de vinaigre dans la chambre avant de démarrer le cycle. -
Page 68: Ouvrir La Porte Lors D'une Panne
5. Mode d’emploi Instructions Les utilisateurs peuvent accéder à une base de données d’instructions imagées sur la façon de réaliser l’entretien régulier, comme l’installation de la solution nettoyante 5.28 Ouvrir la porte lors d’une panne de courant En cas de panne de courant, retirer la plaque de protection du HYDRIM. Retirer la vis à... -
Page 69: Enregistrer Et Récupérer
5. Mode d’emploi 5.29 Enregistrer et récupérer les informations de cycles Le HYDRIM L110w G4 dispose d’un registre intégré capable d’enregistrer et de con- server toutes les données de chaque cycle, qu’il soit réussi ou inachevé, pendant toute la durée de vie de l’appareil. Les informations sont accessibles par l’écran tactile, le portail Web ou par l’utilisation d’une unité... - Page 70 5. Mode d’emploi Récupérer les informations de cycles à l’aide de la sauvegarde sur clé USB L’unité de stockage USB peut être utilisée pour transférer les informations de cycles enregistrées sur l’appareil vers un ordinateur. Il est recommandé de le faire une fois par semaine.
-
Page 71: Configuration De L'imprimante Et
5. Mode d’emploi 5.30 Configuration de l’imprimante et de l’enregistreur de données Le HYDRIM L110w G4 dispose d’un port RS-232 situé à l’arrière de l’appareil. Celui-ci peut être utilisé pour y brancher une imprimante externe ou un enregistreur de données SciCan. -
Page 72: Entretien Et Maintenance
6. Entretien et maintenance 6.1 Remplacer le contenant de solution nettoyante HIP The HYDRIM L110w G4 requiert un contenant de 3,8 L (1 gallon) de solution nettoyante (numéro de pièce CS-HIPL). Utiliser uniquement la solution nettoyante recommandée et lire la fiche signalétique avant d’insérer le contenant dans l’appareil. La solution nettoyante HIP est utilisée, dans une forme diluée, comme détergent pour le nettoyage des instruments chirurgicaux dans le lave-instruments HYDRIM. - Page 73 6. Entretien et maintenance Détacher le sac de solution nettoyante du raccord. Nettoyer le raccord de tout produit chimique séché en l’immergeant dans une tasse d’eau. Retirer le contenant de solution nettoyante vide et le jeter ou le recycler. Raccorder le nouveau contenant et l’insérer dans le compartiment destiné à la solution nettoyante.
-
Page 74: Remplissage Du Réservoir De Sel
6. Entretien et maintenance 6.2 Remplissage du réservoir de sel adoucisseur d’eau Lorsqu’un X rouge apparaît sur l’indicateur de niveau de détergent et d’adoucisseur d’eau, appuyer sur l’icône pour voir si le problème concerne le niveau d’adoucisseur d’eau ou de solution nettoyante. Si l’adoucisseur d’eau requiert un remplissage, procéder comme suit : Pour remplir le réservoir de sel, suivre ces étapes:... -
Page 75: Entretien Du Filtre Et Du Bras
6. Entretien et maintenance 6.4 Entretien du filtre et du bras de lavage Entretien du filtre : Inspecter quotidiennement le filtre de la partie inférieure de la cuve pour détecter tout débris et le nettoyer au besoin. Pour nettoyer le filtre, le retirer, le rincer à l’eau claire et le remettre en place. -
Page 76: Entretien Annuel
6. Entretien et maintenance 6.6 Entretien annuel Si le message « Entretien préventif requis. Appeler un technicien » apparaît, l’entretien annuel doit être fait. Pour continuer à utiliser le HYDRIM, appuyer sur OK. Communiquer avec le service technique dès que possible. L’entretien annuel devrait être fait 365 jours après l’installation initiale ou après le dernier appel de service effectué. - Page 77 6. Entretien et maintenance Essais devant être faits par l’utilisateur : Vérification du verrou de la porte Ce test vise à assurer que la porte ne puisse être ouverte lorsqu’un cycle est en marche ou qu’un cycle ne puisse démarrer lorsque la porte est ouverte. Pour vérifier que ces éléments fonctionnent correctement, essayer d’ouvrir la porte en utilisant la poignée immédiatement après le démarrage d’un cycle.
-
Page 78: Dépannage
7. Dépannage Problème Causes et solutions possibles Les instruments ne sont pas • Ne pas surcharger les cassettes ou les paniers à instruments. propres • Ne pas mettre trop de cassettes dans le HYDRIM. • Utiliser le cycle haut rendement pour les cassettes et les instruments à... - Page 79 7. Dépannage Messages d’erreur Erreur Cause Solution CF1 Défaillance L’eau n’atteint pas la température Appeler le service technique. chauffage requise dans les temps spécifiés. Vérifier que les tuyaux La chambre ne se remplit pas CF2 Défaillance d’entrée d’eau ne sont pas d’eau dans le délai spécifié.
-
Page 80: Spécifications
8. Spécifications Hauter de l’unité standard: 850 mm / 33.5” Hauter de l’unité a bas profile: 820 mm/32.3” Largeur : 598 mm (23,54 po) Profondeur : 600 mm (23,75 po) Profondeur avec la porte ouverte : 1 200 mm (47 po) Poids : 80 kg (176 lb) Bruit maximal de fonctionnement : 78 dBA Raccords d’eau chaude et d’eau froide : ¾... -
Page 81: Garantie
10. Warranty Garantie limitée Pendant une période d’un an, SciCan garantit que le HYDRIM L110w G4, fabriqué à l’état neuf et non utilisé, ne tombera pas en panne en service normal en raison de défauts de matières premières et de main-d’œuvre qui ne soient pas dus à...
Need help?
Do you have a question about the SCICAN HYDRIM L110w G4 and is the answer not in the manual?
Questions and answers