
Related Manuals for barfield BT-700


Summary of Contents for barfield BT-700
- Page 1 BT-700 ANDHELD ETER Models: BT-700 Handheld Bond Meter Operation Manual rev A Manual Part Number: BT-700-900, Rev. A Published March 2021 4101 NW 29TH ST ● MIAMI, FL 33142 ● 305-894-5400 gsesales@barfieldinc.com...
- Page 2 Compliance foreign language) without prior agreement and FCC Notice: This equipment has been written consent from Barfield, Inc. as governed tested and found to comply with the by United States and international copyright limits for a Class A digital device, pursuant to laws.
-
Page 3: Table Of Contents
Table of Contents ABLE OF ONTENTS 1. Instrument Description ..................1-1 Specifications ....................1-1 Optional Accessories and Ordering Information ..........1-3 2. Preparation for Use ....................2-1 General Information ..................2-1 Feature Overview ................... 2-1 Safety Notices and Information ................ 2-2 Unpacking and Inspection ................ -
Page 4: Instrument Description
Instrument Description 1. I NSTRUMENT ESCRIPTION Specifications ENERAL PECIFICATIONS Accuracy ±(0.2% Reading + 0.02% Range) -10 to 55 °C Resistance Ranges and Test Currents: Full Scale Resolution Test Current 10.000 mΩ 1 μΩ 100 mA 100.00 mΩ 10 μΩ 10 mA 1.0000 Ω... - Page 5 Instrument Description NVIRONMENT Standards MIL-PRF-28800F, Class 2 Operating Temp -10 to 55 °C -14 to 131 °F Humidity 5 to 95%, 10 to 30 °C 5 to 95%, 50 to 86 °F Altitude 0 to 4600 m 0 to 15,092 ft Vibration Random 10 –...
-
Page 6: Optional Accessories And Ordering Information
Instrument Description Optional Accessories and Ordering Information RODUCT ODEL ESCRIPTION BT-BKDP-M2 Big Kelvin Display Probe, 700 Series BT-BKP-M2 Big Kelvin Probe, 700 Series BT-BKDP-M2S Big Kelvin Display Probe, 700 Series, Intrinsically Safe BT-BKP-M2S Big Kelvin Probe, 700 Series, Intrinsically Safe BT-BKEP-M2 Big Kelvin Extended Probe, 700 Series BT-BKEP-M2S... - Page 7 Case 700-911 Hard Carry Case Accessories 700-915 Sure Grip Cover 720-911 Hard Carry Case, Intrinsically Safe BT-700- Printed Manual Operation Manual 710-CAL Standard Calibration Service Options 710-17025 17025 Calibration with Report 4101 NW 29TH ST ● MIAMI, FL 33142 ● 305-894-5400...
-
Page 8: Preparation For Use
2. P REPARATION FOR General Information The Barfield BT-700 Handheld Bond Meters are high-accuracy micro-ohmmeters that provide accurate resistance readings in a wide range of manufacturing and service applications. These full-featured, durable, and versatile instruments simplify the process of resistance measurement through the intuitive user-interface. -
Page 9: Safety Notices And Information
Preparation for Use Safety Notices and Information Read this Operation Manual thoroughly before using the instrument to become familiar with its operations and capabilities. Visually inspect instrument before using. Do not use if unit appears damaged or with any part of the case removed. - Page 10 Preparation for Use CAUTION RISK OF INCORRECT READING Do not use when AC or DC voltages exist. Excessive voltage could result in an incorrect reading, or in more extreme cases, a blown fuse that will result in incorrect readings and need for repair. Do not use on reactive loads exceeding 2mH or 100uF.
-
Page 11: Unpacking And Inspection
. Use the original packing materials if reshipment is necessary. If any dents, broken, or loose parts are seen, do not use the equipment. Notify Barfield immediately. Check that all items are present. If any items are missing, notify Barfield immediately. -
Page 12: Making Your First Resistance Measurement
Figure 1: Battery Installation Making Your First Resistance Measurement Barfield’s 700 Series Handheld Bond Meters are designed for easy operation, while still providing a feature-rich experience via the intuitive user interface. To get started making resistance measurements right away, follow these steps: Perform Section 2.5, Battery Installation and Replacement;... - Page 13 We know you are eager to begin using your new bond meter, but this overview is just the beginning. Please take a moment to familiarize yourself with this Operation Manual to learn about all the features and benefits of your new Barfield Handheld Bond Meter. 4101 NW 29TH ST ● MIAMI, FL 33142 ● 305-894-5400...
-
Page 14: Operating Instructions
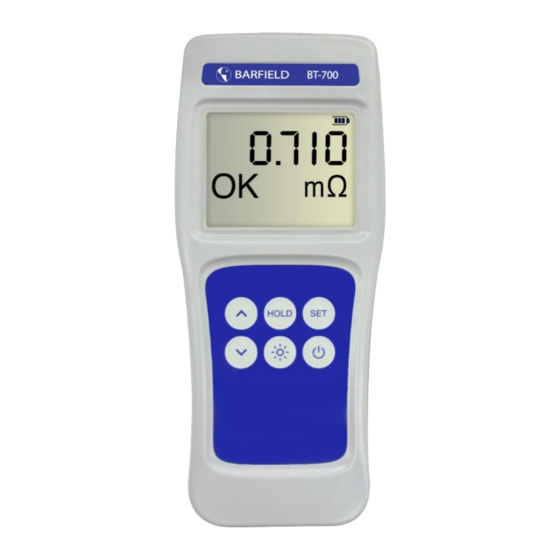
Operating Instructions 3. O PERATING NSTRUCTIONS Keypad Functions The instrument keypad is a six (6) key, sealed membrane keypad. Each key provides audible and tactile user feedback when pressed. Key functions are described in Figure 2 below. Power instrument ON or OFF Disable auto-power OFF while instrument is (1.5s) Enter Test Limit Menu (See Section 3.3) - Page 15 Operating Instructions See Figure 3 below for further description of each display indicator. Measurement is overrange Measurement is 10% or less of range Solid: Hold function is active Flashing: Auto Hold function is active One or both probes are not electrically connected (See Section 3.8, Open Lead Detection)
-
Page 16: Test Limit Menu
Operating Instructions Test Limit Menu Key designators followed by (1.5s), e.g. (1.5s) , indicate that the key should be pressed and held for 1.5 seconds, then released to access the desired function. Test limits are available for the user to easily identify if a measurement is above or below a resistance value with an OK/FAIL indication. -
Page 17: Auto-Hold Function
Operating Instructions Auto-Hold Function The Auto Hold function allows the user to take a measurement, have the unit determine a stable reading, and hold that value. Once the user is ready to make the next measurement, Error! Reference source not found. is pressed momentarily to clear the last reading from the display and re-initiate Auto-Hold mode. -
Page 18: Open Lead Detection
Operating Instructions Open Lead Detection The BT-700 Series Handheld Bond Meters feature open lead detection for all ranges. This feature monitors the test current across the leads on each channel. A small current is sourced between the Kelvin connection of each channel’s test leads. This detection is independent of whether a DUT is or is not connected. -
Page 19: Invalid Measurement Indications
Operating Instructions Invalid Measurement Indications The LCD display indicates when a measurement is invalid, as shown in Figure 5 below. NDICATION ESCRIPTION ————— The device is auto ranging. Reading is 110% of full scale or higher. If possible, switch to a higher OVER and ----- range. -
Page 20: Display Probe (Optional)
ISPLAY ROBE PTIONAL Overview An optional accessory for the BT-700, the Display Probe features an integrated OLED display, a remote HOLD button, and a PASS/FAIL LED. The Display Probe controls are shown in Figure 6 below. OLED Display Remote HOLD button... -
Page 21: Open Lead Detection
Open Lead Detection, see Section 3.8 Open Lead Detection. Connection The BT-700 Display Probe must be used in conjunction with a non-display probe. As long as the Display Probe is connected to Channel 1, any combination of probes can be used with the display probe. -
Page 22: Service Information
5% to 95% RH. The unit under test (“UUT”) shall be acclimated to the controlled environment for a minimum of four (4) hours. Power on the BT-700 for a minimum of ten (10) minutes. To disable Auto-Power Off, press (1.5s) The equipment listed in Appendix A is required to fully verify the UUT. - Page 23 Service Information 15. Press the to put UUT into 10 Ω range and record value. 16. Indicate if the value exceeds the high limit or low limit calculated in Step 6 using “Pass/Fail” column of Appendix B. 17. Staying in the 10 Ω range, connect UUT leads to 1 Ω standard and record value. 18.
- Page 24 Remove the UUT battery door housing to expose the alignment access hole. Press to turn the UUT on. Leave the BT-700 powered on for a minmum of ten (10) minutes. To disable Auto-Power Off, Figure 6: Kelvin Clip Short press (1.5s)
- Page 25 Service Information When using to adjust the value displayed, the value will change slowly with each keypress, but will accelerate if the key is held down. 12. Press “-----” will flash periodically 13. The UUT display will then indicate as follows: “2”...
- Page 26 Service Information 24. Press “-----” will flash periodically 25. The UUT display will indicate as follows: “1” Line 1: ----- Line 2: 1 Ω 26. Short the leads of the unit as described in Step 6. 27. Press the to select 0.000 28.
- Page 27 Service Information Line 1: ----- Line 2: 10 Ω 38. Connect the probes to the 10 Ω resistance standard 39. A value will be displayed, press to select the correct value of the 10 Ω standard. 40. Press “-----” will flash periodically 41.
-
Page 28: Troubleshooting
Service Information Troubleshooting Barfield’s handheld bond meters are designed and built to provide years of uninterrupted use. In the event the instrument malfunctions or does not perform as expected, helpful troubleshooting tips are provided below. Figure 8 below lists some of the more common issues and their resolutions. -
Page 29: Diagnostic Routines And Error Codes
Service Information Diagnostic Routines and Error Codes The instrument momentarily activates all display annunciators and segments during startup to allow for visual inspection of the LCD. Observe the LCD and verify all segments activate. Internal diagnostic routines are also executed during startup. If any diagnostic routine detects a malfunction, an error will be displayed as shown in Figure 9 below. -
Page 30: Preparation For Calibration Or Repair Service
Once you have verified that the cause of the malfunction cannot be solved in the field and the need for repair and calibration service arises, contact Barfield customer service to obtain an RMA (Returned Material Authorization) number. You can contact Barfield customer service via the Barfield website, www.barfieldinc.com... -
Page 31: Expedite Repair & Calibration Form
Service Information Expedite Repair & Calibration Form Use this form to provide additional repair information and service instructions. The completion of this form and including it with your instrument will expedite the processing and repair process. RMA#: Instrument Model #: Serial Number: Company: Technical... -
Page 32: Warranty
Barfield service center with shipping charges prepaid. Barfield Inc. shall pay for the return of the product to the customer if the shipment is to a location within the country in which the Barfield service center is located. The customer shall be responsible for paying all shipping, duties, taxes, and additional costs if the product is transported to any other locations. -
Page 33: Statement Of Calibration
This instrument has been inspected and tested in accordance with specifications published by Barfield, Inc. Barfield, Inc. certifies the above listed instrument has been inspected and calibrated and meets or exceeds all published specifications and has been calibrated using standards whose... - Page 34 Appendices A. R EQUIRED LIGNMENT AND ERIFICATION QUIPMENT QUIPMENT OMINAL ALUE OLERANCE 100 Ω 10 Ω 1 Ω Resistance 100 mΩ ±10% Nominal Standards 10 mΩ 1 mΩ 100 µΩ Required to access the calibration enable switch. Any rigid wire, Rigid Wire approximately 0.8 mm in diameter, may be used.
-
Page 35: Instrument Verification Data Sheet
Appendices B. I NSTRUMENT ERIFICATION HEET ANGE OMINAL ALUE TANDARD ALUE EADING OLERANCE IMIT IMIT 100 Ω ±0.220 Ω 100 Ω 10 Ω ±0.040 Ω 10 Ω ±0.0220 Ω 10 Ω 1 Ω ±0.0040 Ω 1 Ω ±0.00220 Ω 1 Ω 100 mΩ... - Page 36 Barfield, Inc. 4101 NW 29TH St. Miami, FL 33142 4101 NW 29TH ST ● MIAMI, FL 33142 ● 305-894-5400 gsesales@barfieldinc.com...
Need help?
Do you have a question about the BT-700 and is the answer not in the manual?
Questions and answers