Table of Contents
Advertisement
Advertisement
Table of Contents

Related Manuals for ElectrIQ EDFD06


Summary of Contents for ElectrIQ EDFD06
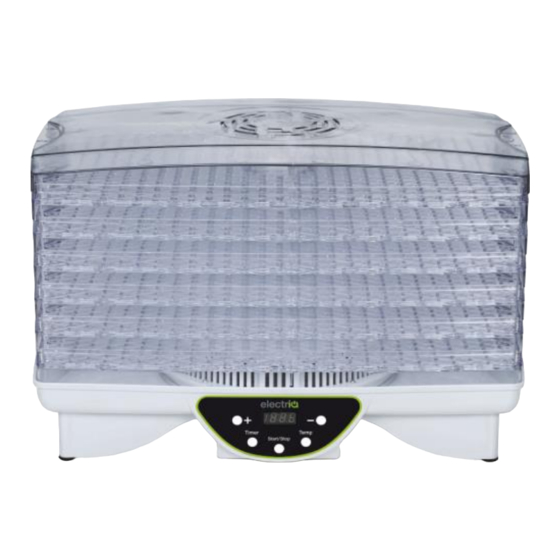
- Page 1 Digital Dehydrator with Timer EDFD06 USER MANUAL Thank you for choosing electriQ Please read this user manual before using the dehydrator and keep it safe for future reference. Visit our page www.electriQ.co.uk for our entire range of Intelligent Electricals...
-
Page 2: Table Of Contents
Contents Features Safety Instructions Parts and Assembly Operation and Dehydrating Guidelines Drying Fruits Drying Vegetables Drying Herbs Drying Meat Recipes Cleaning and Maintenance Troubleshooting... -
Page 3: Features
Your electriQ Food dehydrator brings a new dimension to ancient food preservation processes. It allows you to enjoy a simpler and more rapid drying process in the convenience of you own home. Now you can have the satisfaction of preparing healthful and delicious treats in the comfort and convenience of your own home and save money and have fun at the same time. -
Page 4: Safety Instructions
• Do not cover the dehydrator while in operation. • Always clean the dehydrator immediately after use. Trays are only designed to work in your electriQ dehydrator. Never use them in any other appliance. • Incorrect usage will damage the machine. Only use in dust free and well ventilated environment •... -
Page 5: Parts And Assembly
Parts and Assembly Open the package and account for all parts before disposing packing. Safely dispose of all plastic bags and other packaging components. They may be potentially dangerous to children. Before use please clean the lid and trays. Please clean with warm water mixed with a small quantity of mild detergent. - Page 6 Adjustable Trays Trays are adjustable offering maximum flexibility in drying different food. For drying thick food, you can adjust trays to 25mm height. For drying fast thin food, you can adjust trays to 15mm height. Also the unit occupies less space when stored as in the pictures bellow. When stored In Use Adjusting the tray’s height...
- Page 7 OPERATION Turn on the food dehydrator by pressing the “START/STOP” button. The unit will default to 70 and 10 hrs dehydrating timer. When entering standby mode the unit LED display will stop flashing. Select the timer and the desired food temperature. Press the “TEMP”...
- Page 8 Because of the unique design of your electriQ vortex system dehydrator, you will be surprised at how quick is the drying process. Drying Times Drying times indicated in this user instructions are for reference only and they may vary a lot, depending on the type and amount of food, thickness and evenness of the slices, percentage of water in the food, humidity, temperature of air, altitude.
-
Page 9: Drying Fruits
Fruit rolls are best if removed while still warm. Wrap in plastic wrap and place in airtight moisture-proof containers for storage. Onions and tomatoes are especially prone to absorb moisture from the air and should be packaged immediately after removing from the dehydrator. Testing for Dryness Food must be monitored during the final stages of dehydrating to prevent over-drying. - Page 10 Many fruits can be dried in halves with the pits removed. If they are dried with the skins on, be sure to place them skin-side down to prevent fruit and pulp from dripping down through the trays. Check frequently near the end of the drying process and remove pieces as they become dry.
- Page 11 wonderful fruit rolls. Frozen fruits can also be used, although they tend to be a bit runnier. Simply thaw and follow directions for using fresh fruits. Wash fruits and cut away any blemished portions. Purée fruit in a blender until it is very smooth. In some blenders with some fruits, you may want to add a little juice or water to start the blending process.
-
Page 12: Drying Vegetables
Canned Drain well. If small, 6-12 hrs 45 - 55℃ Snacks, breads, granola Fruit place on mesh screen. Cherries Wash, remove stems 18-26 hrs 45 - 55℃ Breads, baked goods and pit and snacks Citrus Peel, if desired. 6-12 hrs 45 - 55℃... - Page 13 Choose fresh, crisp vegetables for a high quality dehydrated product. Just like fruits, vegetables should be picked ripe and dried as soon as possible to minimize loss. Wash vegetables thoroughly and remove any blemishes. Peel, trim, core, slice or grate. Most vegetables must be blanched, either steaming over boiling water or in the microwave oven to slow the enzyme action which will continue during drying and conditions are key elements to producing dried vegetables which will taste as good in winter as the summer product.
- Page 14 TOMATO SLICES use for colour and crunch when crumbled over a tossed salad. They rehydrate well in soups, stews and casseroles. Tomato leathers can be powdered and used as instant soup, sauces and paste. Add different amounts of water to your powder mixture to make: Tomato paste = 1 tsp.
-
Page 15: Drying Herbs
Aubergines Peel, slice 1/4" thick. 4-14 hrs 55 - 70℃ Cream sauces, casseroles, Blanch. dip in batter and fry Garlic Separate and peel cloves. 6-12 hrs 55 - 70℃ Powder for seasoning. Mushrooms* Clean with soft brush, 4-10 hrs 55 - 70℃ Rehydrate for soups, meat don’t wash. - Page 16 Leaves should be harvested before plant begins to flower and while still tender. Snip stems at base, taking care to leave sufficient foliage for the plant to continue growing. The new leaves at the tip of the plant have the most concentrated flavours. Plants usually survive three or four major harvests and, depending on climate, may produce all year round.
- Page 17 Herb Drying Guide Most herbs may be dried in ElectriQ dehydrator right on the plant stalk and stem. Seeds and leaves are easily stripped from the plant when dry. Drying temperature should be 40℃. Do not dry herbs with fruits and vegetables.
-
Page 18: Drying Meat
Italian, meat, fish, egg & poultry Marjoram Leaves Rinse in cold water, pat dry 1-3 hrs 40℃ dishes Mint Leaves Rinse in cold water, pat dry 20-24 hrs 40℃ Sauces, mint jelly & lamb dishes Corned beef, sauerkraut, salad Mustard Seeds Rinse in cold water, pat dry 2-5 hrs 40℃... - Page 19 The shelf life of dried, cooked meats is 2 to 3 weeks at room temperature. Store in refrigerator or freezer to maintain the best quality until ready for use for backpacking or camping. They will stay fresh and tasty for up to 6 months in the freezer.
- Page 20 Drying Fish Lean fish can be easily dehydrated. You can also dry fat fish, but it will not keep at room temperature more than a week unless smoked. Fish meat strips should contain about 15% moisture when it is completely dry. It will be pliable and firm.
- Page 21 RECEIPES Your ElectriQ dehydrator can be used to cook complex recipes. Many vegan or raw diet people are using dehydrators as their only cooking appliance. For more recipes visit www.food.com/recipes/dehydrator Tastiest Kale Chips 1 Cup Ground Flax Seed 1 bunch Curly Kale 1 Courgette ¼...
- Page 22 Sundried Tomatoes Crackers ¼ Cup Raw Agave or Raw Honey 4 Cups Soaked Flax Seed 2 Tbsp. Coconut Butter 1 Beef Tomato 1 Tsp. Sea Salt ½ Cup of Sundried Tomatoes To prepare the brownie: 2 Tbsp Dried Basil In a food processor, process nuts to a meal being 1 Clove Garlic careful not to over process into a butter.
-
Page 23: Cleaning And Maintenance
CLEANING & MAINTENANCE Make sure the unit is unplugged before cleaning. Your dehydrator trays and lid are easy to clean. Simply soak them in warm water with a mild detergent for several minutes. Wash trays and lid with a non-abrasive moist sponge or cloth. A soft-bristle brush will loosen food particles that resist softening by soaking. - Page 24 Please contact the local council for details of your local household waste recycling centres. ElectriQ UK SUPPORT www.ElectriQ.co.uk/support Please, for your own convenience, check the troubleshooting guide before calling the service line.
Need help?
Do you have a question about the EDFD06 and is the answer not in the manual?
Questions and answers