Table of Contents
Advertisement
Quick Links
Advertisement
Table of Contents

Subscribe to Our Youtube Channel
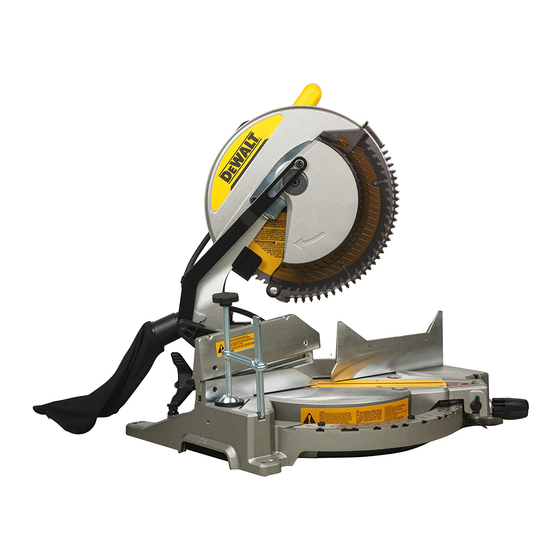
Summary of Contents for DeWalt DWS715-IN
- Page 1 DWS715...
- Page 2 English (original instructions)
- Page 3 English Definitions: Safety Alert Symbols and Words This instruction manual uses the following safety alert symbols and words to alert you to hazardous situations and your risk of personal injury or property damage. DANGER: Indicates an imminently hazardous situation which, if not avoided, will result in death or serious injury. WARNING: Indicates a potentially hazardous situation which, if not avoided, could result in death or serious injury.
-
Page 4: General Power Tool Safety Warnings
English GENERAL POWER TOOL SAFETY WARNINGS f ) Keep cutting tools sharp and clean. Properly maintained cutting tools with sharp cutting edges are less likely to bind and are easier to control. WARNING: Read all safety warnings, instructions, illustrations and specifications g ) Use the power tool, accessories and tool bits, etc. - Page 5 English Additional Safety Rules for Mitre Saws WARNING: Some dust created by power sanding, sawing, grinding, drilling, and other construction activities contains chemicals known to the State of California to cause cancer, WARNING: Do not allow familiarity (gained from frequent use of your saw) to replace safety birth defects or other reproductive harm.
-
Page 6: Important Safety Instructions
English Specifications Fig. B Capacity of cut 50° mitre left and right 48° bevel left: 3° right Baseboard vertically against fence Max. Height 5.5" (140 mm) Max. Width 1" (25 mm) 0° mitre Bench Mounting (Fig. A) Max. Height 3-5/8" (92 mm) Resulting Width 6-1/4"... -
Page 7: Installing A Blade
English Fig. C assembly left or right until the blade is perpendicular to the fence, as measured with the square. Retighten the three screws. Pay no attention to the reading of the mitre pointer at this point. Fig. F Fig. D Mitre Pointer Adjustment (Fig. -
Page 8: Operation
English nOTE: Certain special cuts of large material will require that you manually raise the guard. The Fig. I front section of the guard is louvered for visibility while cutting. Although the louvers dramatically reduce flying debris, there are openings in the guard and safety glasses should be worn at all times. -
Page 9: Quality Of Cut
English Fig. M1 Fig. M2 To Empty the Dust Bag 1. Remove dust bag 35 from the saw and gently shake or tap the dust bag to empty. 2. Reattach the dust bag back onto the dust port 12 You may notice that all the dust will not come free from the bag. This will not affect cutting performance but will reduce the saw's dust collection efficiency. - Page 10 English Cutting Compound Mitres (Fig. Q, R) Other aids such as spring clamps, bar clamps or C-clamps may be appropriate for certain sizes and shapes of material. Use care in selecting and placing these clamps. Take time to make a dry A compound mitre is a cut made using a mitre angle and a bevel angle at the same time.
- Page 11 English When cutting a board between 3-5/8" (91 mm) and 5-1/2" (140 mm), the roller on the tip of the Fig. T guard will hang up on the workpiece. If this occurs, simply place your right thumb on the upper side of the guard and roll the guard up just enough to clear the workpiece, as shown in Figure L.
-
Page 12: Maintenance
English Special Cuts Fig. Y NEVER MAKE ANY CUT UNLESS THE MATERIAL IS SECURED ON THE TABLE AND AGAINST THE FENCE. Aluminum Cutting (Fig. A, V, W) ALWAYS USE THE APPROPRIATE SAW BLADE MADE ESPECIALLY FOR CUTTING ALUMINUM. These are available at your local D WALT retailer or D WALT service center. - Page 13 If you need assistance in locating any accessory, please contact WALT Industrial Tool Co., 701 East Joppa Road, Towson, MD 21286, call 1-800-4-D WALT (1-800-433-9258) or visit our website: www.dewalt.com. Optional Accessories (Fig. A) The following accessories, designed for your saw, may be helpful. Use care in selecting and using accessories.
-
Page 14: Troubleshooting Guide
English Troubleshooting Guide BE SURE TO FOLLOW SAFETY RULES AND INSTRUCTIONS TROUBLE! WHAT’S WRONG? WHAT TO DO Saw will not start Saw not plugged in Plug in saw. Fuse blown or circuit breaker tripped Replace fuse or reset circuit breaker. Cord damaged Have cord replaced by authorized service center. - Page 15 English TABLE 1: COMPOUND MITRE CUT (POSITION WOOD WITH BROAD FLAT SIDE ON THE TABLE AND THE NARROW EDGE AGAINST THE FENCE) SET THIS BEVEL ANGLE ON SAW...
- Page 18 N655915 03/2019...


Need help?
Do you have a question about the DWS715-IN and is the answer not in the manual?
Questions and answers