Table of Contents
Advertisement
Quick Links
Model #: XMB2008 - STAND
Item #:1004095672/1004088908
USE AND CARE GUIDE
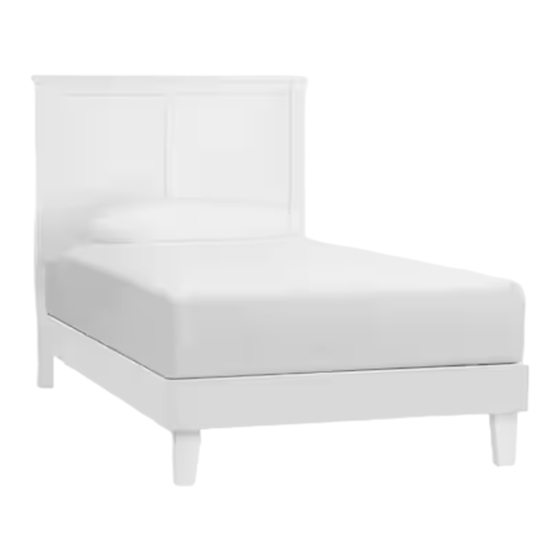
Granbury Classic Panel Bed - Twin
Questions, problems, missing parts?
Before returning to the store, call Customer Service.
8 a.m. –7 p.m., EST, Monday –Friday, 9 a.m. –6 p.m.,
EST, Saturday
1-877-527-0313
HOMEDEPOT.COM
THANK YOU
We appreciate the trust and confidence you have placed in Stylewell through the purchase of this Granbury
Classic Panel Bed - Twin. We strive to continually create quality products designedto enhance your home.
Visit us online to see our full line of products available for your home improvement needs.
Thank you for choosing stylewell!
Advertisement
Table of Contents

Related Manuals for StyleWell XMB2008


Summary of Contents for StyleWell XMB2008
- Page 1 HOMEDEPOT.COM THANK YOU We appreciate the trust and confidence you have placed in Stylewell through the purchase of this Granbury Classic Panel Bed - Twin. We strive to continually create quality products designedto enhance your home. Visit us online to see our full line of products available for your home improvement needs.
-
Page 2: Table Of Contents
Table of Contents .............. Table of Contents ....................Maintenance Safety Information ................Warranty Care and Cleaning......10 ............ What is Covered ..........What is n ot Covered .............. Pre-Assembly ..........Planning Assembly ..........Hardware Included ..........Package Contents ................Assembly... -
Page 3: Safety Information
Safety Information Please read and understand this entire manual before attempting to assemble, operate or install the product. If you have any question regarding the product, please call customer service at 1-877-527-0313, 8 a.m. –7 p.m., EST, Monday –Friday, 9 a.m. –6 p.m., EST, Saturday □... -
Page 4: Warranty
Warranty 1 YEAR WARRANTY WHAT IS COVERED We guarantee this product to be free of manufacturing defects to the original purchaser for one year. WHAT IS NOT COVERED This warranty does not cover commercial use, acts of nature, and abusive use. Pre-Assembly Planning Assembly □... -
Page 5: Package Contents
Pre-Assembly (cont.) PACKAGE CONTENTS Quantity Description Part Headboard Headboard Left Leg Headboard Right Leg Headboard support bar Footboard Footboard Right Leg Footboard Left Leg Left Sideboard Right Sideboard Slat... -
Page 6: Assembly
Assembly Place footboard left leg(G) and right legs(F) with the 4 holes facing up as shown and insert wood dowel (GG) into the middle two holes. Take out the left sideboard (H) and right sideboard (I) and insert wood dowel (GG) into the side two holes as shown photos. - Page 7 (Cont.) Assembly Assemble legs to headboard. Take out the headboard (A) ,headboard left leg (B) ,headboard right leg (C) and put the headboard (A) exterior side facing up as shown. Fasten leg(B) and leg(C) to headboard (A) with screw (AA) fitted with washer (BB).Use allen key (CC) to drive (AA).
- Page 8 (Cont.) Assembly Assemble legs (F and G) to footboard (E). Place footboard(E) with the interior side facing up as shown. Attach leg (F) and leg (G) from step 1 to footboard (E) via wood dowels, and fasten with screw (AA) fitted with washer (BB). Use allen key (CC) to drive (AA).
- Page 9 (Cont.) Assembly Assembly bed frame from step 6 to the headboard from step 4. Insert the screw (FF) to the 2 holes on sideboard(H&I) Fasten the sideboard (H and I) to the headboard legs (B and C) with screw (EE) .Use allen key (CC) to drive (EE).
-
Page 10: Maintenance
Maintenance □ Keep the product away from direct heat and sunlight. □ Prolonged exposure to heat sources may cause scorching, or even cause color to fade. □ Regular vacuuming or light brushing helps to remove dirt and prevent soil build-up, which increases the appearance wear. - Page 11 Questions, problems, missing parts? Before returning to the store, call Customer Service. 8 a.m. – 7 p.m., EST, Monday – Friday, 9 a.m. – 6 p.m., EST, Saturday 1-877-527-0313 HOMEDEPOT.COM Retain this manual for future...
Need help?
Do you have a question about the XMB2008 and is the answer not in the manual?
Questions and answers