Table of Contents
Advertisement
Available languages
Available languages
Quick Links
[TIPE]
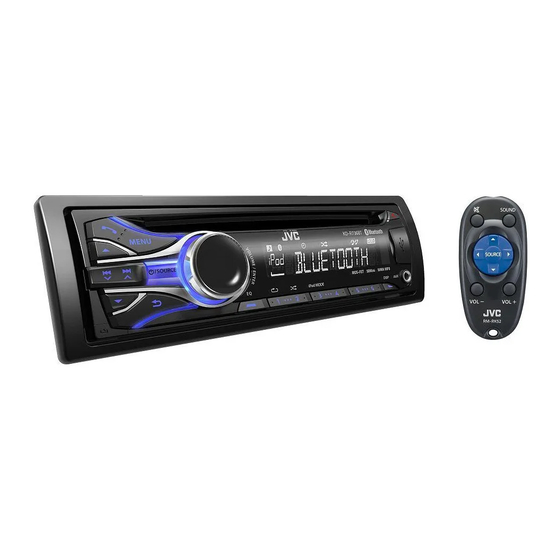
KD-R736BT
[TAPE MOBIL]
CD RECEIVER / ALAT PENERIMA CD
For canceling the display demonstration, see page 4. /
Untuk membatalkan tampilan demonstrasi, lihat halaman 4.
For installation and connections, refer to the separate manual.
Untuk instalasi dan penyambungan, lihat buku pedoman terpisah.
INSTRUCTIONS
BUKU PETUNJUK
ENGLISH
INDONESIA
GET0778-004A
[UN]
Advertisement
Chapters
Table of Contents

Related Manuals for JVC KD-R736BT


Summary of Contents for JVC KD-R736BT
- Page 1 ENGLISH INDONESIA [TIPE] KD-R736BT [TAPE MOBIL] CD RECEIVER / ALAT PENERIMA CD For canceling the display demonstration, see page 4. / Untuk membatalkan tampilan demonstrasi, lihat halaman 4. For installation and connections, refer to the separate manual. Untuk instalasi dan penyambungan, lihat buku pedoman terpisah.
- Page 2 Thank you for purchasing a JVC product. Please read all instructions carefully before operation, to ensure your complete understanding and to obtain the best possible performance from the unit. IMPORTANT FOR LASER PRODUCTS 1. CLASS 1 LASER PRODUCT 2. CAUTION: Do not open the top cover. There are no user serviceable parts inside the unit;...
-
Page 3: Table Of Contents
How to attach/detach the Contents control panel Preparation ............4 Canceling the display demonstration Setting the clock Basic operations ........... 4 Radio ................ 6 CD/USB ..............8 How to reset your unit iPod/iPhone ............. 9 Your preset adjustments will Quick Search ............10 also be erased. -
Page 4: Preparation
Preparation Preparation Canceling the display Setting the clock demonstration (Hold) The display demonstration is always turned on unless you cancel it. 2 Select <CLOCK>. (Hold) 3 Select <CLOCK SET>. (Initial setting) 3 Select <DEMO OFF>. 4 Adjust the hour. 4 Press MENU to exit. 5 Adjust the minute. - Page 5 Basic operations Control panel Remote controller Control dial Display window Loading slot Ejects the disc Detaches the panel AUX input jack USB input terminal Remote sensor Aim the remote controller directly at the sensor. DO NOT expose to bright sunlight. When you press or hold the following button(s)...
-
Page 6: Radio
Radio Radio Searching for a station Select <FM> or <AM>. Auto search. (Press) Manual search. (Hold) “M” flashes, then press the button repeatedly. “ST” lights up when receiving an FM stereo broadcast with sufficient signal strength. Auto presetting (FM only) Storing stations in memory SSM (Strong-station Sequential Memory) Manual presetting... - Page 7 Radio Setting the Radio Timer Naming the stations You can tune in to a preset station at a specific You can assign names for up to 30 station time regardless of the current source. frequencies (FM and AM) using a maximum of 8 characters for each name.
-
Page 8: Cd/Usb
CD/USB CD/USB Playing a CD/USB device USB input terminal Label side USB 2.0 cable (not supplied) USB cable from the rear of the unit The source changes to “CD” and playback starts. The source changes to “USB” and playback starts. This unit can play MP3/WMA files stored in CD-R, CD-RW, and MP3/WMA/WAV files in USB mass storage device (such as a USB memory and Digital Audio Player). -
Page 9: Ipod/Iphone
“ALBUM RND” is not applicable for some iPod/ Applicable under <HEAD MODE> only. iPhone. iPod/iPhone application You can operate JVC original application with this 2 Select the desired list. unit in <APP MODE>. For more details, visit JVC website: <http://www3.jvckenwood.com/ english/car/index.html> (English website only). PLAYLISTS ARTISTS ALBUMS... -
Page 10: Quick Search
Quick Search Quick Search If you have many folders/tracks/contacts, you can search through them quickly according to the first character (A to Z, 0 to 9 and OTHERS). 1 Enter list menu or “Hands-Free” menu. CD (MP3/WMA)/ iPod/iPhone Bluetooth phonebook USB (MP3/WMA/WAV) Select <PHONEBOOK>. -
Page 11: Bluetooth Connection
(supplied) USB cable from the rear of the unit 2 Search and select “JVC Unit” on the Bluetooth device. “BT PAIRING” flashes on the display. For some Bluetooth devices, you may need to enter the Personal Identification Number (PIN) code immediately after searching. - Page 12 Bluetooth connection 3 Perform (A) or (B) depending on what scrolls on the display. For some Bluetooth devices, pairing sequence may vary from the steps described below (A) If “[Device Name]” “XXXXXX” (B) If “[Device Name]” “VOL – YES” “BACK – NO” scrolls on the display, “VOL –...
-
Page 13: Bluetooth Mobile Phone
Connecting to JVC original Deleting a registered device application (Hold) JVC original application is designed to view JVC car receiver status and perform simple control operations on Android smart phones. 2 Select <DELETE YES>. For JVC original application operations, visit JVC <BLUETOOTH>... - Page 14 Bluetooth mobile phone Adjustments during a call Text message notification Phone volume (00 — 50) When a text message is received, the unit rings [VOLUME 15]: Volume and “RCV MESSAGE” “[Device name]” appears. adjustments made during a call <MSG NOTICE> must be set to <ON>. will not affect the other page 16) sources.
- Page 15 Bluetooth mobile phone Making a call from memory If two phones are connected, Select the desired phone Enter “phone list” You can store up to 6 contacts in the memory of (Hold) this unit for speed dialing. To store contacts in memory 1 Enter the “Hands-Free”...
- Page 16 Bluetooth mobile phone Using the SETTINGS menu 3 Repeat this step to perform the necessary 1 Enter the “Hands-Free” menu. settings. 2 Select <SETTINGS>. To return to the previous menu, press To exit from the menu, press MENU. The following settings are applicable to the paired device. If another device is paired, perform the settings again.
-
Page 17: Bluetooth Audio Player
Bluetooth audio player Bluetooth audio player Playing a Bluetooth audio player Select <BT REAR> or <BT FRONT> depending on the location of the USB Bluetooth adapter KS-UBT1. Operate the Bluetooth audio player to start playback. Operations and display indications may differ according to their availability on the connected device. Basic operations Selecting the playback modes Starts or resumes playback. -
Page 18: Illumination Color Adjustments
Illumination color adjustments Button zone Display zone All zone: Includes both Button zone and Display zone. All zone Selecting the preset color Storing your own adjustments You can select a preset color for <BUTTON You can store your own day and night colors for ZONE>, <DISP ZONE>, and <ALL ZONE>... -
Page 19: Brightness Adjustments
Brightness adjustments Brightness adjustments You can select your preferred brightness for <BUTTON ZONE>, <DISP ZONE> separately. (Hold) <DIMMER> BUTTON ZONE BUTTON 00 to 31 <BRIGHTNESS> DISP ZONE DISP 00 to 31 <DAY>/<NIGHT> 4 Press MENU to exit. Sound adjustments This unit memorizes sound settings adjusted for each individual source. Selecting the preset sound Pro Equalizer You can select a preset sound mode, for each... -
Page 20: Menu Operations
Menu operations Menu operations 3 Repeat step 2 if necessary. (Hold) To return to the previous menu, press To exit from the menu, press DISP or MENU. If no operation is done for about 60 seconds, the operation will be canceled. Menu item Selectable setting (Initial: [XX]) DEMO... - Page 21 Menu operations Menu item Selectable setting (Initial: [XX]) FADER *3*4 R06 — F06 [00]: Adjusts the front and rear speaker output balance. BALANCE *4 L06 — R06 [00]: Adjusts the left and right speaker output balance. LOUD ON: Boosts low and high frequencies to produce a well-balanced sound at (Loudness) a low volume level.
- Page 22 INFORMATION PH CNNT DEV/AU CNNT DEV/APP CNT DEV *11: Displays connected phone/audio/application device name. MY BT NAME: Displays the unit name (JVC Unit). MY ADDRESS: Shows address of USB Bluetooth Adapter. AM *12 [ON]/OFF: Enables or disables “AM” in source selection.
-
Page 23: Remote Controller
Remote controller Remote controller Warning: Preparing Do not install any battery other than CR2025 or When you use the remote controller for the first its equivalent. time, pull out the insulation sheet. Do not leave the remote controller in places (such as dashboards) exposed to direct sunlight for a long time. - Page 24 Additional information About audio files About USB device Playable files When connecting a USB cable, use the USB 2.0 cable. File extensions: MP3(.mp3), WMA(.wma), You cannot connect a computer or portable WAV(.wav) HDD to the USB input terminal of the unit. For MP3/WMA discs: Connect only one USB device to the unit at a Bit rate:...
- Page 25 “Made for iPod” and “Made for iPhone” mean operations may not be performed correctly or that an electronic accessory has been designed as intended. In this case, visit the following JVC to connect specifically to iPod, or iPhone, website: respectively, and has been certified by the <http://www3.jvckenwood.com/english/car/...
-
Page 26: Troubleshooting
RESET UNIT”/“WARNING CHK with tape before resetting the unit. ( page 3) WIRING THEN RESET UNIT” If the message does not disappear, consult your JVC car audio appears on the display and no dealer or kits supplying company. operations can be done. - Page 27 “HW ERROR” appears on the Reset the unit and try the operation again. If “HW ERROR” display. appears again, consult your nearest JVC car audio dealer. “BT DEVICE NOT FOUND” The unit failed to search for the registered Bluetooth devices appears on the display.
-
Page 28: Specifications
Specifications Specifications AUDIO AMPLIFIER SECTION Maximum Power Output 50 W per channel Continuous Power Output (RMS) 20 W per channel into 4Ω, 40 Hz to 20 000 Hz at less than 1% total harmonic distortion. Load Impedance 4Ω (4Ω to 8Ω allowance) Frequency Response 40 Hz to 20 000 Hz Signal-to-Noise Ratio... - Page 29 Specifications GENERAL Power Requirement (Operating Voltage) DC 14.4 V (11 V to 16 V allowance) Grounding System Negative ground Allowable Operating Temperature 0°C to +40°C Dimensions Installation Size approx. 182 mm × 52 mm × 158 mm (W × H × D) Panel Size approx.
- Page 30 Terima kasih telah membeli produk JVC. Harap membaca seluruh petunjuk dengan teliti sebelum mengoperasikan, untuk memastikan anda memahami secara keseluruhan dan mendapatkan performansi terbaik dari unit ini. PENTING UNTUK PRODUK-PRODUK LASER 1. PRODUK LASER KELAS 1 2. PERHATIAN: Jangan membuka penutup atas. Tidak ada bagian yang dapat diperbaiki oleh pengguna di dalam unit tersebut;...
- Page 31 Cara memasang/melepas panel Daftar isi kontrol Persiapan ..............4 Membatalkan display demonstrasi Pengaturan jam Pengoperasian dasar .......... 4 Radio ................ 6 CD/USB ..............8 Bagaimana cara mereset unit iPod/iPhone ............9 anda Pencarian Cepat ..........10 Penyetelan-penyetelan Komponen eksternal ........10 pengaturan awal anda akan terhapus juga.
-
Page 32: Persiapan
Persiapan Persiapan Membatalkan display Pengaturan jam demonstrasi (Tahan) Peragaan tampilan selalu dalam kondisi dihidupkan kecuali Anda membatalkannya. 2 Pilih <CLOCK>. (Tahan) 3 Pilih <CLOCK SET>. (Pengaturan awal) 3 Pilih <DEMO OFF>. 4 Setel jam. 4 Tekan MENU untuk keluar. 5 Setel menit. 6 Tekan MENU untuk keluar. - Page 33 Pengoperasian dasar Panel kontrol Remote kontrol Tombol kontrol Jendela tampilan Celah pemuatan Mengeluarkan disk Lepaskan panel Jack input AUX Terminal masukan USB Sensor remote kontrol Arahkan remote kontrol langsung pada sensor. JANGAN SAMPAI terkena sinar matahari. Jika Anda menekan atau menahan tombol berikut... Remote Panel kontrol Fungsi umum...
-
Page 34: Radio
Radio Radio Mencari stasiun Pilih <FM> atau <AM>. Pencarian otomatis. (Tekan) Pencarian manual. (Tahan) “M” berkedip-kedip, kemudian tekan tombol berulang-ulang. “ST” menyala saat menerima siaran FM stereo dengan kekuatan sinyal cukup. Prasetel otomatis (FM saja) Menyimpan stasiun dalam SSM (Memori Urutan Stasiun-Kuat) memori Anda dapat memprasetel sampai 18 stasiun radio Prasetel manual... - Page 35 Radio Menyetel Pengatur Waktu Memberi nama stasiun Radio Anda bisa memberi nama paling banyak 30 frekuensi stasiun (FM dan AM) menggunakan Anda bisa mendengarkan stasiun prasetel pada maksimum 8 karakter untuk setiap nama. saat tertentu tanpa memperhatikan sumber saat ini. 1 Pilih <FM>...
-
Page 36: Cd/Usb
CD/USB CD/USB Memainkan perangkat CD/USB Terminal masukan USB Sisi label Kabel USB 2.0 (tidak disediakan) atau Kabel USB dari bagian belakang unit Sumber berubah menjadi “CD” dan pemutaran dimulai. Sumber berubah menjadi “USB” dan pemutaran dimulai. Unit ini dapat memutar file MP3/WMA yang disimpan dalam CD-R, CD-RW, dan file MP3/WMA/WAV dalam alat penyimpanan massal USB (seperti memori USB dan Digital Audio Player). -
Page 37: Ipod/Iphone
ALBUM RND “Shuffle Albums” dari iPod. “ALBUM RND” tidak berlaku untuk sebagian iPod/iPhone. 2 Memilih daftar yang dikehendaki. Aplikasi iPod/iPhone Anda bisa menjalankan aplikasi asli JVC dengan unit ini dalam <APP MODE>. Untuk perincian PLAYLISTS ARTISTS ALBUMS SONGS lebih lanjut, kunjungi situs web JVC: <http://... -
Page 38: Pencarian Cepat
Pencarian Cepat Pencarian Cepat Jika Anda memiliki banyak folder/trek/kontak, Anda bisa mencari melalui semuanya secara cepat berdasarkan karakter pertama (A sampai Z, 0 sampai 9 dan OTHERS). 1 Masukkan menu daftar atau menu “Bebas-Tangan”. CD (MP3/WMA)/ iPod/iPhone Buku telepon Bluetooth USB (MP3/WMA/WAV) Pilih <PHONEBOOK>. -
Page 39: Koneksi Bluetooth
(disediakan) atau Kabel USB dari bagian belakang unit 2 Cari dan pilih “JVC Unit” pada perangkat Bluetooth. “BT PAIRING” berkedip pada display. Untuk sebagian perangkat Bluetooth, Anda mungkin perlu memasukkan kode Nomor Identifikasi Pribadi (PIN) segera setelah melakukan pencarian. INDONESIA |... - Page 40 Koneksi Bluetooth 3 Lakukan (A) atau (B) tergantung apa yang bergulir pada tampilan. Untuk sebagian perangkat Bluetooth, urutan perpasangan mungkin berbeda dari langkah-langkah yang dijelaskan di bawah (A) Jika “[Nama Perangkat]” “XXXXXX” (B) Jika “[Nama Perangkat]” “VOL – YES” “VOL – YES” “BACK – NO” bergulir pada “BACK –...
-
Page 41: Ponsel Bluetooth
Koneksi Bluetooth Menghubungkan ke aplikasi Menghapus perangkat asli JVC terdaftar Aplikasi asli JVC dirancang untuk melihat status (Tahan) penerima mobil JVC dan melakukan operasi kontrol sederhana pada smart phone Android. Untuk pengoperasian aplikasi asli JVC, kunjungi 2 Pilih <DELETE YES>. - Page 42 Ponsel Bluetooth Penyesuaian selama panggilan Pemberitahuan pesan teks Volume telepon (00 — 50) [VOLUME 15]: Penyesuaian Saat menerima pesan teks, unit berdering dan volume yang dibuat selama “RCV MESSAGE” “[Nama perangkat]” muncul. panggilan tidak akan <MSG NOTICE> harus disetel ke <ON>. memengaruhi sumber-sumber halaman 16) lainnya.
- Page 43 Ponsel Bluetooth Melakukan panggilan dari memori Jika dua telepon terhubung, Pilih telepon yang Masukkan “daftar Anda bisa menyimpan maksimum 6 kontak dalam dikehendaki. telepon” memori unit ini untuk penyambungan cepat. (Tahan) Untuk menyimpan kontak dalam memori 1 Masukkan menu “Bebas-Tangan”. 2 Saat “WAIT VOICE”...
- Page 44 Ponsel Bluetooth Menggunakan menu SETTINGS 3 Ulangi langkah ini untuk melakukan 1 Masukkan menu “Bebas-Tangan”. setelan yang diperlukan. 2 Pilih <SETTINGS>. Untuk kembali ke menu sebelumnya, tekan Untuk keluar dari menu, tekan MENU. Setelan berikut berlaku untuk perangkat pasangan. Jika ada perangkat lain yang dipasangkan, lakukan setelan lagi.
-
Page 45: Audio Player Bluetooth
Audio player Bluetooth Audio player Bluetooth Memutar audio player Bluetooth Pilih <BT REAR> atau <BT FRONT> tergantung lokasi adaptor Bluetooth USB KS-UBT1. Operasikan pemutar audio Bluetooth untuk memulai pemutaran. Pengoperasian dan indikasi tampilan mungkin berbeda tergantung ada tidaknya pada perangkat terhubung. -
Page 46: Penyesuaian Warna Sinar
Penyesuaian warna sinar Zona tombol Zona tampilan Semua zona: Termasuk zona Tombol dan zona Tampilan. Semua zona Memilih warna prasetel Menyimpan pengaturan Anda sendiri Anda juga bisa memilih warna prasetel untuk Anda dapat menyimpan warna siang dan malam <BUTTON ZONE>, <DISP ZONE>, dan Anda sendiri untuk <BUTTON ZONE>... -
Page 47: Penyesuaian Kecerahan
Penyesuaian kecerahan Penyesuaian kecerahan Anda bisa memilih kecerahan yang Anda sukai untuk <BUTTON ZONE> dan <DISP ZONE> secara terpisah. (Tahan) <DIMMER> BUTTON ZONE BUTTON 00 ke 31 <BRIGHTNESS> DISP ZONE DISP 00 ke 31 <DAY>/<NIGHT> 4 Tekan MENU untuk keluar. Penyesuaian suara Unit ini mengingat setelan suara yang disesuaikan untuk masing-masing sumber. -
Page 48: Pengoperasian Menu
Pengoperasian menu Pengoperasian menu 3 Ulangi langkah 2 jika perlu. (Tahan) Untuk kembali ke menu sebelumnya, tekan Untuk keluar dari menu, tekan DISP atau Jika tidak dilakukan operasi selama kurang lebih MENU. 60 detik, operasi tersebut akan dibatalkan. Item menu Pengaturan yang dapat dipilih (Permulaan: [XX]) DEMO Untuk pengaturannya,... - Page 49 Pengoperasian menu Item menu Pengaturan yang dapat dipilih (Permulaan: [XX]) FADER *3*4 R06 — F06 [00]: Menyesuaikan keseimbangan output speaker depan dan belakang. BALANCE *4 L06 — R06 [00]: Menyesuaikan keseimbangan output speaker kiri dan kanan. LOUD ON: Menguatkan frekuensi-frekuensi rendah dan tinggi untuk (Kekerasan suara) menghasilkan keseimbangan suara yang baik pada level volume rendah.
- Page 50 [NO]: Dibatalkan. INFORMATION PH CNNT DEV/AU CNNT DEV/APP CNT DEV *11: Menampilkan nama perangkat telepon/audio/aplikasi yang terhubung. MY BT NAME: Menampilkan nama unit (JVC Unit). MY ADDRESS: Menunjukkan alamat Adaptor Bluetooth USB. AM *12 [ON]/OFF: Mengaktifkan atau menonaktifkan “AM” pada pemilihan sumber.
-
Page 51: Remote Kontrol
Remote kontrol Remote kontrol Peringatan: Mempersiapkan Jangan memasang baterai selain CR2025 atau Jika Anda menggunakan remote kontrol untuk yang setara. pertama kali, lepaskan lembar perekat. Jangan meninggalkan remote kontrol dalam tempat (seperti dasbor) yang terkena sinar matahari langsung untuk waktu yang lama. Simpan baterai di tempat yang tidak dapat Lembar perekat dijangkau anak-anak. - Page 52 Informasi tambahan Tentang perangkat USB Tentang file audio Saat menghubungkan kabel USB, gunakan File yang bisa diputar kabel USB 2.0. Ekstensi file: MP3(.mp3), WMA(.wma), Anda tidak dapat menghubungkan komputer WAV(.wav) atau HDD portabel ke terminal input USB unit. Untuk disk MP3/WMA: Setiap kali hanya dapat menghubungkan satu Kecepatan bit: perangkat USB ke unit.
- Page 53 Corporation dilakukan di bawah lisensi. Merek dengan benar atau sebagaimana mestinya. Jika dagang dan nama dagang lainnya adalah milik ini terjadi, kunjunglah situs web JVC berikut: pemiliknya masing-masing. <http://www3.jvckenwood.com/english/car/ “Made for iPod” and “Made for iPhone” mean index.html>...
-
Page 54: Pemecahan Masalah
RESET UNIT”/“WARNING CHK dengan selotip sebelum menyetel ulang unit tersebut. WIRING THEN RESET UNIT” halaman 3) muncul di layar dan Jika pesan itu tidak lenyap, hubungi dealer audio mobil JVC pengoperasian tidak dapat Anda atau perusahaan yang memasok perlengkapan audio dilakukan. Anda. - Page 55 3) “HW ERROR” muncul pada Reset unit dan coba mengoperasikan lagi. Jika “HW ERROR” tampilan. muncul lagi, hubungi agen penjual audio mobil JVC Anda yang terdekat. “BT DEVICE NOT FOUND” Unit gagal mencari perangkat Bluetooth yang terdaftar muncul pada tampilan.
-
Page 56: Spesifikasi-Spesifikasi
Spesifikasi-spesifikasi Spesifikasi-spesifikasi BAGIAN PENGUAT AUDIO Maksimum keluaran power 50 W per saluran Output Power Kontinu (RMS) 20 W per saluran ke dalam 4Ω, 40 Hz hingga 20 000 Hz pada distorsi harmoni total yang kurang dari 1%. Impedansi Beban 4Ω (kelonggaran 4Ω sampai 8Ω) Respon Frekuensi 40 Hz sampai 20 000 Hz Perbandingan Sinyal ke desis... - Page 57 Spesifikasi-spesifikasi UMUM Power yang Diperlukan (Voltase Pengoperasian) DC 14.4 V (kelonggaran 11 V sampai 16 V) Sistem Pertanahan Tanah negatif Temperatur pengoperasian yang diizinkan 0°C sampai +40°C Dimensi Ukuran instalasi kira-kira 182 mm × 52 mm × 158 mm (L × T × P) Ukuran panel kira-kira 188 mm ×...
- Page 58 Please reset your unit Refer to page of How to reset your unit Ada MASALAH dengan unit anda? Silakan setel (reset) terlebih dahulu unit anda Lihat pada halaman bagaimana cara mereset unit anda. EN, IN 1111DTSSANJEIN © 2011 JVC KENWOOD Corporation...
Need help?
Do you have a question about the KD-R736BT and is the answer not in the manual?
Questions and answers