Table of Contents
Advertisement
Quick Links
2.4GHz 8-CHANNEL
COMPUTER RADIO
INSTRUCTION MANUAL
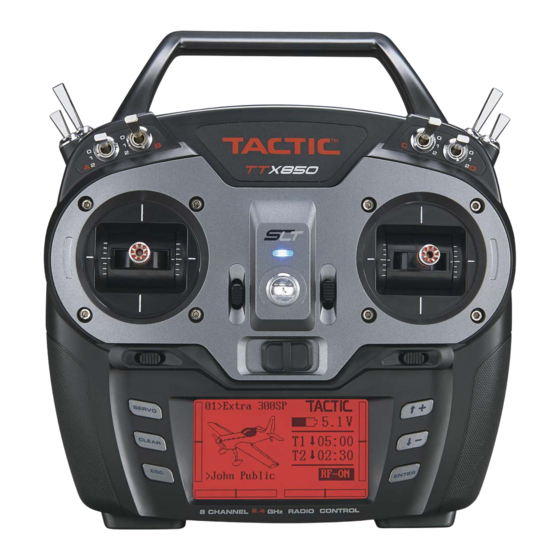
Tactic's TTX850 computer transmitter uses
the advanced 2.4GHz spread spectrum SLT
"Secure Link Technology" protocol for solid,
interference-free control of R/C models. A
large backlit LCD, wired and wireless trainer
systems, 30 model memories, plus advanced
programming options are just a few of the
benefits which can be used for models of all
sizes. Tactic 2.4GHz transmitters are compat-
ible only with Tactic brand receivers and
those utilizing the SLT protocol.
For safe operation and
best results, it's strongly
recommended
this manual in its entirety before
use! Also read and understand the
instructions included with the model.
Damage resulting from misuse or
modification will void your warranty.
TM
™
to
read
Advertisement
Table of Contents

Related Manuals for Tactic TACJ2850


Summary of Contents for Tactic TACJ2850
- Page 1 Tactic 2.4GHz transmitters are compat- ible only with Tactic brand receivers and those utilizing the SLT protocol. ™ For safe operation and best results, it’s strongly...
-
Page 2: Table Of Contents
TABLE OF CONTENTS SLT TECHNOLOGY, Tx-R, AND Aileron Differential ....14 COMPATIBLE RECEIVERS ... . . 3 Flap Mixer . -
Page 3: Slt Technology, Tx-R, And Compatible Receivers
2.4GHz signal, and that your compatible receiver accepts no signal except yours. ™ Binding Tactic brand receivers is as simple as pushing a button, which creates a locked-in, interference free link. The TTX850 is also compatible with non-Tactic brand receivers which use the *SLT protocol, for the ultimate in convenience and fl exibility. -
Page 4: Ttx850 Power System
TTX850 POWER SYSTEM INPUT POWER Four 1.2V “AA” NiMH cells are included. NiCd or 1.5V alkaline batteries can also be used. Do not mix cell types, or old and new cells, etc. Slide open the battery door to fi nd the battery holder. Insert all cells with the proper polarity as shown inside the battery holder. -
Page 5: Gimbal Sticks
GIMBAL STICKS Ball-bearing construction allows both sticks to provide the ultimate in smooth, precise control. Stick length can be adjusted for optimum feel and control. Each stick consists of a base and a tip. To adjust, hold the base tightly, then loosen the tip by turning it counter-clockwise. Adjust the stick tip to the desired length. Tighten the stick by holding the tip in place and turning the base counter-clockwise until it’s tight against the tip. -
Page 6: Toggle Switches
TOGGLE SWITCHES Each switch can be assigned to control one of a variety of functions as desired and described throughout this manual. The identifi cation of each switch by letter is marked on the Tx. The factory default switch assignments are as follows: Default Function Default Function Switch... -
Page 7: Menus
To select or de-select a setting, or enter a screen. Press briefl y to access the SETTINGS menu. Press and hold to access the MODEL SETUP menu. MENUS The TTX850 has three types of menus. The SYSTEM SETUP menu allows for setting basic operational functions for the radio itself. Selecting and managing the model memories, confi... -
Page 8: Battery Alarm
BATTERY ALARM An alarm will sound and the display will show a warning when the Tx battery’s voltage drops to the level shown in this setting. Do NOT set this value too low, as the radio could lose power very rapidly as the battery nears full discharge and cause a loss of control of the model. -
Page 9: Wing Type
Select “NO” to cancel or “YES” to proceed with the reset, and press ENTER. The display will then return to the “MODEL RESET” screen. Model Transfer: To transfer all parameters of one memory in this transmitter to another Tactic TTX850 transmitter, move the cursor to this line and press ENTER. Press... -
Page 10: Channel Assignments
2AI1FL: This “2 ailerons + 1 fl ap” setting is for airplanes having two separate aileron servos, requiring one servo to control each aileron, and also one servo (or 2 servos on a Y-harness) that will control fl aps for both wings simultaneously (not available for 2-elevator tail settings). CHANNEL ASSIGNMENTS This function allows transmitter channels to be re-assigned to different outputs before being sent to the receiver. -
Page 11: Settings Menu - Airplanes
SETTINGS MENU – AIRPLANES This menu is for setting servo control functions for airplane use. Press ENTER briefl y to access this menu. SERVO SET Enter this function to adjust any channel’s reversing, travel limits, or sub-trim settings. Press select the desired function to adjust and press ENTER. Reverse: Sets the rotational direction for a channel’s output relative to the movement of the control stick. -
Page 12: Ch5-Ch8 Set
CH5-CH8 SET Enter this screen to set the functions of channels 5 through 8. At the INPUT line select the desired channel to adjust. Then, follow the steps below. Name: A name for the function of this channel can be set as desired. The method for setting this name is the same as for setting the USER NAME as described on page 7. -
Page 13: Throttle Cut
To set points on the curve, start at the minimum throttle position which will be noted as point “L”. A point for “L” is not marked on the graph, but is the left-most end of the curve line. The vertical position of this point can be adjusted by moving the cursor to the RATE percentage, press ENTER then as desired. -
Page 14: Advanced Gyro Gain
ADVANCED GYRO GAIN This screen is for setting gain sensitivities if using a stabilization gyro in the aircraft. Up to three sensitivity adjustments can be set for a gyro’s X, Y, and Z axes (if applicable). For each respective axis, move the cursor to the rate percentage at top and press ENTER. Adjust this value to the desired gain sensitivity for this axis. -
Page 15: Flap Mixer
FLAP MIXER This function allows fl aps to be set, adjusted, and mixed to the ailerons and/or elevator channels. Mixes such as fl aperons, air brake, and spoilers can be achieved in the FLAP MIXER. These settings or mixes can be assigned and activated by a two or three position switch. Not available for 1AI or 2AI wing types. Different setup options are available depending on the selected wing type, where the fl... -
Page 16: Rf Output
RF OUTPUT The Rf output signal can be turned on or off. If changing any programming parameters in the radio, it’s recommended to turn the Rf off so not to unnecessarily clutter the fl ying space with radio signals. Leave the Rf output signal ON anytime the model is being controlled. -
Page 17: Model Setup Menu - Helicopters
MODEL SETUP MENU – HELICOPTERS This menu is for setting control functions for use with helicopters. All functions in this menu are the same as described in the MODEL SETUP MENU – AIRPLANES section, except that a swashplate type selection function is included for helicopters. -
Page 18: Throttle Hold
Position 1 = normal: Used for startup, take-off, landing, and typical fl ight profi les. Position 2 = idle-up 1: Used for aerobatic fl ight Position 3 = idle-up 2: Typically used as a secondary setup for aerobatic fl ight. Make sure all mechanical linkages are connected exactly as specifi... -
Page 19: Cyclic Mixer
1– 5 above and move the Tx at least three feet away from the Rx. FAILSAFE FUNCTION The failsafe function is not controlled by the TTX850 transmitter itself, but rather by the Tactic receiver. Tactic’s stand-alone 2.4GHz receivers have a failsafe feature which engages in the event that the signal from the Tx somehow becomes interrupted. -
Page 20: Wireless Trainer
WIRELESS TRAINER Two Tactic brand transmitters with trainer capabilities can communicate with each other by wireless means for teaching a student how to fl y. The TTX850 can be confi gured for wireless trainer function with any other Tactic brand transmitter, but is not compatible with wireless trainer systems in other brand transmitters. - Page 21 OFF position. This will terminate the wireless link between both transmitters. Teacher’s radio Tactic TTX404/600 - Student’s radio Tactic TTX850 1. Link the teacher’s TTX404/600 to the Rx. Remove power from the model, and then turn the teacher’s Tx off.
-
Page 22: Wired Trainer
See the ACCESSORIES section for details about optional trainer cords. Select the proper cord for Tactic and the other radio to be used for training purposes. 1. Link the teacher’s radio to the Rx and move the throttle stick to minimum position. -
Page 23: Warning Indications
WARNING INDICATIONS The following indications will sound and/or show if any of the following occur: LOW BATTERY: Battery voltage is at or below the BATT. ALARM setting. Cannot change memories at this time. Replace or re-charge batteries. RF ON / OFF?: Turn the radio’s Rf signal on or off. THRO POS.: The throttle stick is >25% full defl... -
Page 24: Flying The Aircraft
7. Perform a range check as explained on page 22. 8. Anytime power is to be removed from the radio system, it’s important to shut down power in the aircraft fi rst. Otherwise, the aircraft could become out of control and cause a safety hazard! Move the throttle stick and throttle trim to minimum position to stop the glow engine or shut down the ESC. -
Page 25: Ttx850 Specifications
® Charge Jack: Futaba compatible Trainer System: wireless - Tactic SLT compatible, and wired TROUBLESHOOTING RANGE IS SHORT: Interference – check Rx installation and servo connections. Low Tx or Rx battery – replace the batteries or recharge if applicable. Transmitter antenna not unfolded properly. Rx may need to be located to a different position in the model for better reception. -
Page 26: Safety Guide
Use with non-hobby related products for non-hobby related activities is not recommended or encouraged. Any alterations or modifi cations to any parts of this product are not recommended. Tactic is not responsible for unauthorized repairs or modifi cations. All unauthorized repairs will void the warranty. -
Page 27: Fcc Statement
FCC STATEMENT This device complies with part 15 of the FCC rules. Operation is subject to the following two conditions. (1) This device may not cause harmful interference. (2) This device must accept any interference received, including interference that may cause undesired operation. -
Page 28: 1-Year Limited Warranty
1-YEAR LIMITED WARRANTY Tactic warrants this product to be free from defects in materials and workmanship for a period of one (1) year from the date of purchase. During that period, Tactic will, at its option, repair or replace without service charge any product deemed defective due to those causes.
Need help?
Do you have a question about the TACJ2850 and is the answer not in the manual?
Questions and answers