Table of Contents

Related Manuals for LG LAC5700R


Summary of Contents for LG LAC5700R
- Page 1 SA_LAC5700R_ENG ENGLISH CAR CD/MP3/WMA Receiver OWNER’S MANUAL MODEL : LAC5700R LAC5705R LAC5710R LAC5715R Please read this instruction booklet carefully and completely before installing, operating or adjusting this product.
-
Page 2: Safety Note
Safety note CAUTION RISK OF ELECTRIC SHOCK DO NOT OPEN CAUTION : TO REDUCE THE RISK OF ELECTRIC SHOCK DO NOT SPLIT COVER(OR BACK) NO USER SERVICEABLE PARTS INSIDE. REFER SERVICING TO QUALIFIED SERVICE PERSONNEL. The lightning flash with the arrowhead symbol, within an equilateral triangle is intended to alert the user about the presence of uninsulated dangerous voltage within the product’s enclosure that may be of sufficient magnitude to constitute a risk of electric shock. - Page 3 Safety note • A defective or soiled disc inserted into unit can cause sound to drop out during playback. • Handle the disc by holding its inner and outer edges. • Do not touch the surface of the unlabeled side of the disc. Do not stick paper or tape etc.
-
Page 4: Table Of Contents
Table of contents Safety note ..........2-3 Table of contents . -
Page 5: Before Use
Before use Detaching the control panel You can detach the control panel when leaving the car. When detaching or attaching the control panel, be careful not to damage the connectors on the back of the control panel and on the panel holder. 1. -
Page 6: Control Panel
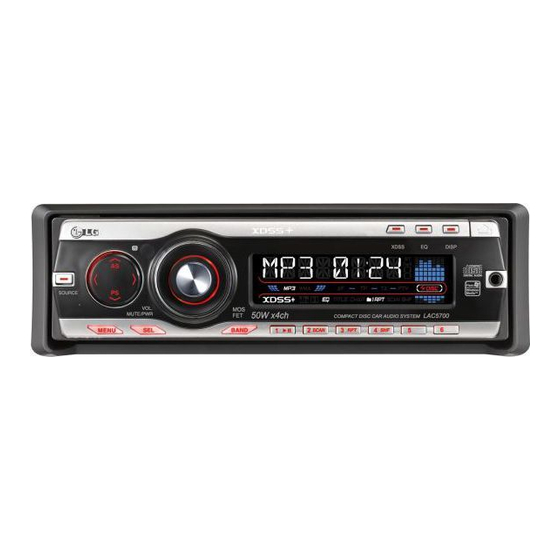
Control Panel [SOURCE] AUX In [AUX] I I /i i • Skip / Search Preset Station [1-6] I I /i i • Seek/ Tune Shuffle [SHF] U U / • Auto Store [ Repeat [RPT] u u / • Preset Scan [ Intro Scan [SCAN] U U /u u •... -
Page 7: Remote Control (Optional)
Remote control (optional) Power [POWER] / Mute Select [MENU/SEL] Source [SRC] Play / Pause B/X Intro Scan [SCAN] Shuffle [SHF] • MP3 Track +10 • Folder Up • CD Skip / Search ?m m • Seek / Tune ?m m [BAND] Volume Up / Down... -
Page 8: Installation
Installation Basic Installation Before installing, make sure that the ignition-switch is set to Bend the claws OFF and remove the terminal of the car battery to avoid according to short-circuiting. the thickness of the dashboard 1 Remove the existing receiver unit. 2 Make the necessary connections. -
Page 9: Connection Diagram
Connection diagram Before connecting, make sure that the ignition switch is set to OFF, and remove the battery # terminal to avoid short circuits. To Speaker To Vehicle (Optional) PHONE MUTE (ORANGE) GROUND(-) (BLACK) DIMMER (PINK) DIMMER SWITCH TO IGNITION (RED) IGNITION SWITCH TO BATTERY(+) (YELLOW) POWER ANTENNA (BLUE) -
Page 10: Connection
Connection Speaker Connections From antenna To the wiring of the vehicle colors of leads. • BLACK : This lead is for the ground connection. • ORANGE : This lead is for the phone line connection. • PINK : This lead is for the dimmer line connection. -
Page 11: Basic Operation
Basic operation Turning the unit on Press MUTE/PWR (POWER/ on the remote control) or any other button. Note When you insert the CD in the CD slot, the unit turns on. Turning the unit off Press and hold MUTE/PWR (POWER/ on the remote control). - Page 12 Basic operation Changing the general settings 1 Press MENU (Press and hold MENU/SEL on remote control) so that one of menu items appears. 2 Press MENU (MENU/SEL on remote control) to scroll between menus. AF ON t REG ON t TA ALARM t PI SOUND t AUX ON t AUX 00dB t DEMO OFF t BEEP 2ND 3 Rotate MUTE/PWR clockwise or unclockwise to select one of the settings specified below.
- Page 13 Basic operation AUX (Auxiliary) ON / OFF It is possible to use auxiliary equipment with this unit. Activate the auxiliary setting when using auxiliary equipment connected to this unit. AUX ON When using a auxiliary equipment. AUX OFF When not using a auxiliary equipment. AUX (Auxiliary) 00dB / +6dB You can adjust the volume level of each source to prevent radical changes in volume when switching between sources.
- Page 14 Basic operation Adjusting the sound level 1 Press SEL (MENU/SEL on the remote control) repeatedly to select the mode you want to adjust from volume, bass, middle, treble, balance and fader. The indicator lights up in the following order. VOL t BAS t MID t TRB t BAL t FAD 2 Rotate the MUTE/PWR (Press VOLUME on the remote control) to adjust the sound quality.
-
Page 15: Radio Operation
Radio operation Listening to radio stations 1 Press SOURCE to select the tuner. 2 Press the BAND repeatedly to select a band. The indicator lights up in the following order. FM1 t FM2 t FM3 t MW(AM) 3 Auto Seek : Press I I i i ( on the remote control). -
Page 16: Rds Operation
RDS operation RDS Display options In normal RDS operation the display will indicate the station name. Pressing DISP enables you to cycle through the various data types in the following sequence: CT t FREQUENCY t PTY t RT t PS •... -
Page 17: Cd/Mp3/Wma Operation
CD/MP3/WMA operation Playing an Audio CD and MP3/WMA Disc The unit can play MP3/WMA formatted recordings on CD-ROM, CD-R or CD-RW discs. Before playing MP3/WMA recordings, read the notes on MP3/WMA Recordings on page 21. If you change the source, CD play also stops (without ejecting the CD). Next time you select “CD”... - Page 18 CD/MP3/WMA operation Shuffle All of the tracks/files (SHF) or the current selected folder ( SHF) on the disc is played randomly. 1 Press SHF during playback. – (or SHF ) appears on the display window. Press and hold SHF for about 2 seconds during playback. –...
-
Page 19: Aux Operation
AUX operation Playing an Auxiliary Equipment You can connect Auxiliary Equipment to this unit. Connect one to the external device jack using the line input cable (not supplied), and the other to the AUX input jack on the control panel. Auxiliary input Line input cable MP3 Player, etc... -
Page 20: Troubleshooting
Troubleshooting Symptom Cause Correction Leads and connectors are not Confirm once more that all Power doesn’t turn on. properly connected. connections are correct. The fuse is blown. Rectify the problem that caused The unit doesn’t operate. the fuse to blow, and then replace it. -
Page 21: Specifications
Specifications MP3/WMA Disc compatibility with this unit is limited as follows: 1. Sampling Frequency / 8 - 48kHz (MP3) 22.05 - 48kHz (WMA) 2. Bit rate / within 8 - 320kbps (include VBR) (MP3) 32 -320kbps (WMA) 3. CD-R/CD-RW file system should be “ISO 9660” 4. - Page 22 P/NO : MFL37340612...
Need help?
Do you have a question about the LAC5700R and is the answer not in the manual?
Questions and answers