
Subscribe to Our Youtube Channel
Related Manuals for LG SIGNATURE WD205C Series


Summary of Contents for LG SIGNATURE WD205C Series
- Page 1 OWNER’S MANUAL WASHING MACHINE Please read this owner's manual thoroughly before operating and keep it handy for reference at all times. WD205C* www.lg.com MFL68267012...
-
Page 2: Table Of Contents
TABLE OF CONTENTS TABLE OF CONTENTS IMPORTANT SAFETY INSTRUCTIONS SPECIFICATIONS 3 Basic Safety Precautions 4 Grounding Requirements SMART DIAGNOSIS™ SYSTEM 5 Safety Instructions for Installation 6 Safety Instructions for Use, Care, Cleaning and TROUBLESHOOTING Disposal 25 Faqs: Frequently Asked Questions FEATURES AND BENEFITS 26 Normal Sounds You May Hear 26 Before Calling for Service... -
Page 3: Important Safety Instructions
IMPORTANT SAFETY INSTRUCTIONS IMPORTANT SAFETY INSTRUCTIONS SAFETY MESSAGES For your safety, the information in this manual must be followed to minimize the risk of fire, explosion, or electric shock, or to prevent property damage, injury to persons, or death. Your safety and the safety of others is very important. -
Page 4: Grounding Requirements
IMPORTANT SAFETY INSTRUCTIONS y Use fabric softeners or products to eliminate static only as recommended by the manufacturer. y This washer is not designed for maritime use or for mobile installations such as in RVs, aircraft, etc. y Turn off the water faucets and unplug the washer if the machine is to be left for an extended period of time, such as during vacations. -
Page 5: Safety Instructions For Installation
IMPORTANT SAFETY INSTRUCTIONS WARNING For your safety, the information in this manual must be followed to minimize the risk of fire, explosion, or electric shock, or to prevent property damage, injury to persons, or death. SAFETY INSTRUCTIONS FOR INSTALLATION WARNING To reduce the risk of fire, electric shock or injury to persons when using this appliance, follow basic precautions, including the following: y Refer to INSTALLATION INSTRUCTIONS for detailed grounding procedures. -
Page 6: Safety Instructions For Use, Care, Cleaning And Disposal
IMPORTANT SAFETY INSTRUCTIONS y The pedestal washer is for installation and use only underneath an LG manufactured front-loading washer. The pedestal washer is not designed to operate as a standalone unit, under an LG top-loading washer, under a dryer, or under a non-LG manufactured washer. y Do not tamper with the stacking switch. -
Page 7: Features And Benefits
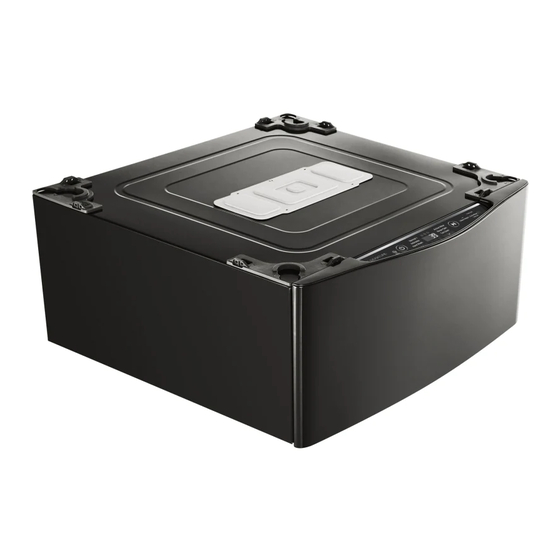
FEATURES AND BENEFITS FEATURES AND BENEFITS KEY PARTS AND COMPONENTS Appearance and specifications may vary without Stacking Switch notice to improve the quality of the product. Drawer Leg Support Control panel Top Cover Leveling feet INVERTER DIRECT DRIVE MOTOR The inverter motor, which is directly connected to the tub, produces less noise and vibration while offering outstanding durability and a long lifespan. -
Page 8: Installation Instructions
INSTALLATION INSTRUCTIONS INSTALLATION INSTRUCTIONS CHOOSE THE PROPER LOCATION FLOORING WARNING y To minimize noise and vibration, the washer MUST be installed on a solidly constructed floor. y Two or more people are required when moving, unpacking, and y Allowable slope under the entire washer is a maximum 1 stacking the washer. -
Page 9: Unpacking And Removing Shipping Material
INSTALLATION INSTRUCTIONS UNPACKING AND REMOVING 4. Make sure the leveling legs on the front-loading washer are fully retracted before stacking it SHIPPING MATERIAL on top of the pedestal washer. Position the 1. After removing the carton and shipping material, appliance on top of the pedestal washer. lift the washer off the foam base. - Page 10 INSTALLATION INSTRUCTIONS OVERVIEW OF CONNECTIONS CONNECTING THE DRAIN HOSE WITH FULL-SIZE WASHER CONNECTING THE WATER LINES WITH 1. Front-loading washer and pedestal washer with FULL-SIZE APPLIANCES dryer. 1. Front-loading washer and pedestal washer with dryer. Short inlet hose Cold Wire Clamp Tie Strap Required for water inlet Item...
-
Page 11: 1 Connecting The Water Lines
INSTALLATION INSTRUCTIONS CONNECTING THE WATER LINES 3. Flush out the inlet hoses. After connecting the inlet hoses NOTE: to the water faucets, turn on the • For your safety, and for extended product life, water faucets to flush out foreign use high-quality LG components. -
Page 12: 2 Connecting The Drain Hose
INSTALLATION INSTRUCTIONS CONNECTING THE DRAIN HOSE OPTION 1: STANDPIPE Bend the outlet end of the drain hoses to form a U shape. y The drain hose should always be properly secured. Insert the end of the drain connector into the drain. Use the Failure to properly secure the drain hose can result in three tie straps included with the installation materials in the flooding and property damage. -
Page 13: Leveling The Washing Machine
INSTALLATION INSTRUCTIONS • Check again that the washing machine is level. LEVELING THE WASHING MACHINE - Push or rock the top edges of the washing The washer tub of your new washing machine spins machine gently to make sure that the washing at very high speeds. -
Page 14: 4 Connecting To The Power Supply
INSTALLATION INSTRUCTIONS CONNECTING TO THE POWER WARNING SUPPLY y The power outlet must be within 60 inches (1.5 m) of either side of the washer. The washer should be plugged into a 120 VAC, 60 y The appliance and outlet must be positioned so Hz, 3-prong (grounded) outlet. -
Page 15: 5 Sorting Wash Loads
INSTALLATION INSTRUCTIONS SORTING WASH LOADS FABRIC CARE LABELS Many articles of clothing include a fabric care label. CAUTION Using the chart below, adjust the cycle and option selections to care for your clothing according to the y Do not load items higher than the top edge of the manufacturer’s recommendations. -
Page 16: 6 Detergent And Dispenser Use
INSTALLATION INSTRUCTIONS DETERGENT AND DISPENSER USE NOTE: y Extra care must be exercised when using 2X and A WORD ABOUT DETERGENTS 3X concentrated detergents because even a little High-Efficiency (HE) detergents produce fewer bit extra can contribute to the problems mentioned suds, dissolve more efficiently to improve wash- above. -
Page 17: How To Use
HOW TO USE HOW TO USE CONTROL PANEL FEATURES POWER (ON/OFF) BUTTON START/PAUSE BUTTON Press to turn the washer ON. Press again to Touch and hold to Start the selected cycle. turn the washer OFF. Pressing the POWER If the washer is running, use this button to button during a cycle will cancel that cycle pause the cycle without losing the current and any load settings will be lost. -
Page 18: 8 Time And Status Display
HOW TO USE TIME AND STATUS DISPLAY The time and status display shows the estimated time remaining and cycle progress. A E B DRAWER LOCK INDICATOR ESTIMATED TIME REMAINING The DRAWER LOCK indicator will illumi- When a cycle is selected, the default nate once a cycle has started. -
Page 19: 9 Operating The Washer
HOW TO USE OPERATING THE WASHER SORT LAUNDRY AND LOAD THE WASHER Sort laundry by fabric type, soil level, color and load size, as needed. Open the lid and load items into the washer. CLEANING PRODUCTS Measure High-Efficiency (HE) detergent with the dispenser and pour it into the washer. -
Page 20: Cycle Guide
HOW TO USE CYCLE GUIDE The cycle guide below shows the default settings, available options and recommended fabric types for each cycle. Allowable modifier Default adjustments are shown below the default setting for each cycle. Available option Cycle Cycle Use Est. -
Page 21: Options
HOW TO USE OPTIONS After selecting a cycle, select additional features for the load. NOTE: y To protect your garments, not every feature is available with every cycle. y If the START/PAUSE button is not pressed within 4 minutes to start the cycle, the control will shut off and all settings will be lost. -
Page 22: Care And Cleaning
CARE AND CLEANING CARE AND CLEANING WARNING To reduce the risk of fire, electric shock, or injury to persons, read and follow this entire Owner’s Manual, including the Important Safety Instructions, before operating this washer. y Unplug the washer before cleaning to avoid the risk of electric shock. Failure to follow this warning can cause serious injury, fire, electric shock, or death. -
Page 23: Maintenance
CARE AND CLEANING MAINTENANCE NOTE: An IE message may blink on the display when the water pressure is weak or an inlet filter is clogged with dirt. Clean the inlet filter. CLEANING THE WATER INLET FILTERS WARNING If the washer does not fill properly, an error message will show on the display. -
Page 24: Specifications
SPECIFICATIONS SPECIFICATIONS Model : WD205C* Description Top-Loading Compact Pedestal Washer Electrical requirements 120 VAC @ 60 Hz. Max. water pressure 20~120 PSI (138~827 kPa) Dimensions 29" (W) x 30 7/8" (D) x 14 1/8"(H), 50 9/16"(D with open) Net weight 108lb(49.1kg) Max. -
Page 25: Troubleshooting
TROUBLESHOOTING TROUBLESHOOTING FAQS: FREQUENTLY ASKED QUESTIONS Can the pedestal washer and the front-loading washer be run at the same time? Yes. The pedestal washer is designed to operate simultaneously under LG manufactured front-loading washers produced after 2009. It is not designed for operation under LG toploading washers, LG dryers, non-LG manufactured appliances, or as a standalone unit. -
Page 26: Normal Sounds You May Hear
TROUBLESHOOTING NORMAL SOUNDS YOU MAY HEAR WATER SLOSHING SOUND: A liquid in the balance ring around the wash basket The following sounds may be heard while the wash- helps the basket spin smoothly. er is operating. They are normal. SOUND OF WATER BEING ADDED AFTER CLICKING: THE WASHER HAS ALREADY BEEN IN Lid lock relay when the lid locks and unlocks. - Page 27 TROUBLESHOOTING BEFORE CALLING FOR SERVICE (continued) Problem Possible Cause Solutions Wrinkling Washer not unloaded promptly. Always remove items from the washer as soon as the cycle is complete. Washer overloaded. The washer can be fully loaded, but the tub should not be tightly packed with items.
- Page 28 TROUBLESHOOTING BEFORE CALLING FOR SERVICE (continued) Problem Possible Cause Solutions Washer will not operate Control panel has powered off due This is normal. Press the POWER button to turn the to inactivity. washer on. Washer is unplugged. Make sure cord is plugged securely into a working outlet.
- Page 29 TROUBLESHOOTING BEFORE CALLING FOR SERVICE (continued) Problem Possible Cause Solutions Washer will not drain water Kinked drain hose. Ensure that the drain hose is not kinked. Drain located higher than 96 in. Make sure that the drain hose is no higher than 8 ft. (243.84 cm).
-
Page 30: Error Codes
TROUBLESHOOTING ERROR CODES Problem Possible Cause Solutions The display shows: Drawer is not closed properly Close the drawer and press START/PAUSE button to start the cycle. If the drawer is closed and the drawer lock error message is displayed, call for service The display shows: Lid is not closed properly Open the drawer and make sure the latch... - Page 31 TROUBLESHOOTING ERROR CODES (continued) Problem Possible Cause Solutions The display shows: If the rebalancing operation (see The automatic attempt to rebalance the load above) is not successful, this error was not successful. The cycle has been will be displayed. paused to allow the load to be manually adjusted.
-
Page 32: Warranty
WARRANTY LG WASHING MACHINE LIMITED WARRANTY (USA) WARRANTY: LG Electronics U.S.A., Inc. (“LG”) warrants your LG Washing Machine (“product”) against defect in materials or workmanship under normal household use, during the warranty period set forth below, LG will, at its option, repair or replace the product. - Page 33 MEMO...
- Page 34 MEMO...
- Page 35 1-800-984-6306...
Need help?
Do you have a question about the WD205C Series and is the answer not in the manual?
Questions and answers