Table of Contents
Advertisement
Available languages
Available languages
Quick Links
Advertisement
Table of Contents

Related Manuals for Samsung DW80M99 Series


Summary of Contents for Samsung DW80M99 Series
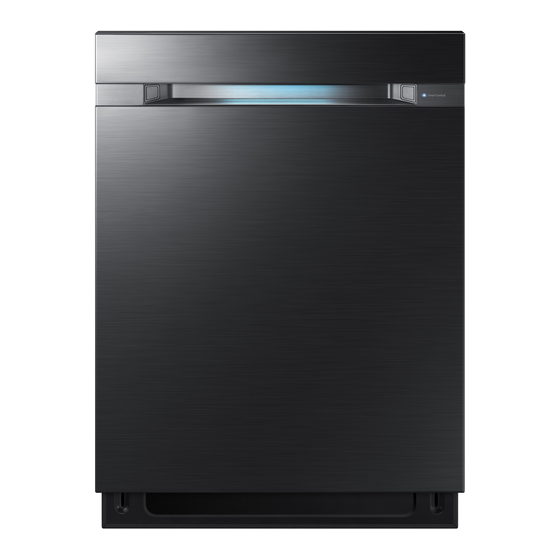
- Page 1 DW80M9* Series Dishwasher user manual imagine the possibilities Thank you for purchasing this Samsung product. DW9900M-00184A-00_EN.indd 1 DW9900M-00184A-00_EN.indd 1 2016-12-12 2016-12-12 2:47:16 2:47:16...
-
Page 2: Table Of Contents
Meeting installation requirements USING YOUR DISHWASHER Control panel Cycle selector Basic guidelines Samsung smart home (applicable models only) Adjusting the angle of the plate supports Adjusting the height of the upper rack Removing the upper rack Loading the lower rack... - Page 3 Congratulations on your new Samsung dishwasher. This manual contains important information on the installation, use, and care of your appliance. Please take time to read this manual to take full advantage of your washer’s many benefi ts and features.
- Page 4 safety information WARNING WARNING State of California Proposition 65 Warning (US only) This product contains chemicals known to the State of California to cause cancer and birth defects or other reproductive harm. WARNING: When using your dishwasher, follow basic precautions, including the following: WARNING 1.
- Page 5 • To safely operate this appliance, familiarize yourself with its operations and exercise care when using it. • Do not put gasoline, solvents, or other flammable materials inside the dishwasher. Do not wash dishes exposed to these materials. • Keep your dishwasher detergent out of the reach of children. Detergent has an adverse eff ect on human organs.
- Page 6 safety information REGULATORY NOTICE FCC Notice FCC CAUTION: CAUTION Any changes or modifi cations not expressly approved by the party responsible for compliance could void the user’s authority to operate the equipment. This device complies with Part 15 of FCC Rules. Operation is Subject to following two conditions: (1) This device may not cause harmful interference, and (2) This device must accept any interference received including interference that cause...
- Page 7 The software included in this product contains open source software. You may obtain the complete corresponding source code for a period of three years after the last shipment of this product by sending an email to mailto:oss.request@samsung.com. It is also possible to obtain the complete corresponding source code in a physical medium such as a CD-ROM;...
-
Page 8: Setting Up Your Dishwasher
CHECKING PARTS When your dishwasher has been unpacked, make sure you’ve received all the parts shown below. If your dishwasher was damaged during shipping, or if you do not have all the parts, contact Samsung Customer Service at 1-800-SAMSUNG (726-7864). -
Page 9: Meeting Installation Requirements
Your dishwasher must be properly installed in accordance with the Installation Guide before you use it. If you did not receive an Installation Guide with your dishwasher, you can obtain one by visiting our website at www.samsung.com. English - 9 DW9900M-00184A-00_EN.indd 9... -
Page 10: Using Your Dishwasher
using your dishwasher WARNING: To reduce the risk of fi re, electric shock, or injury to persons, read the IMPORTANT SAFETY INSTRUCTIONS before operating this appliance. WARNING CONTROL PANEL DW80M99** Series DW80M95** Series When you press the Power button, the Cycle On light for the most recently started cycle turns Power on. - Page 11 With the Sanitize option selected, the water temperature is increased to 163 ˚F (73 ˚C) in the fi nal rinse cycle for high temperature sanitization. If you select the Sanitize option, the "Sanitize" lamp blinks when the water temperature reaches the sanitary temperature (over 155 ˚F (68 ˚C)), and then remains illuminated until the Sanitize option ends.
-
Page 12: Cycle Selector
using your dishwasher To start a cycle, press the Start button before closing the door. *Cancel: To cancel a currently running cycle and drain the dishwasher, press and hold the Start Start button for three (3) seconds. Once the dishwasher is reset, select a cycle and option, and then press Start to restart the dishwasher. -
Page 13: Basic Guidelines
BASIC GUIDELINES 1. Open the door and load your dishes (see page 20-22). Place dishes into the upper and lower racks, unless you have selected the Lower (Lower Rack - Only) option. Remove any food remains from the dishes before placing them in the rack(s). After placing the dishes into the racks, turn the upper nozzles to make sure none of the dishes will block nozzle rotation. - Page 14 using your dishwasher Touch Controls Touch controls allow you to operate the dishwasher easily. • They are convenient to operate, requiring only a soft touch. • Have a simple and stylish design. • Are easy to clean. If you have children or you want to clean the Control Interface, we recommend activating the Control Lock feature to lock the control buttons.
- Page 15 Using the Toggle keys • Press the Lower + Hi-Temp Wash button for 3 seconds to enable or disable Auto Release™ Dry. "A0" disables Auto Release™ Dry. "A1" activates Auto Release™ Dry. More About Auto Release Dry Once the door opens in the Auto Release™...
-
Page 16: Samsung Smart Home (Applicable Models Only)
Home”. Download and install the Samsung Smart Home app provided by Samsung Electronics to your smart device. The Samsung Smart Home app is designed for Android 4.0 (ICS) or higher, or iOS 7.0 or higher, and is optimized for Samsung smartphones (Galaxy S and Galaxy Note series). - Page 17 This product is a smart dishwasher that supports the Samsung Smart Home service. For more information, visit www.samsung.com. Key features Register Samsung smart home appliances to the Samsung Smart Home server for remote access. Menu overview English - 17 DW9900M-00184A-00_EN.indd 17 DW9900M-00184A-00_EN.indd 17...
-
Page 18: Adjusting The Angle Of The Plate Supports
using your dishwasher For improved performance, the content and design of the app is subject to change without notice. Current cycle Tap to select a desired cycle. With Smart Control enabled on the dishwasher, you can Start or Start/Pause Pause operation temporarily using your smart phone. Set or adjust the options as necessary. -
Page 19: Adjusting The Height Of The Upper Rack
ADJUSTING THE HEIGHT OF THE UPPER RACK You can adjust the height of the upper rack in your Samsung dishwasher so that the lower rack can accommodate larger sized dishes. Depending on where you set the upper rack height, the lower rack can accommodate plates up to 12 in. -
Page 20: Loading The Lower Rack
using your dishwasher LOADING THE LOWER RACK The lower rack has been especially designed for dinner dishes, soup bowls, plates, pots, lids, casserole dishes, and plates. Load large items such as pans and pots into the dishwasher so their open sides face downwards. We recommend loading cups, stemware, and small plates into the upper rack. -
Page 21: Using The 3 Rd (Cutlery) Rack
USING THE 3 (CUTLERY) RACK (FOR SOME MODELS) Loading the cutlery rack <Place items randomly or regularly.> In addition to the standard cutlery basket in the lower rack, some models come with a cutlery rack. The cutlery rack is best suited for fl atware and cooking or serving utensils. You can place cutlery and utensils randomly or regularly on the cutlery rack. -
Page 22: Using The Cutlery Rack
using your dishwasher USING THE CUTLERY RACK The cutlery rack consists of two compartments. You can place each knife, spoon, or fork separately into the spoon stands in the basket’s covers to prevent chipping and discoloration. You can use the cutlery rack with the cover open. Refer to the illustration to the right. Left Right 10 place setting... -
Page 23: Using The Glass Support
USING THE GLASS SUPPORT You can load cups or glasses onto the glass support. This is also very convenient for washing wine glasses. Hang your wine glasses on the pegs of the glass support. You can fold the glass support back when it is not being used. USING THE EASY CADDY (FOR SOME MODELS) Use this Easy caddy on the left of the upper rack to hold spatulas, serving spoons, and similar items. -
Page 24: Using Detergent
using your dishwasher USING DETERGENT All dishwasher cycles require detergent in the detergent compartment. Add the correct amount of detergent for the selected cycle to ensure the best performance. Use dishwasher detergent only. Regular detergent produces too much foam, which may decrease the dishwasher’s performance or cause it to malfunction. -
Page 25: Using Rinse Aid
The cover opens automatically to dispense the detergent during the wash. AMOUNT OF DETERGENT CYCLE Main wash dispenser Onto the door for pre-wash Auto, Normal 3/4 oz (20 g) 1/3 oz (10 g) Heavy, Express 60 1 oz (30 g) 1/2 oz (15 g) Delicate 3/4 oz (20 g) -
Page 26: Cleaning And Maintaining Your Dishwasher
cleaning and maintaining your dishwasher Keeping your dishwasher clean improves its performance, reduces unnecessary repairs, and lengthens its life. CLEANING THE EXTERIOR It’s best to clean spills on the outside of your dishwasher as they occur. Use a soft, damp cloth on the control panel to gently wipe away spills and dust. -
Page 27: Cleaning The Nozzles
CLEANING THE NOZZLES If your dishwasher does not seem to be cleaning adequately or the nozzles seem clogged, you can clean each of the nozzles. When removing the nozzles, take care as they can break. Upper nozzle 1. Pull the upper rack towards the front 2. -
Page 28: Cleaning The Filter
cleaning and maintaining your dishwasher CLEANING THE FILTER 1. Remove the lower rack fi rst. 2. Rotate the fi lter handle counterclockwise to unfasten the fi lter compartment door. 3. Remove the fi lter door, and then the cylindrical micro fi lter underneath. Filter with handle cylindrical micro fi... -
Page 29: Cleaning The Drain Pump
CLEANING THE DRAIN PUMP If the dishwasher fails to drain because the drain pump is clogged with foreign matter or there is an abnormal noise coming from the drain pump, you must unclog and clean the drain pump as instructed below. 1. -
Page 30: Cycles
cycles CYCLE CHART : Basic, : Optional step) Cycle Pre-Wash1 Pre-Wash2 Pre-Wash3 Main wash Rinse1 Rinse2 Rinse3 Auto 122-140 ˚F (50-60 ˚C) Normal 113-143 ˚F (45-62 ˚C) ... -
Page 31: Troubleshooting
troubleshooting CHECK THESE POINTS IF YOUR DISHWASHER… PROBLEM POSSIBLE CAUSE SOLUTION The door is not closed Check if the door is latched and closed completely. completely. Check whether the Upper Rack is properly joined with Duct Nozzle. Also, check if the Upper Rack is crooked or unbalanced. - Page 32 troubleshooting PROBLEM POSSIBLE CAUSE SOLUTION The cycle selected was Select a cycle according to the number and soil unsuitable. level of the dishes, as directed in this manual. The water temperature is low. Connect the water supply line to a hot water supply.
- Page 33 PROBLEM POSSIBLE CAUSE SOLUTION There is no rinse aid in the Check the dispenser and add rinse aid. dispenser. Use a liquid type rinse aid. The temperature of the water Connect the water supply line to a hot water is low when the dishwasher is supply.
-
Page 34: Information Codes
If a water supply valve connection leak occurs, close the water supply valve and go to your house circuit breaker panel, set the dishwasher’s circuit breaker switch to off , and then contact the installer to fi x. If the problem continues, contact an authorized Samsung service center. Water supply check. •... -
Page 35: Appendix
appendix HELPING THE ENVIRONMENT • Your dishwasher is manufactured from recyclable materials. If you decide to dispose of it, please observe local waste disposal regulations. Cut off the power cable so that the appliance cannot be connected to a power source. •... - Page 36 Charges for in-home service starting from the 2nd year is customer’s responsibility), and Lifetime Stainless Door Liner & Tub for leakage. Samsung will replace your unit with same or current model (that is better or equivalent in functionality) (Labor related to replacement is customer’s responsibility).
- Page 37 PURPOSE. NO WARRANTY OR GUARANTEE GIVEN BY ANY PERSON, FIRM, OR CORPORATION WITH RESPECT TO THIS PRODUCT SHALL BE BINDING ON SAMSUNG. SAMSUNG SHALL NOT BE LIABLE FOR LOSS OF REVENUE OR PROFITS, FAILURE TO REALIZE SAVINGS OR OTHER BENEFITS, OR ANY...
- Page 38 Questions or comments? COUNTRY CALL OR VISIT US ONLINE AT 1-800-SAMSUNG (726-7864) U.S.A www.samsung.com/us/support 1-844-SAM-PAYS (726-7297) MEXICO 01-800-SAMSUNG (726-7864) www.samsung.com/mx/support DD68-00184A-00 DW9900M-00184A-00_EN.indd 38 DW9900M-00184A-00_EN.indd 38 2016-12-12 2016-12-12 2:47:58 2:47:58...
- Page 39 Serie DW80M9* Lavavajillas manual del usuario imagine las posibilidades Gracias por adquirir este producto Samsung. DW9900M-00184A-00_MES.indd 1 DW9900M-00184A-00_MES.indd 1 2016-12-12 2016-12-12 2:48:30 2:48:30...
- Page 40 USO DE LA LAVAVAJILLAS Panel de control Selector de ciclos Pautas básicas Samsung smart home (solo modelos aplicables) Ajuste del ángulo de los soportes para platos Ajuste de la altura del estante superior Cómo retirar el estante superior Carga del estante inferior...
- Page 41 Felicitaciones por la compra de su nueva lavavajillas Samsung. Este manual contiene información importante acerca de la instalación, el uso y el cuidado del electrodoméstico. Lea detenidamente estas instrucciones a fi n de aprovechar al máximo los múltiples benefi...
- Page 42 información sobre seguridad ADVERTENCIA ADVERTENCIA Advertencia sobre la State of California Proposition 65 (solo EE.UU.) Este producto contiene productos químicos reconocidos en el estado de California como capaces de provocar cáncer y defectos de nacimiento u otras afecciones reproductivas. ADVERTENCIA: Cuando utilice la lavavajillas, tome todas las precauciones básicas, incluyendo las siguientes: ADVERTENCIA 1.
- Page 43 • Para usar este electrodoméstico en forma segura, familiarícese con su funcionamiento y manéjelo con cuidado cuando lo use. • No vierta gasolina, solventes ni otros materiales infl amables dentro de la lavavajillas. No lave vajilla que haya sido expuesta a estos materiales. •...
- Page 44 información sobre seguridad AVISO REGULATORIO Aviso de FCC PRECAUCIÓN FCC: PRECAUCIÓN Todos los cambios y modifi caciones que no cuenten con la aprobación expresa de la parte responsable del cumplimiento invalidará la autoridad del usuario para operar el equipo. Este dispositivo cumple con el Apartado 15 de las Normas de la FCC. El funcionamiento se encuentra sujeto a las siguientes dos condiciones: (1) Este aparato no puede causar interferencias perjudiciales, y (2) Este aparato debe aceptar la recepción de cualquier interferencia, incluidas aquellas que puedan...
- Page 45 Asimismo es posible obtener el correspondiente código fuente completo en un soporte físico como un CD- ROM; se le cobrará una tasa mínima. La siguiente URL http://opensource.samsung.com/opensource/SimpleConnectTP/seq/0 lleva a la página de descarga del código fuente disponible y a la información de licencia de código abierto relacionada con este producto.
- Page 46 Cuando haya recibido la lavavajillas, desempáquela con cuidado y verifi que que no esté dañada. Si la lavavajillas está dañada, tome nota de ello en la carta de porte y guarde una copia. No instale la lavavajillas y comuníquese con el Servicio al cliente de Samsung al número que se indica a continuación.
- Page 47 Nunca instale la lavavajillas sobre una plataforma o sobre una estructura con soportes poco resistentes. La lavavajillas debe instalarse adecuadamente, conforme a la Guía de instalación, antes de utilizarla. Si no recibió una Guía de instalación junto con la lavavajillas, puede obtener una en nuestro sitio Web www.samsung.com. Español - 9 DW9900M-00184A-00_MES.indd Sec3:9 DW9900M-00184A-00_MES.indd Sec3:9...
- Page 48 uso de la lavavajillas ADVERTENCIA: Para reducir el riesgo de incendio, descarga eléctrica o lesiones personales, lea las INSTRUCCIONES DE SEGURIDAD IMPORTANTES antes de poner en marcha este electrodoméstico. ADVERTENCIA PANEL DE CONTROL Serie DW80M99** Serie DW80M95** Cuando presiona el botón Power (Encendido) se enciende la luz del último ciclo iniciado. Una vez completado Power (Encendido) el ciclo seleccionado, la lavavajillas se apaga automáticamente.
- Page 49 Cuando se selecciona la opción Sanitize (Desinfección), la temperatura del agua se eleva a 163 ˚F (73 ˚C) en el ciclo de enjuague fi nal para la desinfección a alta temperatura. Si selecciona la opción Sanitize (Desinfección) el indicador "Sanitize (Desinfección)" parpadea cuando la temperatura del agua alcanza la temperatura de desinfección, más de 155 ˚F (68 ˚C), y permanece encendido hasta el fi...
- Page 50 uso de la lavavajillas Para iniciar un ciclo, presione el botón Start (Inicio) antes de cerrar la puerta. *Cancel (Cancelar): Para cancelar un ciclo que esté ejecutándose y desaguar la lavavajillas, mantenga Start (Inicio) presionado el botón Start (Inicio) durante tres (3) segundos. Una vez restablecida la lavavajillas, seleccione un ciclo y una opción y luego presione Start (Inicio) para reiniciar la lavavajillas.
- Page 51 PAUTAS BÁSICAS 1. Abra la puerta y cargue la vajilla (consulte la página 20-22). Coloque la vajilla en los estantes superior e inferior, a menos que seleccione la opción Lower (Lower Rack - Only) (Inferior (Estante inferior - Solo)). Retire los restos de comida de la vajilla antes de colocarla en los estantes. Después de cargar la vajilla en los estantes, rote las boquillas superiores para asegurarse de que ninguno de los platos bloquee la rotación de las boquillas.
- Page 52 uso de la lavavajillas Controles táctiles Los controles táctiles le permiten operar fácilmente la lavavajillas. • Se activan fácilmente con un toque suave. • Tienen un diseño sencillo y elegante. • Son fáciles de limpiar. Si tiene niños o desea limpiar la Interfaz de control, recomendamos activar la función Control Lock (Bloqueo controles) para bloquear los botones de control.
- Page 53 Uso de las teclas de alternancia • Presione los botones Lower (Inferior) + Hi-Temp Wash (Lavado a alta temperatura) durante 3 segundos para activar o desactivar el Secado Auto Release™. "A0" desactiva el Secado Auto Release™. "A1" activa el Secado Auto Release™. Más acerca del secado Auto Release Cuando la puerta se abre en el modo de Secado Auto Release™, no se puede...
- Page 54 SAMSUNG SMART HOME (SOLO MODELOS APLICABLES) Instalación Visite Google Play Store, Galaxy Apps o Apple App Store y busque “Samsung Smart Home”. Descargue e instale la aplicación Samsung Smart Home provista por Samsung Electronics a su dispositivo inteligente. La aplicación Samsung Smart Home está diseñada para Android 4.0 (ICS) o superior, o iOS 7.0 o superior, y está...
- Page 55 Este producto en una lavavajillas inteligente que admite el servicio Samsung Smart Home. Para obtener más información, visite www.samsung.com. Funciones principales Registre los electrodomésticos Samsung smart home en el servidor de Samsung Smart Home para acceso remoto. Descripción del menú Español - 17 DW9900M-00184A-00_MES.indd 17...
- Page 56 uso de la lavavajillas Para un mejor desempeño, el contenido y el diseño de la aplicación están sujetos a cambios sin previo aviso. Ciclo actual Toque para seleccionar el ciclo deseado. Con Smart Control activado en la lavavajillas, puede iniciar o pausar Inicio/Pausa temporalmente la operación con el teléfono inteligente.
- Page 57 AJUSTE DE LA ALTURA DEL ESTANTE SUPERIOR Puede ajustar la altura del estante superior de su lavavajillas Samsung para dar cabida en el estante inferior a platos de mayor tamaño. Según la altura del estante superior que establezca, en el estante inferior puede ubicar platos de hasta 12 pulgadas (30 cm) de diámetro y en el estante superior platos de hasta 8 pulgadas (20 cm) de diámetro.
- Page 58 uso de la lavavajillas CARGA DEL ESTANTE INFERIOR El estante inferior se ha diseñado específi camente para vajilla, tazones para sopa, platos, ollas, tapas y fuentes de horno. Cargue los objetos grandes como recipientes y ollas de manera que sus lados abiertos miren hacia abajo. Recomendamos colocar las tazas, la cristalería y los platos pequeños en el estante superior.
- Page 59 USO DEL 3 ESTANTE (CUBIERTOS) (EN ALGUNOS MODELOS) Carga del estante para cubiertos <Coloque los artículos en forma aleatoria u ordenada.> Además de la canasta para cubiertos estándar del estante superior, algunos modelos cuentan con un estante para cubiertos. El estante para cubiertos es adecuado para cubiertos y utensilios para cocinar y servir. Puede acomodar los cubiertos y utensilios en forma aleatoria u ordenada en el estante para cubiertos.
- Page 60 uso de la lavavajillas USO DEL ESTANTE PARA CUBIERTOS El estante para cubiertos consiste en dos compartimientos. Puede colocar independientemente cada cuchillo, cuchara o tenedor en el soporte para cucharas en la cubierta de la canasta para evitar roturas o decoloración. El estante para cubiertos puede utilizarse con la cubierta abierta.
- Page 61 USO DEL SOPORTE PARA COPAS Puede cargar tazas o vasos en el soporte para copas. Resulta muy práctico también para lavar copas de vino. Cuelgue sus copas de vino de las espigas del soporte para copas. Puede plegar el soporte para copas cuando no se use. USO DE LA CUBETA AUXILIAR (PARA ALGUNOS MODELOS) Use la cubeta auxiliar a la izquierda del estante superior para colocar espátulas, cucharas de servir y artículos similares.
- Page 62 uso de la lavavajillas USO DEL DETERGENTE Todos los ciclos de la lavavajillas requieren detergente en el compartimiento correspondiente. Agregue la cantidad adecuada de detergente para el ciclo seleccionado para asegurar el mejor desempeño. Use solamente detergente para lavavajillas. Los detergentes normales producen demasiada espuma, lo que puede reducir el desempeño de la lavavajillas o causar su mal funcionamiento.
- Page 63 La cubierta se abre automáticamente para dosifi car el detergente durante el lavado. CANTIDAD DE DETERGENTE CICLO Dosifi cador para el lavado principal En la puerta para el prelavado Auto, Normal 3/4 oz (20 g) 1/3 oz (10 g) Heavy (Muy sucio), 1 oz (30 g) 1/2 oz (15 g) Express 60 (Rápido 60)
- Page 64 limpieza y mantenimiento de la lavavajillas Mantener la lavavajillas limpia mejora su desempeño, reduce la cantidad de reparaciones innecesarias y alarga su vida. LIMPIEZA DEL EXTERIOR Se recomienda limpiar los derrames en el exterior de la lavavajillas a medida que ocurran. Utilice un paño suave y húmedo para limpiar suavemente todos los derrames y el polvo del panel de control.
- Page 65 LIMPIEZA DE LAS BOQUILLAS Si la lavavajillas no limpia correctamente o las boquillas parecen estar obstruidas, puede limpiarlas en forma individual. Tenga cuidado al retirar las boquillas, ya que pueden romperse. Boquilla superior 1. Jale el estante superior hacia el frente 2.
- Page 66 limpieza y mantenimiento de la lavavajillas LIMPIEZA DEL FILTRO 1. Retire el estante inferior. 2. Rote la manija del fi ltro en sentido contrario al de las agujas del reloj para afl ojar la puerta del compartimiento del fi ltro. 3.
- Page 67 LIMPIEZA DE LA BOMBA DE DRENAJE Si la lavavajillas no desagua porque la bomba de drenaje está obstruida con objetos extraños, o esta produce un ruido anormal, deberá desatascar y limpiar la bomba como se indica a continuación. 1. Retire el estante inferior. 2.
- Page 68 ciclos TABLA DE CICLOS : Básico, : paso opcional) Lavado Ciclo Prelavado 1 Prelavado 2 Prelavado 3 Enjuague 1 Enjuague 2 Enjuague 3 principal Auto 122-140 ˚F (50-60 ˚C) ...
- Page 69 solución de problemas CONTROLE ESTOS PUNTOS SI SU LAVAVAJILLAS… PROBLEMA CAUSA POSIBLE SOLUCIÓN La puerta no está completamente Verifi que que la puerta esté trabada y completamente cerrada. cerrada. Verifi que si el estante superior está unido correctamente a la boquilla del conducto. Verifi...
- Page 70 solución de problemas PROBLEMA CAUSA POSIBLE SOLUCIÓN El ciclo seleccionado no es el Seleccione un ciclo de acuerdo con la cantidad de adecuado. vajilla y su nivel de suciedad, tal como se indica en este manual. La temperatura del agua es baja. Conecte la tubería de suministro de agua a la llave del agua caliente.
- Page 71 PROBLEMA CAUSA POSIBLE SOLUCIÓN No hay producto de enjuague en Verifi que el dosifi cador y agregue producto de enjuague. el dosifi cador. Use un producto líquido para el enjuague. Cuando la lavavajillas está Conecte la tubería de suministro de agua a la llave del funcionando, la temperatura del agua caliente.
- Page 72 Luego de cerrar la válvula de suministro de agua, revise si la manguera de desagüe está obstruida o doblada. Además, verifi que si el orifi cio de desagüe está obstruido. Si el problema continúa, contacte a un centro de servicio técnico de Samsung autorizado. Control de calentamiento de temperatura alta.
- Page 73 apéndice AYUDA AL MEDIO AMBIENTE • Esta lavavajillas se fabrica con materiales reciclables. Si decide deshacerse de ella, siga la normativa local relacionada con la eliminación de desechos. Corte el cable de alimentación para que el aparato no pueda conectarse a una fuente de alimentación. •...
- Page 74 Estados Unidos/Canadá. Para recibir el servicio técnico de la garantía, el comprador debe comunicarse con SAMSUNG con el fi n de que se determine el problema y los procedimientos del servicio. El servicio técnico de la garantía solo puede ser prestado por un centro de servicio técnico autorizado de SAMSUNG. Se debe presentar la factura de compra original como prueba de compra a SAMSUNG o al servicio técnico autorizado de...
- Page 75 SALVO LO ESTABLECIDO EN LA PRESENTE GARANTÍA, NO EXISTEN GARANTÍAS SOBRE EL PRESENTE PRODUCTO, YA SEAN EXPRESAS O TÁCITAS, Y SAMSUNG DESCONOCE TODAS LAS GARANTÍAS QUE INCLUYEN, AUNQUE NO EN CARÁCTER TAXATIVO, CUALQUIER GARANTÍA TÁCITA DE QUE EL PRODUCTO SE ENCUENTRA EN CONDICIONES APTAS PARA LA VENTA, DE DEFRAUDACIÓN DE DERECHOS O DE QUE EL PRODUCTO SE ADECUA A LOS FINES ESPECÍFICOS PARA LOS CUALES SE ADQUIERE.
- Page 76 ¿Tiene alguna pregunta o algún comentario? PAÍS LLAME AL O VISÍTENOS EN LÍNEA EN 1-800-SAMSUNG (726-7864) U.S.A www.samsung.com/us/support 1-844-SAM-PAYS (726-7297) MEXICO 01-800-SAMSUNG (726-7864) www.samsung.com/mx/support DD68-00184A-00 DW9900M-00184A-00_MES.indd Sec10:38 DW9900M-00184A-00_MES.indd Sec10:38 2016-12-12 2016-12-12 2:48:54 2:48:54...
Need help?
Do you have a question about the DW80M99 Series and is the answer not in the manual?
Questions and answers