
Related Manuals for Makita XWT14


Summary of Contents for Makita XWT14
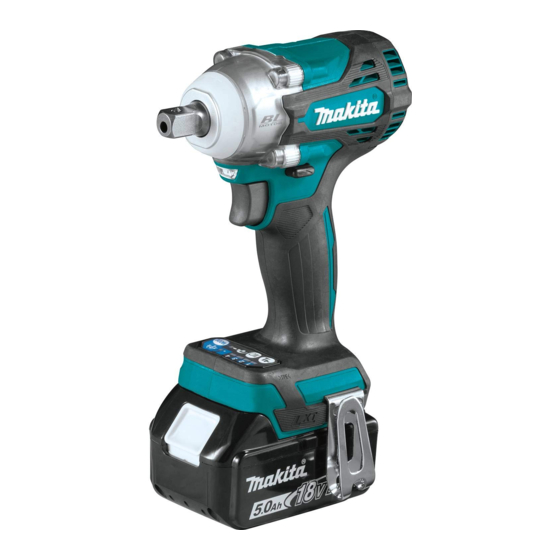
- Page 1 INSTRUCTION MANUAL MANUAL DE INSTRUCCIONES Cordless Impact Wrench Llave de Impacto Inalámbrica XWT14 XWT15 XWT15XV XWT16 IMPORTANT: Read Before Using. IMPORTANTE: Lea antes de usar.
-
Page 2: Specifications
ENGLISH (Original instructions) SPECIFICATIONS Model: XWT14 XWT15 XWT15XV XWT16 Fastening capacities Standard bolt M10 - M20 (3/8″ - 3/4″) High tensile bolt M10 - M16 (3/8″ - 5/8″) Square drive 12.7 mm (1/2″) 9.5 mm (3/8″) No load speed (RPM) - Page 3 Avoid body contact with earthed or grounded Always wear protective goggles to protect your surfaces, such as pipes, radiators, ranges and eyes from injury when using power tools. The refrigerators. There is an increased risk of elec- goggles must comply with ANSI Z87.1 in the USA. It is an employer's responsibility to enforce the tric shock if your body is earthed or grounded.
- Page 4 Under abusive conditions, liquid may be ejected Symbols from the battery; avoid contact. If contact acci- dentally occurs, flush with water. If liquid con- The followings show the symbols used for tool. tacts eyes, additionally seek medical help. Liquid ejected from the battery may cause irritation or burns. volts Do not use a battery pack or tool that is damaged or modified.
-
Page 5: Functional Description
It will with a little click. If you can see the red indicator as also void the Makita warranty for the Makita tool and shown in the figure, it is not locked completely. charger. -
Page 6: Overheat Protection
This tool is equipped with an electric brake. If the tool Lighted Blinking consistently fails to quickly stop after the switch trigger 75% to 100% is released, have the tool serviced at a Makita service center. 50% to 75% Lighting up the front lamp 25% to 50%... - Page 7 Reversing switch action ► 1. Button To turn on the lamp status, press the button ► 1. Reversing switch lever one second. To turn off the lamp status, press the but- for one second again. CAUTION: Always check the direction of With the lamp status ON, pull the switch trigger to turn rotation before operation.
-
Page 8: Changing The Application Mode
Changing the application mode Changing the impact force You can change the impact force in four steps: 4 (max), 3 (hard), 2 (medium), and 1 (soft). This allows a tightening suitable to the work. The level of the impact force changes every time you press the button You can change the impact force within approximately one minute after releasing the switch trigger. - Page 9 Example of application Application mode Example of application (Impact force grade displayed on panel) 4 (Max) Assembling steel frames and tightening long screws or bolts. 3 (Hard) Assembling steel frames. 2 (Medium) Assembling or disassembling scaffolds and frameworks. 1 (Soft) Assembling furniture.
- Page 10 Changing the application mode This tool employs several easy-to-use application modes for driving bolts with good control. The type of the application mode changes every time you press the button You can change the application mode within approximately one minute after releasing the switch trigger. NOTE: You can extend the time to change the application mode approximately one minute if you press the button Application mode Feature...
- Page 11 For impact socket without O-ring and pin ► 1. Button 2. Lamp Model XWT14, XWT16 When full speed mode is turned on, the tool speed becomes fastest even if you do not pull the switch trig- ger fully. When full speed mode is turned off, the tool speed increases as you increase the pressure on the switch trigger.
-
Page 12: Installing Hook
For impact socket with O-ring and pin Installing hook Model XWT14 CAUTION: When installing the hook, always secure it with the screw firmly. If not, the hook may come off from the tool and result in the personal injury. CAUTION: Use the hanging/mounting parts for their intended purposes only. -
Page 13: Maintenance
(207) (5/8") (5/8") To maintain product SAFETY and RELIABILITY, (177) repairs, any other maintenance or adjustment should (148) (9/16") be performed by Makita Authorized or Factory Service (9/16") Centers, always using Makita replacement parts. (118) (1/2") (89) (1/2") (59) OPTIONAL ACCESSORIES... -
Page 14: Especificaciones
ESPAÑOL (Instrucciones originales) ESPECIFICACIONES Modelo: XWT14 XWT15 XWT15XV XWT16 Capacidades de apriete Perno estándar 10 mm - 20 mm (3/8″ - 3/4″) Perno de alta resistencia 10 mm - 16 mm (3/8″ - 5/8″) Adaptador cuadrado 12,7 mm (1/2″) 9,5 mm (3/8″) Velocidad sin carga (RPM) Modo de impacto máx. - Page 15 Mantenga a los niños y curiosos alejados Retire cualquier llave de ajuste o llave de mientras utiliza una herramienta eléctrica. Las apriete antes de encender la herramienta. Una distracciones le pueden hacer perder el control. llave de ajuste o llave de apriete que haya sido dejada puesta en una parte giratoria de la herra- Seguridad eléctrica mienta eléctrica puede ocasionar alguna lesión.
- Page 16 Mantenga las herramientas de corte limpias Servicio y filosas. Si recibe un mantenimiento adecuado Haga que una persona calificada repare la y tiene los bordes afilados, es probable que la herramienta eléctrica utilizando sólo piezas de herramienta se atasque menos y sea más fácil repuesto idénticas.
- Page 17 El cartucho de batería lesiones personales y daños. Asimismo, esto inva- puede explotar si se tira al fuego. lidará la garantía de Makita para la herramienta y el No clave, corte, aplaste, lance o deje caer el cargador Makita.
-
Page 18: Descripción Del Funcionamiento
Consejos para alargar al máximo Para instalar el cartucho de batería, alinee la lengüeta sobre el cartucho de batería con la ranura en la carcasa la vida útil de la batería y deslícela hasta su lugar. Insértelo por completo hasta que se fije en su lugar con un pequeño clic. - Page 19 La herramienta está equipada con un freno eléctrico. Si 25% a 50% la herramienta falla constantemente en detenerse tras soltar el gatillo interruptor, lleve la herramienta a mante- 0% a 25% nimiento a un centro de servicio Makita. Iluminación de la luz delantera Cargar la batería. La batería PRECAUCIÓN:...
- Page 20 NOTA: Para confirmar el estado de la lámpara, jale el gatillo. Cuando la lámpara se enciende al jalar el gatillo interruptor, el estado de la lámpara está acti- vado. Cuando la lámpara no se enciende, el estado de la lámpara está desactivado. NOTA: Cuando la herramienta se sobrecalienta, la luz parpadea durante un minuto, y luego la pantalla LED se desactiva.
- Page 21 Cambio del modo de aplicación Cambio de la fuerza de impacto Usted puede cambiar la fuerza de impacto a cuatro niveles: 4 (máx.), 3 (dura), 2 (media) y 1 (suave). Esto permite un apriete adecuado para el trabajo. El nivel de la fuerza de impacto cambia cada vez que presiona el botón Usted puede cambiar la fuerza de impacto dentro de aproximadamente un minuto después de haber soltado el gatillo interruptor.
- Page 22 Ejemplo de aplicación Modo de aplicación Ejemplo de aplicación (Grado de la fuerza de impacto mostrado en el panel) 4 (Máx.) Ensamble de armazones de acero y apriete de tornillos o pernos largos. 3 (duro) Ensamble de los armazones de acero. 2 (medio) Ensamble o desensamble de andamios y bastidores.
- Page 23 Cambio del modo de aplicación Esta herramienta emplea varios modos de aplicación fáciles de usar para insertar pernos con un buen control. El tipo de modo de aplicación cambia cada vez que presiona el botón Usted puede cambiar el modo de aplicación dentro de aproximadamente un minuto después de haber soltado el gatillo interruptor. NOTA: Usted puede extender el tiempo para cambiar el modo de aplicación en aproximadamente un minuto si oprime el botón Modo de aplicación...
- Page 24 Modo de aplicación Característica Propósito (Tipo de asistencia mostrado en el panel) Modo para pernos (2) En el sentido de las maneci- llas del reloj La herramienta se detiene auto- máticamente aproximadamente 0.5 segundos después a partir del momento en que la herramienta ha iniciado los golpes de impacto.
- Page 25 Para dados de impacto sin anillo en O ni pasador Modelo XWT15, XWT15XV Modelo XWT14, XWT16 ► 1. Dado de impacto 2. Orificio 3. Adaptador cua- drado 4. Pasador de retención ► 1. Dado de impacto 2. Adaptador cuadrado 3.
-
Page 26: Operación
Torsión de apriete apropiada para un perno de alta OPERACIÓN resistencia N•m PRECAUCIÓN: Siempre inserte completa- (ft•lbs) mente el cartucho de batería hasta que quede 280 N•m asegurado en su lugar. Si puede ver el indicador (207 ft•lbs) 16 mm (5/8") 16 mm rojo del lado superior del botón, esto indica que no... -
Page 27: Mantenimiento
Para mantener la SEGURIDAD y FIABILIDAD del pro- ducto, las reparaciones, y cualquier otra tarea de man- tenimiento o ajuste deberán ser realizadas en centros de servicio autorizados o de fábrica Makita, empleando siempre repuestos Makita. ACCESORIOS OPCIONALES PRECAUCIÓN:... - Page 28 Para reducir la exposición a estos productos químicos: trabaje en un área bien ventilada y póngase el equipo de seguridad indicado, tal como las máscaras contra polvo que están especialmente diseñadas para filtrar partículas microscópicas. Makita Corporation 3-11-8, Sumiyoshi-cho, Anjo, Aichi 446-8502 Japan 885898A941...
Need help?
Do you have a question about the XWT14 and is the answer not in the manual?
Questions and answers