Table of Contents
Advertisement
Quick Links
Advertisement
Table of Contents

Related Manuals for NEC KMP7N2K1


Summary of Contents for NEC KMP7N2K1
- Page 1 Model name: e373...
- Page 2 File name: e373.pdf Software version: Date Phone File name Reviewed by...
- Page 3 Copyright Notice ® ® Windows XP and Windows 2000 are registered trademarks of Microsoft Corporation in the United States and/or other countries. This product contains NetFront Internet browser software of ACCESS CO.,LTD. This product contains JV-Lite2 Java virtual machine of ACCESS CO.,LTD. This product contains AVE-SSL encryption module of ACCESS CO., LTD.
- Page 4 Basic Functions Main Menu This User Manual is printed by NEC Mobile Communicate Corporation without any warrant. NEC Mobile Communication Co., Ltd reserves the right Reference Information to modify or improve this Manual for any printing error, discrepancy from the latest data, program and equipment any time without separate notice, which, however, will be incorporated into the latest version of the User Manual.
-
Page 5: Table Of Contents
Important Safety Information Start-up e373 Overview ...................... 8 Definitions of Buttons .................... 9 Status Icons ......................12 SIM Card and Battery ..................15 Charging Method .................... 16 Basic Functions On/off ........................18 PIN and PUK Codes ................... 18 PIN and PIN2 Codes ..................18 PUK Code and PUK2 Code ................ - Page 6 Main Menu Settings ......................26 1. Phone ......................26 2. Phone modes ..................... 27 3. Display ....................... 28 4. Power saving ..................... 28 5. Calls ......................28 6. Security ...................... 29 7. Network ...................... 30 8. Reset settings .................... 31 9.
- Page 7 Important Safety Information Emergency services To make an emergency call in any country • Ensure that your e373 is switched on and in service. • Press the Send key to return to the Home screen if needed. • Press 112 (or 999 within the UK or 000 in Australia) followed by the Send key. (When the SIM card is not inserted or when the dial lock function is on, press the SK2 (EMRGCY).
- Page 8 • Do not drop, throw or subject the phone to rough treatment. • Do not place the phone alongside computer disks, credit cards, travel cards and other magnetic media. The information contained on disks or cards may be affected by the phone.
- Page 9 • Use an anti-static cloth to clean the phone. Do not use an ordinary dry cloth or electrostatically charged cloth. Do not use chemical or abrasive cleaners as these could damage the case. • Remember to recycle the cardboard packaging supplied with this phone. •...
- Page 10 Switch off your phone and remove its battery in areas where the use of phones is prohibited. Follow the instructions given by the respective medical centre regarding the use of mobile phones on their premises. General safety • Observe “Turn off mobile” signs, such as those near petrol stations, chemicals or explosives and switch off your phone.
- Page 11 Third party equipment The use of third party equipment, batteries, cables or accessories, not made or authorised by NEC, may invalidate the warranty of your phone and also adversely affect the phone's operation. Service The phone, batteries and charger contain no user-serviceable parts. We recommend that your NEC phone is serviced or repaired by an NEC authorised service centre.
- Page 12 ・ For body worn operation, this phone has been tested and meets FCC RF exposure guidelines when used with an accessory that contains no metal and that positions the handset a minimum of 1.5cm from the body. Use of other accessories may not ensure compliance with FCC RF exposure guidelines.
- Page 13 The video/audio recordings you make/download are protected by copyright laws. They are for personal use only and must not be otherwise used without the permission of the copyright owner. Disposing of your used NEC product In the European Union EU-wide legislation as implemented in each Member State requires that used electrical and electronic products carrying the mark (left) must be disposed of separately from normal household waste.
-
Page 14: Start-Up
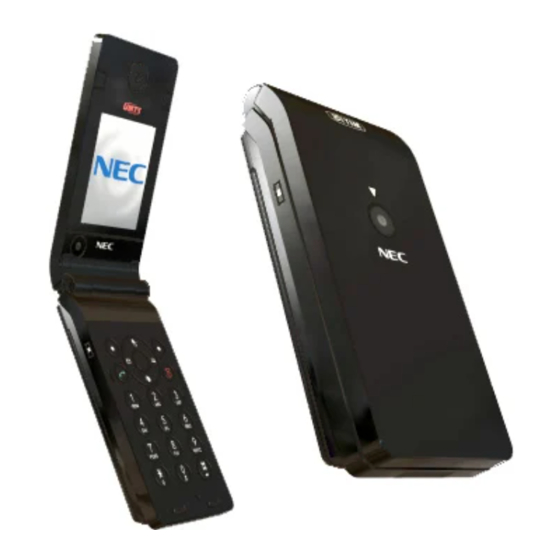
1. Start-up 1.1 e373 Overview Headphone LOUDSP Back lens Front lens Side key Headset jack Microphone Charger jack, dataline jack START-UP > E373 OVERVIEW... -
Page 15: Definitions Of Buttons
1.2 Definitions of Buttons Display Upper navigation key OK key Right navigation key Left navigation key RSK key LSK key Power key Send key Down navigation key Letter/number key # key * key Keyboard DEFINITIONS OF BUTTONS < START-UP... - Page 16 LSK/RSK LSK key Idle mode: enter into the main menu screen keys Menu mode: select menu or pop-up menu Editing mode: switch over the input methods RSK key Idle mode: enter into main menu screen Menu mode: back to the last page Editing mode: clear off text and characters OK KEY Idle mode: enter into main menu screen...
- Page 17 Letter/number key Idle mode: press it to input 0-9 Hold [number key 1] to call voice box Hold [number key 2-9] to call the number whose caller ID is corresponding number registed in phone Hold [number key 0] to input "+" Menu mode: press it to enter into the corresponding menu option * key...
-
Page 18: Status Icons
1.3 Status Icons 1 6 1 7 1 10 1 11 Meaning Simple description Icon Battery Low power status Power status SMS status New short message Un-read short message MMS status New MMS Unread MMS WAP prompt WAP prompt SIM card full SIM short message full MP full MP short message full... - Page 19 Meeting Display the Phone mode mode Pocket mode Car mode Normal mode Phone mode and incoming call transfer and incoming call transfer Meeting mode incoming call transfer Pocket mode and incoming call transfer mode and incoming call transfer Alarm clock Initiate the alarm clock STATUS ICONS <...
- Page 20 Display Display 3G SIM card in 3G network network Display 2.5G SIM card in GSM network coverage (i.e. Display 2G SIM card in GSM network card) types Display Display SIM card compliant with 3G and manual- GSM manually chooses 3G network selected Display SIM card compliant with 3G and network...
-
Page 21: Sim Card And Battery
1.4 SIM Card and Battery SIM card (user ID mode) incorporates MP number and service items, and can store phone numbers and personal data. Caution: Place SIM card beyond the reach of children. Caution: SIM card and the contact points are vulnerable to scratch or damage, please gently handle the SIM card. -
Page 22: Charging Method
The e373 is charged by rechargeable charger. Please note that the new battery can reach the best performance after two or three full charging-discharging cycles. The battery can sustain hundreds of charging-discharging cycles before out of service. It is the time to replace the battery upon obviously shortened working time of the battery (session duration and idle time). - Page 23 Connect the charger with the power supply when the e373 is shut off, the screen will display “charging”. In case of charging when turning on, the battery icon will flash with the voltage grids rising, the e373 operates normally. During charging, the Illumination is light all the while, and the light coloris red.
-
Page 24: Basic Functions
2. Basic Functions Caution: The e373 supports audio and video session in 3G network, and supports only audio session in GSM network. 2.1 On/off Power Press [Power] for 2-3 seconds to power on e373 while seeing power-on animation or text. Then the e373 will prompt you to input PIN code if applicable. It will prompt you to input the lock password if applicable. -
Page 25: Puk Code And Puk2 Code
PUK Code and PUK2 Code When modifying locked PIN code, MP requires PUK code (personal unlocking code code that is issued with SIM card. Please contact with the service provider for PUK code otherwise. In case of inputting 10 wrong PUK codes in a row, the SIM card will be permanently locked. -
Page 26: Dial From Phonebook
Dial from phonebook Search for a number in the telephone book, press [send key] to dial the audio call to such number; or dial video call to the number in the menu. Dial the number through call options Search for the session lists in the session options, or in idle screen, press [send key] to search for the dialed numbers, press [send key] again to dial audio call to such number, or dial video call to the number in the menu. -
Page 27: Receive Calls
2.4 Receive Calls The MP will ring or vibrate when incoming calls, answer calls by pressing [OK] and [send key], [LSK] is mute and cancel the vibration function, if configured any-key answer function and the MP is folded, [Side key] is mute and cancel the vibration funtion. If configured any- key answer function, you can press any key other than [RSK], [LSK] and [Power] to answer calls. -
Page 28: Mute
Mute During the session, press [LSK] to enter into in-session menu; in case of suspension of the mike, select "Mute" when the other party cannot hear you; to restore the session, press [LSK] and select "turn off silent tone". In one call, two calls or telephone conference, press [LSK] to enter into the in-session menu, select SMS, and conduct relevant operations;... -
Page 29: Functions In Video Session
You can then talk with the isolated party (maintain the session with other parties), then disconnect the number, then conduct multi-party session with the maintained parties (or hold on the isolated number, press "LSK key" to select "add" to conduct multi-party session.) 2.7 Functions in Video Session Caution: Video phone session is only available in 3G network. -
Page 30: Screen Mode
Screen mode During the session, press [LSK] to enter into in-session menu; select "screen mode" to configure screen modes as "My side is smaller", "My side is larger", "Other side only" or "My side only". BASIC FUNCTIONS > FUNCTIONS IN VIDEO SESSION... -
Page 31: Main Menu
3. Main Menu Press [LSK] in the idle screen. In the main menu, select the 9 options by [direction navigation key]: Settings Message Web Brower Phone book Camera My data Java™ Accessory SIM toolkit < MAIN MENU... -
Page 32: Settings
Press [direction navigation key] to switch over the sub-menus, then press [OK] or relevant number key for confirmation. Note: If the wallpaper is calendar, banner won't be disapplyed. [9. SIM toolkit] display will vary with SIM cards. 3.1 Settings The default configuration of your MP will enable to use the functions immediately after inserting SIM card. -
Page 33: Phone Modes
Clock: Configure time and date and the formats by [up and down navigation key]. Press [OK] to determine the modification contents. - Set time: allows input of correct time; - Set date: allows input of correct date; - Set time format: adjust the date display format in12/24-hour system; - Set date format: adjust the date display formats of 6. -
Page 34: Display
1. Normal mode In the scene mode screen, select the desired working mode, then configure the parameters as per your personal taste, including the following setting items: - Ring volume: adjust the tone volume - Keypad volume: "press key volume" can adjust the volume of key pressing; - Earpiece volume: "headphone volume"... -
Page 35: Security
- On busy: with setting, the incoming calls will be transferred to designated number when MP is busy. - No reply: with this setting, the incoming calls will be transferred to designated number when MP does not respond. - Unreachable: with this setting, the incoming calls will be transferred to designated number when MP upon failure of connection (e.g. -
Page 36: Network
- PIN activate: With PIN code function, input the PIN code upon power on. In case of inputting three wrong PIN codes in a row, the SIM card will be automatically locked and display the locking information.Initial PIN code is 0000. - Change PINs: modify PIN code, PIN2 code. -
Page 37: Reset Settings
8. Reset settings Select the option; you can restore the MP settings to ex-work setting. 9. Videophone During the video session, you can configure the communication needs, including camera setting, video call option and video call service. 1. Camera settings: Setting of camera parameters in video session. -
Page 38: Message
3.2 Message In "Message" application, you can create, send, receive, browse, edit and sort "short message" and "MMS". 1. SMS 1. Create and send short message In "SMS" screen, press [LSK] to enter into the new interface. In the new short message interface, select "Add new" to input new numbers, press [down navigation key] to select from the phone book list;... - Page 39 - Sent: store the sent messages. In the message list, press [LSK] to execute the operation below: Read: read details of sent message. Delete: delete selected message from the Sent. Delete all: delete all sent messages. - Drafts: store messages for future use. In the message list, press [LSK] to execute the operation below: Edit: edit message detail in the draft box.
-
Page 40: Mms
5. Memory status: Display free room you can store and total roomage in SIM and Phone. 2. MMS The MMS may include text, picture and audio clips. The received or sent MMS shall not exceed 300k, otherwise the MP will reject the mail. Upon incoming new mail, the MMS center will send the notice message to you, and you can decide on receiving or rejecting it. - Page 41 [Slide Options]: Configure Image Timing, Sound Timing, Text Timing, Image Fit Mode. It may take longer to send a SMIL than a short message. Upon sending failure, the SMIL well be stored in "Outbox" for attempt of re-sending. 2.Read MMS In idle mode, press [LSK] to enter into the menu list, select "message"...
- Page 42 All delete: delete all MMS in the Drafts. Sort: queue the MMS as requested. Filter View: extraction of specified message - Sent : store MMS successfully sent out. In the message list, press [LSK] pop-up menu for operation below: Open: read the sent messages. Edit: re-edit MMS content.
-
Page 43: Web Browser
- Reset Settings: reset settings. 3.3 Web browser You shall follow the steps below prior to using WAP functions: Apply for WAP services; contact your network service provider for specifics of WAP services. Make necessary WAP setting on your MP by referring to the data statistic setting or proxy. - Page 44 Go to: display the web page. Edit: edit the title and address of the web page. Delete: delete the web page. Delete all: delete all web pages. Show Address: display the web page address. 3.Page Memo List Store web pages browsed and stored; when the cursor is in a web page, select the menu in the interface to pop up the options below: Show: display the web page.
-
Page 45: Browse The Web Page
Show All: display all configured information. 10. Reset: restore initial setting. About Browser: display browser version. 8.Exit Exit the browser. Browse the web page Initiate WAP to browse web pages, the caption column in the window will display the title of the web page, the right/LSK keys in the screen will prompt the operations, the contents are displayed in the middle and the underlined text refers to the super linkage. - Page 46 Input name and mailbox, enter into the text editing window; input other phone numbers, enter into the number-input window, select the group to enter into the group names list window and then press [OK]. If you do not select group when creating record, you will be divided into the ordinary group.
- Page 47 - Memo: input key characters in the input window, search for the numbers of designated character string in the contact name list; - SIM location: input designated numbers in the input window, search for the contact of designated position from all contacts stored in SIM card; - Phone location: input designated numbers in the input window, search for the contact of designated position from all contacts stored in phone;...
- Page 48 capacity in SIM card, phone, Fixed numbers, Service numbers and the used capacity. 9. Function menu of contact details In contact list, select the highlighted item, the screen will display detailed contact information; select [LSK] for pop-up menu, press [Direction navigation key] to select: - Edit: edit all items.
-
Page 49: Camera
To operate the selected number in inquiry, press [LSK] for pop-up menu to execute the functions like save, Create message, voice call, video call, delete, delete all or press [OK] for detailed information including name, number, time, date, session duration. - Save: store desired contents to the phone book. -
Page 50: Taking Pictures
2. Taking pictures Initiate camera function, enter into the view frame as shown in figure 1. Figure 1 - In the camera view-finding screen, adjust camera position to display the object on the screen. - In the camera view-finding screen, the illumination shall be always light and the color of the light is blue. - Page 51 3.Camera function options Prior to taking pictures In view-finding screen, press [LSK] to pop up the menu, then press required key for desired options. Front camera: when the view frame adopts front lens/back lens, the item in the menu display back lens/front lens; when selecting the item, return to the view frame interface, which displays the view of back lens/front lens.
-
Page 52: Shooting Function Options
3. Shooting function options Shooting a film In the camera view-finding screen, the illumination shall be always light and the color of the light is blue. In the view frame screen, press [LSK] for pop-up menu, then press relevant keys for desired options. -
Page 53: My Data
Caution: During recording and there is unsaved data, when you close the fold, MP shall stop the movie recorder then entry like pressing [OK]. If there isn't unsaved data, when you close the fold, MP shall close the viewfinder. End of shooting After shooting a film, press [OK] to store with a default name provided by system automatically.You can also send your films out by pressing [LSK] to enter into SMIL sending interface to send out the film. -
Page 54: Java
Send by MMS: send the sound out in the form of SMIL. Rename: rename the sound. Sort by: queue the sounds as per names, sizes and dates. Delete: delete current files. Delete all: delete all files. Set as voice tone: configure current sound as the voice call tone. Set as video tone: configure current sound as the video call tone. - Page 55 the idle screen, hold [RSK] (over 2 seconds) to display Java application list) 1. Execute Java program In Java program list interface, when the desired application program is highlighted, press [OK] to operate the Java program. 2. Update Java program In Java program list interface, press [LSK] for pop-up menu, select Update to update the current Java program.
-
Page 56: Accessory
Permission to review the Permission of the program operating, you can modify the Permission. 10.Proxy setting In Java program list interface, press [LSK] for pop-up menu, select Proxy setting to review the Proxy setting screen. You can configure the use of proxy and proxy server address for Java Application Manager and Java Application;... - Page 57 - Status: activate or deactivate alarm clock. Above operations also apply to setting of "alarm clock 2" and "alarm clock 3". Caution: The above function is available when MP is on, otherwise the alarm clock will not operate. 2. Schedule 1.
- Page 58 the schedules of all dates, you can view, edit or delete in the same steps of "new schedule". 7. At the scheduled prompt date, the MP will play the event tone (if configured) and the prompt picture; browse the schedule, the content will scroll out. 3.
-
Page 59: Sim Toolkit
3. Thirdly, connect your computer and your MP with PC Tool data line. Note: If it doesn't include PC Tool data line when you buy it, you can order it from provider. 3.9 SIM toolkit STK is provided by service provider. If your MP SIM supports STK, you can see STK menu. The menu name and contents depend on the contents provided by service provider. -
Page 60: Reference Information
4. Reference Information Input Text The MP provides many kinds of expedient text input methods matching other functions, including T9 English, T9 Italian, ABC, 123 number input methods. English/ Italian input: press [LSK] to switch over the input methods, select "T9 English". -
Page 61: Repair Guideline
5. Repair Guideline You are welcome to use the MP produced by NEC. In case of any problem of e373 MP in use, please contact the distributor or NEC repair center. In case of repair, please send your MP to local repair station (see the Warranty Certificate attached with MP); in case of no repair station locally, please send your MP and duplicate invoice to the distributor for EMS.
Need help?
Do you have a question about the KMP7N2K1 and is the answer not in the manual?
Questions and answers