Table of Contents
Advertisement
Quick Links
Operating, Maintenance &
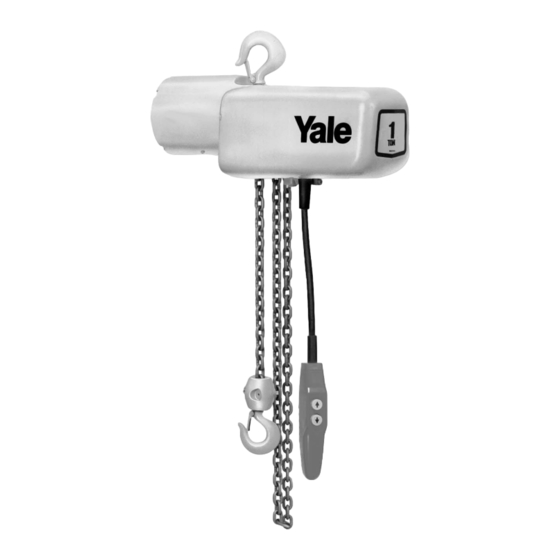
YEL Series
F
ollow all instructions and warnings for
inspecting, maintaining and operating this hoist.
The use of any hoist presents some risk of personal injury
or property damage. That risk is greatly increased if proper
instructions and warnings are not followed. Before using this
hoist, each operator should become thoroughly familiar with
all warnings, instructions, and recommendations in this
manual. Retain this manual for future reference and use.
Forward this manual to the hoist operator.
Failure to operate the equipment as directed in the manual
may cause injury.
Should you have any questions or have problems with this
product, please call Yale Hoists at (866) 805-2962
Before using the hoist, fill in the information below:
Model No.
Serial No.
Purchase Date
Tel: 866.805.2962 • Fax: 800.742.9270
Parts Manual
Capacities
1/8 Ton
1/4 Ton
1/2 Ton
1 Ton
2 Ton
414 Broadway Avenue
P.O. Box 769
Muskegon, Michigan USA
www.yalehoists.net
YJL680-2
Advertisement
Table of Contents

Related Manuals for Yale HOISTS YEL Series


Summary of Contents for Yale HOISTS YEL Series
- Page 1 Failure to operate the equipment as directed in the manual may cause injury. Should you have any questions or have problems with this product, please call Yale Hoists at (866) 805-2962 Before using the hoist, fill in the information below: Model No.
- Page 2 Yale Hoists • 414 Broadway Avenue • P.O. Box 769 • Muskegon, Michigan USA Tel: 866.805.2962 • Fax: 800.742.9270 www.yalehoists.net ©...
-
Page 3: Safety Precautions
21. NOT remove or obscure the warnings on the hoist. 22. NOT operate a hoist on which the safety placards or decals Each Yale YEL Series Electric Chain Hoist is built in accordance are missing or illegible. with the specifications contained herein and at the time of manufacture complies with our interpretation of applicable 23. -
Page 4: Table Of Contents
Recommended Lubrication Schedule............................17 Replacement Parts List................................18 Warranty ........................................Back Cover HOIST SPECIFICATIONS Yale YEL series electric chain hoists are rugged, portable Table 2 - Motor Amperage of 1-Speed Hoist Models hoists that provide quick, precise lifting. The hoists are Full Load Amps... -
Page 5: Application Information
This hoist is intended for general industrial use for lifting and requirements of your equipment. transporting freely suspended material loads within its rated capacity. Yale Hoists cannot be responsible for applications 7. Inspect the unit daily before operating hoist. other than those for which Yale equipment is recommended. - Page 6 Country Club Road P.O. Box 779 Wadesboro, NC 28170 USA TEL: (800) 477-5003 FAX: (800) 374-6853 For installations where the trolley can not be slid onto the CHAIN CONTAINER (Optional Accessary) end of a beam, leave the load pin nuts loose enough to get Refer to Table 4.
-
Page 7: Operation
Country Club Road P.O. Box 779 Wadesboro, NC 28170 USA TEL: (800) 477-5003 FAX: (800) 374-6853 3. Attach chain container to bracket with two open links and OVERLOAD LIMITING PROTECTION then close the links. This hoist is equipped with a factory-calibrated overload 4. - Page 8 Country Club Road P.O. Box 779 Wadesboro, NC 28170 USA TEL: (800) 477-5003 FAX: (800) 374-6853 HOOKS Chain Replacement with Chain in Hoist Refer to Figures 3 & 4. Refer to Figure 2. 1. Run hook up to its top limit. 1.
- Page 9 Country Club Road P.O. Box 779 Wadesboro, NC 28170 USA TEL: (800) 477-5003 FAX: (800) 374-6853 Dead-End Screw Slack End Load End Figure 5 — Chain Replacement with No Chain in Hoist Double-chained 8. Place the motor coupling on the splined shaft and carefully Hoist Single-chained fit the two hoist sections together.
- Page 10 Country Club Road P.O. Box 779 Wadesboro, NC 28170 USA TEL: (800) 477-5003 FAX: (800) 374-6853 Adjusting Lower Limit (Silver Nut) Refer to Figure 3. 1. Suspend the hoist. Carefully lower the load block to a point where the slack-end loop of the chain hangs down 6" or more from the hoist housing (or the limit desired in any particular application allowing the minimum 6").
- Page 11 Country Club Road P.O. Box 779 Wadesboro, NC 28170 USA TEL: (800) 477-5003 FAX: (800) 374-6853 LUBRICATION The reversing contactor can be slid off the rail, but it must be Refer to Figure 11. snapped on. Where the contactor fits the rail, one side has springs or pads that apply pressure against the edge of the Proper lubrication is necessary for a long and relatively trouble- rail.
- Page 12 Country Club Road P.O. Box 779 Wadesboro, NC 28170 USA TEL: (800) 477-5003 FAX: (800) 374-6853 Gearing Refer to Figures 8, 12 and 22. As disassembly is extensive for gearing, disconnect the hoist and move it to a workbench. 1. Remove the electrical cover. 2.
-
Page 13: Trouble Shooting
Country Club Road P.O. Box 779 Wadesboro, NC 28170 USA TEL: (800) 477-5003 FAX: (800) 374-6853 TROUBLE SHOOTING Failure to follow proper lockout/tagout procedures may present the danger of electrical shock. Always disconnect unit from the power supply system before TO AVOID INJURY: Disconnect power and lockout/tagout disconnecting removing hoist covers or the back cover of control station. -
Page 14: Wiring Diagrams
Country Club Road P.O. Box 779 Wadesboro, NC 28170 USA TEL: (800) 477-5003 FAX: (800) 374-6853 TROUBLE SHOOTING CONTINUED Lack of proper lifting speed Hoist overloaded 1. Reduce load to within rated capacity of hoist. Brake dragging 2. Check for proper brake adjustment or other defects. Low voltage 3. - Page 15 Country Club Road P.O. Box 779 Wadesboro, NC 28170 USA TEL: (800) 477-5003 FAX: (800) 374-6853 Figure 9B — Wiring Diagram for 1-Speed, 230/460V - 3 Phase Models Figure 9C — Wiring Diagram for 1-Speed, 208V, 380V, 575V - 3 Phase Models * Factory supplied diagrams will be numbered beginning with 985 for 575V, 987 for 208V, and 988 for 380V.
- Page 16 Country Club Road P.O. Box 779 Wadesboro, NC 28170 USA TEL: (800) 477-5003 FAX: (800) 374-6853 Figure 9D — Wiring Diagram for 2-Speed, 3 Phase Models * Factory supplied diagrams will be numbered beginning with 983 for 230 or 460V, 985 for 575V, 987 for 208V, and 988 for 380V.
-
Page 17: Inspection And Maintenance Check List
Country Club Road P.O. Box 779 Wadesboro, NC 28170 USA TEL: (800) 477-5003 FAX: (800) 374-6853 INSPECTION AND MAINTENANCE CHECK LIST ELECTRIC POWERED OVERHEAD CHAIN HOIST Type of Hoist ___________________________________________________________ Capacity (Tons) _________________________________________________ Location _______________________________________________________________ Original Installation Date _______________________________________ Manufacturer___________________________________________________________ Manufacturer’s Serial No. -
Page 18: Recommended Lubrication Schedule
Country Club Road P.O. Box 779 Wadesboro, NC 28170 USA TEL: (800) 477-5003 FAX: (800) 374-6853 INSPECTOR’S REPORT ITEM REMARKS (LIST DEFICIENCIES AND RECOMMENDED ACTION) Inspector’s Date Signature Inspected Approved by Date Figure 10B — Recommended Inspector’s Report RECOMMENDED LUBRICATION SCHEDULE* YALE ELECTRIC POWERED CHAIN HOIST PAGE AND COMPONENT... -
Page 19: Replacement Parts List
Figure 12 - Basic Hoist Parts List for Basic Hoist Description Part Description Part Motor — Latch Kit Assembly 4X1305 (See Figures 13 & 14) Hook Hole Cover JF277-1 Sheave Housing Screw H2978P Suspension Lug* 50KG84 Sheave Housing Yale Decal YJL677 1/2 Ton &... - Page 20 Figure 13 - Hoist Motor, 115/230V - 1 Phase † † Refer to the motor nameplate for part number, voltage, full load amperage, horsepower, and other motor information. Parts List for Hoist Motor, 115/230V - 1 Phase Description Part Description Part Hoist Motor SINPAC...
- Page 21 Figure 14 - Hoist Motor, 3 Phase † † Refer to the motor nameplate for part number, voltage, full load amperage, horsepower, and other motor information. Parts List for Hoist Motor, 3 Phase Description Part Description Part Hoist Motor (1-Speed) 1 hp, 575V-3Ph-60Hz 873JL12 1/4 hp, 230/460V-3Ph-60Hz...
- Page 22 Figure 15 - Brake & Solenoid Parts NOTE: Refer to wiring diagram inside electrical cover of hoist or Figures 9A, 9B, 9C or 9D, when connecting any wires. Parts List for Brake & Solenoid Parts Description Part Description Part Disc Brake Assembly* Brake Plate for 1/4 hp JF291 1/4 hp, 115V*...
- Page 23 Figure 16 - Electrical Parts, 1-Speed Models 1516 Parts List for Electrical Parts, 1-Speed Models Description Part Description Part Gear Box Cover JL34 Terminal Block Panel Plate 257JL200 115/230V 909J14 Reversing Contactor* End Plate 1/2 hp & under: 115/230V 909J15 24V Coil 28860 230/460V...
- Page 24 Figure 17 - Electrical Parts, 2-Speed Models 11 12 11 12 Parts List for Electrical Parts, 2-Speed Models Description Part Description Part Gear Box Cover JL34 Pri.: 575V, Sec.: 24V 821J452 Panel Plate 257JL200 Pri.: 575V, Sec.: 115V 821J451 Reversing Contactor* Pri.: 208V, Sec.: 24V 821J472 1/2 hp &...
- Page 25 Figure 18 - 1-Speed Pushbutton Station 10 11 13 14 15...
- Page 26 Parts List for 1-Speed Pushbutton Station Ref. Part Description Pushbutton Station & Control Cable Assembly 6 ft Cable Length PB299-6C 11 ft Cable Length PB299-11C 16 ft Cable Length PB299-16C Special Drop PBS299-†C Pushbutton Station Assembly 36900 Control Cable Assembly 6 ft Cable Length PBC299-6 11 ft Cable Length...
- Page 27 Figure 19 - 2-Speed Pushbutton Station...
- Page 28 Parts List for 2-Speed Pushbutton Station Ref. Part Description Pushbutton Station & Cable Assembly 10' Lift, 6' Cable Length 534JG4-6 15' Lift, 11' Cable Length 534JG4-11 20' Lift, 16' Cable Length 534JG4-16 Special Drop 534JG4-† Pushbutton Station Assembly 534JG4 Pushbutton Cable Assembly 10' Lift, 6' Cable Length PB300-6 15' Lift, 11' Cable Length...
- Page 29 Figure 20 - Limit Switch Assembly Parts List for Limit Switch Assembly Description Part Description Part Gear Box Cover JL34 Bushing JF531-4 Limit Switch Assembly 918JG4 Limit Switch Shaft JF117-3S (Includes items 4-12) Limit Switch Nut (silver) SK6000-63Z Limit Switch Bracket Assembly 918JG3 Limit Switch Nut (gold) SK6000-63W...
- Page 30 Figure 21 - Long Lift Limit Switch Parts Parts List for Long Lift Limit Switch Parts Description Part Description Part Gear Box Cover JL34 Switch 815J1 Limit Switch Assembly 944JG6 6-32UNC X 1" Screw H1402P (Includes items 3-21) 6-32UNC Elastic Locknut H3944 Post 110J14...
- Page 31 Figure 22 - Gearbox **32 (*) NOTE: This stage of gearing is not required on 32 FPM models. (**) NOTE: Orient output gear (32) with long boss towards gear housing (2) on 1/2 ton & under models and towards gear box cover (3) on 1 &...
- Page 32 Parts List for Gearbox Ref. Part Description Sheave Housing 1/2 Ton & Under JL33 1 & 2 Ton JL39 Gear Housing (includes oil seals) 1/2 Ton & Under JL35 1 & 2 Ton JL44 Gear Box Cover JL34 (includes oil seals) Spring Washer 360J1 O-Ring...
- Page 33 Figure 23 - Chaining Parts 2-Ton Models 1/2-Ton & Under Models 2-Ton Models 1-Ton Models...
- Page 34 Parts List for Chaining Parts Description Part Description Part Sheave Housing Chain Support JF109 1/2 Ton & Under JL33 Chain Support Pin JL18 1 & 2 Ton JL39 Cotter Pin H5025P Gear Housing Lockwasher H4083P 1/2 Ton JL35 1/2-20UNF Hex Jam Nut H3621P 1 &...
Need help?
Do you have a question about the YEL Series and is the answer not in the manual?
Questions and answers