Table of Contents
Advertisement
Quick Links
Advertisement
Table of Contents

Subscribe to Our Youtube Channel
Related Manuals for Becker BDGP-1

Summary of Contents for Becker BDGP-1
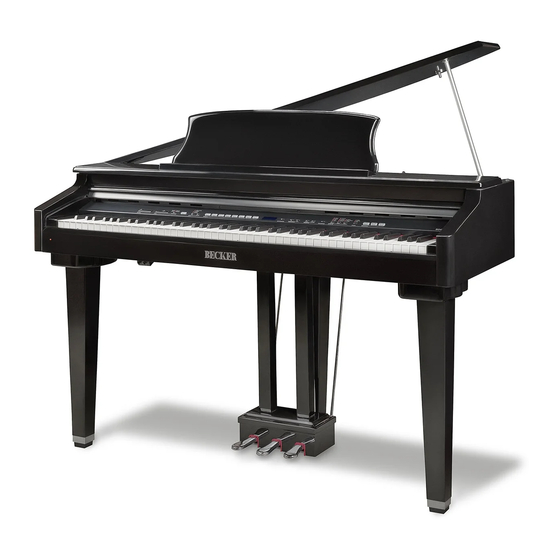
- Page 1 BDGP-1 digital piano owner’s manual...
-
Page 3: Assembly Instruction
Assembly instruction 1) Make sure you have the following parts, which are supplied in the package: A) Piano cabinet B) Right Leg C) Left Leg D) Rear Panel E) Bottom crossbar with three pedals group F) Chippendale (2x) G) Pedal clog H) Headphone hang and the fixing accessories to be found into a nylon bag: L) M6x20 TC screw (6X) - Page 5 TABLE OF CONTENTS Control Panel ..................1 Starting instruments ................2 Main volume set up ................2 Connecting headphones ............... 2 Demo listening ..................2 Presets selection ................. 3 Presets Variation ................. 3 Layering Presets ................. 3 Level Select key ................. 4 Split ....................
-
Page 6: Control Panel
For these and many other reasons, you will discover your BDGP-1 is an absolute pleasure to play! To get the absolute most out of your new piano, we recommend that you read this manual carefully so that you can take full advantage of all the advanced and convenient functions. -
Page 7: Standby/On Switch
STANDBY/ON switch Connect the power cord to a power outlet, your BDGP-1 is now in power saving mode (standby) and the red LED indicates the status. At this point, press the standby button located on the right side of the keyboard to turn on the instrument, the LED turns from red to green (ON). - Page 8 Presets selection The presets are the internal sounds on your BDGP-1 digital piano. Your piano has 16 professional sounds which may be played separately, or in combinations of two. They have been selected & optimized with the associated effects and control parameters to provide you with the most exciting combinations.
-
Page 9: Level Select
Balance: allows you to modify the balance between the three sound parts of BDGP-1 when you are playing in dual or split mode. Below we see the part configurations and how these are influenced by Balance: 1. - Page 10 BDGP-1 owner’s manual Change the Split point: To change the Split Point Press and hold the Bass button down for two seconds, the four LEDs on the Bass section will begin to flash and the display shows the current Split Point. Play the note on your piano (or use the TEMPO/DATA buttons) to assign a new split point.
- Page 11 REVERB: Selecting or modifying a reverb in a preset Each of your BDGP-1 sounds can include a reverb effect. The reverb type (Room - Hall 1 - Hall 2 - Stage) selection is indicated by the corresponding led on the panel. Press the reverb button to change the reverb type.
- Page 12 BDGP-1 owner’s manual MAF: Selecting MAF (Multiple Acoustic Feel) The MAF (cabinet and mechanical sound simulation – physical modelling) selection is available on the piano sound only. The MAF type (Classic - Baby Grand - Grand ) selection is indicated by the corresponding led-light on the panel.
- Page 13 BDGP-1 owner’s manual SONG PLAYER/REC: recording a song BDGP-1 allows you to easily record and playback your performances. The following steps will guide you to the recording of a song: 1. Choose the combination of sound and volume you want.
- Page 14 BDGP-1 owner’s manual PROGRAM: The piano functions menu allows you to adjust your piano to different operating situations. Function FUNCTION button allows to enter the function menù . The Function Enter function , LED starts flashing and the display shows F 1...
- Page 15 BDGP-1 owner’s manual (F1)Tune This function allows you to adjust the piano's pitch: the display shows the current tune value 0 by default. Edit the value using the TEMPO/DATA buttons, from -99 to 99 cent of tone. 0=standard pitch A=440Hz...
- Page 16 BDGP-1 owner’s manual (F5)Decay Env. Allows you to edit the envelope of all the presets that do not normally have decay (Organ, Strings, Choir), replacing the sustain phase with a decay one. These sounds will benefit from this effect only in the case where they are in one layer with a sound with decay (Grand Piano, El Piano, Vibes, Harpsichord, Guitar).
- Page 17 Set YES and press ENTER to confirme the factory reset: the piano will re-start. (F12) Firmware version This function will illustrate the software release number on your BDGP-1 piano. (F13) Standby Enable (ON) or Disable (OFF) the auto-off function of the piano, after a period of inactivity.
-
Page 18: Rear Pannel
Mp3 player, etc.). Right e Left/Mono To connect BDGP-1 to a computer it is necessary to have the USB cable (not supplied). Once you have connected the two units, follow the installation wizard of the MIDI driver on your computer. -
Page 19: Technical Specifications
BDGP-1 owner’s manual Technical Specifications keyboard Keys with hammer action poliphony 128 note max sounds 20 presets operating mode Whole, Layer, Dual (volume balance adjustable), Split (progr.) volume, balance/brillance, demo, split, metronome, play/pausa, stop, rec, controls tempo/data, transpose, preset e variation selection, split, reverb (send... -
Page 20: Fcc Rules
Disposal of old Electrical & Electronic Equipment (Applìcable throughout the European Union and other European countries with separate collection programs) Dir. 2002/95/CE, 2002/96/CE e 2003/108/CE This syrnbol, found on your product or on its packaging, indicates that this product should not be treated as household waste when you wish to dispose of it.
Need help?
Do you have a question about the BDGP-1 and is the answer not in the manual?
Questions and answers