Advertisement
Quick Links
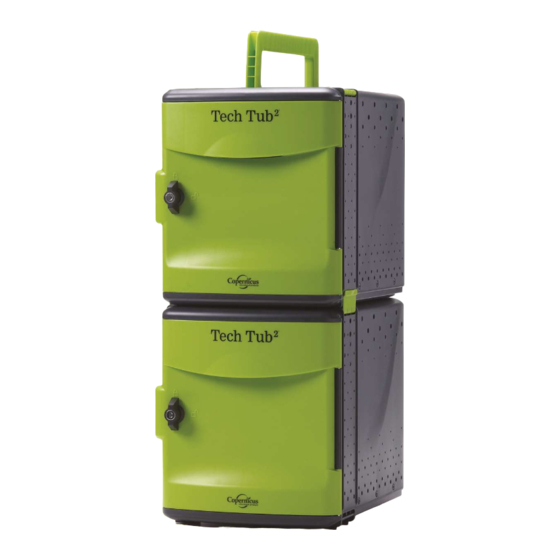
FTT1000
FTT1000-USB
WARNING
Flip Lock (2)
PLEASE KEEP THIS GUIDE WITH THE PRODUCT
Please Recycle
FTT1000_FTT1000-USB - Version C - Released August 2nd, 2016 - Copernicus Educational Products Inc.
2
Tech Tub - 10 Device Setup
Assembly Guide
FTT1000_FTT1000-USB_2016_C
Check out our other products online at
www.copernicused.com
This product is meant to be assembled by an adult.
In its unassembled state, small parts present a hazard.
To be used under direct supervision of an adult.
Tech Tub
2
Cable Pocket
Door (2)
Divider (12)
use 9 only
2
Tech Tub
TM
Power Box
Door (2)
Surface Mount
Lock (1)
®
For assistance, please contact us:
1-800-267-8494
Email info@copernicused.com
Have your packing slip ready for reference
®
Top Handle (1)
Cable Hooks (4)
Advertisement

Related Manuals for Copernicus Tech Tub2 FTT1000


Summary of Contents for Copernicus Tech Tub2 FTT1000
- Page 1 Power Box Door (2) Surface Mount Lock (1) Flip Lock (2) PLEASE KEEP THIS GUIDE WITH THE PRODUCT Top Handle (1) Cable Hooks (4) Please Recycle FTT1000_FTT1000-USB - Version C - Released August 2nd, 2016 - Copernicus Educational Products Inc.
-
Page 2: North American
PERICLES PROVERB Validate Your Warranty Life Time Year To validate your warranty, submit the ON-LINE form at www.copernicused.com Enter a draw to win a Copernicus Product for your classroom at the same time! ® Tech Tub Component Warranty Warranty Frame... - Page 3 72 consecutive hours. Turn off power strip before unplugging. Specifications Read the electrical specifications of any electronic equipment you are using with your Copernicus products. Failure to read these specifications and follow their instructions could result in damage to your equipment or personal injury.
-
Page 4: Before You Begin
Email our Tech Support Service 1-800-267-8494. Monday - Friday 8:30am - 4:30 pm EST. Check out some of our Email our Tech Support Service at info@copernicused.com other great products! www.copernicused.com FTT1000_FTT1000-USB - Version C - Released August 2nd, 2016 - Copernicus Educational Products Inc. - Page 5 Not to scale Hardware components are not used for all tech tub setup configurations. Depending on the setup configuration you choose, you may have extra hardware.. FTT1000_FTT1000-USB - Version C - Released August 2nd, 2016 - Copernicus Educational Products Inc.
- Page 6 Not to scale Hardware components are not used for all tech tub setup configurations. Depending on the setup configuration you choose, you may have extra hardware.. FTT1000_FTT1000-USB - Version C - Released August 2nd, 2016 - Copernicus Educational Products Inc.
- Page 7 If you have not purchased one of these two products, please proceed to the next page to begin setting up your ® Tech Tub . ® Royal Reading Writing Center Dual Duty Teaching Easel FTT1000_FTT1000-USB - Version C - Released August 2nd, 2016 - Copernicus Educational Products Inc.
- Page 8 Actual Size: You will need: (Not to Scale) 4mm Driver Allen Key Not to Scale (43281) ® Bolt Tech Tub Together With Provided Hardware FTT1000_FTT1000-USB - Version C - Released August 2nd, 2016 - Copernicus Educational Products Inc.
- Page 9 Push bottom of door into holes until you hear a SNAP! Look at the underside of the tub to ensure all the Power Door snaps are fully engaged. FTT1000_FTT1000-USB - Version C - Released August 2nd, 2016 - Copernicus Educational Products Inc.
- Page 10 Plug Device Power Cords into Power Strip, if using a USB Hub go to Step 6 Start from the back of the power strip and work forwards iPads/Tablets Chromebooks Wrap excess cord around power adapter. FTT1000_FTT1000-USB - Version C - Released August 2nd, 2016 - Copernicus Educational Products Inc.
- Page 11 Make sure all device cables are pushed far back into tub before wrapping Power Strip or 10 Outlet USB Hub cable Use the Cable Clip to keep the Power Strip cord secure. FTT1000_FTT1000-USB - Version C - Released August 2nd, 2016 - Copernicus Educational Products Inc.
- Page 12 Feed 6 of the 10 cables through the opening between tubs. Bottom Tub: Use the top four slots to ensure the cables line up with your devices. Slide cable through opening FTT1000_FTT1000-USB - Version C - Released August 2nd, 2016 - Copernicus Educational Products Inc.
- Page 13 SNAP. It’s easiest to start from the bottom of the tub, just above the Power Door, and work upwards. SNAP! Depending on your device and/or cases used, divider spacer can be customized for your needs. FTT1000_FTT1000-USB - Version C - Released August 2nd, 2016 - Copernicus Educational Products Inc.
- Page 14 You can use the Cable Clip on the front of the Shelf to keep your cables in place. Push extra cord behind Cable Pocket Door once device is installed. FTT1000_FTT1000-USB - Version C - Released August 2nd, 2016 - Copernicus Educational Products Inc.
-
Page 15: Surface Mounting
® After sliding pin through bracket, lock front door of Tech Tub to secure devices. FTT1000_FTT1000-USB - Version C - Released August 2nd, 2016 - Copernicus Educational Products Inc.
Need help?
Do you have a question about the Tech Tub2 FTT1000 and is the answer not in the manual?
Questions and answers