Table of Contents
Advertisement
Quick Links
Advertisement
Table of Contents

Related Manuals for TRENDnet TEW-831DR


Summary of Contents for TRENDnet TEW-831DR
- Page 1 Cover Page TRENDnet User’s Guide...
-
Page 2: Table Of Contents
Secure your wireless network ..................22 Open a device on your network to the Internet ............47 Connect wireless devices to your router ..............24 DMZ ........................47 Connect wireless devices using WPS ................24 © Copyright 2020 TRENDnet. All Rights Reserved. - Page 3 Reboot your router ...................... 64 Upgrade your router firmware ..................65 Allow/deny ping requests to your router from the Internet ........67 How to capture network packets ................67 Diagnostic Tools ......................68 © Copyright 2020 TRENDnet. All Rights Reserved.
-
Page 4: Product Overview
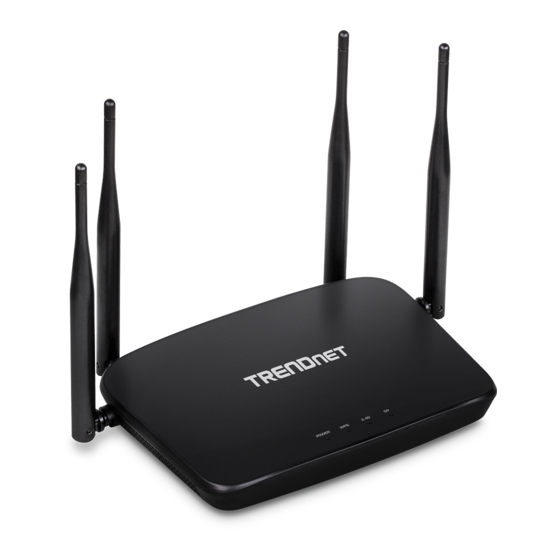
Product Overview In addition to your router, the package includes: If any package contents are missing or damaged, please contact the retail store, online retailer, or reseller/distributor from which the product was purchased. TEW-831DR © Copyright 2020 TRENDnet. All Rights Reserved. -
Page 5: Features
Fast Ethernet Ports 10/100 Mbps Ethernet ports connect up to three devices TRENDnet’s AC1200 Dual Band WiFi Router, model TEW-831DR, is a high-speed wireless ac router designed to handle multiple HD streams in a busy connected home. This dual band wireless ac router creates two concurrent wireless networks—a high performance... -
Page 6: Product Hardware Features
Fi Protected Setup) activate WPS. The Power LED on front panel will blink when WPS is activated. Push and hold for 5 seconds or longer to reset to factory defaults. All LEDs will flash. © Copyright 2020 TRENDnet. All Rights Reserved. -
Page 7: Application Diagram
Solid Blue – 2.4GHz radio is on. Blinking Blue – Data Transmit/Receive. Off – 2.4GHz radio is off. 5G Wireless LEDs Solid Blue – /5GHz radio is on. Blinking Blue – Data Transmit/Receive. Off – 5GHz radio is off. © Copyright 2020 TRENDnet. All Rights Reserved. -
Page 8: Router Setup
Computers/devices with an Ethernet port (also called network port) or wireless networking capabilities. A modem and Internet service to your home, provided by your ISP (modem typically supplied by your ISP). A router to connect multiple devices to the Internet. © Copyright 2020 TRENDnet. All Rights Reserved. -
Page 9: Router Installation
Username: _________ Password: ________________ Service Name: _________________ (Optional) DNS Servers Address 1 (Static IP): _____. _____._____._____ DNS Servers Address 2 (Static IP): _____. _____._____._____ (Optional) Reconnect Mode: Always / On Demand / Manual (Optional) © Copyright 2020 TRENDnet. All Rights Reserved. - Page 10 Note: If your modem includes a battery backup, remove the battery backup as well. 5. Connect your modem to the router WAN port 6. Connect your computer to one of the router LAN ports © Copyright 2020 TRENDnet. All Rights Reserved.
- Page 11 4. Select your WAN interface connection from the dropdown and fill out the required information then click Next. Note: Dynamic IP (DHCP) is typical for most Internet services. You can verify your settings with your Internet Service Provider. © Copyright 2020 TRENDnet. All Rights Reserved.
- Page 12 TEW-831DR TRENDnet User’s Guide 5. Review and change your wireless network settings, then click Next on each page. © Copyright 2020 TRENDnet. All Rights Reserved.
- Page 13 Please wait while changes are being applied. Click Back to go back to previous page, or Cancel to go back to the router login page. © Copyright 2020 TRENDnet. All Rights Reserved.
-
Page 14: Connect Additional Wired Devices To Your Network
Note: If you encounter issues connecting to your network, there may be a problem with your computer or device network settings. Please ensure that your computer or device network settings (also called TCP/IP settings) are configured to obtain IP address settings automatically (also called dynamic IP address or DHCP) and to Obtain DNS Server address settings automatically. © Copyright 2020 TRENDnet. All Rights Reserved. -
Page 15: Basic Router Settings
Repeater: Utilizes wireless radio to simultaneously connect to, and repeat the wireless SSID. Client: Acts as a wireless client, bridging the LAN and wireless networks. WISP: Wireless Internet Service Provider. Select this if the WAN connection is a wireless connection. © Copyright 2020 TRENDnet. All Rights Reserved. - Page 16 Remote Network Name: Enter in the SSID to connect to for the uplink type, then select and enter in the encryption. Or, click on Site Survey. 4. Click Save & Apply to save the configuration. © Copyright 2020 TRENDnet. All Rights Reserved.
-
Page 17: Advanced Router Settings
User Name “admin” and the new password instead of the your ISP. predefined default password. If you reset the device to defaults, you will need to access the router management page use the predefined settings on the side or bottom labels. © Copyright 2020 TRENDnet. All Rights Reserved. -
Page 18: Wireless Settings
Disable - Turns off the ability for wireless devices to find your network. It is still supported wireless devices from obtaining higher performance and data rates. possible for wireless devices to be configured to connect to your wireless network. Disabling this setting will disable WPS functionality. © Copyright 2020 TRENDnet. All Rights Reserved. -
Page 19: Guest Network
It differentiates your wireless network from others around you. It is recommended to use a different name from your primary wireless network to a name that you can easily identify and differentiate from the © Copyright 2020 TRENDnet. All Rights Reserved. - Page 20 Please refer to page 18 to find out about different security types and page 19 for wireless security configuration. Security Mode – Select the wireless security to use for the guest network. © Copyright 2020 TRENDnet. All Rights Reserved.
-
Page 21: Parental Control
4. Enter a Computer Name. Note: If the network device is connected to your router, you can also click the drop-down list to choose one of the network devices (MAC Address/IP Address) detected by your router. © Copyright 2020 TRENDnet. All Rights Reserved. - Page 22 Delete column next to the rule(s) you would like to delete. Then click Delete those checked rules. If you would like to delete all rules, click Delete All. © Copyright 2020 TRENDnet. All Rights Reserved.
-
Page 23: Website Filter
Schedule section, click Define and a table will appear to define the time slots when the specified URL/website should be blocked. Note: Before defining a schedule, please ensure your Time settings are configured correctly. See page 38 to configure Time Settings. © Copyright 2020 TRENDnet. All Rights Reserved. -
Page 24: Wireless Networking And Security
Setting up wireless security is very important. Leaving your wireless network open and standard. If you find that one of your wireless network devices does not support unsecure could expose your entire network and personal files to outsiders. TRENDnet WPA2 encryption, then set your router to either WPA or WPA-Auto encryption. -
Page 25: Secure Your Wireless Network
WEP Key Format ASCII Character set 0-9 & A-F, a-f only Alphanumeric (a,b,C,?,*, /,1,2, etc.) 64-bit key length 10 characters 5 characters 128-bit key length 26 characters 13 characters © Copyright 2020 TRENDnet. All Rights Reserved. - Page 26 Port: Enter the port your RADIUS server is configured to use for RADIUS security. authentication. Note: It is recommended to use port 1812 which is typical default RADIUS port. Shared Secret: Enter the shared secret used to authorize your router with your RADIUS server. © Copyright 2020 TRENDnet. All Rights Reserved.
-
Page 27: Connect Wireless Devices To Your Router
WPS LED will blink to indicate WPS has been activated on your router. (See “Product Hardware Features” on page 2) For connecting additional WPS supported devices, repeat this process for each additional device. © Copyright 2020 TRENDnet. All Rights Reserved. -
Page 28: Pbc (Software/Virtual Push Button)
Note: You should a message on your WPS client device indicating WPS was successful. 4. Wait for your router to finsh the WPS process. Note: You should a message on your WPS client device indicating WPS was successful. © Copyright 2020 TRENDnet. All Rights Reserved. -
Page 29: Advanced Wireless Settings
SSID. wireless name is unique to the device. It is recommended to change it to a name different from the primary SSID 1 and one that you can easily remember. © Copyright 2020 TRENDnet. All Rights Reserved. -
Page 30: Wireless Bridging Using Wds (Wireless Distribution System)
5. To save changes to this section, click Save when finished. Commit your changes to the router by clicking on Apply/Discard Changes in the left-hand menu, and click Apply & Reboot. Note: You can repeat the steps to enable and configure additional SSIDs. © Copyright 2020 TRENDnet. All Rights Reserved. - Page 31 LAN ports 1-4 only on all additional routers and the WAN port is not used. Then, repeat the steps for additional routers you are bridging. To configure WDS bridging between TEW-831DR routers: 1. Log into your router management page (see “Access your router management...
-
Page 32: Wireless Client Bridge Mode
(2.4GHz or 5GHz) and will not provide any of the access control features typically provided in router mode. To configure your TEW-831DR in client bridge mode: 1. Log into your router management page (see “Access your router management... - Page 33 7. To save changes to this section, click Save when finished. Commit your changes to the router by clicking on Apply/Discard Changes in the left-hand menu, and click Apply & Reboot. After applying changes, you can check the connection status under Status > Connection Status. © Copyright 2020 TRENDnet. All Rights Reserved.
-
Page 34: Advanced Settings
Short Preamble: Using a short preamble can potentially increase throughput as the transfer time is 96 microseconds versus the more commonly used long © Copyright 2020 TRENDnet. All Rights Reserved. - Page 35 TEW-831DR TRENDnet User’s Guide © Copyright 2020 TRENDnet. All Rights Reserved.
-
Page 36: Steps To Improve Wireless Connectivity
3. Antenna orientation can also have a large impact on your wireless signal. Use on page 10). the wireless adapter’s site survey tool to determine the best antenna orientation for your wireless devices. 2. Click on Advanced and click on Setup, then click on IPv6 Settings. © Copyright 2020 TRENDnet. All Rights Reserved. - Page 37 Apply & Reboot. Note: Please contact your ISP for IPv6 service availability. Select the IPv6 connection type provided by your ISP. Static IPv6 Auto-configuration (SLAAC/DHCPv6) PPPoE 6to4 Link-Local Only © Copyright 2020 TRENDnet. All Rights Reserved.
-
Page 38: Clone A Mac Address
MAC address. 4. To save changes to this section, click Save when finished. Commit your changes to the router by clicking on Apply/Discard Changes in the left-hand menu, and click Apply & Reboot. © Copyright 2020 TRENDnet. All Rights Reserved. -
Page 39: Change Your Router Ip Address
Primary DNS Server: Enter a primary DNS server IP address to issue to DHCP IP address will use the following format using your new IP address clients. http://(new.ipaddress.here) to access your router management page. You can also use the default login URL http://tew-831dr © Copyright 2020 TRENDnet. All Rights Reserved. -
Page 40: Set Up Dhcp Reservation
Note: You can click Clone your PC’s MAC Address to copy the current computer’s MAC address into the MAC address field. Copy your PC’s MAC – To copy your current computer’s MAC address to the field, you can click Copy. © Copyright 2020 TRENDnet. All Rights Reserved. - Page 41 Delete Selected to delete the reservation. You can also click Delete All to delete all DHCP reservation entries from the list. To save changes when modifying a reservation, click Save. © Copyright 2020 TRENDnet. All Rights Reserved.
-
Page 42: Enable/Disable Upnp On Your Router
& Reboot. 5. To save changes to this section, click Apply when finished. Commit your changes to the router by clicking on Apply/Discard Changes in the left-hand menu, and click Apply & Reboot. © Copyright 2020 TRENDnet. All Rights Reserved. -
Page 43: Denial Of Service (Dos)
Apply/Discard Changes in the left-hand menu, and click Apply & Reboot. 4. To save changes to this section, click Save when finished. Commit your changes to the router by clicking on Apply/Discard Changes in the left-hand menu, and click Apply & Reboot. © Copyright 2020 TRENDnet. All Rights Reserved. -
Page 44: Ipv6 Firewall
Note: Before applying scheduling, please ensure your Time settings are configured correct and you have defined a schedule. See page 38 to configure Time Settings and see page 39 “ Create Schedules” to create a schedule. © Copyright 2020 TRENDnet. All Rights Reserved. -
Page 45: Identify Your Network On The Internet
(NOT your router or wireless network password) 5. To save changes to this section, click Save when finished. Commit your changes to the router by clicking on Apply/Discard Changes in the left-hand menu, and click Apply & Reboot. © Copyright 2020 TRENDnet. All Rights Reserved. -
Page 46: Set Your Router Date And Time
Settings section. Note: Time is specified in 24-hour format. In addition, you can the annual range when daylight saving is activated. click Synchronize with Your Computer’s Time Settings to copy the time and date settings from your computer. © Copyright 2020 TRENDnet. All Rights Reserved. -
Page 47: Create Schedules
Special Applications Gaming 1. Log into your router management page (see “Access your router management page” on page 10). 2. Click on Advanced and click on Setup, then click on Schedule. © Copyright 2020 TRENDnet. All Rights Reserved. -
Page 48: Access Control (Ip Protocol Filter)
Note: Before applying scheduling, please ensure your Time settings are configured correct and you have defined a schedule. See page 41 to configure Time Settings and see page 42 “ Create Schedules” to create a schedule. © Copyright 2020 TRENDnet. All Rights Reserved. -
Page 49: Inbound Filter
You can also delete a rule by clicking under under the Delete column next to the rule you would like to delete. the Delete column next to the rule you would like to delete. © Copyright 2020 TRENDnet. All Rights Reserved. -
Page 50: Open A Device On Your Network To The Internet
You may want to expose a specific computer or device on your network to the Internet (TRENDnet IP cameras default to HTTP TCP port 80 for remote access web requests) on to allow anyone to access it. Your router includes the DMZ (Demilitarized Zone) feature your network to be able to view it over the Internet. - Page 51 It is recommended to assign a static IP address to the device or use DHCP reservation to ensure the IP address of 2. Access TRENDnet IP Camera management page and forward Port 80 (see product the device does not change.
-
Page 52: Special Applications
You can also delete a rule by clicking under the Rule Name – Enter a name for the port trigger rule. Delete column next to the rule you would like to delete. © Copyright 2020 TRENDnet. All Rights Reserved. - Page 53 To define a new schedule, click New Schedule and refer to page 42 “ Create Schedules”. After you have created a new schedule, click the drop-down list and the new schedule will be available for © Copyright 2020 TRENDnet. All Rights Reserved.
-
Page 54: Allow Remote Access To Your Router Management Page
Metric: Enter the metric or priority of the route. The metric range is 1-15, the lowest number 1 being the highest priority. (e.g. 1 ) Interface – Select the interface to assign the route. © Copyright 2020 TRENDnet. All Rights Reserved. -
Page 55: Enable Dynamic Routing
If you have other routing devices that support dynamic routing protocol, you can enable these routing protocols on your router to learn and automatically generate the routes needed between these networks. © Copyright 2020 TRENDnet. All Rights Reserved. -
Page 56: Using External Usb Storage
Apply/Discard Changes in the left-hand menu, and click Apply & Reboot. 4. Computers with the iTunes application installed will be able to discover and browse the media found on the USB storage over the network. © Copyright 2020 TRENDnet. All Rights Reserved. - Page 57 User Name: Enter the user name to be used to access your files. Password: Enter the password for the user name. Re-type Password to confirm. 5. Review the User Account List section. Click Add to add the account. © Copyright 2020 TRENDnet. All Rights Reserved.
-
Page 58: Ftp (File Transfer Protocol) Server
Access From Internet: Selecting Enable will allow access to the USB storage using FTP over the Internet (WAN) and local (LAN) networks. Selecting Disable will disable FTP access over the Internet and allow LAN access only. © Copyright 2020 TRENDnet. All Rights Reserved. -
Page 59: Bittorrent Client Settings
Apply/Discard Changes in the left-hand menu, and click Apply & Reboot. Note: You can click the Settings button at the top to return to the router management page. © Copyright 2020 TRENDnet. All Rights Reserved. -
Page 60: Virtual Private Networking (Vpn)
The additional server settings are optional (not required) and can be configured if any VPN tunnel is configured with a different IP network or subnet. issues are encountered when attempting to establish VPN connectivity. © Copyright 2020 TRENDnet. All Rights Reserved. - Page 61 Advanced > Setup > VPN. the .ovpn extension must be changed to .conf. 3. Once you have downloaded the software, navigate to the location where you downloaded the file and double click to start the installation. © Copyright 2020 TRENDnet. All Rights Reserved.
- Page 62 4. If prompted to run the file, click Run. 6. At the license agreement window, review the license agreement and click I Agree. 5. At the installation window, click Next. 7. At the choose components window, click Next. © Copyright 2020 TRENDnet. All Rights Reserved.
- Page 63 10. At the installation completion window, click Next. 9. At the prompt to install the TAP-Windows adapter, click Install. 11. Make sure to uncheck the “Show Readme” and “Start OpenVPN GUI” options and click Finish. © Copyright 2020 TRENDnet. All Rights Reserved.
- Page 64 14. The OpenVPN system tray icon will appear in the bottom right corner. Right-click the icon to display the configuration menu. 12. Copy the client configuration file(s) (client.ovpn) downloaded from the router to the following path without any sub-folders. C:\Program Files\OpenVPN\config © Copyright 2020 TRENDnet. All Rights Reserved.
- Page 65 You will be able to access resources securely from your router LAN network over the Internet such as shared folders, media, files, etc. Note: To disconnect your VPN client connection, right click OpenVPN system tray icon and select Disconnect. © Copyright 2020 TRENDnet. All Rights Reserved.
-
Page 66: Router Maintenance & Monitoring
2. Click on Advanced and click on Administrator, then click on Settings Management. 3. Next to Reset to Factory Default Settings and Reset, click Load Default. When prompted to confirm this action, click OK. © Copyright 2020 TRENDnet. All Rights Reserved. -
Page 67: Backup And Restore Your Router Configuration Settings
4. A separate file navigation window should open. 5. Select the router configuration file to restore and click Import. (Default Filename: TEW-831DR_config.bin). If prompted, click Yes or OK. 6. Wait for the router to restore settings. © Copyright 2020 TRENDnet. All Rights Reserved. -
Page 68: Upgrade Your Router Firmware
TRENDnet may periodically release firmware upgrades that may add features or fix firmware upgrade procedure to complete successfully. problems associated with your TRENDnet router model and version. To check if there is a firmware upgrade available for your device, please check your TRENDnet model and version using the link. - Page 69 Do not upgrade the firmware using a wireless connection, only using a wired located and select it. network connection. Any interruptions during the firmware upgrade process may permanently 5. Click Apply. If prompted, click Yes or OK. damage your router. © Copyright 2020 TRENDnet. All Rights Reserved.
-
Page 70: Allow/Deny Ping Requests To Your Router From The Internet
WAN ping requests from the Internet 4. To save changes to this section, click Apply when finished. Commit your changes to the router by clicking on Apply/Discard Changes in the left-hand menu, and click Apply & Reboot. © Copyright 2020 TRENDnet. All Rights Reserved. -
Page 71: Diagnostic Tools
Ping Interval: The time interval between each connectivity (ping) test to the specified IP address or URL. Threshold: The number of consecutive times the connectivity (ping) test is allowed to fail before the router initiates an automatic reboot. © Copyright 2020 TRENDnet. All Rights Reserved. -
Page 72: Auto Reboot
Signal Level: Displays the estimated signal strength (RSSI) of the client device to hand menu, and click Apply & Reboot. the router. Link Rate: Displays the estimated link rate of the client device connection to the router. © Copyright 2020 TRENDnet. All Rights Reserved. -
Page 73: Check The Router System Information
PPPoE WAN Type: These buttons will be available in DHCP WAN type only. Connect: Click this option to connect to your DSL ISP Disconnect: Click this option to disconnect from your DSL ISP. © Copyright 2020 TRENDnet. All Rights Reserved. - Page 74 SSID2 assigned to your router. Guest Network / Security Mode: Displays the current 2.4GHz wireless network name and security mode of the guest network assigned to your router. © Copyright 2020 TRENDnet. All Rights Reserved.
-
Page 75: View Your Router Log
Note: Clicking Refresh will refresh the page to ensure display of the most recent logging information. Click Clear will clear and delete all of the current logging information. Log Window © Copyright 2020 TRENDnet. All Rights Reserved. -
Page 76: Router Management Page Structure
Settings Management MAC Filter (Wireless) File Sharing Server Export/Import configuration FTP Server Reset to factory default Station List Reboot BitTorrent Time Eject Device Setup Wireless 5GHz LAN Settings © Copyright 2018 TRENDnet. All Rights Reserved. -
Page 77: Technical Specifications
Multi-Language interface: English, Spanish, French, German, 802.11n: BPSK, QPSK, 16-QAM, 64-QAM, 256-QAM with OFDM Russian/Portuguese 802.11ac: OFDM with BPSK, QPSK and 16/64/256-QAM Pre-encrypted wireless network TR-069 Media Access Protocol CSMA/CA with ACK © Copyright 2020 TRENDnet. All Rights Reserved. - Page 78 0° – 40° C (32° – 104° F) **Due to regulatory requirements, the wireless channels specified cannot be statically assigned, but will be available within the available wireless channels when set to auto. © Copyright 2020 TRENDnet. All Rights Reserved.
-
Page 79: Troubleshooting
Click Internet Protocol (TCP/IP) and click Properties. 5. Please see “Steps to improve wireless connectivity” on page 28 if you continue to d. Then click Obtain an IP address automatically and click OK. have wireless connectivity problems. © Copyright 2020 TRENDnet. All Rights Reserved. -
Page 80: Appendix
2. In the Network Preference window, next to "Show:", select Network Status. You'll see Ethernet and select the TCP/IP tab. your network status and your IP address settings displayed. In MAC OS 10.5/10.6, in the left column, select Ethernet. e. Configure TCP/IP to use DHCP. © Copyright 2020 TRENDnet. All Rights Reserved. - Page 81 3. You may be prompted to enter a security key in order to connect to the network. 4. Enter in the security key corresponding to the wireless network, and click Connect. © Copyright 2020 TRENDnet. All Rights Reserved.
- Page 82 This equipment has been tested and found to comply with the limits for a Class B digital device, TRENDnet hereby declare that the product is in compliance with the essential requirements pursuant to Part 15 of the FCC Rules. These limits are designed to provide reasonable and other relevant provisions under our sole responsibility.
- Page 83 TEW-831DR TRENDnet User’s Guide stabilite dalla direttiva 2014/35/CE, 2014/30/CE, 2014/53/EU, Česky [Czech] TRENDnet tímto prohlašuje, že tento TEW-831DR je ve shodě se 2013/35/EU, 2009/125/CE, 2011/65/EU, e 2012/19/EU. základními požadavky a dalšími příslušnými ustanoveními směrnice 2014/35/ES, 2014/30/ES, 2014/53/EU, 2013/35/EU, Latviski AršoTRENDnetdeklarē, ka TEW-831DR atbilstDirektīvas 2009/125/ES, 2011/65/EU, a 2012/19/EU.
- Page 84 [Slovak] a všetkypríslušnéustanoveniaSmernice 2014/35/ES, 2014/30/ES, 2014/53/EU, 2013/35/EU, 2009/125/ES, 2011/65/EU, a 2012/19/EU. Suomi [Finnish] TRENDnet vakuuttaa täten että TEW-831DR tyyppinen laite on direktiivin 2014/35/EY, 2014/30/EY, 2014/53/EU, 2013/35/EU, 2009/125/EY, 2011/65/EU, ja 2012/19/EU oleellisten vaatimusten ja sitä koskevien direktiivin muiden ehtojen mukainen. Svenska Härmed intygar TRENDnet att denna TEW-831DR står I...
- Page 85 énumérés ci-dessous et ayant un gain admissible maximal. Les types d'antenne non inclus dans cette liste, et dont le gain est supérieur au gain maximal indiqué, sont strictement interdits pour l'exploitation de l'émetteur. © Copyright 2020 TRENDnet. All Rights Reserved.
- Page 86 An RMA number is required in order to initiate warranty service support the event that the RMA unit needs to be replaced, TRENDnet may replace it with a for all TRENDnet products. Products that are sent to TRENDnet for RMA service must refurbished product of the same or comparable model.
- Page 87 TRENDnet User’s Guide shipping from outside of the USA and Canada are responsible for any return shipping LIMITATION OF LIABILITY: TO THE FULL EXTENT ALLOWED BY LAW, TRENDNET ALSO and/or customs charges, including but not limited to, duty, tax, and other fees.
Need help?
Do you have a question about the TEW-831DR and is the answer not in the manual?
Questions and answers