Table of Contents
Advertisement
Available languages
Available languages
Quick Links
Installation & Operating Guide
Read all instructions thoroughly. Keep this guide for future reference.
Proof of purchase is required for Warranty. Staple receipt or proof of
purchase to this manual for easy reference. Warranty non-transferable.
Pg. 1-10 English
Pg. 11-20 Francaise
Pg. 21-30 Espanol
NOTE: Do not plug appliance into power supply if tank is empty.
Record important Hot Water Dispenser information here
Model Number*
HOT WATER DISPENSER
Serial Number*
(1)
®
IM-RH-TRI-171
Advertisement
Table of Contents

Related Manuals for Joneca Ready H2 ot RH-200-SS


Summary of Contents for Joneca Ready H2 ot RH-200-SS
- Page 1 ® HOT WATER DISPENSER Installation & Operating Guide Read all instructions thoroughly. Keep this guide for future reference. Proof of purchase is required for Warranty. Staple receipt or proof of purchase to this manual for easy reference. Warranty non-transferable. Pg. 1-10 English Pg.
-
Page 2: Hot Water Dispenser
Ready H HOT WATER DISPENSER ® COMPONENTS: When you purchase the Ready Hot Water tank, contents include: 1. Quick-connect fi tting for water inlet tube 2. Tank 3. 1/4” or 3/8” Hose Clamp 4. Connector/Reducer adapter for 1/4” or 3/8” center outlet tubing TYPE OF FAUCET REQUIRED Only use an “open vent”... - Page 3 SAFETY INSTRUCTIONS | Please Read All Instructions Carefully Electric Shock Hazard: Using an ungrounded or improperly connected appliance can result in serious injury or death from electrical shock. This appliance must be grounded. This instant hot water dispenser is equipped with a cord that has a grounding conductor and a grounding pin.
-
Page 4: Electrical Requirements
ELECTRICAL REQUIREMENTS Recommended Ground Method For your personal safety, the hot water dispenser is equipped with a power supply cord having a 3-prong ground plug. To minimize possible shock hazard, the cord must be plugged into a mating 3-prong, ground type outlet, grounded in accordance with all local codes and ordinances. - Page 5 IMPORTANT: Observe all governing codes and ordinances. Faucet may be installed in spray hose opening in sink or drilled hole. If drilling another hole is needed, the 13⁄8"/35mm maximum diameter hole is required. Tank must be mounted vertically Quick - connector fittings connects to cold water supply line.
-
Page 6: Typical Installations
Faucet line connects to the cold water supply with quick-connect fitting or compression fitting (not supplied) Dual Handle Faucet (Single Handle Faucet not shown) Connect silicone hose to the center outlet tube on top of tank. Tighten Faucet line connects to filtered cold the connection with ¼”... - Page 7 IMPORTANT INFORMATION - This dispenser is equipped with a self re-setting thermal fuse. Turn the thermostat to OFF position and fi ll tank with water before plugging the power cord from the tank into an electrical outlet. If tank is empty and the thermostat set in the ON position when the power cord is connected, the self re-setting fuse in the heater control will disconnect the current to the heater after approximately one minute, thus protecting the heater from a “dry start”...
-
Page 8: Care And Use
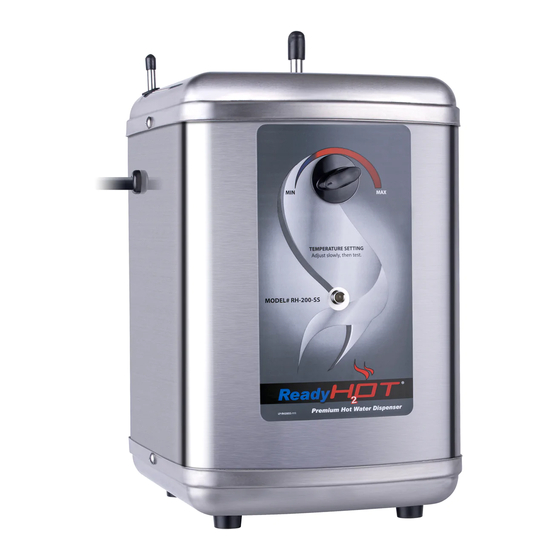
CARE AND USE Electric Shock Hazard: To prevent electrical shock, disconnect power before servicing unit. Use only a properly grounded and polarized electric outlet. ADJUSTING THE THERMOSTAT Factory temperature pre-set is 190°F (88°C) ±5°. To reset the thermostat to that setting, turn the indicator two notches to the right of vertical. -
Page 9: Troubleshooting
TROUBLESHOOTING PROBLEM POSSIBLE CAUSE WHAT TO DO Water and steam spits • Unit is boiling. • Activate faucet lever to release some water from forcefully from spout the tank. May be normal during initial setup. without turning on the • Adjust water temperature using dial on tank front. dispenser faucet. - Page 10 If connected backwards or cross-connected, valve may be damaged. Joneca Corporation 4332 E. La Palma Avenue Anaheim, California 92807 Telephone: 714.993.5997 Fax: 714.993.2126 Website: www.Joneca.com E-Mail: ConsumerService@Joneca.com Call Our Toll Free Help Line 888.8JONECA (10)
-
Page 11: Guide D'installation Et D'utilisation
® DISTRIBUTEUR D'EAU CHAUDE Guide d'installation et d'utilisation Lisez attentivement toutes les instructions. Conservez ce manuel pour vous y reporter ultérieurement. La garantie n’est valide que sur preuve d’achat. Veuillez donc agrafer votre reçu ou preuve d’achat au présent manuel pour y avoir accès facilement. Garantie non transférable. - Page 12 DISTRIBUTEUR D'EAU CHAUDE Ready H ® COMPOSANTS : Contenu de l'emballage du réservoir d'eau chaude Ready Hot : 1. Raccord à branchement rapide pour tuyau d’arrivée d’eau 2. Réservoir 3. Collier de serrage de 1/4 po ou de 3/8 po 4.
- Page 13 CONSIGNES DE SÉCURITÉ | Lisez toutes les instructions attentivement DANGER Risque d'électrocution : L'utilisation d'un appareil dont la prise de terre est absente ou défaillante peut provoquer une électrocution parfois mortelle. Cet appareil doit impérativement être mis à la terre. Ce distributeur d'eau chaude instantané est équipé d'un cordon d'alimentation avec fi...
- Page 14 EXIGENCES ÉLECTRIQUE Méthode de mise à la terre Pour des raisons de sécurité, ce distributeur d'eau chaude est équipé d'un cordon d'alimentation terminé par une prise avec broche de terre. Pour éviter tout risque DANGER d'électrocution, il doit être branché à une prise secteur reliée à la terre, conformément aux codes et décrets en vigueur.
-
Page 15: Étape 1 - Installation Du Réservoir
IMPORTANT : Respecter tous les codes et décrets en vigueur. Le robinet peut être installé sous le brise-jet de l’évier ou un trou percé par vos soins. Dans ce cas, le diamètre ne doit pas dépasser 35 mm (13⁄8”). Le ballon doit être en position verticale... -
Page 16: Installation Type
Le tuyau du robinet se connecte à l’alimentation en eau froide au moyen d’un raccord à branchement rapide ou un raccord à compression (non inclus) Robinet à deux poignées (il existe aussi un robinet à une poignée) Raccordez le tuyau de silicone au tuyau central du réservoir. - Page 17 IMPORTANT Ce distributeur est équipé d'un fusible thermique à réinitialisation automatique. Placez le thermostat sur OFF et remplissez le réservoir avant de brancher le cordon électrique sur le secteur. Si le réservoir est vide et que le thermostat est sur ON lorsque le cordon électrique est branché, le fusible thermique à...
-
Page 18: Entretien Et Utilisation
ENTRETIEN ET UTILISATION Risque d'électrocution : Pour éviter tout risque d'électrocution, mettez DANGER préalablement l'appareil hors tension. Utilisez exclusivement une prise secteur correctement polarisée et à la terre. RÉGLAGE DU THERMOSTAT La température est réglée en usine sur 88 °C (190°F)±5°. Pour réinitialiser le thermostat, faites tourner les deux encoches vers la droite. -
Page 19: Dépannage
DÉPANNAGE PROBLÈME CAUSE POSSIBLE SOLUTION Actionnez le levier du robinet pour évacuer un peu d'eau du • L'eau est en ébullition. • L'eau et de la vapeur ballon. Ce peut être normal lors de la s'échappent avec • Réglez la température de l'eau à l'avant du ballon. mise en service. - Page 20 Joneca Corporation 4332 E. La Palma Avenue Anaheim, California 92807 - USA Téléphone : 714.993.5997 Fax : 714.993.2126 Internet : www.Joneca.com E-Mail : ConsumerService@Joneca.com Assistance téléphonique gratuite 888.8JONECA (20)
-
Page 21: Número De Modelo
DISPENSADOR DE AGUA CALIENTE Guía de Instalación y Operación Lea todas las instrucciones con atención. Guarde esta guía para consultarla en el futuro. NOTA: No enchufe el aparato a la fuente de alimentación eléctrica si el tanque está vacío. Anote la información importante del dispensador de agua caliente Número de Modelo* Número de Serie* (21) - Page 22 DISPENSADOR DE AGUA CALIENTE COMPONENTES: Al comparar el tanque de agua caliente Ready Hot, encontrará el siguiente contenido: Acoplador de conexión rápida del tubo de entrada de agua 2. Tanque 3. Abrazadera para manguera de 1/4 ó 3/8 de pulg. 4.
- Page 23 INSTRUCCIONES DE SEGURIDAD | Por favor lea todas las instrucciones cuidadosamente ¡ ADVERTENCIA Peligro de descarga eléctrica: El uso de un dispositivo sin conexión a tierra o conectado incorrectamente puede provocar lesiones graves o incluso la muerte por una descarga eléctrica. Este aparato debe conectarse a tierra.
-
Page 24: Requerimientos Eléctricos
¡ ADVERTENCIA ! PELIGRO GUARDE ESTAS INSTRUCCIONES. ESTE PRODUCTO ES SOLO PARA USO DOMÉSTICO. Los símbolos de alerta aparecen donde hay información importante de seguridad para que usted esté consciente de los peligros potenciales que pueden ocasionar lesiones graves o incluso la muerte. - Page 25 del fregadero, o bien puede perforar un orifi cio de 35 mm (1.4 pulg.) en el fregadero. Para determinar la ubicación del grifo, tenga en cuenta el tipo de utensilio que va a utilizar cuando use el aparato, como por ejemplo una sartén grande.
-
Page 26: Instalaciones Típicas
de salida central de la parte superior del tanque. Utilice cables de sujeción o bridas para fijar la conexión firmemente. Así tendrá una conexión segura cuando quede instalado correctamente. Verifique que la manguera no esté torcida. Si es necesario, puede recortar la manguera. NOTA: NO alargue la manguera, puesto que esto afectará... - Page 27 PASO 5 - Revise si hay fugas Abra la válvula de la línea de agua. Abra la llave del grifo para llenar el tanque (1 minuto aprox.). Cuando el tanque esté lleno, el agua fluirá desde el grifo. Cierre la llave del grifo. Revise si hay fugas. PASO 6 - Preparación para conectar a la electricidad Vuelva a verificar que el control del termostato esté...
- Page 28 5. Utilice solo limpiadores suaves para limpiar los componentes de plástico y del grifo. Los limpiadores con ácidos, abrasivos, alcalinos o solventes orgánicos harán que se deterioren los componentes de plástico y anularán la garantía. USO Y CUIDADOS ¡ ADVERTENCIA Riesgo de Descarga Eléctrica: Para evitar una descarga eléctrica, desconecte la alimentación eléctrica antes de darle servicio a la unidad.
-
Page 29: Solución De Fallas
SOLUCIÓN DE FALLAS PROBLEMA POSIBLE CAUSA QUÉ HACER • La unidad está hirviendo. • Active la llave del grifo para liberar un poco Salen chorros de agua y vapor del de agua del tanque. Puede ser normal durante la orificio de escape •... - Page 30 Si se conectan al revés o de forma cruzada, la válvula se puede dañar. Joneca Corporation 4332 E. La Palma Avenue Anaheim, California 92807 Teléfono: 714.993.5997 Fax: 714.993.2126 Sitio Web: www.Joneca.com E-Mail: ContactUs@Joneca.com Llame a Nuestro Número de Ayuda Gratis 888.8JONECA...
Need help?
Do you have a question about the Ready H2 ot RH-200-SS and is the answer not in the manual?
Questions and answers
What connectors do you use to connect the 1/4 inch tubing to the hot water dispenser
The Joneca Ready H2 ot RH-200-SS hot water dispenser uses a quick-connect fitting for the water inlet tube and a connector/reducer adapter for the 1/4-inch or 3/8-inch center outlet tubing.
This answer is automatically generated
My hot water heater is beeping. Why?