Table of Contents
Advertisement
Quick Links
CONTENTS
Dear Customers,
This instruction manual describes the most
important connections, settings, and functions for
your new television.
The more detailed instruction manual is available
under www.grundig.com in the "Downloads"
section.
3
4
5
5
6
7
7
7
8
8
8
8
9
9
10
11 SETTINGS
11
11
12
14
14
15
18 TELEVISION-OPERATION
18
19
19
19
19
2
ENGLISH
- ------------------------------------------------------------------------------------------------------------------------------------
20 INTERACTIVEPORTAL(HBBTV)
20
20
21 3DFUNCTION
21
21
22
24 SMARTINTER@CTIVETVAND
HOMENETWORK
24
24
24
30
32
33
34 USBRECORDING
34
34
external data medium
35
35
36
38
38
39 USBOPERATION
39
39
40
41 INFORMATION
41
ENGLISH
Advertisement
Table of Contents

Subscribe to Our Youtube Channel
Related Manuals for Grundig 40VLE8270


Summary of Contents for Grundig 40VLE8270
-
Page 1: Table Of Contents
CONTENTS - ------------------------------------------------------------------------------------------------------------------------------------ Dear Customers, This instruction manual describes the most important connections, settings, and functions for your new television. The more detailed instruction manual is available under www.grundig.com in the "Downloads" section. 3 SETUPANDSAFETY 20 INTERACTIVEPORTAL(HBBTV) ... - Page 2 SETUPANDSAFETY - ----------------------------------------------------------------------------------------------------- Please note the following instructions when Make sure the power cord or the power sup- setting up the television set: ply unit (if provided) are not damaged. This television is designed to receive and dis- Only operate the television with the power play video and audio signals.
-
Page 3: Setupandsafety
SETUPANDSAFETY - ----------------------------------------------------------------------------------------------------- Do not connect any other equipment while the Notesonstillimages device is switched on. Also switch off other Watching the same image for a long time on the equipment before connecting it. screen may cause a still image remains feebly on Do not plug in the power cord of the device the background. -
Page 4: Service Information For Dealers
EN62301 as per European Union framework di- ground surface. rectives 2009/125/EC and 2010/30/EU. Maximum 100 mW e.i.r.p. Indoor applica- With this note, Grundig declares that this appli- tions. ance is in conformity with the main and other rel- evant terms of the 1999/5/EC directive. -
Page 5: Licence
SETUPANDSAFETY - ----------------------------------------------------------------------------------------------------- Licence Under licence from SRS Labs, Inc. Tru- Surround HD, SRS and the symbol are trademarks of SRS Labs, Inc. “Dolby” and the double-D logo are t ra d e m a r ks D o l by L a b o ra t o r i e s . -
Page 6: Connectionandpreparation
CONNECTIONANDPREPARATION - ---------------------------------------------- Connectingtheantenna Connectingexternaldatamedia (socketA) (socketB) To receive digital satellite channels (DVB-S), Connect the »USB2 (HDD)« socket of the connect the satellite antenna cable to the television and the corresponding socket of the data medium (external hard disk) using antenna socket »SATELLITE«... -
Page 7: Connecting A Bluray Player Or A Game Pad (Socket C)
CONNECTIONANDPREPARATION - ---------------------------------------------- ConnectingaBluRayplayerora Insertingbatteriesintothe gamepad(socketC) r emotecontrol Open the battery compartment by removing Connect the »HDMI1«, »HDMI2«, »HDMI3« the lid. or »HDMI4« socket on the television and the corresponding HDMI socket on the BluRay Insert the batteries (2 x 1.5 V micro, for player or the game pad using a standard example R03 or AAA). -
Page 8: Overview
M oves the cursor to the left and may control your TV by your phone after right in the menus. downloading the free »GRUNDIG TV Remote« application from Apple App. Store A ctivates various functions and save functions/settings. -
Page 9: Navigation In The Menus
OVERVIEW ------------------------------------------------------------------------------------------------------------------------------------ Navigationinthemenus Display the required menu item with »OK«. – The menu (e.g. »PICTURE SETTINGS«) The main menu and submenus for your television appears. enable you to select many functions and carry out all required settings. 20.09.2010 15:46 You access the main menu with »MENU« and PICTURE SETTINGS select the submenus using »... -
Page 10: Initial Set-Up And Tuning Television Channels
SETTINGS ----------------------------------------------------------------------------------------------------------------------------------------- Selectinglanguage,countryand Initialset-upandtuning operatingmode t elevisionchannels Switch on the television set from standby with The television set is equipped with automatic » «, »1…0« or »P+« or »P-«. channel search, which searches for satellite – During initial set-up, the »Installation Guide« channels (DVB-S), terrestrial channels (DVB-T), will be displayed. -
Page 11: Tuning The Television Channels From Satellite (Dvb-S)
SETTINGS ----------------------------------------------------------------------------------------------------------------------------------------- Tuningthetelevisionchannels Advancedinstallation fromsatellite(DVB-S) In the »Source Setup« menu, in the »Connec- tion Type« line, select the option »Satellite« You have two options for tuning digital satellite < > with » « or » «. channels. Select the line »Advanced Installation« with The easy installation, »... - Page 12 SETTINGS ----------------------------------------------------------------------------------------------------------------------------------------- 6 Select the line »DISEqC Mode« with » « Importantnote: or » «. Λ It is possible, that some TV channels Select »DiSEqC 1.0« or »DiSEqC 1.1« in (transponders) cannot be found. This is accordance with the existing antenna system caused by a change in satellite parameters <...
-
Page 13: Tuning Terrestrial Television Channels (Dvb-T)
SETTINGS ----------------------------------------------------------------------------------------------------------------------------------------- Tuningterrestrialtelevision Tuningtelevisionchannelsfrom channels(DVB-T) thecableprovider(DVB-C) In the »Source Setup« menu, in the »Connec- In the »Source Setup« menu, in the »Connec- tion Type« line, select the option »Cable« tion Type« line, select the option »Air« with < > < >... -
Page 14: Changing The Program Table For The Digital Channels
SETTINGS ----------------------------------------------------------------------------------------------------------------------------------------- Changingtheprogramtablefor Selectingchannellists thedigitalchannels Open the menu with »MENU«. Channels which are found using the scan are Select the »SOURCE SETUP« menu with » « saved in the »PROGRAM TABLE«. or » « and press »OK« to confirm. Λ –... - Page 15 SETTINGS ----------------------------------------------------------------------------------------------------------------------------------------- Deletingchannels Skippingchannels In the »PROGRAM TABLE« menu, select the You can mark television channels which should Edit mode by pressing » « (red). be skipped when selecting with » « or » «. Λ It is still possible to select them using the number Select the television channel to be deleted buttons.
- Page 16 SETTINGS ----------------------------------------------------------------------------------------------------------------------------------------- Enterownnamesforthefavourites Note: lists(max.6characters) Channels can also be deleted from the favourites lists. Select the channel to be You can enter own names for all favourites lists. < > deleted with » «, » «, » « or » «...
-
Page 17: Basic Functions
TELEVISION-OPERATION -------------------------------------------------------------------------------- Basicfunctions Displayinginformation 1 Display information, press »?« repeatedly. Switchingonandoff – The display disappears automatically after a short while. Press » «, »1…0« or »P+« or »P-« to switch on the television from standby mode. Freeze-frame Press » « to switch the television to standby. If you wish to view a particular scene for longer, you can “freeze”... -
Page 18: Zoom Function
TELEVISION-OPERATION -------------------------------------------------------------------------------- Zoomfunction ElectronicTVguide This function allows you to enlarge the picture The electronic TV guide provides an overview of as required. all programmes that will be broadcast in the next week (for digital channels only). Open the Tools menu with »TOOLS«. Press »GUIDE«... -
Page 19: What Is Hbbtv
INTERACTIVEPORTAL(HBBTV) -------------------------------------------------------------- WhatisHbbTV? The ARD offering includes, for example, a de- To put it simply, HbbTV provides next-generation tailed programme overview, the full offering of interactive teletext with modern structured con- "Das Erste Mediathek” as well as graphical re- tent, high-definition pictures and video sequenc- structured teletext with high-definition pictures. -
Page 20: Important Information About The 3D Function
- ------------------------------------------------------------------------------------------------------------------------ Importantinformationaboutthe Preparingthe3Dfunction 3Dfunction Your Grundig television and 3D shutter glasses can provide the reality of the cinema when you Keep a sufficient distance from the television. watch 3D movies in your home. The optimum distance is three times the height of the screen. -
Page 21: 3Dsettings
3DFUNCTION - ------------------------------------------------------------------------------------------------------------------------ Note: Watching3Dfilms Frame Packing appears in the 3D menu only Notes: if a video signal is sent to the »HDMI« input The 3D function is supported using the »DVB- in HDMI 1.4 format. The »Side by Side« T«, »DVB-C«, »DVB-S«... - Page 22 When Frame Packing mode is enabled in HDMI Note: source, 3D perception may disappear in 3D Refer to the user manual of the Grundig AS- films or 3D games due to a synchronization shift 3D G glasses for further information about arising from HDMI signal.
-
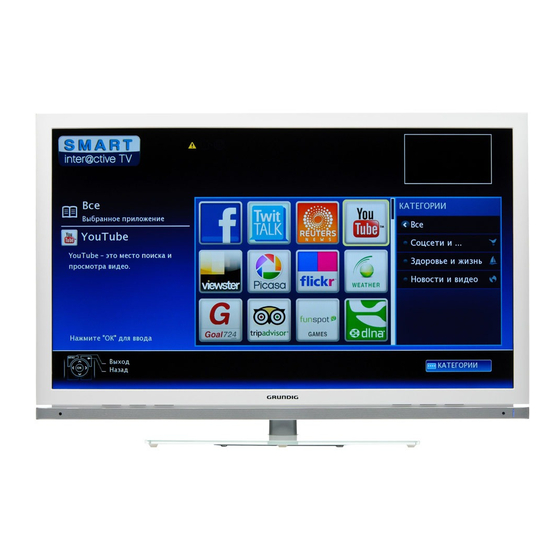
Page 23: What Is Smart Inter@Ctive Tv
SMARTINTER@CTIVETVANDHOMENETWORK WhatisSmartInter@ctiveTV Wirednetwork Wirednetworkconnection Smart Inter@ctive TV provides your television with internet services and pages when con- Connect the output of external modem to the nected to internet. »LAN« socket with Cat 5 cable. Through Interactive TV feature you can run many local and global internet applications. - Page 24 SMARTINTER@CTIVETVANDHOMENETWORK Wirednetworksettings Select »Connection Type« with » « or » « Λ < > and then select »Wired« with » « or » «. There are two ways of making the wired network settings. Select »Network Configuration« with » «...
- Page 25 SMARTINTER@CTIVETVANDHOMENETWORK Manualconnection Select »Netmask« with » « and press »OK«. Enter the Netmask with »1…0« and press Certain networks require Static IP address. If » « (green) to save the value. your network requires a Static IP address, you must enter the »IP Address«, »Netmask«, »Gate- Select »Gateway«...
- Page 26 SMARTINTER@CTIVETVANDHOMENETWORK Wirelessnetworkconnection Notes: The GRUNDIG Wireless WiFi Adapter sup- ports IEEE 802.11 B/G and N communica- tion protocols. We recommend you to use IEEE 802.11N protocol to obtain the best performance in HD video playback. If you use a modem that supports IEEE 802.
- Page 27 SMARTINTER@CTIVETVANDHOMENETWORK Wirelessnetworksettings Select »Network Configuration« with » « or < > » « and then select »AUTO« with » « or » «. Λ There are two ways of making the wireless net- work settings. Select »Select Access Point« with » «...
- Page 28 SMARTINTER@CTIVETVANDHOMENETWORK Manualconnection Select »Network Configuration« with » « or < » « and then select »Manual« with » « or Λ Certain networks require Static IP address. If > » «. »IP Address«, »Netmask«, »Gateway« your network requires a Static IP address, you and »DNS«...
-
Page 29: Smart Inter@Ctive Tv Internet Applications
See page 24 or those applications with their own decision. Grundig cannot be held responsible for such changes. Grundig reserves the right to make all changes such as modifications, restrictions, extensions, transfers and removals on internet applications provided through your Smart Inter@ctive TV. - Page 30 SMARTINTER@CTIVETVANDHOMENETWORK Smartİnter@ctivebrowsermainmenu Application gallery Selected applications Description of the application CATEGORIES Live picture from the Selected Application current TV channel Social&Fun Aplication information Health&Life Submenü for selecting News&Video the different categories. Press OK to Enter Exit Back CATEGORIES Navigationinthemainmenu Playingandotheroptionsinthe...
-
Page 31: Playback The Video, Music And Image Files With Home Network Connection
SMARTINTER@CTIVETVANDHOMENETWORK Playbackthevideo,musicand Press » « (blue) to discover DMS devices on home network. imagefileswithhomenetwork – DMS devices that are discovered appears connection in the menu. With DLNA menu of your television, you can Note: easily access Video, music and photo files on If no DMS device appears, check the server;... -
Page 32: Vtuner Internet Radio
SMARTINTER@CTIVETVANDHOMENETWORK Startplayback vTunerinternetradio In the content of the DMC device select the Many radio stations broadcast through the inter- < > required folder with » «, » «, » « or » « net. vTuner allows you to access many popular Λ... -
Page 33: Information On Recording And Playing Television Programmes
CA module. Copying a programme from a digital television ■ Grundig does not accept liability for any loss ■ channel onto a video or DVD recorder using of saved data on an external data medium. -
Page 34: 35 "Pausing" Time Shift Programmes
USBRECORDING - ------------------------------------------------------------------------------------------------------------- Recordingprogrammes ″Pausing”timeshift programmes You can record programmes. The data for these programmes is recorded on an external data You can pause the programme you are watch- medium and this archive is administered via the ing. This is a useful function, for example if the television. -
Page 35: Presetting Programmes To Be Recorded
USBRECORDING - ------------------------------------------------------------------------------------------------------------- Recordingaprogrammefromthe Presettingprogrammestobe channellist recorded Open the »CHANNEL LIST« with »OK«..usingtheelectronicTVguide Select a television channel with » «, » «, Λ You can use data from the electronic TV guide < > » « or » «... - Page 36 USBRECORDING - ------------------------------------------------------------------------------------------------------------- ...bymanualdataentry Editingrecordingdatainthe timermenu You can preset up to 25 programmes for timer recording. You can edit the data for programmed timer recordings. Press »GUIDE« to display channel informa- Select the timer menu by pressing »GUIDE«, tion. »...
-
Page 37: Playback
USBRECORDING - ------------------------------------------------------------------------------------------------------------- Playback Playbackduringarecording The recorded programmes – whether started During a recording, you can either watch the manually or using the timer function – are stored programme you are currently recording or watch on the external data medium. You can open the a different one that you have already recorded. -
Page 38: The File Browser
USBOPERATION --------------------------------------------------------------------------------------------------------------- Thefilebrowser Basicplaybackfunctions The file browser displays video, audio and Select the data medium by pressing » «, < > picture files stored on external data media. use » «, » «, » « or » « to select the option Λ... -
Page 39: Additional Playback Functions
USBOPERATION --------------------------------------------------------------------------------------------------------------- Notes: Additionalplayback Use » « to select »Up Folder«, when you functions Λ would like to return to the last folder. Use Depending on the file format, the following »Root« (and then press »OK«) to return to additional functions are available: the main folder. -
Page 40: Technical Data
INFORMATION --------------------------------------------------------------------------------------------------------------------- GRUNDIG40VLE8270BL 128QAM and 256QAM Symbol rate: 4.0 Msym/s to 7.4 Msym/s Technicaldata Terrestrial(DVB-T): Operatingvoltage: VHF/UHF band, Bandwidth 7 MHz and 8 MHz 220–240 V, ~ , 50–60 Hz FFT Size: 2k, 8k Powerconsumption: Modulation: 16QAM, 64QAM, QPSK On mode 88 W Guard Interval: 1/4, 1/8, 1/16, 1/32 Standby <0.50 W... - Page 41 Grundig Intermedia GmbH Beuthener Strasse 41 90471 Nürnberg www.grundig.com 72011 777 4000 12/31...
Need help?
Do you have a question about the 40VLE8270 and is the answer not in the manual?
Questions and answers