
Related Manuals for D-Link DIR-841


Summary of Contents for D-Link DIR-841
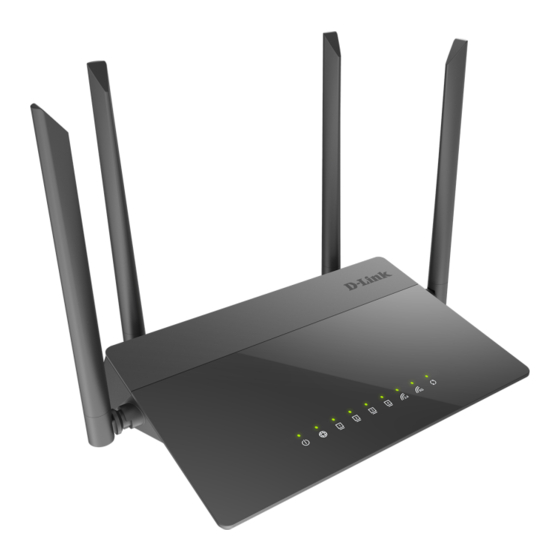
- Page 1 Quick Installation Guide DIR-841 AC1200 Wave 2 MU-MIMO Wi-Fi Router with Gigabit WAN Port...
-
Page 2: Before You Begin
If any of the items are missing, please contact your reseller. The “User Manual” and “Quick Installation Guide” documents are available on D-Link website (see www.dlink.ru). Using a power supply with a different voltage rating than the one included will cause damage and void the warranty for this product. -
Page 3: Default Settings
Router DIR-841 with default settings cannot connect to the Internet. To get started, please set your own password for access to the web-based interface and change the WLAN name (SSID); then, if needed,... -
Page 4: System Requirements And Equipment
DIR-841 Quick Installation Guide System Requirements and Equipment An Android or iPhone mobile device (smartphone or tablet) or a computer • with any operating system that supports a web browser. A PC web browser to access the web-based interface of the router: •... -
Page 5: Pc With Ethernet Adapter
DIR-841 Quick Installation Guide CONNECTING TO PC PC with Ethernet Adapter 1. Connect an Ethernet cable between any of LAN ports located on the back panel of the router and the Ethernet port of your PC. 2. Connect the power cord to the power connector port on the back panel of the router, then plug the power adapter into an electrical outlet or power strip. - Page 6 DIR-841 Quick Installation Guide Obtaining Address Automatically (OS Windows 7) 1. Click the Start button and proceed to the Control Panel window. 2. Select the Network and Sharing Center section. (If the Control Panel has the category view (the Category value is selected from the View by...
- Page 7 DIR-841 Quick Installation Guide 6. Make sure that the Obtain an IP address automatically and Obtain DNS server address automatically choices of the radio buttons are selected. Click the OK button. 7. Click the OK button in the connection properties window.
- Page 8 DIR-841 Quick Installation Guide Obtaining Address Automatically (OS Windows 10) 1. Click the Start button and proceed to the Settings window. 2. Select the Network & Internet section. 3. In the Change your network settings section, select the Change adapter options line.
- Page 9 DIR-841 Quick Installation Guide 6. Make sure that the Obtain an IP address automatically and Obtain DNS server address automatically choices of the radio buttons are selected. Click the OK button. 7. Click the Close button in the connection properties window.
-
Page 10: Pc With Wi-Fi Adapter
DIR-841 Quick Installation Guide PC with Wi-Fi Adapter 1. Connect the power cord to the power connector port on the back panel of the router, then plug the power adapter into an electrical outlet or power strip. 2. Turn on the router by pressing the POWER button on its back panel. - Page 11 DIR-841 Quick Installation Guide Obtaining Address Automatically Connecting to Wireless Network (OS Windows 7) 1. Click the Start button and proceed to the Control Panel window. 2. Select the Network and Sharing Center section. (If the Control Panel has the category view (the Category value is selected from the View by...
- Page 12 DIR-841 Quick Installation Guide 6. Make sure that the Obtain an IP address automatically and Obtain DNS server address automatically choices of the radio buttons are selected. Click the OK button. 7. Click the OK button in the connection properties window.
- Page 13 Quick Installation Guide 9. In the opened window, in the list of available wireless networks, select the wireless network DIR-841 (for operating in the 2.4GHz band) or DIR- 841-5G (for operating in the 5GHz band) and click the Connect button.
- Page 14 DIR-841 Quick Installation Guide Obtaining Address Automatically Connecting to Wireless Network (OS Windows 10) 1. Click the Start button and proceed to the Settings window. 2. Select the Network & Internet section. 3. In the Change your network settings section, select the Change adapter options line.
- Page 15 9. In the opened window, in the list of available wireless networks, select the wireless network DIR-841 (for operating in the 2.4GHz band) or DIR- 841 -5G (for operating in the 5GHz band) and click the Connect button.
- Page 16 DIR-841 Quick Installation Guide If you perform initial configuration of the router via Wi-Fi connection, note that immediately after changing the wireless default settings of the router you will need to reconfigure the wireless connection using the newly specified settings.
-
Page 17: Configuring Router
DIR-841 Quick Installation Guide CONFIGURING ROUTER Connecting to Web-based Interface Start a web browser. In the address bar of the web browser, enter the domain name of the router (by default, dlinkrouter.local) with a dot at the end and press the Enter key. Also you can enter the IP address of the device (by default, 192.168.0.1). - Page 18 DIR-841 Quick Installation Guide If you configured the device previously, after access to the web-based interface the login page opens. Enter the username (admin) in the Username field and the password you specified in the Password field, then click the LOGIN button.
- Page 19 DIR-841 Quick Installation Guide The Summary page displays general information on the router and its software.
- Page 20 DIR-841 Quick Installation Guide The Home page displays links to the most frequently used pages with device's settings. The web-based interface of the router is multilingual. You can select the needed language upon the initial configuration of the web-based interface of the router or in the System / Configuration section of the menu.
-
Page 21: Initial Configuration Wizard
Click the OK button and wait until the factory default settings are restored. If you perform initial configuration of the router via Wi-Fi connection, please make sure that you are connected to the wireless network of DIR-841 (see the WLAN name (SSID) in the Default Settings section, page 3) and click the NEXT button. - Page 22 DIR-841 Quick Installation Guide 1. Click YES in order to leave the current language of the web-based interface or click NO to select another language. 2. On the next page, click the CONTINUE button.
-
Page 23: Selecting Operation Mode
DIR-841 Quick Installation Guide Selecting Operation Mode Select the needed operation mode and click the NEXT button. Router In order to connect your device to a wired ISP, on the Device mode page, from the Connection method list, select the Wired connection value. - Page 24 DIR-841 Quick Installation Guide Access Point or Repeater In order to connect your device to a wired router for adding a wireless network to the existing local network, on the Device mode page, from the Connection method list, select the Wired connection value. Then from the Work mode list select the Access point value.
-
Page 25: Changing Lan Ipv4 Address
This configuration step is available for the Access point, Repeater, and Client modes. 1. Select the Automatic obtainment of IPv4 address to let DIR-841 automatically obtain the LAN IPv4 address. 2. In the Hostname field, you should specify a domain name of the router using which you can access the web-based interface after finishing the Wizard. - Page 26 DIR-841 Quick Installation Guide If you want to manually assign the LAN IPv4 address for DIR-841, do not select the Automatic obtainment of IPv4 address checkbox and fill in the IP address, Subnet mask, Hostname fields and, if needed, the Gateway IP address field.
- Page 27 DIR-841 Quick Installation Guide Wi-Fi Client This configuration step is available for the WISP Repeater, Repeater, and Client modes. 1. On the Wi-Fi Сlient page, click the WIRELESS NETWORKS button and select the network to which you want to connect in the opened window.
-
Page 28: Configuring Wan Connection
DIR-841 Quick Installation Guide Configuring WAN Connection This configuration step is available for the Router and WISP Repeater modes. You should configure your WAN connection in accordance with data provided by your Internet service provider (ISP). Make sure that you have obtained all necessary information prior to configuring your connection. - Page 29 DIR-841 Quick Installation Guide PPPoE, IPv6 PPPoE, PPPoE Dual Stack, PPPoE + Dynamic IP (PPPoE Dual Access): Enter authorization data provided by your ISP (the username (login) in the Username field and the password in the Password field). Click the Show icon ( ) to display the entered password.
- Page 30 DIR-841 Quick Installation Guide PPTP + Dynamic IP or L2TP + Dynamic IP: Enter authorization data provided by your ISP (the username (login) in the Username field and the password in the Password field). Click the Show icon ( ) to display the entered password.
- Page 31 DIR-841 Quick Installation Guide 2. If your ISP uses MAC address binding, select the Clone MAC address of your device checkbox. 3. If the Internet access is provided via a VLAN channel, select the Use VLAN checkbox and fill in the VLAN ID field.
-
Page 32: Configuring Wireless Network
DIR-841 Quick Installation Guide Configuring Wireless Network This configuration step is available for the Router, Access point, WISP Repeater, and Repeater modes. 1. On the Wireless Network 2.4 GHz page, in the Network name field, specify your own name for the wireless network in the 2.4GHz band or leave the value suggested by the router. - Page 33 DIR-841 Quick Installation Guide 5. If you want to create an additional wireless network isolated from your LAN in the 2.4GHz band, select the Enable guest network checkbox (available for the Router and WISP Repeater modes only). 6. In the Network name field, specify your own name for the guest wireless network or leave the value suggested by the router.
-
Page 34: Configuring Lan Ports For Iptv/Voip
DIR-841 Quick Installation Guide Configuring LAN Ports for IPTV/VoIP This configuration step is available for the Router mode. 1. On the IPTV page, select the Is an STB connected to the device checkbox. 2. Select a free LAN port for connecting your set-top box. - Page 35 DIR-841 Quick Installation Guide 5. On the VoIP page, select the Is an IP phone connected to the device checkbox. 6. Select a free LAN port for connecting your IP phone. 7. If the VoIP service is provided via a VLAN channel, select the Use VLAN ID checkbox and fill in the VLAN ID field.
-
Page 36: Changing Web-Based Interface Password
DIR-841 Quick Installation Guide Changing Web-based Interface Password On this page you should change the default administrator password. To do this, enter a new password in the User’s interface password and Password confirmation fields. You may set any password except admin. Use digits, Latin letters (uppercase and/or lowercase), and other characters available in the US keyboard layout. -
Page 37: Configuring Local Area Network
DIR-841 Quick Installation Guide Configuring Local Area Network 1. Go to the Connections Setup / LAN page. 2. If needed, change the IPv4 address of the router's LAN interface and the mask of the local subnet. To do this, click the IPv4 tab and specify needed values in the IP address and Mask fields in the Local IP Address section. - Page 38 DIR-841 Quick Installation Guide 4. IPv4 address assignment. By default, the built-in DHCP server of the router assigns IPv4 addresses to the devices of the LAN. If you want to manually assign IPv4 addresses, disable the DHCP server (click the...
- Page 39 DIR-841 Quick Installation Guide 5. IPv6 address assignment. By default, the devices of the LAN automatically assign IPv6 addresses to themselves (the Stateless value is selected from the Mode of dynamic IPv6 address assignment drop-down list in the Dynamic IPv6 Addresses section on the IPv6 tab).
-
Page 40: Specifications
DIR-841 Quick Installation Guide SPECIFICATIONS Hardware · Processor RTL8197FH (1GHz) · 64MB, DDR2, built in processor · Flash 8MB, SPI · 10/100/1000BASE-T WAN port Interfaces · 4 10/100BASE-TX LAN ports · Power LEDs · Internet · 4 LAN LEDs ·... - Page 41 DIR-841 Quick Installation Guide Software · Support of IEEE 802.1X for Internet connection Network functions · DHCP server/relay · Advanced configuration of built-in DHCP server · Stateful/Stateless mode for IPv6 address assignment, IPv6 prefix delegation · Automatic obtainment of LAN IP address (for access point/repeater/client modes) ·...
- Page 42 Management and monitoring TELNET/WEB (HTTP/HTTPS) · Multilingual web-based interface for configuration and management · Support of D-Link Assistant application for Android and iPhone smartphones · Notification on connection problems and auto redirect to settings · Firmware update via web-based interface ·...
- Page 43 DIR-841 Quick Installation Guide Wireless Module Parameters · Support of client mode Advanced functions · WMM (Wi-Fi QoS) · Information on connected Wi-Fi clients · Advanced settings · Smart adjustment of Wi-Fi clients · Guest Wi-Fi / support of MBSSID ·...
- Page 44 DIR-841 Quick Installation Guide Wireless Module Parameters · 802.11a (typical at room temperature 25 °C) Transmitter output power 14dBm at 6, 9, 12, 18, 24Mbps 13dBm at 36Mbps 12.5dBm at 48Mbps The maximum value of the 12dBm at 54Mbps transmitter...
- Page 45 DIR-841 Quick Installation Guide Wireless Module Parameters Receiver sensitivity · 802.11a (typical at PER < 10% (1000-byte PDUs) at room temperature 25 °C) -82dBm at 6Mbps -81dBm at 9Mbps -79dBm at 12Mbps -77dBm at 18Mbps -74dBm at 24Mbps -70dBm at 36Mbps...
- Page 46 DIR-841 Quick Installation Guide Wireless Module Parameters 5GHz, HT20 -82dBm at MCS0 -79dBm at MCS1 -77dBm at MCS2 -74dBm at MCS3 -70dBm at MCS4 -66dBm at MCS5 -65dBm at MCS6 -64dBm at MCS7 5GHz, HT40 -79dBm at MCS0 -76dBm at MCS1...
- Page 47 DIR-841 Quick Installation Guide Wireless Module Parameters VHT80 -76dBm at MCS0 -73dBm at MCS1 -71dBm at MCS2 -68dBm at MCS3 -64dBm at MCS4 -60dBm at MCS5 -59dBm at MCS6 -58dBm at MCS7 -53dBm at MCS8 -51dBm at MCS9 Modulation schemes ·...
-
Page 48: Safety Rules And Conditions
DIR-841 Quick Installation Guide SAFETY RULES AND CONDITIONS Please carefully read this section before installation and connection of the device. Make sure that the power adapter and cables are not damaged. The device should be used only as intended in accordance with the documents. -
Page 49: Technical Support
Quick Installation Guide TECHNICAL SUPPORT You can find software updates and user documentation on our website. D-Link provides its customers with free support within the product's warranty period. Customers can contact the technical support group by phone or by e- mail/Internet.
Need help?
Do you have a question about the DIR-841 and is the answer not in the manual?
Questions and answers