Table of Contents
Advertisement
Quick Links
Topic:
Thank you for purchasing one of our XOMAX products!
We appreciate your confidence. Enjoy your brand new multimedia unit!
i
Please read the following manual carefully before you install and use the
unit. Please save this manual in case you will need to clarify further possible
questions regarding installation and usage of our product.
We recommend you to let the technician install the unit in your vehicle.
You can find the detailed manual for your XOMAX product on our homepage:
www.xomax.de/download
https://www.xomax.de
XOMAX
Installation Manual
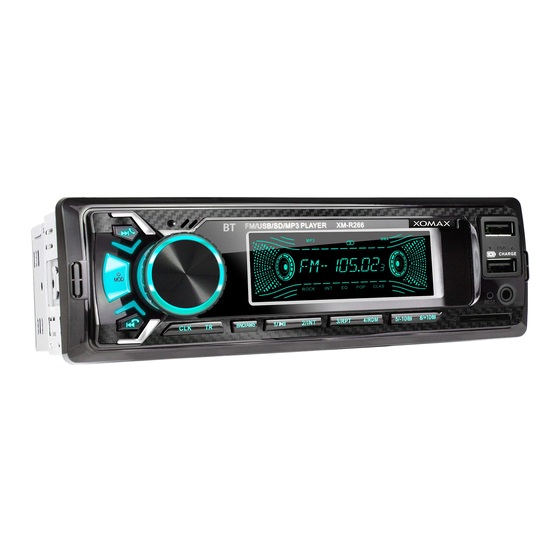
XM-R265
XM-R266
XM-RD269
XM-R270
1
EN
XOMAX
Advertisement
Table of Contents

Summary of Contents for Xomax XM-RD269
- Page 1 Please save this manual in case you will need to clarify further possible questions regarding installation and usage of our product. We recommend you to let the technician install the unit in your vehicle. You can find the detailed manual for your XOMAX product on our homepage: www.xomax.de/download XOMAX...
-
Page 2: Table Of Contents
Deinstallation instructions (EU DoC) 1) Prepair the instruments ....10 2) Unloose the fixation sheet ...10 3) Use the extraction keys ....11 4) Unloose the unit ......11 5) Remove the unit ......12 6) Remove the installation accesso- ries ..........12 XOMAX https://www.xomax.de... -
Page 3: Safety Instructions And Precautions
+40° C. Leave all the repair operations to If it's too cold or too hot inside of the professional technicians. vehicle, do not turn the unit on until the inside temperature of the cabin XOMAX https://www.xomax.de... -
Page 4: Cleaning Of The Unit
Moisture To avoid the danger of fire or the electric shock do not put the unit in to the moist environment (e.g. adverse weather conditions, inappropriate wet cleaning etc.) XOMAX https://www.xomax.de... -
Page 5: Installation
ISO interface. Do not ever connect the warranty becomes invalid. negative speaker cables with the vehicle » Before the installation please make body. sure that the vehicle has the 12 Volt » This unit is designed and construed on-board power supply. XOMAX https://www.xomax.de... - Page 6 » Do not ever connect the negative speaker cables with the vehicle body. » To ensure a flawless performance of XOMAX https://www.xomax.de...
-
Page 7: Installation Instructions
Therefore it might cause from product to product some irrelevant discrepancies, especially regarding some depictions (e.g. installation accessories) You can find the detailed manual for your XOMAX product on our homepage: www.xomax.de/download 4. unit 1) Installation steps 1. -
Page 8: Fixture Of The Fixation Sheet
Please remove first the installation frame inside the cell (slot). frame (if it's included in delivery) from the unit. Please use for that the extrac- tion keys ( see page 10 ). Possibly the faceplate should be removed as well. XOMAX https://www.xomax.de... -
Page 9: Connect The Unit
This procedure refers to the step 2 and may be possibly skipped as well. As earlier required ( see page 8 ), the dual-ended bolt of the unit should be pulled through one of the holes in the XOMAX https://www.xomax.de... -
Page 10: Deinstallation Instructions
2) Unloose the fixation sheet due to the lack of space the unit initially was not fixated to the fixation metal First of all please unloose the fixation sheet. nut on the rear side of the unit by spanner (wrench). XOMAX https://www.xomax.de... -
Page 11: Use The Extraction Keys
4) Unloose the unit When and as long as inserted, the extraction keys press the holding side-cogs outwards so that the unit is released from the installation frame and can be carefully pulled out. XOMAX https://www.xomax.de... -
Page 12: Remove The Unit
6) Remove the installation accessories Finally remove all the installation accessories such as fixation metal sheet and installation frame. XOMAX https://www.xomax.de... -
Page 13: Connection Schedule - Cinch Multicore
Topic: Connection schedule – Cinch multicore Connection schedule – Cinch multicore radio-antenna passiv loud speakers rear left front left front right rear right XOMAX https://www.xomax.de... -
Page 14: Connection Schedule - Iso Plug
Topic: Connection schedule – ISO plug Connection schedule – ISO plug phantom power radio-aerial active permanent current +12V ignition ground rear right front right front left rear left loud speakers XOMAX https://www.xomax.de... -
Page 15: Iso Plug Configuration
If connection may lead to grievous errors. these problems appear the connections A4 and A7 should be interchanged. XOMAX https://www.xomax.de... -
Page 16: Common Solutions
Common solutions Common solutions The following advices are generally valid and refer to diverse XOMAX models with the similar characteristics. Please note that some articles may refer not to your model exactly and contain the describtion of features and functions that your model does not support. - Page 17 Please interchange the cables for ignition plus (red) and will be lost. for steady plus (yellow). Caution: If these wires have fuses the latter should be interch- anged as well. XOMAX https://www.xomax.de...
-
Page 18: Specifications
Hereby STEL Multimedia GmbH declares Slot type ........microSD that the radio equipments "XM-R265", File system ........FAT32 "XM-R266", "XM-RD269" and "XM-R270" Bluetooth (only for XM-R265, is in compliance with Directive 2014/53/ XM-R266 and XM-R270): Version ........2.0 Class 2 The full text of the EU declaration of Profile .... -
Page 19: Recycling Of An Old Unit
The proper disposal of these products contributes to environment protection. To find the nearest collection point or recycling yard please consult your municipal administration. Made for STEL Multimedia GmbH Paewesiner Weg 20 13581 Berlin GERMANY XOMAX https://www.xomax.de... -
Page 20: Eu Declaration Of Conformity (Eu Doc)
Car Multimedia System mit Bluetooth, XOMAX, XM-R265 Car Multimedia System mit Bluetooth, XOMAX, XM-R266 Car Multimedia System mit Bluetooth, XOMAX, XM-R270 Car Multimedia System mit Bluetooth, XOMAX, XM-RD269 den grundlegenden Anforderungen der oben genannten Richtlinie entspricht. Zur Beurteilung des Gerätes wurden folgende Normen herangezogen:...


Need help?
Do you have a question about the XM-RD269 and is the answer not in the manual?
Questions and answers