Table of Contents
Advertisement
Quick Links
Topic:
EN
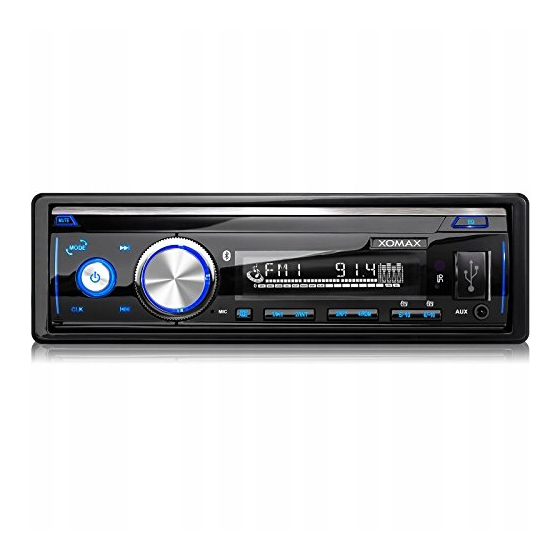
Installation Manual
XM-RSU253BT
Thank you for purchasing one of our XOMAX products!
We appreciate your confidence. Enjoy your brand new multimedia unit!
i
Please read the following manual carefully before you install and use the
unit. Please save this manual in case you will need to clarify further possible
questions regarding installation and usage of our product.
We recommend you to let the technician install the unit in your vehicle.
You can find the detailed manual for your XOMAX product on our homepage:
www.xomax.de/download
XOMAX
1
X M - R S U 2 5 3 B T
Advertisement
Table of Contents

Summary of Contents for Xomax XM-RSU253BT
- Page 1 Please save this manual in case you will need to clarify further possible questions regarding installation and usage of our product. We recommend you to let the technician install the unit in your vehicle. You can find the detailed manual for your XOMAX product on our homepage: www.xomax.de/download XOMAX...
-
Page 2: Table Of Contents
2 Unloose the fixation sheet ....11 3 Use the extraction keys ....12 4 Unloose the unit ......12 6 Remove the unit ......13 5 Remove the installation accessories ........13 Connection schedule – Cinch multicore XOMAX X M - R S U 2 5 3 B T... -
Page 3: Safety Instructions And Precautions
Do not use the unit any further since not turn the unit on until the inside you detect any kind of technical temperature of the cabin descends. problems. XOMAX X M - R S U 2 5 3 B T... -
Page 4: Cleaning Of The Unit
To avoid the danger of fire or the electric shock do not put the unit in to the moist environment (e.g. adverse weather conditions, inappropriate wet cleaning etc.) XOMAX X M - R S U 2 5 3 B T... -
Page 5: Installation
» The connection cables may not be correctly please refer to the manuals of cutted or short-circuited. Otherwise the the both devices. warranty becomes invalid. » Please ensure that the negative XOMAX X M - R S U 2 5 3 B T... - Page 6 Otherwise the unit does not turn off automatically, causing the discharging of the vehicle battery. » To avoid a rogue and hazardous short circuit do not lay the yellow cable XOMAX X M - R S U 2 5 3 B T...
-
Page 7: Installation Instructions
Therefore it might cause from product to product some irrelevant discrepancies, especially regarding some depictions (e.g. installation accessories) You can find the detailed manual for your XOMAX product on our homepage: www.xomax.de/download 4. unit 1 Installation steps 5. -
Page 8: Fixture Of The Fixation Sheet
(if it's included in delivery) from the unit. Please use for that the extrac- tion keys ( see page 11 ). Possibly the faceplate should be removed as well. XOMAX X M - R S U 2 5 3 B T... -
Page 9: Connect The Unit
As earlier required ( see page 9 ), the dual-ended bolt of the unit should be pulled through one of the holes in the XOMAX X M - R S U 2 5 3 B T... -
Page 10: Deinstallation Instructions
First of all please unloose the fixation sheet. nut on the rear side of the unit by spanner (wrench). XOMAX X M - R S U 2 5 3 B T... -
Page 11: Use The Extraction Keys
4 Unloose the unit When and as long as inserted, the extraction keys press the holding side-cogs outwards so that the unit is released from the installation frame and XOMAX X M - R S U 2 5 3 B T... -
Page 12: Remove The Unit
5 Remove the installation accessories Finally remove all the installation accessories such as fixation metal sheet and installation frame. XOMAX X M - R S U 2 5 3 B T... -
Page 13: Connection Schedule - Cinch Multicore
Topic: Connection schedule – Cinch multicore Connection schedule – Cinch multicore XOMAX X M - R S U 2 5 3 B T... -
Page 14: Connection Schedule - Iso Plug
Topic: Connection schedule – ISO plug Connection schedule – ISO plug phantom power radio aerial active permanent current ignition rear right front right front left rear left XOMAX X M - R S U 2 5 3 B T... -
Page 15: Iso Plug Configuration
If connection may lead to grievous errors. these problems appear the connections A4 and A7 should be interchanged. XOMAX X M - R S U 2 5 3 B T... -
Page 16: Iso Cable Connections
» The ISO port may be already inte- grated in certain units. In this case an additional ISO cable becomes unnecessary. We recommend you to let a professional technician install the unit in your vehicle. XOMAX X M - R S U 2 5 3 B T... - Page 17 Common solutions Common solutions The following advices are generally valid and refer to diverse Xomax models with the similar characteristics. Please note that some articles may refer not to your model exactly and contain the describtion of features and functions that your model does not support.
- Page 18 Please interchange the cables for ignition plus and for will be lost. steady plus. Caution: If these wires have fuses the latter should be interch- anged as well. XOMAX X M - R S U 2 5 3 B T...
- Page 19 The proper disposal of these products contributes to environment protection. To find the nearest collection point or recycling yard please consult your municipal administration. XOMAX X M - R S U 2 5 3 B T...


Need help?
Do you have a question about the XM-RSU253BT and is the answer not in the manual?
Questions and answers