Table of Contents
Advertisement
Quick Links
Advertisement
Table of Contents

Related Manuals for Technics SL-1200M7L


Summary of Contents for Technics SL-1200M7L
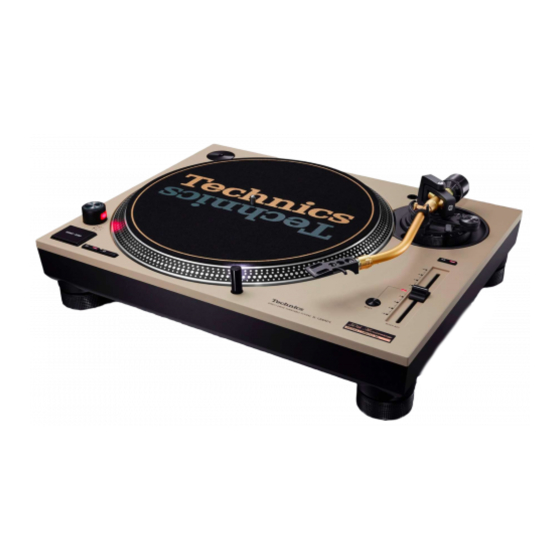
- Page 1 SL-1200M7L Direct Drive Turntable System Operating Instructions...
- Page 2 This is our philosophy. With a combination of our love of music and the vast high-end audio experience of the Technics team, we stand committed to building a brand that provides the ultimate emotive musical experience by music lovers, for music lovers.
-
Page 3: Table Of Contents
Attaching the head shell ......09 For further support on your product, please visit our Before fitting the turntable ...... 11 website: www.technics.com/uk/ Fitting the turntable ........ 11 Fitting the slipmat ........11 Attaching the balance weight ....11 Features ... -
Page 4: Safety Precautions
Safety precautions Warning Caution Unit Unit To reduce the risk of fire, electric shock or Do not place sources of naked flames, such product damage, as lighted candles, on this unit. This unit may receive radio interference - Do not expose this unit to rain, moisture, dripping or splashing. - Page 5 Caution for AC Mains Lead (For the AC mains plug of three pins) Before use For your safety, please read the following text Remove the connector cover. carefully. This appliance is supplied with a moulded three How to replace the fuse pin mains plug for your safety and convenience.
-
Page 6: Accessories
Dust cover (1 pc.) (TYL0332) (TTFA0617) Slip sheet (1 pc.) (TBMX5371) Technics LABEL for limited One of each is provided with edition (1 pc.) the unit. The slip sheet is a thin, transparent sheet. Be careful not to throw it away by mistake. - Page 7 In case of repair, might be different in colour, logo, and so on. The model numbers of the accessories are as of February 2022. They are subject to change without notice. Keep the packaging materials after taking out the goods. You will need them when carrying the product over long distances.
-
Page 8: Parts Name
Parts Name Numbers such as ( 00) indicate reference pages. Arm clamp ( 14) Arm rest ( 14) EP record adaptor ( 18) Front Centre spindle ( 10) Head shell stand ( 09) Balance weight ( 11) START-STOP button ( ... -
Page 9: Putting The Player Together
Putting the player together Attaching the cartridge Attention The cartridge should be parallel on the shell When performing scratching (including reverse head when viewed from the top play), use a cartridge and stylus for DJs. and side (the illustration is the top view). Attach a cartridge (store-bought) tentatively. - Page 10 Putting the player together (continued) In order to prevent damage during shipping, some of the equipment has been disassembled. Put the player together in the following order. Attention Before setting up, put on the stylus guard to protect the stylus tip, return the tone arm to the arm rest and fix it with the arm clamp.
-
Page 11: Before Fitting The Turntable
Before fitting the turntable Fitting the slipmat Remove the magnet cover from Lay the slipmat and slip sheet on the turntable. the turntable. There is a magnet and its cover on the A record on the rotating turntable can be stopped manually as well as rotated back side of the turntable. -
Page 12: Connections And Installation
Connections and installation Turn off all units and disconnect the AC mains lead from the socket before making any connections. Connect the AC mains lead only after all other connections are completed. Be sure to connect the PHONO earth lead. Otherwise mains hum may occur. ... -
Page 13: Installation
Installation Install the unit on a horizontal surface Notes for installation protected from vibrations. Before you move the unit, turn the unit off, Keep this unit as far as possible from speakers. pull out the power plug and disconnect all ... -
Page 14: Adjustment
Adjustment Horizontal balance Stylus pressure Preparation Preparation Remove the stylus cover, taking care not Return the tone arm to the arm rest and fix it to damage the stylus, then release the arm with the arm clamp. clamp. ... -
Page 15: Anti-Skating
Anti-skating Turn the balance weight to adjust Turn the anti-skating control to to the appropriate stylus pressure adjust it to the same value as the for the cartridge. stylus pressure control. The stylus pressure control will turn together with the balance weight. ... -
Page 16: Tone Arm Height
Adjustment (continued) Tone arm height Make this adjustment only if the cartridge you When you don’t know the cartridge are using makes it necessary. height (H) or when you don’t use the supplied head shell Preparation Remove the stylus cover, taking care not to ... -
Page 17: Armlift Height
Armlift height Operation settings Allows for LED colour setting, reverse playback Make an adjustment according to your setting, 78 rpm setting, torque setting and brake cartridge if necessary. setting. ①Turn the unit off and pull out the power plug. Preparation ② ... -
Page 18: Playing Records
Playing records Preparation 1 Put a record (not included) on the turntable. 2 Take off the stylus cover and release the arm clamp. Turn [ON/OFF] to turn the unit on. Press [START-STOP]. The strobe light comes on. 33- rpm is The turntable starts revolving. - Page 19 Press [RESET] to light the pitch To temporarily stop play control RESET LED lamp. Lift the cue lever. The stylus lifts off the record. The unit plays at a preset pitch (33- , 45 To start play again, lower the cue lever. or 78 rpm) regardless of the [PITCH ADJ] position.
-
Page 20: Pitch Control (Fine Adjustment To Pitch)
Pitch control (fine adjustment to pitch) Press [RESET] to turn off the To measure pitch RESET LED lamp. The four rows of strobe mirrors around the edge of the turntable can assist you in measuring pitch. Press the pitch range select button to select the pitch range. -
Page 21: Maintenance
Maintenance Care of the parts Moving the unit Thoroughly clean dust off the stylus and Repackage the unit in the packaging it came record. Take off the head shell with the cartridge and Keep the packaging materials after taking out clean the stylus using a soft brush. -
Page 22: Troubleshooting Guide
Troubleshooting guide Before requesting service, make the below checks. If you are in doubt about some of the check points, or if the remedies indicated in the chart do not solve the problem, contact your dealer. No power. Is the AC mains lead plugged in? Plug the mains lead in firmly. -
Page 23: Specifications
Specifications General Tone arm section Power supply AC 110 - 240 V, 50/60 Hz Type Static Balance Power 8.0 W (ON) Effective length 230 mm consumption Approx. 0.2 W (OFF) Overhang 15 mm Dimensions 453 x 169 x 353 mm Tracking error Within 2°... - Page 24 Headquarter Address : Panasonic Corporation Kadoma, Osaka, Japan Importer for UK : Panasonic UK, a branch of Panasonic Marketing Europe GmbH Maxis 2, Western Road, Bracknell, Berkshire, RG12 1RT Authorized Representative in Europe : Panasonic Marketing Europe GmbH Panasonic Testing Centre Winsbergring 15, 22525 Hamburg, Germany Panasonic Corporation Web Site: http://www.panasonic.com...
Need help?
Do you have a question about the SL-1200M7L and is the answer not in the manual?
Questions and answers