Table of Contents
Advertisement
Quick Links
Download this manual
See also:
Quick Reference Manual
Advertisement
Table of Contents

Related Manuals for GoVideo Offroad DP8240


Summary of Contents for GoVideo Offroad DP8240
- Page 1 ������ ������� �������� ��� ������ ������ ����� ��������������� 82-154-00480...
-
Page 2: Table Of Contents
GoVideo shall not be liable for any errors contained herein or for any damages arising out of or related to this document or the information contained herein, even if GoVideo has been advised of the possibility of such damages. This document is intended for informational and instructional purposes only. -
Page 3: Fcc And Safety Information
FCC and Safety Information NOTE: This equipment has been tested and found to comply with the limits for a Class B digital device pursuant to part 15 of the FCC Rules. These limits are designed to provide reasonable protection against harmful interference in a residential installation. -
Page 4: Important Safety Instructions
Important Safety Instructions Read these instructions. Keep these instructions. Heed all warnings. Follow all instructions. Do not use this apparatus near water. Clean only with a damp cloth. Do not block any of the ventilation openings. Install in accordance with the manufacturer’s instructions. -
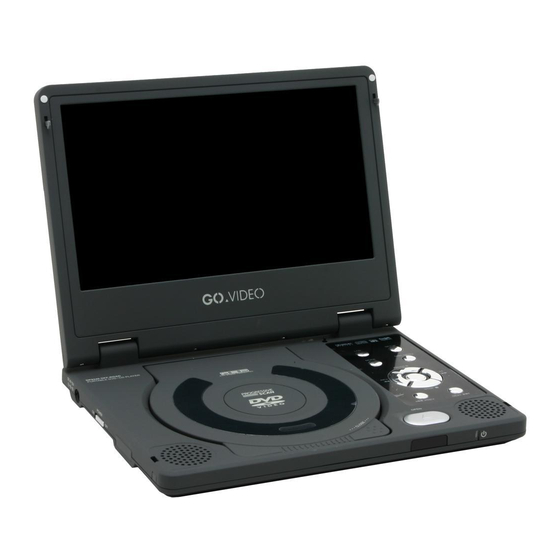
Page 5: Player Overview
Player Overview Front View LCD Screen Built-in Speakers CLOSE - Press here to close the disc tray. - Scans backward at variable speed during playback. Moves left in menus. OPEN - Opens the disc tray. PREV - Skips to previous chapter/track during playback. -
Page 6: Other Views
Player Overview Other Views Front Left Side Right Side IR sensor - Receives input from remote control. Power indicator - Lights when player is DC In Jack - Connects to the supplied AC adapter. POWER Switch - Turns the player on and off. -
Page 7: Remote Control
Player Overview Remote Control Auto Info. Search Setup Menu Mode Title Play Sel. CR2025 OPEN PUSH INFO. - Displays current chapter/track information. SETUP/AUTO SEARCH - Displays the player’s Setup menu. Source PAUSE menus. MODE - Switches between S-Video and Progressive Scan modes. ... -
Page 8: Quick Start
Step 2 - Connect AC Adapter Connect the supplied AC adapter to the DC IN jack on the left side of the portable DVD player. • You can also use the supplied cigarette lighter adapter in place of the AC adapter to supply power to the player. -
Page 9: Battery Pack Overview
Before using the battery pack, make sure it is fully charged. You can charge the battery pack directly or while it is attached to the portable DVD player. Charging the Battery Pack Directly Plug the supplied AC adapter into a standard power outlet, and then connect it to the DC IN jack on the left side of the battery pack. -
Page 10: Connections
Set your TV to its appropriate Video input to view the player. Enhanced Video Connections For improved picture quality, you can connect the portable DVD player to a TV equipped with S-Video or Progressive Scan inputs. These connections require special cables with mini-plug adapters (not included). S-Video Connections... -
Page 11: Enhanced Audio Connections
Connections Enhanced Audio Connections For enhanced audio quality, you can connect the portable DVD player to a stereo system or digital amplifier/receiver. Analog Audio Connections Connect the supplied audio cable (mini-plug to RCA stereo) from the Audio Out jack on the side of the player to the left and right Audio Inputs on your stereo or 2-channel analog receiver. -
Page 12: Dvd Playback
Press DISC MENU. The portable DVD player stops playback, and then displays the menu screen. When not in use... When the portable DVD player is not in use, remove the disc and press POWER to turn off the player. Then close the display panel. -
Page 13: Forward/Reverse Scan
Press PREV during playback. • When you press the PREV through a chapter, the portable DVD player returns to the beginning of the chapter. The player then skips a chapter each time you press the PREV button. -
Page 14: Special Dvd Features
Special DVD Features Displaying Scene Information Press INFO. during playback. • Press INFO. repeatedly to display the title number, chapter number, and other information on the screen. Stop Displaying Scene Information • Press INFO. repeatedly until the scene information disappears. Audio You can change the audio sound track to any available language on the disc. -
Page 15: Angle
• ANGLE will only function on discs where different angles have been recorded. Mute To mute the volume on the portable DVD player. Press MUTE during playback. • To resume normal sound, press MUTE repeatedly until “MUTE OFF” appears on the screen. -
Page 16: Other Disc Playback
Other Disc Playback Playing Audio CDs Before You Begin... Connect the portable DVD player to a power outlet and plug in headphones or listen to the built-in speakers. You can also connect the player to external equipment, such as a TV and/or audio system. If you do this, remember to: •... -
Page 17: Playing Kodak Picture Cds
You can play Kodak Picture CDs in your portable DVD player. Basic Playback Load a Kodak Picture CD. • After a few seconds, the portable DVD player starts a slide show of available images. Press INFO. to view the current image number and total number of images. -
Page 18: Playing Jpeg Picture Cds
You can play JPEG picture CDs in your portable DVD player. Basic Playback Load a JPEG Picture CD. • After a few seconds, the portable DVD player starts a slide show of available images. Press INFO. to view the current image number and total number of images. -
Page 19: Playing Mp3 Cds
• Press press PLAY during playback. Playing CDs with MP3 and JPEG files The portable DVD player will play CDs with MP3 and JPEG files. The operations are the same as with standard MP3 and JPEG discs. to stop playback. -
Page 20: Language Setup
Language Setup On Screen Display (OSD) Language You can select among various languages for the player’s on-screen display (OSD). Press SETUP in Stop mode. Press to select “Language Setup”, then press PLAY / SELECT. Press to select “OSD”, then press ... -
Page 21: Audio Language [Dvd]
Language Setup Audio Language [DVD] You can select your preferred language for DVD audio sound tracks. Press SETUP in Stop mode. Press to select “Language Setup”, then press PLAY / SELECT. Press to select “Audio”, then press ... -
Page 22: Screen Setup
Screen Setup TV Type The TV Type feature allows you to set your preferred aspect ratio for DVD movies. Choose from the following: • 4:3 PS (Pan & Scan) - Crops widescreen movies to fit a standard television. • 4:3 LB (Letterbox) - Shows the full width of widescreen movies on a standard television with black bars above and below the picture. -
Page 23: Tv System
Press SETUP or select “Exit Setup” on the Setup Menu screen. Video Output If you are using the S-Video/Progressive Scan video output to connect the portable DVD player to your TV, you must specify which connection you are using (S- Video or P-SCAN). •... -
Page 24: Audio Setup
Audio Setup Digital Audio Output [DVD] The digital audio output jack (labeled “Coaxial”) is used to output the audio signal recorded on DVD discs to an external amplifier/receiver. The player provides three options for this audio signal: • SPDIF/PCM - Select if you are using a 2-channel digital amplifier. -
Page 25: Custom Setup
Custom Setup Parental Control [DVD] The Parental Control feature enables you to block playback of movies based on their rating. For example, if you set the rating level to PG-13, the player will block playback of movies rated PG-13, R, NC-17 and X unless the correct password is entered. -
Page 26: Angle Mark [Dvd]
Press To exit the Setup menu Press SETUP or select “Exit Setup” on the Setup Menu screen. Restore Defaults Select “Default” to restore the portable DVD player to its factory default settings. Press SETUP in Stop mode. Press PLAY Press PLAY •... -
Page 27: Lcd Setup
LCD Setup The LCD button provides a shortcut to four common screen adjustments. Panel Press the LCD button. Use the buttons to select “Panel” then press Panel Normal Invert 16:9 Color Bright Zoom Close Use the buttons to select from the ... -
Page 28: Troubleshooting
Troubleshooting Before requesting service for the portable DVD player, check the chart below for a possible cause of the problem you are experiencing. Some simple checkups or a minor adjustment on your part may eliminate the problem and restore proper operation.•... -
Page 29: Disc Handling & Maintenance
Disc Handling & Maintenance Handling Precautions • Hold the disc by the edges so the surface will not be soiled with fingerprints. • Fingerprints, dirt and scratches can cause skipping and distortion. • Do not write on the label side with a ball-point pen or other writing utensil. -
Page 30: Parts & Accessories
Parts & Accessories A number of replacement parts and optional accessories are available for this portable DVD player. To order any of the items below, please contact the GoVideo Parts department at: • 800-736-7679, option 8 • or via e-mail at: parts@govideo.com... -
Page 31: Limited Warranty
This warranty covers internal operating parts and service/labor to repair or replace covered parts in this GoVideo product for 90 days labor, 1 year parts, from the date of purchase, defined as follows: (1) Original Consumer Retail Purchase; (2) First Rental Purchase Agreement; or (3) First Lease Purchase Agreement (the “Warranty Period”).
Need help?
Do you have a question about the Offroad DP8240 and is the answer not in the manual?
Questions and answers