Table of Contents
Advertisement
Advertisement
Table of Contents

Related Manuals for GoVideo DV2150


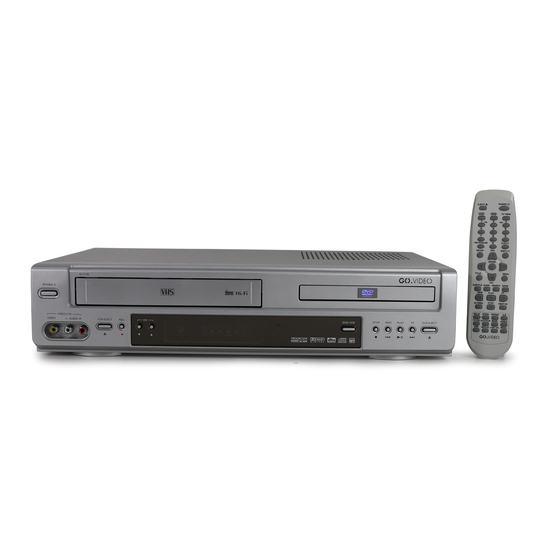
Summary of Contents for GoVideo DV2150
- Page 1 ������ ������ ����� ��� � ���...
-
Page 2: Progressive Scan Output
Congratulations! Congratulations on your purchase of this DV2150 DVD+VCR. We know you will enjoy this product for many years to come. In case service is required, please take a moment to write down your serial number located on the rear panel of the DVD+VCR: ______________________________________ ��������... -
Page 3: Table Of Contents
Clock Settings / Channel Settings / 23 Other VCR Settings / 25 ©2004 GoVideo. All rights reserved. Manufactured under license from Dolby Laboratories. “Dolby” and the double-D symbol are trademarks of Dolby Laboratories. “DTS” and “DTS Digital Surround” are trademarks of Digital Theater Systems, Inc. -
Page 4: Important Safety Instructions
Important Safety Instructions Read Instructions – All the safety and oper- ating instructions should be read before the product is operated. Retain Instructions – The safety and operat- ing instructions should be retained for future reference. Heed Warnings – All warnings on the prod- uct and in the operating instructions should be adhered to. - Page 5 Important Safety Instructions tion with regard to proper grounding of the mast and supporting structure, grounding of the lead-in wire to an antenna discharge unit, size of grounding conductors, location of antenna–discharge unit, connection to grounding electrodes, and requirements for the grounding electrode.
-
Page 6: Welcome
Welcome This Chapter provides a basic introduction to the DVD+VCR, including an overview of the front panel, rear panel, and remote control. DVD+VCR User’s Guide... -
Page 7: Unpacking
Unpacking Check to make sure the following items are included with your DVD+VCR: ������ ������� ��� ��������� ������ ����� � ����� ��������� ����� ������������ ���� Compatible Media This DVD+VCR will play the following media: • • Audio CD • Video CD/Super Video CD •... -
Page 8: Front Panel
Front Panel Front panel overview: � � � � � 1 POWER button 2 VCR deck 3 DVD deck 4 AUDIO/VIDEO IN jacks 5 VCR EJECT button 6 RECORD button 7 CHANNEL / buttons NOTE: NOTE: • CHILD LOCK - To lock the DVD+VCR to prevent unwanted operation, press and hold the POWER button on the remote control for 8 seconds. -
Page 9: Front Panel Display
Front Panel Display Front panel display overview: � � 1 VHS tape loaded indicator 2 VCR mode indicator 3 DVD mode indicator 4 Disc loaded indicator � � � � � 5 Record indicator 6 DVD+VCR status indicator 7 Timer Record indicator 1 - Welcome... -
Page 10: Rear Panel
Rear Panel Rear panel overview: DIGITAL AUDIO OUT � DVD Playback Only These jacks are for DVD playback only: 1 STEREO AUDIO OUT jacks 2 DIGITAL AUDIO OUT jack 3 COMPONENT VIDEO OUT jacks 4 S-VIDEO OUT jack DVD+VCR User’s Guide DVD ONLY AUDIO COMPONENT... -
Page 11: Remote Control
Remote Control Remote control overview: � � � � � � � � � �� �� �� �� NOTE: NOTE: • Press VCR to control the VCR deck and press DVD to control the DVD deck. • Press TV VIEW to switch among all inputs. 1 EJECT button 2 VCR button DVD button... -
Page 12: Connections
Connections This Chapter shows you how to connect the DVD+VCR to your TV and other home theater components. • • DVD+VCR User’s Guide For basic connections, see pages 13-15. For advanced connections, see pages 16-19. -
Page 13: Antenna/Basic Cable Connections
Antenna/Basic Cable Connections If you are using an antenna or basic cable TV service: Connect the RF coaxial cable from the antenna or cable wall outlet to the rear panel of the DVD+VCR as shown. Connect the DVD+VCR to your TV; see page 15. DIGITAL AUDIO OUT �������... -
Page 14: Cable Box/Satellite Receiver Connections
Cable Box/Satellite Receiver Connections If you are using a cable box or satellite receiver: Connect an RF cable from the wall outlet to the cable box/receiver. Connect an RF cable from the cable box/receiver to the DVD+VCR. Connect the DVD+VCR to your TV; see page 15. DVD ONLY AUDIO COAXIAL... -
Page 15: Basic Tv Connections
Turn on your TV and set it to channel 3 or 4 (for the RF connection) or the appropri- ate Video input (for the AV connection). • The GoVideo splash screen appears. Continue with Chapter 3 to set up your DVD+VCR. -
Page 16: Enhanced Video Options
Enhanced Video Options If your TV has S-Video or Component Video inputs, you can enjoy superior picture quality (DVD playback only). Connect an S-Video cable OR set of Component Video cables from the DVD+VCR to your TV as shown. Select the S-Video or Component Video input on your TV to view the DVD+VCR. -
Page 17: Enhanced Audio Options
Enhanced Audio Options If you have a stereo system or digital audio receiver, you can enjoy superior sound quality. Connect left/right audio cables from the DVD+VCR to your stereo system as shown. Connect a digital coaxial cable from the DVD+VCR to your digi- tal audio receiver as shown. -
Page 18: Rear Av Connections
Rear AV Connections You can view and record from an external device, such as a VCR, connected to the rear AV inputs. Connect standard audio/video cables from the outputs of the external device to the inputs of the DVD+VCR as shown. Press TV VIEW until Video 1 appears on the screen. -
Page 19: Front Av Connections
Front AV Connections You can view and record from an external device, such as a camcorder or video game, connected to the front panel AV inputs. Connect standard audio/video cables from the outputs of the external device to the inputs of the DVD+VCR as shown. Press TV VIEW until Video 2 appears on the screen. -
Page 20: Setup
Setup This Chapter allows you to customize the DVD+VCR to meet your system requirements and personal preferences. Key settings: • • DVD+VCR User’s Guide To set the time and date, see page 22. To search for TV channels, see page 23. -
Page 21: Vcr Setup Menu Overview
VCR Setup Menu Overview The VCR Setup menu allows you to set your preferences for the VCR deck. Choose from these categories: • Clock Settings – see page 22 • Channel Settings – see page 23-24 • Other VCR Settings – see page 25 About VCR Menu Navigation •... -
Page 22: Clock Settings / Clock
Clock Settings Time & Date Set Allows you to set the date and time.This is necessary if you wish to record TV shows with the timer record feature. Press VCR, then press SETUP. Select Clock Set > Time and Date Set. Set the time and date: •... -
Page 23: Channel Settings
Channel Settings Auto Channel Search Automatically searches for all available TV stations from antenna or cable TV. If you are using a cable box or satellite receiver, you do not need to run Auto Channel Search. Press VCR, then press SETUP. Select Channel Set >... -
Page 24: Signal Type
Channel Settings Signal Type Specifies whether the DVD+VCR is connected to an antenna or cable TV source. Press VCR, then press SETUP. Select Channel Set > Signal Type. Choose from the following: Antenna - Select if the DVD+VCR is connected to an antenna. Cable - Select if the DVD+VCR is con- nected to a cable TV source. -
Page 25: Other Vcr Settings
Other VCR Settings Auto Play Starts VCR playback automatically when you load a tape with its record safety tab removed. Press VCR, then press SETUP. Select Functions > Auto Play. Turn Auto Play on or off. When finished, press SETUP to exit. Auto TV/VCR Controls whether the DVD+VCR switches to VCR mode automatically when turned... -
Page 26: Dvd Setup Menu Overview
DVD Setup Menu Overview The DVD Setup menu allows you to set your preferences for the DVD deck. Choose from these categories: • Language Settings – see page 27 • Video Settings – see pages 28 • Audio Settings – see page 29 •... -
Page 27: Language Settings
Language Settings On-Screen Display Language Sets the default language for the DVD Setup menu and on-screen displays. In DVD Stop mode, press SETUP. Select Language > OSD Language. Select your preferred OSD language (English, French, or Spanish). Audio Language Sets your preferred language for DVD audio soundtracks. -
Page 28: Video Settings
Video Settings TV Aspect Ratio Sets your preferred aspect ratio for DVD movies. In DVD Stop mode, press SETUP. Select Video > TV Aspect. Choose from the following: 4:3 PS - Select if you have a standard TV and prefer to have widescreen movies cropped to fit the screen. -
Page 29: Audio Settings
Audio Settings Digital Out Sets the format of the digital audio signal from the rear panel Coaxial jack. In DVD Stop mode, press SETUP. Select Audio > Digital Out. Choose from the following: Bitstream - Select if the DVD+VCR is connected to a 5.1 channel amplifier/ receiver with a Dolby Digital or DTS decoder. -
Page 30: Other Dvd Settings
Other DVD Settings On-Screen Display Enables the on-screen display (OSD), which provides feedback on the current status of the DVD+VCR. In DVD Stop mode, press SETUP. Select Others > OSD. Turn On-Screen Displays on or off. Screen Saver Enables the built-in screensaver, which appears automatically if the DVD+VCR is left in Stop for longer than 5 minutes. -
Page 31: Parental Control
Other DVD Settings Parental Control Blocks playback of rated DVDs based on their content. Not all discs are rated. In DVD Stop mode, press SETUP. Select Others > Parental. Select the desired Parental Control rating from “1 Kids” to “8 Adult” , then press ENTER. -
Page 32: Operations
Operations This Chapter shows you how to use the most com- mon features of the DVD+VCR, including playing tapes and discs, and recording TV shows. • • DVD+VCR User’s Guide For playback features, see pages 33-36. For recording features, see pages 37-40. -
Page 33: Basic Dvd+Vcr Playback
Basic DVD+VCR Playback Playing a DVD Follow these steps to play a DVD. Press POWER to turn on the DVD+VCR. Press DVD to control the DVD deck. Load your DVD in the disc tray with the label side up. • Press EJECT to open and close the disc tray. -
Page 34: Special Dvd Playback Options
Special DVD Playback Options REW/FF Scans backward/forward at variable speeds. In Pause mode, plays in slow mo- tion (forward only). PREV/NEXT Skips to the next or pre- vious Chapter. In Pause mode, steps forward one frame at a time. DISPLAY Displays current playback information, including the Title and Chapter number,... -
Page 35: Special Vcr Playback Options
Special VCR Playback Options REW Scans backward at high speed. In Stop mode, re- winds the tape. FF Scans forward at high speed. In Stop mode, fast- forwards the tape. In Pause mode, plays in slow mo- tion (forward only). NEXT... -
Page 36: Other Disc Playback
Other Disc Playback Audio CD/MP3 CD Playback To play an Audio CD or MP3 files on CD-R/RW: Load the Audio CD or CD-R/RW in the disc tray. • Audio CDs begin playback auto- matically. Press PREV/ NEXT to browse the tracks. -
Page 37: Basic Recording
Basic Recording Recording from TV Follow these steps to record a TV show to a VHS tape. Press POWER to turn on the DVD+VCR. Press VCR to control the VCR deck. Insert a recordable tape (a tape with the record safety tab intact). ������... -
Page 38: Special Recording Options
Special Recording Options Recording from a Camcorder or other Device Follow these steps to record from a camcorder or other external device. Connect your external device to the front panel or rear panel inputs; see pages 18-19. Press TV VIEW repeatedly to select: Video 1 - If the device is connected to the rear Audio/Video Inputs. -
Page 39: Timer Recording
Timer Recording Setting a Timer Recording Follow these steps to program a timer recording. Before you begin, make sure the Time and Date are set correctly (see page 22), and that your tape has enough available space to record the desired program. - Page 40 Timer Recording Use to select the source of the program (Antenna or Cable), then press . Use the (or 0-9) buttons to set the date, start time, and end time, pressingafter each. Use to set the Tape Speed to SP, SLP or AUTO, then press .
-
Page 41: Help
Help This Chapter shows you how to get help, including troubleshooting, customer support, and warranty information. -
Page 42: Customer Support
The Troubleshooting section below will help you solve common issues with your DVD+VCR. If you don’t find the answers you need here, you can contact our Customer Service Department as follows: Phone (800) 736-7679 E-Mail customersupport@govideo.com www.govideo.com Troubleshooting SYMPTOM No power. No picture. - Page 43 Troubleshooting SYMPTOM Picture from external input is distorted Some channels are skipped over when using CH Picture or sound of broadcasting channel is weak or missing. Camcorder image via AV input to DVD+VCR is not shown on TV screen. Cannot record or did not record successfully.
-
Page 44: Product Care & Handling
Product Care & Handling Placement and handling • The picture and sound of a nearby TV, VCR, or radio may be distorted dur- ing playback. In this case, position the unit away from the TV, VCR, or radio, or turn off the unit after removing the disc. -
Page 45: Technical Specifications
Technical Specifications Specifications Power Supply...AC 120V, 60Hz Power Consumption ...24W (supplementary 4W) Weight ...9.9 lbs (4.5kg) Dimensions (WxHxD)...17.1” x 3.7” x 10.0” (435mm x 93mm x 255mm) Operating Temp..Operating Temp..Operating Temp. 41°F~95°F (5°C~35°C) Operating Humidity ...< 80% RH Channel Coverage...VHF: 2-13 CH / UHF: 14-69 CH / Cable: 1-125 Signal Type...NTSC COLOR... -
Page 46: Warranty
What is Covered and How Long This warranty covers internal operating parts and service/labor to repair or replace covered parts in this GoVideo product for 90 days labor, 1 year parts, from the date of purchase, defined as follows: (1) Original Consumer Retail Purchase;... -
Page 47: Index
Index A-B Repeat 34 Add/Remove Channels 23 Angle 34 Aspect Ratio 28 Audio 34, 35 Audio CD Playback 36 Audio Language 27 Audio Settings 29 Auto Channel Search 23 Auto Clock Set 22 Auto Play DVD 31 VCR 25 Auto Repeat 35 Auto TV/VCR 25 Cable Box Setup 24 Channel Settings 23...
Need help?
Do you have a question about the DV2150 and is the answer not in the manual?
Questions and answers