Table of Contents
Advertisement
Quick Links
Advertisement
Table of Contents
Troubleshooting

Related Manuals for Leviton EMB HubLite A8810-PS1


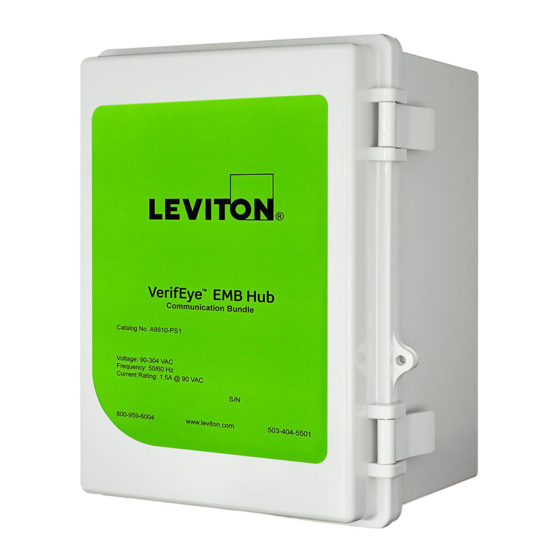
Summary of Contents for Leviton EMB HubLite A8810-PS1
- Page 1 EMB HubLite – Data Acquisition HUBLite Leviton Installation and Operation Manual Model A7810 Date January 15 , 2013 Page 1 A7810 EMB HubLite – Data Acquisition HubLite GlobalTestSupply www. .com Find Quality Products Online at: sales@GlobalTestSupply.com...
- Page 2 Leviton's authorized facilities; (4) has not been sold subject to other warranty terms specified at the time of sale; and (5) is still owned by the original purchaser. This warranty provides specific legal rights that may be varied by state law. Leviton's products are not designed for life or safety applications.
-
Page 3: Table Of Contents
Table of Contents Overview ........................................4 Installation Checklist ...................................... 4 Markings and Symbols: ....................................4 Hardware Overview ......................................5 A7810 Features and Specifications ................................5 Electrical Connections ....................................6 Hardware Installation ....................................6 Basic Network Configuration ..................................7 Laptop/Computer Setup .................................... 8 EMB HubLite Administration Overview .............................. -
Page 4: Overview
Overview The EMB HubLite™ data acquisition system is designed to allow owners and managers of commercial and industrial facilities with a cost-effective means of gathering crucial information in a timely manner. To meet these requirements, the EMB HubLite™ system provides the installer with all the tools necessary to install and configure the hardware and software with a minimum of time and investment. -
Page 5: Hardware Overview
Hardware Overview A7810 Features and Specifications Processor Arm9 embedded CPU Operating System Linux 2.6 Memory 32 MB ram, 16 MB flash Ethernet, Pulse (x4), power, alarm Console 2 x 16 character LCD, two pushbuttons RJ45 10/100 Ethernet, full half duplex, auto polarity Protocols Modbus/TCP, TCP/IP, PPP, HTTP/HTML, FTP, NTP, XML, SNMP-Trap Power Supply... -
Page 6: Electrical Connections
Electrical Connections A7810 EMB HubLite Hardware Installation Step 1 - Unpack materials: Remove all materials from shipping box and verify all required components are available Step 2 - Mount the EMB HubLite on the wall, panel or other appropriate location. Step 3 –... -
Page 7: Basic Network Configuration
192.168.40.50 This indicates that the EMB HubLite has loaded properly and is ready for configuration and connection to the network and sensors. If the “Alive” light does not come on or the LCD display does not cycle to the above screen, verify that the power wires and connector are secure, and are providing required power as specified. -
Page 8: Laptop/Computer Setup
[Main Menu] TCP/IP Config B. Press the Select button once to select the TCP/IP Config menu options, first of which is DHCP: [TCP/IP Config] DHCP on/off C. Press the Menu button once to see the TCP/IP IP Address menu: [TCP/IP Config] IP Address D. - Page 9 EMB HubLite EMB HubLite LAN connected HubLite Direct connected HubLite The remainder of this section will assume the installer has brought a laptop to the site, and will connect the laptop to the building LAN, or directly to the EMB HubLite. Attach the laptop to the EMB HubLite or LAN as shown in figure 6, Ethernet hookup.
-
Page 10: Emb Hublite Administration Overview
If you have an in-house data collection service, you should enter the address of your data HUBLite in this field. Leviton also provides a service called Building Manager Online that can collect and report data for you. If you are using the BMO service, the target address to upload data should be set to http://www.buildingmanageronline.com/upload.php... -
Page 11: Security
Security The EMB HubLite has three levels of security. These are “operator”, “user” and “admin”. When using a browser to access the EMB HubLite, basic http authentication is used to prompt your browser for a username and password. The admin account uses “admin”... -
Page 12: Device List Options
Note: not all Modbus devices have built in driver support in the EMB HubLite. If a device appears in the list with “Unknown” in the status column, you may need to upgrade the firmware on the EMB HubLite to access the device. At the bottom of the device list page under the Type column, a link is shown that will show all the Modbus devices with built in driver support provided in the firmware. - Page 13 Show [setup]: Display links for Device configuration and Advanced configuration for each device. Show [devinfo]: Display the communications options including baud rate, serial number and firmware version (when available) for all devices in the Modbus device list. Show [stats]: show packet counters for all devices in the device list. These include Sent: Total number of packets sent to this Modbus address.
-
Page 14: Device Details
Device Details. The device detail page will show a list of all the pulse input data points, alarm settings and console options. The data point names for most devices are automatically entered. At the top of the page, the status of the device is shown. This usually reports “ok”... -
Page 15: Device Configuration
Device Configuration When the “configure” button is clicked from the device details page, the screen will be refreshed, with the same information, however the device name, alarm settings and console checkbox will be available. Device Name: This field allows you to specify a name for the device such as “main building power” or other useful name to indicate the location or function of the device. -
Page 16: Manual Device Add Options
Manual Device Add Options Modbus devices may be added manually by clicking on the “add” link on the bottom of the Modbus device list page. This option is intended for use when adding devices to the configuration profile prior to installing the physical hardware, or configuring Modbus/TCP devices that will not automatically populate in the Modbus device list. -
Page 17: Troubleshooting Pulse Inputs
Troubleshooting Pulse inputs If the device you have attached does not appear in the Modbus device list, check the following: Verify the pulse input connections are correct . Verify the status LED blinks for the specific pulse input in question. Try bridging the two terminals at the input of the EMB HubLite to verify the input LED turns on. -
Page 18: Modbus Framework
SMTP Mail HUBLite Address: The IP address of the email HUBLite on the LAN that will process and forward the email message to the recipient. Sender Address: The address that will be used in the “From:” line of the email. This is helpful in identifying the source of the alarm email message. -
Page 19: Troubleshooting Ethernet Problems
EMB HubLite. The LCD console will report the reboot or shutdown status. Processes The system process table is shown in both tree and tabular formats. The process list is useful when contacting Leviton technical support. Date and Time The EMB HubLite keeps time using UTC or Universal time. -
Page 20: Universal Time Is Your Friend
NTP or Rdate packets to pass through. Generally, it is better to use a local time HUBLite if possible. The time HUBLite time.Leviton.com supports both NTP and Rdate time protocols. If you use a GSM-connected system, you will probably need to use Rdate. -
Page 21: Firmware Update
The EMB HubLite can upgrade its own firmware using the Firmware Version page. After clicking the “Check for updates” button, the EMB HubLite will contact the Leviton.com webHUBLite and attempt to download a list of firmware files. The list is compared to the firmware versions installed, and a listing of the files will be displayed. -
Page 22: Lcd Console
Ping ethernet gateway [192.168.10.1]: Success Ping DNS #1 [192.168.10.1]: Success The DNS #2 HUBLite address is not configured. Resolving time HUBLite [time.Leviton.com] to an IP address: Success. Got [70.99.203.62] Ping time HUBLite [time.Leviton.com]: Success Testing time HUBLite SyncTime: Sync system time with time.Leviton.com. - Page 23 Show Serial # Upload Data Now Modules Disable All (previous menu) Shutdown Reboot (previous menu) The TCP/IP sub menu will allow you to configure the Ethernet settings for the EMB HubLite. To edit the IP settings, use the Menu button to change options, and press the Select button to edit the option. Once selected, you will see the current value displayed and a blinking square cursor on the first character.
-
Page 24: Log File Data
The Enable Console feature will provide a shell prompt on the serial port for remote diagnostics. This is intended to be used by Leviton technical support only. The Reset Configuration option will remove all the user settings, data, and passwords that have been configured and will return the EMB HubLite to the factory default settings. - Page 25 necessarily the time at the start of the log cycle. Users with large number of devices may notice some of the Modbus devices at higher address numbers report 1 or 2 seconds after the first Modbus devices. This is because the 9600baud speed of the Modbus loop is not fast enough to log all Modbus devices in less than 1 second.
-
Page 26: Log Storage Capacity
For data exported from the BMO website, the columns that are invalid (NULL) are reported as blank fields. This makes it easier to import into MS Excel as blank cells. With the current firmware, the EMB HubLite will report blank fields rather than "NULL"... -
Page 27: Retrieving Data From The Emb Hublite
This option specifies how long to wait before retrying. Step 3: Contact the Leviton Technical Support department. Please have the EMB HubLite serial number and password to upload data handy. Your tech support representative will confirm your BMO account and will add the EMB HubLite to one of your client databases. -
Page 28: Enertrax Download Direct From The Emb Hublite
Enertrax download direct from the EMB HubLite Leviton provides a free tool called Enertrax DL that can automate the process of downloading log data from the EMB HubLite to your Windows PC hard drive. Enertrax DL can merge new log data into existing log files on your computer as well as provide configuration information about the EMB HubLite. -
Page 29: Linking To Emb Hublite Device Status Pages
The EMB HubLite can provide Modbus device data in XML format. This feature, coupled with browser based AJAX (Javascript) can provide a very powerful tool to allow the creation of custom web pages. Further examples of XML and its uses are available on the Leviton website in the Documentation/Technotes section. Page 29 A7810 EMB HubLite –... -
Page 30: Mechanical Drawings
Mechanical Drawings The EMB HubLite uses a plastic enclosure that is approximately 4” x 4.25” x 2” deep. The EMB HubLite has 4 mounting holes for use with a #6 screw. The drawing above shows the relative position of the mounting holes.
Need help?
Do you have a question about the EMB HubLite A8810-PS1 and is the answer not in the manual?
Questions and answers