
Related Manuals for Rotex R2CND035A4AA


Summary of Contents for Rotex R2CND035A4AA
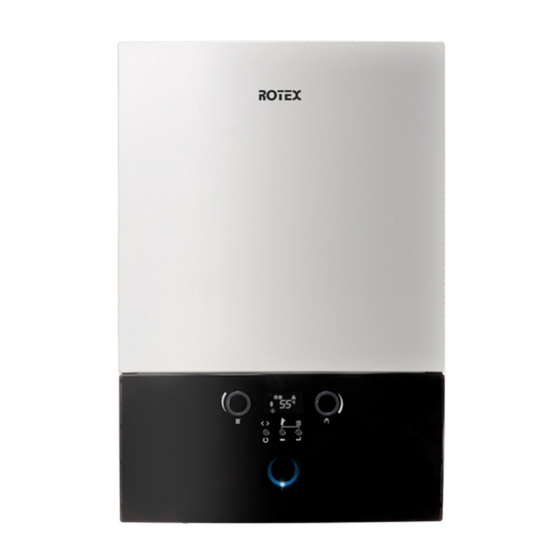
- Page 1 Installation manual Wall-mounted condensing boiler R2CND028A4AA R2CND035A4AA Installation manual R2TND028A4AA English Wall-mounted condensing boiler R2TND035A4AA...
- Page 2 2P475131-2B...
-
Page 3: Table Of Contents
Damage caused by non- observance of these instructions are not under the responsibility of Central heating system requirements........10 ROTEX. Underfloor heating requirements..........11 Residual pump lift graph............11 ▪ The original documentation is written in English. All other Connections ................ -
Page 4: Symbols On The Package
About the unit Maximum central heating pressure (bar) Maximum central heating pressure (MPa) This ROTEX unit is a wall-mounted gas-fired condensing boiler that Maximum domestic hot water pressure (bar) Maximum domestic hot water pressure (MPa) can supply heat to central heating systems, as well as supply Country of destination(s) domestic hot water. -
Page 5: Dimensions
294.4 temperature drops below 13°C and it activates the burner when the Bottom view of model R2CND028A4AA and R2CND035A4AA water temperature drops below 8°C. The unit keeps running until the temperature reaches 20°C. To enable this function, the unit must be connected to the power supply and its main gas valve must be open. -
Page 6: Components
3 About the unit Components Components of model R2CND028A4AA and R2CND035A4AA Components of models R2TND028A4AA and R2TND035A4AA Automatic air vent (heat exchanger) Flow temperature sensor Expansion vessel (10 litres) Gas valve Automatic air vent (heat exchanger) Heat exchanger Flow temperature sensor 3-way valve stepper motor Expansion vessel (10 litres) -
Page 7: Technical Specifications
3 About the unit Technical specifications Technical specifications Unit R2CND028A*AA R2CND035A*AA R2TND028A4AA R2TND035A4AA Heat Input Range(Qn) 4.8~27.0 4.8~34.0 4.8~27.0 4.8~34.0 Nominal Heat Output Range (Pn) at 80-60°C 4.6~26.3 4.6~33.2 4.6~26.3 4.6~33.2 Nominal Heat Output Range (Pn) at 50-30°C 5.2~28.2 5.2~35.0 5.2~28.2 5.2~35.0 Efficiency (30% partial load at 30°C return temperature) -
Page 8: Installation
4 Installation Energy-related products (ErP) specifications Symbol Unit R2CND028A*AA R2CND035A*AA R2TND028A4AA R2TND035A4AA Daily electricity consumption 0.153 0.204 — elec Annually electricity consumption — Water heating energy efficiency η — Water heating energy efficiency class — — — Daily fuel consumption 23.25 30.26 —... -
Page 9: Minimum Installation Clearances
4 Installation Minimum installation clearances Vertical, flat wall ▪ The boiler can be installed outdoors in a partially protected location. A partially protected location is a place where the boiler is not exposed to the direct action and to the penetration of atmospheric precipitation (rain, snow, hail,...). -
Page 10: To Mount The Unit
ROTEX accepts no liability for any such damage Central heating system or ineffectiveness caused by using inappropriate additive. -
Page 11: Underfloor Heating Requirements
Ensure that necessary gaskets are placed. Residual pump lift graph Note: Optional ROTEX connection kit can be used and it is The residual pump lift graph shows the amount of pump lift (mbar) recommended to use it. -
Page 12: Guidelines When Connecting The Gas Piping
The manufacturer is not responsible for any damage that may occur this way. Note: Optional ROTEX connection kit can be used and it is recommended to use it. ▪ The installation of the boiler should be in compliance with the applicable legislation, standards, and regulations. -
Page 13: Guidelines When Connecting The Electrical Wiring
4 Installation ▪ If old piping material does not have oxygen barrier, then it must be separated from the boiler circuit via a plate heat exchanger and a a<b second pump has to be installed for necessary circulation. ▪ If the pressure reading on the boiler user interface is dropping repeatedly, most probably there is a leakage in the installation. - Page 14 4 Installation PG7 PG7 Holes on the bottom sheet that are reserved for cable glands are covered with insulation material. The insulation material must be bored if glands are to be used. Note: Unit must be opened to mount cable glands. See "4.1 To open the unit" on page 8 to reach the inside of the boiler.
-
Page 15: Wiring Diagram
4 Installation 4.8.6 Wiring diagram DANGER: RISK OF ELECTROCUTION Disconnect the power supply for more than 10 minutes before servicing Model R2CND028A4AA and R2CND035A4AA Models R2TND028A4AA and R2TND035A4AA R2CND028+035A4AA + R2TND028+035A4AA Installation manual Wall-mounted condensing boiler 3P469346-6E – 2017.07... -
Page 16: Guidelines When Connecting The Condensate Piping
4 Installation Symbols: 4.8.7 Guidelines when connecting the condensate piping Item Description Option DANGER Wiring depending on model In order to prevent escape of flue gases and so poisoning, the condensate trap must be mounted to its place before Switch box commissioning. -
Page 17: Guidelines When Connecting The Boiler To The Flue Gas System
4 Installation Terminating into an internal soil and vent stack Approved flue systems Choose a flue type according to the installation site. Approved flue types are written on the identification label. Flue termination The positions of the terminals in the roof or in the wall with respect to openings for ventilation must be in accordance with national regulations. - Page 18 4 Installation 30° elbow 60/100 Tee 60/100 with measurement point Extension 60/100 L = 500-1000 mm Allowable flue length for C13x Concentric 60/100 mm 7.0 m Concentric 80/125 mm 33.6 m Including 1 90° elbow Equivalent length of options 90° elbow 60/100 mm 1.5 m 45° elbow 60/100 mm 1.0 m 30°...
- Page 19 CE marking. The connection between the boiler and ▪ Minimum combustion products mass flow rate: 2.2 g/s the shaft and, the connection between the boiler and the air intake system must be obtained via ROTEX. ▪ CO content at nominal heat input: 8.8% ▪...
- Page 20 CE marking. The connection between the boiler and the shaft and, the connection between the boiler and the air intake system must be obtained via ROTEX. In C83x type units, condensate flow into the unit is not allowed.
- Page 21 4 Installation Allowable flue length for C93x DN 80 Flex circular and rough 11.6 34.1 DN 80 Flex circular and rough 13.0 DN 80 Flex square and rough 23.8 69.9 DN 80 Flex square and rough 20.6 60.6 DN 80 Flex square and rough 14.8 43.5...
- Page 22 Flue parts order codes 15 m EKFGP6344 Required flue kits and/or additional parts can be ordered from 25 m EKFGP6341 ROTEX with the order codes given in the table below: 50 m EKFGP6342 Flue part Order code Connector flex - flex PP 80...
-
Page 23: To Fill The System With Water
11 Isolate the appliance from power mains. Method 2 4.10.1 To convert the system for use with a (For model R2CND028A4AA and R2CND035A4AA) different type of gas 1 Open the front cover of the unit as described in this manual. R2CND028+035A4AA + R2TND028+035A4AA... -
Page 24: To Modify Settings For Gas Conversion
5 Commissioning 2 To set natural gas, adjust screw on the gas valve to position "1". 3 To set LPG, adjust the screw to position "2". 4 Mount the front cover, connect the unit to the main power supply. Gas-air ratio: No need to adjust The installer does not have to adjust the gas-air ratio, because the 4.10.2 To modify settings for gas conversion... -
Page 25: To Commission The Central Heating
6 Hand-over to the user 5.4.2 To commission the central heating capacity setting The boiler's central heating capacity can be adjusted form the control panel. If the heat loss of installation is much less than that of the boiler nominal capacity, it is recommended to reduce the boiler nominal capacity to the installation capacity. - Page 28 Unsere Partner im Ausland Our partners abroad • Unsere Partner im Ausland Nos partenaires à l’étranger • Le nostre sedi all'estero Neustros representantes en el extranjero Nasi partnerzy za granicą • Naši partneři v zahraničí http://de.rotex-heating.com > ueber-rotex > international 3P469346-6E 2017.07...
Need help?
Do you have a question about the R2CND035A4AA and is the answer not in the manual?
Questions and answers