Advertisement
Quick Links
Advertisement

Related Manuals for SOtM sDP-1000EX


Summary of Contents for SOtM sDP-1000EX
- Page 1 sDP-1000 Operating Instructions Rev. : 1.0...
- Page 2 주의 사항 Precautions 반드시 본 사용설명서를 모두 읽은 후 제품을 사용하십시오. Please read this instruction carefully before use. 제품의 분해, 개조 등을 하지 마십시오. Do not attempt to disassemble or modify the product. 제품에 진동, 충격을 가하지 마십시오. Keep the product away from the external shocks or vibrations. 반드시...
-
Page 3: Warranty Information
A/S 정보 Warranty information 1. 무상 A/S Free warranty service • 정상적인 사용 중 설계, 제조상의 결함으로 발생된 불량에 대하여 구입일로부터 1년간 A/S를 보 증 합니다. In case of the defect is found caused by the design or the production flaw while using the device properly, a manufacturer is responsible for the faulty product and the free warranty service for 1 year from the date of purchasing. - Page 4 기본 구성품 Supplied accessories 1. sDP-1000 2. 리모컨 Remote controller 3. 배터리 충전용 전원 장치 Power supply for charging the battery Ultimate High Performance Audio 4. 사용 설명서 Operating instructions 5. 디바이스 드라이버 CD 6. USB 케이블 Device driver CD USB cable...
- Page 5 기능 Features User interface • 3.12” Graphic OLED display • Soft feel front panel switch • High quality remote controller Audio inputs • USB input - USB audio class 2.0 - 32bit/192KHz PCM & DSD playback - Asynchronous audio interface - Ultra high performance audio clock •...
-
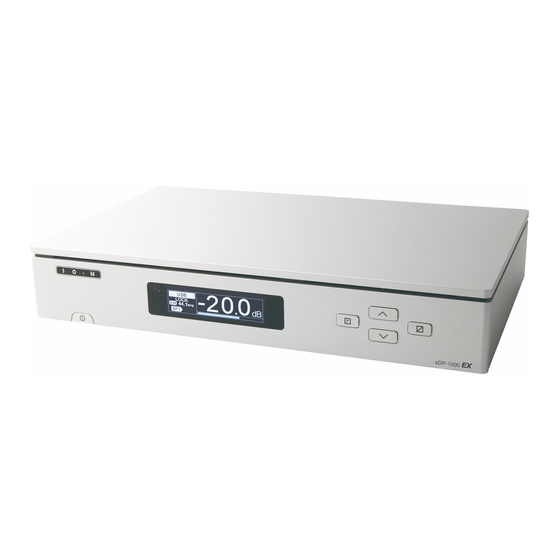
Page 6: Front Panel
전면 구조 Front panel 대기모드 스위치 On/Standby switch 제품을 동작 상태로 전환 하거나 대기모드로 전환 합니다. Used to set the product to On or Standby. OLED 정보 표시 창 OLED display windows 제품 동작 상태를 표시 합니다. Used to indicate the operational status. 입력... - Page 7 후면 구조 Rear panel 충전용 전원 잭 디지털 광 입력 단자 Charger power jack Optical input connector 배터리 충전용 전원 입력 잭 입니다. CD player나 DDC의 디지털 광 출력 단자와 연결 합니다. Power input jack for charging the battery. Connect to the optical output connector of the audio source device such as CD player or DDC.
-
Page 8: Remote Controller
리모컨 Remote controller 대기모드 on/off 스위치 Standby on/off switch ON : 제품을 동작 모드로 전환 합니다. Change to normal operating mode. OFF : 제품을 대기모드로 전환 합니다. Change to standby mode. 입력 선택 스위치 Input select switch 각 버튼을 누르는 것에 따라 입력소스가 선택 됩니다. Select the input source by pressing each button. - Page 9 OLED 표시창 OLED display window 입력 선택 정보 The following chart is shown the battery operation status. Input source information 충전 완료 선택한 입력소스를 표시 합니다. 사용 중 충전 중 저전압 Charging Used Charging Low battery Display the selected input source. complete 배터리...
- Page 10 제품 전면의 대기전원 스위치를 누르면 잠시 후 전면 표시창에 로고가 표시 된 후 제품이 동작 상태로 전환 합니다. Press the standby button to operate the unit and then SOtM logo will be shown. 윈도우즈 OS를 사용하는 PC는 본 제품과 USB로 연결하여 음악을 재생하기 위해서는 반드시 드라이버 설치를 하여야 합니다. 필...
-
Page 11: Specification
제품 사양 Specification USB input USB specification 2.0 or higher USB audio class 2.0 32bit/192KHz PCM & DSD playback Native ASIO support Optical, Coaxial, AES/EBU input Max bit-depth : 24bit Sampling rate : 32KHz, 44.1KHz, 48KHz, 88.2KHz, 96KHz, 176.4KHz, 192KHz Impedance Coaxial, BNC : 75Ω... - Page 12 이버 CD가 별도로 제공되며 사용자가 직접설치 해야 합 동으로 실행 됩니다. (설치 프로그램이 자동으로 실행 되지 니다. 않을 경우 설치 CD의 “\SOtM USB Audio 2.0 Driver”폴더 The user should install the USB audio class 2.0 를 열어 ‘setup.exe’파일을 실행 합니다.) drivers for Windows OS.
- Page 13 윈도우 OS 용 USB audio class 2.0 driver 설치 방법 Windows OS USB audio class 2.0 driver installation 필요한 프로그램이 복사되며 설치가 진행 됩니다. The installation is started. 제품 인식과 설정이 완료 되면 “Next”버튼을 눌러 종료 단계 로 넘어 갑니다. Press the “...
- Page 14 USB audio class driver 제어판 설정 USB audio class driver control panel settings 드라이버 설치가 완료 되면 아래와 같이 작업표시줄의 알림 Firmware Upgrade를 선택하면 제품의 USB auido기능의 프 영역에 USB Audio Class Driver Control Panel의 icon이 표 로그램을 업그레이드 할 수 있습니다. “Browse”버튼을 누 시...
- Page 15 USB audio class driver 제어판 설정 USB audio class driver control panel settings 펌웨어 업그레이드가 완료되면 다음과 같은 펌웨어 업그레 이드 결과창이 표시됩니다. 결과를 확인 한 후 “Finish”버튼 을 눌러 업그레이드를 종료합니다. The following message will appear once finished. Please confirm the message and click the ‘finish’...
Need help?
Do you have a question about the sDP-1000EX and is the answer not in the manual?
Questions and answers