Advertisement
Advertisement
Table of Contents

Related Manuals for PheeNet WLn-402

Summary of Contents for PheeNet WLn-402
- Page 1 IEEE802.11n Wireless Router Quick Installation Guide WLn-402 Version 1.0...
- Page 2 Before you starting to use this router, please check if there’s anything missing in the package, and contact your dealer of purchase to claim for missing items: WLn-402, 802.11n Wireless Router ( 1 pcs) □ Quick installation guide (1 pcs) □...
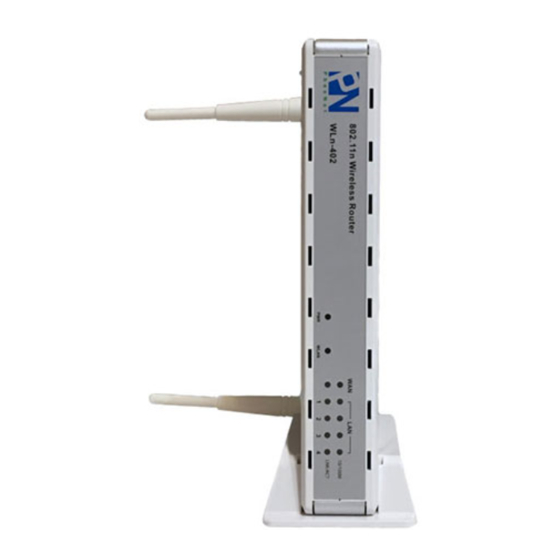
- Page 3 3. Connect the A/C power adapter to the wall socket, and then connect it to the ‘Power’ socket of the router. Please check all LEDs on the front panel. ‘PWR’ LED should be steadily on, WAN and LAN LEDs should be on if the computer / network device connected to the respective port of the router is powered on and correctly connected.
- Page 4 Network Setup Please use the web browser to configure the wireless router. A computer with wired Ethernet connection to the wireless router is required for this first-time configuration. 1. Set your computer to obtain an IP address from wireless router: click ‘...
- Page 5 3. Select ‘ Obtain an IP address automatically’ and ‘ Obtain DNS server address automatically’ , then click ‘ OK’ . 4. After the IP address setup is complete, please click ‘ start’ -> ‘ run’ at the bottom-lower corner of your desktop, then input ‘...
- Page 6 5. Input ‘ ipconfig’ , then press ‘ Enter’ key. Please check the IP address followed by ‘ Default Gateway’ (In this example, the IP address of router is 192.168.2.1) Please note that this value may be different. HERE! 6. Start the web browser and input the IP address of wireless router in address bar, and the following message should be shown.
- Page 7 9. Select a broadband type of the Internet connection you’ re using, then click ‘ Next’ . 10. Please input the Internet connection parameters, you should use the value provided by your Internet service provider. Click ‘ OK’ when you finish. (The content of this page will vary depends on the connection method you selected in step 9)
Need help?
Do you have a question about the WLn-402 and is the answer not in the manual?
Questions and answers