
Related Manuals for Makita XDT16


Summary of Contents for Makita XDT16
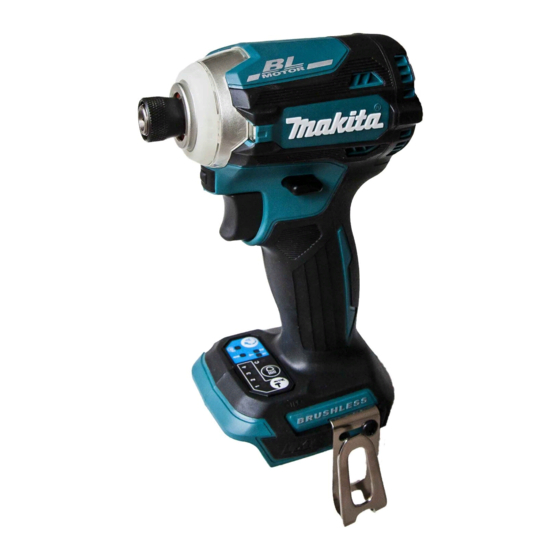
- Page 1 INSTRUCTION MANUAL MANUAL DE INSTRUCCIONES Cordless Impact Driver Atornillador de Impacto Inalámbrico XDT16 IMPORTANT: Read Before Using. IMPORTANTE: Lea antes de usar.
-
Page 2: Specifications
ENGLISH (Original instructions) SPECIFICATIONS Model: XDT16 Fastening capacities Machine screw 4 mm - 8 mm (5/32" - 5/16") Standard bolt 5 mm - 16 mm (3/16" - 5/8") High tensile bolt 5 mm - 14 mm (3/16" - 9/16") No load speed (RPM) -
Page 3: General Power Tool Safety Warnings
Prevent unintentional starting. Ensure the SAFETY WARNINGS switch is in the off-position before connecting to power source and/or battery pack, picking up or carrying the tool. Carrying power tools with General power tool safety warnings your finger on the switch or energising power tools that have the switch on invites accidents. - Page 4 When battery pack is not in use, keep it away WARNING: DO NOT let comfort or familiarity from other metal objects, like paper clips, with product (gained from repeated use) replace coins, keys, nails, screws or other small metal strict adherence to safety rules for the subject objects, that can make a connection from one product.
-
Page 5: Functional Description
Use of non-genuine Makita batteries, or batteries that have been altered, may result in the battery bursting causing fires, personal injury and damage. It will also void the Makita warranty for the Makita tool and charger. Tips for maintaining maximum... -
Page 6: Overheat Protection
This tool is equipped with an electric brake. If the tool Indicator lamps Remaining consistently fails to quickly stop after the switch trigger capacity is released, have the tool serviced at a Makita service center. Lighted Blinking Lighting up the front lamp... -
Page 7: Changing The Application Mode
This tool has a reversing switch to change the direction of rotation. Depress the reversing switch lever from the A side for clockwise rotation or from the B side for coun- terclockwise rotation. When the reversing switch lever is in the neutral posi- tion, the switch trigger cannot be pulled. - Page 8 Quick mode-switching button Quick reference The following table shows the functions of the quick The function of the quick mode-switching button varies mode-switching button. depending on whether you have registered the applica- tion mode to the tool. indicates the quick mode-switching button. Button(s) / Purpose How to confirm Registering the application...
- Page 9 Changing the impact force You can change the impact force in four steps: max, hard, medium, and soft. This allows a tightening suitable to the work. The level of impact force changes every time you press the button or the quick mode-switching button. You can change the impact force within approximately one minute after releasing the switch trigger or press- ing the button...
- Page 10 Changing assist type This tool employs assist function that offers several easy-to-use application modes for driving screws with good control. The type of the application mode changes every time you press the button You can change the assist type within approximately one minute after releasing the switch trigger or press- ing the button , or the quick mode-switching...
- Page 11 Quick mode-switching function Using the quick mode-switching function When the tool is in the mode that is not registered, What you can do with the quick mode- press the quick mode-switching button to switch to the switching function registered application mode. The tool switches between the registered application mode and last application The quick mode-switching function saves the time for changing mode every time you press the quick mode-switching...
-
Page 12: Operation
To install the driver bit, insert it into the sleeve as far as OPERATION it will go. ► 1. Driver bit 2. Sleeve The proper fastening torque may differ depending upon To remove the driver bit, pull the sleeve in the direction the kind or size of the screw/bolt, the material of the of the arrow and pull the driver bit out. -
Page 13: Maintenance
M10(3/8") M12(1/2") (72) To maintain product SAFETY and RELIABILITY, (58) repairs, any other maintenance or adjustment should M8(5/16") M10(3/8") be performed by Makita Authorized or Factory Service (43) Centers, always using Makita replacement parts. M8(5/16") (29) (14) OPTIONAL ACCESSORIES 1. Fastening time (second) 2. Fastening torque... -
Page 14: Especificaciones
ESPAÑOL (Instrucciones originales) ESPECIFICACIONES Modelo: XDT16 Capacidades de apriete Tornillo de máquina 4 mm - 8 mm (5/32" - 5/16") Tornillo estándar 5 mm - 16 mm (3/16" - 5/8") Tornillo de alta resistencia 5 mm - 14 mm (3/16" - 9/16") Velocidad sin carga (RPM) Modo de impacto máx. -
Page 15: Advertencias De Seguridad
Cuando utilice una herramienta eléctrica en ADVERTENCIAS DE exteriores, utilice un cable de extensión apro- piado para uso en exteriores. La utilización de SEGURIDAD un cable apropiado para uso en exteriores redu- cirá el riesgo de que se produzca una descarga eléctrica. - Page 16 Desconecte la clavija de la fuente de energía Siga todas las instrucciones para la carga y y/o la batería de la herramienta eléctrica antes evite cargar la herramienta o la batería fuera de realizar ajustes, cambiar accesorios o guar- del rango de temperatura especificado en dar las herramientas eléctricas.
- Page 17 Si el tiempo de operación se ha acortado en lesiones personales y daños. Asimismo, esto inva- exceso, deje de operar de inmediato. Podría lidará la garantía de Makita para la herramienta y el correrse el riesgo de sobrecalentamiento, cargador Makita.
-
Page 18: Descripción Del Funcionamiento
Sistema de protección para la DESCRIPCIÓN DEL herramienta/batería FUNCIONAMIENTO La herramienta está equipada con un sistema de pro- tección de la herramienta/batería. Este sistema corta PRECAUCIÓN: Asegúrese siempre de que la en forma automática el suministro de energía al motor herramienta esté... - Page 19 La herramienta está equipada con un freno eléctrico. Si disminuir. la herramienta falla constantemente en detenerse tras soltar el gatillo interruptor, lleve la herramienta a mante- nimiento a un centro de servicio Makita. 19 ESPAÑOL...
- Page 20 El modo de aplicación puede cambiarse oprimiendo el Accionamiento del conmutador de botón , o el botón rápido de conmutación de inversión de giro modo. ► 1. Palanca del interruptor de inversión PRECAUCIÓN: Confirme siempre la direc- ► 1. Botón rápido de conmutación de modo ción de rotación antes de la operación.
- Page 21 Cuando el modo de aplicación no está Referencia rápida registrado: La siguiente tabla muestra las funciones del botón rápido de conmutación de modo. El nivel de fuerza del impacto cambiará cada vez que indica el botón rápido de conmutación de modo. presione el botón rápido de conmutación de modo.
- Page 22 Cambio de la fuerza de impacto La fuerza del impacto puede cambiarse a cuatro nive- les: máx., dura, media y suave. Esto permite un apriete adecuado para el trabajo. El nivel de fuerza del impacto cambiará cada vez que presione el botón o el botón rápido de conmutación de modo.
- Page 23 Cambio del tipo de asistencia Esta herramienta emplea la función de asistencia que ofrece varios modos de aplicación fáciles de usar para insertar tornillos con un buen control. El tipo de modo de aplicación cambia cada vez que presiona el botón Puede cambiar el tipo de asistencia aproximadamente un minuto después de soltar el gatillo interruptor o presionar los botones...
- Page 24 Función rápida de conmutación de Mantenga presionados el botón y el botón modo rápido de conmutación de modo al mismo tiempo hasta que la lámpara de personalización y la lámpara del Lo que puede hacer con la función rápida modo de aplicación deseado comiencen a parpadear. de conmutación de modo La función rápida de conmutación de modo ahorra tiempo para cambiar el modo de aplicación de la herra-...
-
Page 25: Operación
ENSAMBLADO NOTA: Si la punta de destornillador no se encuentra insertada hasta el fondo en el mandril, éste no regre- sará a su posición original y la punta de destornillador no quedará asegurada. En este caso, procure insertar PRECAUCIÓN: Asegúrese siempre de que la la broca de nuevo siguiendo las instrucciones de arriba. -
Page 26: Mantenimiento
Para mantener la SEGURIDAD y FIABILIDAD del pro- mienta por lo menos 15 min. ducto, las reparaciones, y cualquier otra tarea de man- tenimiento o ajuste deberán ser realizadas en centros de servicio autorizados o de fábrica Makita, empleando siempre repuestos Makita. 26 ESPAÑOL... -
Page 27: Accesorios Opcionales
PRECAUCIÓN: Estos accesorios o aditamen- tos están recomendados para utilizarse con su herramienta Makita especificada en este manual. El empleo de cualquier otro accesorio o aditamento puede conllevar el riesgo de lesiones personales. Utilice los accesorios o aditamentos solamente para su fin establecido. - Page 28 Para reducir la exposición a estos productos químicos: trabaje en un área bien ventilada y póngase el equipo de seguridad indicado, tal como las máscaras contra polvo que están especialmente diseñadas para filtrar partículas microscópicas. Makita Corporation 3-11-8, Sumiyoshi-cho, Anjo, Aichi 446-8502 Japan 885673-945...
Need help?
Do you have a question about the XDT16 and is the answer not in the manual?
Questions and answers