LG 34UM64 Owner's Manual
Ips led monitor
Hide thumbs
Also See for 34UM64:
- Owner's manual (42 pages) ,
- Owner's manual (42 pages) ,
- Owner's manual (34 pages)

Related Manuals for LG 34UM64


Summary of Contents for LG 34UM64
- Page 1 Owner's Manual IPS LED MONITOR (LED MONITOR) Please read the safety information carefully before using the product. IPS LED Monitor (LED Monitor) Model List 25UM64 25UM65 34UM64 34UM65 www.lg.com...
-
Page 2: Table Of Contents
Table of ConTenTs Table of ConTenTs InsTallInG THe lG lICense MonIToR sofTWaRe asseMblInG anD UseR seTTInGs PRePaRInG Activating the Main Menu Product Composition - Main Menu Features Product and Button Description User Settings - How to Use the Joystick Button... -
Page 3: License
Each model has different licenses. Visit www.lg.com for more information on the license. The terms HDMI and HDMI High-Definition Multimedia Interface, and the HDMI logo are trademarks or registered trademarks of HDMI Licensing LLC in the United States and other countries. -
Page 4: Assembling And Preparing
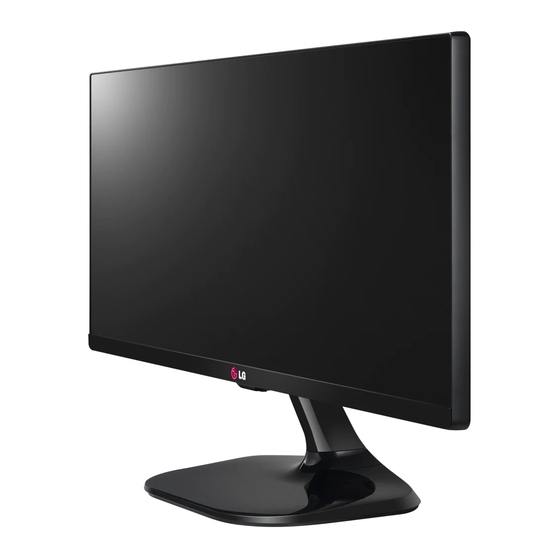
34UM64 Two screws stand base screw Cover Clear sheet (M4 x 10) CaUTIon Always use genuine LG components to ensure safety and product performance. The product warranty will not cover damage or injury caused by the use of unauthorized components. -
Page 5: Product And Button Description
asseMblInG anD PRePaRInG noTe The components may look different from those illustrated here. Without prior notice, all product information and specifications contained in this manual are subject to change to improve the performance of the product. To purchase optional accessories, visit an electronics store or an online shopping site, or contact the retailer from which you purchased the product. -
Page 6: How To Use The Joystick Button
PRePaRInG 34UM65 34UM64 Power Indicator on Power on off Power off Joystick button noTe The joystick button is located at the bottom of the monitor. How to Use the Joystick button You can easily control the functions of the monitor by pressing the joystick button or moving it left/right with your finger. -
Page 7: Input Connector
PRePaRInG Input Connector 25UM65 25UM64 AUDIO IN(PC) HDMI IN 2 DVI-D IN DP IN DC-IN (19 V HDMI IN 1 34UM65 34UM64 AUDIO IN (PC) DC-IN DVI-D IN (19 V DP IN HDMI IN 1... -
Page 8: Moving And Lifting The Monitor
asseMblInG anD PRePaRInG Moving and lifting the When moving the monitor, keep it upright and never turn the monitor on its side or tilt it side- Monitor ways. When moving or lifting the monitor, follow these CaUTIon instructions to prevent the monitor from being scratched or damaged and to ensure safe trans- Avoid touching the monitor screen as much as portation, regardless of its shape or size. -
Page 9: Installing The Monitor
asseMblInG anD PRePaRInG Installing the Monitor Tighten two screws into the back of the stand body and close the screw cover. assembling the stand CaUTIon Applying excessive force when tightening screws may cause damage to the monitor. Damage caused in this way will not be cov- ered by the product warranty. - Page 10 asseMblInG anD PRePaRInG Fix the stand base to the stand body. Turn the screws on the stand base to the right. stand body stand base...
- Page 11 PRePaRInG 34UM65 34UM64 Place the screen face down. 100 mm (3.9 inch) stand Hinge screw Cover CaUTIon To protect the screen from scratches, cover the surface with a soft cloth. Mount the stand base onto the stand hinge as CaUTIon shown in the illustration.
-
Page 12: Detaching The Stand
asseMblInG anD PRePaRInG Detaching the stand Turn the screws on the stand base to the left to detach the stand base from the stand body. CaUTIon stand body Illustrations in this document represent typical procedures, so they may look different from the actual product. - Page 13 asseMblInG anD PRePaRInG Lift up the screw cover to detach the screw cover from the stand body. Remove the screws from the back of the stand body using a screw- driver and detach the stand body from the stand hinge as shown in the illustration. stand body stand Hinge screw Cover...
- Page 14 PRePaRInG 34UM65 34UM64 Place the screen face down. stand base CaUTIon To protect the screen from scratches, cover the surface with a soft cloth. Detach the screw cover from the stand base as shown in the illustration and then remove the two screws on the back to detach the stand base from the hinge.
-
Page 15: Installing On A Table
25UM65 25UM64 10 cm (3.9 inch) 10 cm 10 cm 10 cm 34UM65 34UM64 34UM64 34UM65 10 cm (3.9 inch) 10 cm 10 cm Press the joystick button on the bottom of the 10 cm monitor to turn on the monitor. -
Page 16: Adjusting The Angle
The angle of the screen can be adjusted forward or backward from -5° to 20° for a comfortable viewing experience. 25UM64 25UM65 34UM64 34UM65 front Rear Be careful not to touch or press the screen The angle of the screen can be adjusted forward area when adjusting the angle of the monitor. -
Page 17: Tidying Up Cables
Tidy up cables using the cable holder on the stand Cables can get caught in the hinge area as base as shown in the illustration. shown in the illustration, so be careful when organizing cables. 25UM65 25UM64 34UM64 34UM65 34UM65 34UM64... -
Page 18: Installing The Wall Mount Plate
A non-VESA standard screw may damage the product and cause the monitor to fall. LG Elec- tronics is not liable for any accidents relating to the use of non-standard screws. - Page 19 Wall Mount Plate RW120 slanted wall may result in the monitor falling off, (optional) which could lead to injury. Use an authorized LG wall mount and contact the local dealer or quali- fied personnel. Applying excessive force when tightening screws may cause damage to the monitor. Dam-...
-
Page 20: Using The Kensington Lock
Kensington lock owner's manual or visit the website at http://www.kensington.com. Connect the monitor to a table using the Kensing- ton security system cable. 25UM65 25UM64 34UM65 34UM64 noTe The Kensington security system is optional. You can obtain optional accessories from most electronics stores. -
Page 21: Using The Monitor
UsInG THe MonIToR UsInG THe MonIToR Connecting to a PC This monitor supports the *Plug and Play The following instructions are based on the feature. 25UM65 model. Illustrations in this manual * Plug and Play: A feature that allows you to add a may differ from the actual product. -
Page 22: Hdmi Connection
UsInG THe MonIToR HDMI Connection DisplayPort Connection Transmits digital video and audio signals from your Transmits digital video and audio signals from your AUDIO OUT DVI-I(D) OUT PC to the monitor. Connect your PC to the monitor PC to the monitor. Connect the monitor to your PC using the HDMI cable as shown in the illustration using the display port cable as shown in the illus- below. -
Page 23: Connecting Av Devices
UsInG THe MonIToR Connecting aV Devices Connecting Peripherals HDMI Connection Connecting Headphones DP OUT HDMI transmits digital video and audio signals Connect peripherals to the monitor via the head- from your AV device to the monitor. Connect your phones port. Connect as illustrated. AV device to the monitor using the HDMI cable as AUDIO IN(PC) AUDIO IN(PC) -
Page 24: Installing The Lg Monitor Software
InsTallInG THe lG MonIToR sofTWaRe InsTallInG THe lG MonIToR sofTWaRe Insert the Software CD included in the product packaging into your PC's CD drive and install the LG Monitor Software. Follow the instructions to proceed with the Set up Internet Explorer as the default web installation. - Page 25 Mode. ※ Extended Mode is not supported when using a single display. noTe The LG Monitor Software starts the installation as shown below: When you run Screen Split, the Screen Split icon [ ] appears in the system tray at the bottom right of the PC screen.
-
Page 26: User Settings
UseR seTTInGs UseR seTTInGs activating the Main Menu Press the joystick button on the bottom of the monitor. Move the joystick up/down (▲/▼) and left/right(◄/►) to set the options. Press the joystick button once more to exit the main menu. Joystick button button... -
Page 27: User Settings
UseR seTTInGs User settings Menu settings To view the osD menu, press the joystick button at the bottom of the monitor and then enter the Menu. Configure the options by moving the joystick up/down/left/right. To return to the upper menu or set other menu items, move the joystick to ◄ or pressing ( / OK) it. -
Page 28: Ratio
UseR seTTInGs Ratio easy control > brightness To view the osD menu, press the joystick button at the easy control > Contrast bottom of the monitor and then enter the Menu. > Volume Go to easy control > Ratio by moving the joystick. function >... -
Page 29: Function
UseR seTTInGs function function > super energy saving To view the osD menu, press the joystick button at the easy control > Picture Mode Custom bottom of the monitor and then enter the Menu. Go to function by moving the joystick. function Configure the options following the instructions that appear in the bottom right corner. -
Page 30: Pbp
UseR seTTInGs > To view the osD menu, press the joystick button at the easy control > Input bottom of the monitor and then enter the Menu. > audio HDMI Go to PbP by moving the joystick. function swap Configure the options following the instructions that appear in sub full the bottom right corner. -
Page 31: Picture
UseR seTTInGs Picture screen > Picture To view the osD menu, press the joystick button at the easy control > Color bottom of the monitor and then enter the Menu. Go to screen > Picture by moving the joystick. function Configure the options following the instructions that appear in the bottom right corner. -
Page 32: Color
UseR seTTInGs Color screen > Picture To view the osD menu, press the joystick button at the easy control > Color bottom of the monitor and then enter the Menu. Go to screen > Color by moving the joystick. function Configure the options following the instructions that appear in the bottom right corner. -
Page 33: Settings
UseR seTTInGs settings settings > Main audio To view the osD menu, press the joystick button at the easy control > language english bottom of the monitor and then enter the Menu. > Power leD Go to settings by moving the joystick. function >... -
Page 34: Reset
UseR seTTInGs Reset Reset Do you want to reset your settings? To view the osD menu, press the joystick button at the easy control Reset bottom of the monitor and then enter the Menu. Cancel Go to Reset by moving the joystick. function Configure the options following the instructions that appear in the bottom right corner. -
Page 35: Reader
UseR seTTInGs Reader Reader Mode Press the joystick button on the bottom of the monitor. Reader off Reader 2 Reader 1 Go to Reader by moving the joystick button to ▲. ◄ / ►: Change Mode : oK Configure the options following the instructions that appear in the bottom right corner. Each option is described below. -
Page 36: Troubleshooting
TRoUblesHooTInG TRoUblesHooTInG nothing is displayed on the screen. Is the monitor's power cord Check if the power cord is correctly plugged into the power outlet. plugged in? Is the power indicator on? Check the power cable connection and press the power button. Is the power on and the power Check that the connected input is enabled (Menu - Input). - Page 37 TRoUblesHooTInG noTe Check if the video card's resolution or frequency is within the range allowed by the monitor and set it to the recommended (optimal) resolution in Control Panel > Display > settings. Not setting the video card to the recommended (optimal) resolution may result in blurred text, a dimmed screen, a truncated display area or misalignment of the display.
-
Page 38: Product Specification
PRoDUCT sPeCIfICaTIon PRoDUCT sPeCIfICaTIon 25UM65 25UM64 LCD Screen Type 63.5 cm TFT (Thin Film Transistor) LCD (Liquid Crystal Display) Screen Diagonal length of the screen: 63.5 cm 25" class (25" / 63.5 cm diagonal) Pixel Pitch 0.2286 mm x 0.2286 mm Resolution Max Resolution 2560 x 1080 @ 60 Hz... - Page 39 PRoDUCT sPeCIfICaTIon 34UM65 34UM64 LCD Screen Type 86.6 cm TFT (Thin Film Transistor) LCD (Liquid Crystal Display) Screen Diagonal length of the screen: 86.6 cm 34" class (34.1" / 86.6 cm diagonal) Pixel Pitch 0.312 mm x 0.310 mm Resolution...
-
Page 40: Factory Support Mode (Preset Mode, Dvi-D/Hdmi/Displayport Pc)
PRoDUCT sPeCIfICaTIon factory support Mode (Preset Mode, DVI-D/HDMI/DisplayPort PC) Horizontal frequency Vertical frequency Preset Mode Polarity (H/V) Remarks (kHz) (Hz) 720 x 400 31.468 70.08 640 x 480 31.469 59.94 640 x 480 37.5 75.0 800 x 600 37.879 60.317 800 x 600 46.875 75.0... -
Page 41: Proper Posture
The stand of the touch monitor allows the product to be used in the optimum position. Adjust the stand angle from -5° to 15° (34UM64 / 34UM65) / -5° to 20° (25UM64 / 25UM65) to obtain the best view of the screen. - Page 42 Address: 1000 Sylvan Ave. Englewood Cliffs NJ 07632 U.S.A TEL: 201-266-2534 (** 25UM64, 25UM65, 34UM64, 34UM65) This device meets the EMC requirements for home appliances (Class B) and is intended ENERGY STAR is a set of power-saving for home usage. This device can be used in guidelines issued by the U.S.Environmental...
Need help?
Do you have a question about the 34UM64 and is the answer not in the manual?
Questions and answers