Table of Contents
Advertisement
Advertisement
Table of Contents

Related Manuals for Baofeng UV-5R


Summary of Contents for Baofeng UV-5R
- Page 1 SAIN3 LLC DUAL BAND FM Transceiver UV-5R PERATING ANUAL FCC ID: 2AN62-UV5R...
- Page 2 PREFACE Thank you for purchasing UV-5R Amateur Portable Radio, which is a dual band/dual display radio. This easy-to-use radio will deliver you secure, instant and reliable communications at peak efficiency. Please read this manual carefully before use. The information presented herein will help...
- Page 3 CONTENT 1.-SAFETY INFORMATION 2.-FEATURES AND FUNCTIONS 3.-UNPACKING AND CHECKING EQUIPMENTS 4.- OPTIONAL ACCESSORIES 5.- INSTALLATION OF ACCESSORIES 5.1.- INSTALLING THE ANTENNA 5.2.- INSTALLING THE BELT CLIP 5.3.- MICRO-HEADSET INSTALLATION OF EXTERNAL 5.4. – BATTERY INSTALLATION 6.-BATTERY CHARGING 7.-BATTERY INFORMATION 7.1.-INITIAL USE 7.2.-BATTERY TIPS 7.3.-PROLONG BATTERY LIFE 7.4.-BATTERY STORAGE...
-
Page 4: Troubleshooting
12.2.-SHORTCUT MENU OPERATION 12.3. -“SQL” (SQUELCH) 12.4.-FUNCTION “VOX” (VOICE OPERATED TRANSMISSION) 12.5.- SELECT WIDEBAND OR NARROW BAND “W/N” 12.6.-TDR (DUAL WATCH/DUAL RECEPTION) 12.7.- TOT(TRANSMISSION TIMER) 12.8.-CTCSS/DCS 12.9.- ANI 12.10.- DTMFST (DTMF TONE OF TRANSMITTING CODE ) 12.11.- SC-REV(SCAN RESUME METHOD) 12.12.- PTT-ID(PTT OR RELEASE PTT TO TRANSMIT THE SIGNAL CODE) 12.13-BCL(BUSY CHANNEL LOCKOUT) 12.14.- SFT-D(DIRECTION OF FREQUENCY SHIFT) -
Page 5: Safety Information
1.-SAFETY INFORMATION: The following safety precautions shall always be observed during operation, service and repair of this equipment. ◇ This equipment shall be serviced by qualified technicians only. ◇ Do not modify the radio for any reason. ◇ Use only SAIN3 LLC supplied or approved batteries and chargers. ◇... -
Page 6: Unpacking And Checking Equipments
- Function "VOX" (voice operated transmission). - Alarm function. - Up to 128 memory channels. - Broadband (Wide) / Narrowband (Narrow), selectable. - High power / low (5 W/1 W) selectable. - Display illumination and programmable keyboard. - Function "beep" on the keyboard. - Dual Watch/dual reception . -
Page 7: Optional Accessories
4.- OPTIONAL ACCESSORIES: Note: - Consult the dealer or retailer for information about options available. 5.- INSTALLATION OF ACCESSORIES: 5.1.- INSTALLING THE ANTENNA: Install the antenna as shown in the figure below and turn it clockwise until it stops. Note: - When installing the antenna, don’t rotate it by its top, holding it by its base and turn. -
Page 8: Battery Installation
Plug the external micro-headset connector into the jack of ‘SP. & MIC’ of the transceiver as shown in the figure below. 5.4. – BATTERY INSTALLATION: -When attaching the battery, make sure the battery is in parallel and in good contact with the aluminum chassis. -
Page 9: Battery Charging
6.-BATTERY CHARGING: Use only the charger specified by the manufacturer. The charger’s LED indicates the charging progress. CHARGING STATUS LED INDICATION Standby (no-load) Red LED flashes,while Green LED glows Charging Red LED solidly glows Fully Charged Green LED solidly glows Error Red LED flashes,while Green LED glows Please follow these steps:... -
Page 10: Battery Tips
7.2.-BATTERY TIPS: 1. When charging your battery, keep it at a temperature among 5℃ - 40℃. Temperature out of the limit may cause battery leakage or damage. 2. When charging a battery attached to a radio, turn the radio off to ensure a full charge. 3. -
Page 11: Band】Button
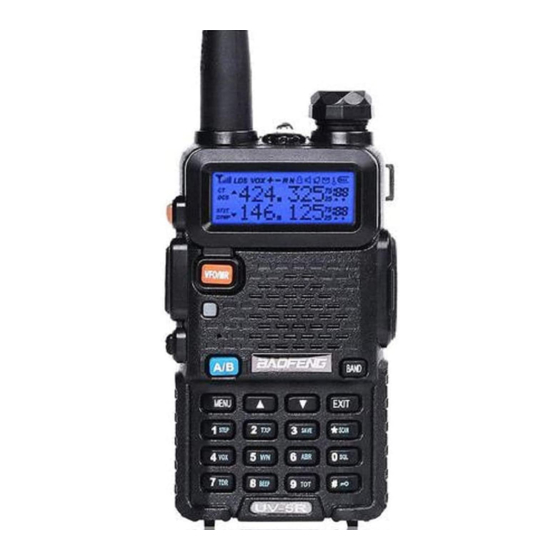
① antenna 11.accessory jack ② flashlight 12.A/B key(frequency display switches) 3. knob (ON/OFF,volume) 13.BAND key(band switches) 4.LCD 14.keypad 5.SK-side key1/CALL(radio,alarm) 15.SP.&MIC. 6.SK-side key2/MONI(flashlight,monitor) 16.battery pack 7. PTT key(push-to-talk) 17.battery contacts 8.VFO/MR (frequency mode/channel mode) 18.battery remove button 9.LED indicator 10.strap buckle 8.2.- COMMAND/KEY DEFINITION: -【PTT】(PUSH-TO-TALK):... -
Page 12: Numeric Keypad
-While setting the RX CTCSS/DCS, press the key 【*SCAN】to scan the RX CTCSS/DCS. KEY: -Under channel mode, press key to switch High/Low transmit power. -Press key for 2 seconds to lock/unlock the keypad. -FUNCTION KEYPAD: -【MENU】key: -To enter the menu of the radio and confirm the setting. -【▲】【▼】key: -Press and hold 【▲】or 【▼】key for frequency up or down fast. -
Page 13: Basic Operation
‘DCS’ activated. Frequency offset direction for accessing repeaters. Dual Watch/Dual Reception functions activated. Function ‘VOX’ enabled. Reverse function activated. Wide Band selected. Battery Level indicator Keypad lock function activated. Low transmit power. Operation frequency. ▲▼ Signal Strength Level. 10.- 1750 Hz TONE FOR ACCESS TO REPEATERS: The user needs to establish long distance communications through an amateur radio repeater which is activated after receiving a 1750 Hz tone. - Page 14 Menu Function/Description Available settings SQL (Squelch level) STEP(Frequency step) 2.5/5/6.25/10/12.5/25kHz TXP(Transmit power) HIGH/LOW SAVE( Battery save,1:1/1:2/1:3/1:4) OFF/1/2/3/4 VOX(Voice operated transmission) OFF/0-10 W/N( Wideband/narrowband) WIDE/NARR ABR(Display illumination) OFF/1/2/3/4/5s TDR(Dual watch/dual reception) OFF/ON BEEP(Keypad beep) OFF/ON TOT(Transmission timer) 15/30/45/60.../585/600seconds R-DCS(Reception digital coded squelch) OFF/D023N...D754I R-CTS(Reception Continuous Tone Coded Squelch) 67.0Hz...254.1Hz...
-
Page 15: Shortcut Menu Operation
12.2.-SHORTCUT MENU OPERATION: 1.-Press the key MENU,then press the key ▲ or ▼ to select the desired menu. 2.-Press the key MENU again, come to the parameter setting. 3.-Press the key ▲ or ▼ to select the desired parameter. 4.-Press the key MENU to confirm and save, press the key EXIT to cancel setting or clear the input. -Note: Under channel mode,the following menu settings are invalid:CTCSS,DCS,W/N,PTT-ID,BCL,SCAN ADD TO,S-CODE,CHANNEL NAME.Only the H/L power could be changed. -
Page 16: Dtmfst (Dtmf Tone Of Transmitting Code )
This feature allows you to operate between frequency A and frequency B. Periodically, the transceiver checks whether a signal is received on another frequency that we have scheduled. If you receive a signal, the unit will remain in the frequency until the received signal disappears. 12.7.- TOT(TRANSMISSION TIMER): This function can automatically control the time we transmit each time you press [PTT] on the transceiver. -
Page 17: Sc-Rev(Scan Resume Method)
12.11.- SC-REV(SCAN RESUME METHOD): This transceiver allows you to scan memory channels, all the bands or part of the bands. When the transceiver detects a communication, the scan will stop automatically. Notes: - "TO" (Time Operation): Scanning will stop when it detects an active signal. The scanning will stop on each channel or active frequency for a predetermined time, after that time the scan will resume automatically. -
Page 18: Ctcss Table
12.16.-STE (TAIL TONE ELIMATION): This function is used to activate or deactivate the transmission end of the transceiver. this final tone transmission only be used in communications between transceivers and not in communications through a repeater, which must be deactivated. 13.-CTCSS TABLE: Nº... - Page 19 15.-TECHNICAL SPECIFICATION: 15.1.-GENERAL: Frequency range: Rx:136MHz-174MHz / 400MHz-480MHz Tx:144MHz-148MHz / 420MHz-450MHz Memory channels: Up to 128 channels Frequency stability: 2.5ppm. Frequency step: 2.5kHz/5kHz/6.25kHz/10kHz/12.5kHz/25kHz. 50Ω . Antenna impedance: Operating temperature: -20 ° C to +60 ° C. Supply voltage: Rechargeable Lithium-Ion mAh 7.4V/1800. Consumption in standby: Consumption in reception: 380mA...
- Page 20 16.-TROUBLESHOOTING: Problem Possible cause / solution The radio does not start. The battery is low, replace the battery with a charged battery or proceed to the battery. The battery is not installed correctly, remove the battery and reattach it. The battery runs down quickly. The battery life has come to an end, replace the battery with a new one.
-
Page 21: Warranty Certificate
17.-WARRANTY: (Better buy the radios from local dealer). WARRANTY CERTIFICATE Brand: Model no.: Serial no.: Name of purchaser: Address: City: Zip code: Province/State: Tel no.: Seal and name of the dealer: Date of purchase: WARNING: Warranty is valid provided it is complete and properly filled in legibly and clearly present the seal and name of the dealer and have attached the bill proof of purchase of equipment. - Page 22 The warranty does not cover any faults caused by accident, improper installation and use, electric shock (eg storms), connect a power other than that specified, reverse polarity in the diet, or claims due to deterioration in the external appearance of normal use, nor the amount or condition of the accessories. Checking the accessories is the responsibility of the purchaser at the time of purchasing the device.
Need help?
Do you have a question about the UV-5R and is the answer not in the manual?
Questions and answers