Table of Contents
Advertisement
This manual is made with 100 % recycled paper.
FE-R300_XAA_DG68-00277A-09_EN.indd 1
Electric Range
user manual
imagine
the possibilities
Thank you for purchasing this Samsung product.
To receive more complete service, please register
your product at
www.samsung.com/register
1-800-SAMSUNG (726-7864)
FE-R300SX
FE-R300SW
FE-R300SB
ENGLISH
02/01/2014 11:12:12
Advertisement
Table of Contents

Subscribe to Our Youtube Channel
Related Manuals for Samsung FE-R300SX


Summary of Contents for Samsung FE-R300SX
- Page 1 Electric Range user manual This manual is made with 100 % recycled paper. imagine the possibilities ENGLISH Thank you for purchasing this Samsung product. To receive more complete service, please register your product at www.samsung.com/register 1-800-SAMSUNG (726-7864) FE-R300_XAA_DG68-00277A-09_EN.indd 1 02/01/2014 11:12:12...
- Page 2 • Steam Quick cleaning Thanks to Steam Quick™, Samsung’s unique technology for light-duty cleaning jobs, keeping your oven Spic-and-Span is a snap — no hassle, no odor, no chemicals. Steam Quick™ cleans the inside of your range with high-temperature steam in just 20 minutes.
- Page 3 Hazards or unsafe practices that may result in minor personal injury or property damage. CAUTION To reduce the risk of fire, explosion, electric shock, or personal injury when using your oven, follow these basic CAUTION safety precautions. Do NOT attempt. Do NOT disassemble.
- Page 4 Do not step, lean, or sit on the doors of the range. You can cause the range to tip, resulting in burns or serious injuries. Confirm that the Anti-Tip device is installed properly. Then, to verify that the Anti-Tip device is engaged, grasp the top rear edge of the range and carefully attempt to tilt it forward.
- Page 5 Do not enter inside the oven. Do not store items of interest to children in cabinets above a range or on the back guard of a range. Children climbing on the range to reach items could be seriously injured. Do not leave children alone. Children should not be left alone or unattended in an area where appliance is in use.
- Page 6 SURFACE COOKING UNITS Never leave surface units unattended at high heat settings. Boilovers cause smoking and greasy spillovers that may ignite. Do not lift the cooktop. Lifting the cooktop can lead to damage and improper operation of the range. Do not operate the cooktop when there is no cookware. If the cooktop operates without a cookware, the control knob will become hot.
- Page 7 OVEN DO NOT TOUCH HEATING ELEMENTS OR INTERIOR SURFACES OF THE OVEN. Heating elements may be hot even though they are dark in color. Interior surfaces of an oven become hot enough to cause burns. During and after use, do not touch or let clothing or other flammable materials contact heating elements or interior surfaces of oven until they have had sufficient time to cool.
- Page 8 SELF-CLEANING OVENS Do not clean the door gasket. The door gasket is essential for a good seal. Care should be taken not to rub, damage, or move the gasket. Never keep pet birds in the kitchen. The health of birds is extremely sensitive to the fumes released during an oven self-clean cycle.
- Page 9 SEVERE WARNING SIGNS FOR INSTALLATION WARNING The installation of this appliance must be performed by a qualified technician or service company. - Failing to do so may result in electric shock, fire, an explosion, problems with the product, or injury. Unpack the oven, remove all packaging material and examine the oven for any damages such as dents on the interior or exterior of the oven, broken door latches, cracks in the door, or a door that is not lined up correctly.
- Page 10 SEVERE WARNING SIGNS FOR USING CAUTION If the appliance is flooded please contact your nearest service center : Failing to do so may result in electric shock or fire. If the appliance generates a strange noise, a burning smell or smoke, unplug the power plug immediately and contact your nearest service center. - Failing to do so may result in electric shock or fire In the event of a gas leak (such as propane gas, LP gas, etc.), ventilate immediately without touching the power cord.
- Page 11 Do not let children or any person with reduced physical, sensory or mental capabilities use this appliance unsupervised. Make sure that the appliance is out of the reach of children. - Failing to do so may result in electric shock, burns or injury. Do not touch the inside of the appliance immediately after cooking, because the inside of the appliance is hot after being heated for a long time or heating a small amount of food.
- Page 12 CAUTION SIGNS FOR USING CAUTION When the surface is cracked, turn the power switch of the appliance off. - Failing to do so may result in electric shock. Dishes and containers can become hot. Handle with care. Hot foods and steam can cause burns. Carefully remove container coverings, directing steam away from hands and face.
- Page 13 Do not defrost frozen beverages in narrow-necked bottles. The containers can break. Do not scratch the glass of the oven door with a sharp object. - This may result in the glass being damaged or broken. Do not store anything directly on top of the appliance when it is in operation. Do not use sealed containers.
-
Page 14: Table Of Contents
contents INTRODUCING YOUR NEW RANGE Overview What’s included with your range SURFACE COOKING About surface cooking How to set the appliance for surface cooking Using the proper cookware Choosing the proper cookware Protecting the smoothtop surface OPERATING THE OVEN The oven control panel Setting the clock Setting the kitchen timer Minimum and maximum settings... -
Page 15: Introducing Your New Range
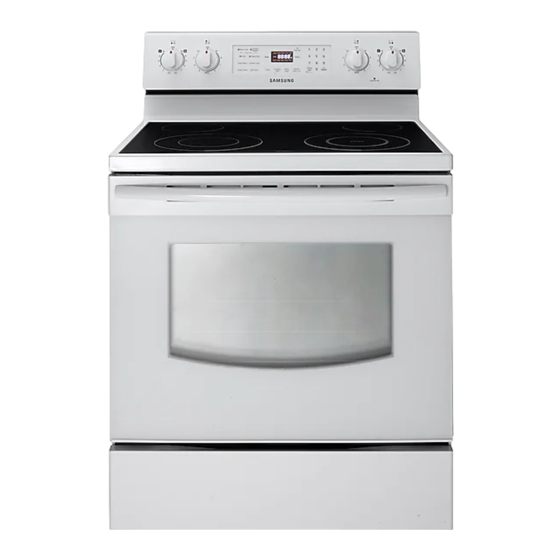
Oven control panel See page 19 for more Glass surface information Automatic oven light switch * Oven light Self/steam clean latch Oven door Gasket Shelf position WHAT’S INCLUDED WITH YOUR RANGE * Wire racks If you need an accessory marked with a *, you can buy it from the Samsung Contact Center (1-800-726-7864). Introducing your new range _14 FE-R300_XAA_DG68-00277A-09_EN.indd 14 02/01/2014 11:12:14... -
Page 16: Surface Cooking
surface cooking ABOUT SURFACE COOKING BEFORE COOKING • Do not use the glass cooktop surface as a cutting board. • Do not place or store items that can melt or catch fire on the glass cooktop, even when it is not being used. •... -
Page 17: How To Set The Appliance For Surface Cooking
Location of the radiant surface elements and controls The radiant control knobs operate the radiant surface elements on the cooktop as shown below. Dual Single Single Dual Left Front Left Rear Right Rear Right front Element Element Element Element Hot surface indicator •... -
Page 18: Using The Proper Cookware
Dual surface unit control knob (left front, right front) The dual surface unit has 2 cooking sizes to select from so you can match the size of the unit to the size of the cookware you are using. 1. Push the knob in. 2. -
Page 19: Choosing The Proper Cookware
CHOOSING THE PROPER COOKWARE What your cookware is made of determines how evenly and quickly heat is transferred from the surface element to the pan bottom. • ALUMINUM - Excellent heat conductor. Some types of food will cause the aluminum to darken. (Anodized aluminum cookware resists staining & pitting.). If aluminum pans are slid across the ceramic cooktop, they may leave metal marks that resemble scratches. -
Page 20: Operating The Oven
operating the oven THE OVEN CONTROL PANEL READ THE INSTRUCTIONS CAREFULLY BEFORE USING THE OVEN. For satisfactory use of your oven, become familiar with the various features and functions of the oven as described below. Detailed instructions for each feature and function follow later in this user manual. 1. -
Page 21: Setting The Clock
SETTING THE CLOCK The clock must be set to the correct time of day for the automatic oven timing functions to work properly. • The time of day cannot be changed during a timed cooking, a delay-timed cooking or a self- cleaning cycle. •... -
Page 22: Minimum And Maximum Settings
MINIMUM AND MAXIMUM SETTINGS All of the features listed have minimum and maximum time or temperature settings. A beep will sound each time a pad on the control panel is pressed and the entry is accepted. An error tone will sound in the form of a long beep if the entered temperature or time is below the minimum or above the maximum setting for the feature. -
Page 23: Baking
BAKING The oven can be programmed to bake at any temperature from 150°F to 550°F. How to set the thermostat 1. Start the set up. Press the BAKE pad. The default temperature is 350°F. 2. Enter the temperature you want on the number pad, eg. 3, 7, 5. 3. -
Page 24: Delay Timed Cooking
5. Press the SET/START pad to begin cooking operation. The oven will continue to cook until the set amount of time has elapsed. If you want to show temperature display, press the bake pad. 6. You can cancel a timed cooking at any time by pressing the CLEAR/OFF pad. -
Page 25: Broiling
BROILING Broil stop position Leave the door open to the broil stop position. The door will stay Broil stop position open by itself, yet the proper temperature is maintained in the oven. Using the broil pan The broil pan and the insert allow grease to drain and be kept away from the high heat of the broiler. -
Page 26: Using The Easy Cook Feature
USING THE EASY COOK FEATURE Slow Cook The Slow Cook feature may be used to cook food more slowly at lower oven temperatures. The extended cooking times allow better distribution of flavors in many recipes. This feature is ideal for roasting beef, pork & poultry. Slow cooking meats may result on the exterior of meats becoming dark but nor burnt. -
Page 27: Using The Custom Cook Feature
USING THE CUSTOM COOK FEATURE By using the custom cook feature, you can record up to 3 different recipe settings. The feature may be used for baking. It will not work with any other function, including the delay start feature. How to record a recipe setting 1. -
Page 28: Extra Features
EXTRA FEATURES 12 hour energy saving With this feature, should you forget and leave the oven on, the control will automatically turn off the oven after 12 hours during baking functions or after 3 hours during a broil function. How to turn 12 hour energy saving feature on or off 1. - Page 29 Sound on/off By using this feature, you can set the oven controls to operate silently. How to turn the sound on or off 1. Press Oven Light and 0 on the number pad at the same time for 3 seconds. The display will show Snd On (sound on) or Snd OFF (sound off).
- Page 30 Setting the Sabbath (For use on the Jewish Sabbath & Holidays) The Sabbath feature can be used with baking only. The oven temperature may be set higher or lower after setting the Sabbath feature (the oven temperature adjustment feature should be used only during Jewish holidays).
-
Page 31: Maintaining Your Appliance
maintaining your appliance SELF-CLEANING A self-cleaning oven uses high temperatures (well above cooking temperatures) to burn off leftover grease and residue completely or reduce them to a finely powdered ash that you can wipe away with a damp cloth. • During the self-cleaning cycle, the outside of the range can become very hot to touch. Do not leave small children unattended near the appliance. - Page 32 How to set the oven for self-cleaning 1. Select the length of time for the self-cleaning operation, eg. 3 hours. Press the SELF CLEAN pad once for a 3 hour clean time, twice for a 4 hour clean time, or 3 times for a 2 hour clean time. The default setting is 3 hours.
-
Page 33: Steam-Cleaning
STEAM-CLEANING How to set the oven for steam-cleaning Steam-cleaning saves time and energy for light cleaning. For heavier-duty cleaning of debris and grease, use the self-cleaning function. 1. Remove all accessories from the oven. 2. Pour approximately 10 oz. (300 ml) of water onto the bottom of the empty oven and close the oven door. -
Page 34: Care And Cleaning Of The Oven
CARE AND CLEANING OF THE OVEN • Be sure all controls are OFF and all surfaces are COOL before cleaning any part of the range. • If your range is removed for cleaning, servicing or any reason, be sure the Anti-Tip device is re-engaged properly when the range is replaced. -
Page 35: Care And Cleaning Of The Glass Cooktop
Oven racks • If the racks are left in the oven during a self-cleaning cycle, their color will turn slightly blue and the finish will be dull. After the self-cleaning cycle is complete and the oven has cooled, rub the sides of the racks with wax paper or a clothing containing a small amount of cooking oil. - Page 36 Removing heavy, burned-on residue 1. Allow the cooktop to cool. 2. Use the single-edge razor-blade scraper at approximately a 45° angle against the glass surface and scrape the soil. It will be necessary to apply pressure in order to remove the residue. 3.
-
Page 37: Removing And Replacing The Oven Door
REMOVING AND REPLACING THE OVEN DOOR How to remove the door • The door is very heavy. Be careful when removing and lifting the door. Do not lift the door by the handle. • Turn the power OFF before removing the door. Hinge lock 1. Open the door completely. 2. -
Page 38: Changing The Oven Light
CHANGING THE OVEN LIGHT The oven light is a standard 40-watt appliance bulb. It will come on when the oven door is open. When the oven door is closed, press the OVEN LIGHT pad to turn it on or off. It will not work during a self-cleaning cycle. -
Page 39: Troubleshooting
TROUBLESHOOTING Samsung works hard to ensure that you don’t have problems with your new electric range. If you run into unexpected trouble, look first for a solution in the table below. If, after trying the suggested solution, you’re still having trouble, call Samsung at 1-800-SAMSUNG (1-800-726-7864). - Page 40 PROBLEM POSSIBLE CAUSE SOLUTION Areas of Food spillover was not cleaned. • Refer to the section on care and cleaning discoloration on the of the glass cooktop on page 34. cooktop The surface is hot and the model • This is normal. The surface may appear features a light-colored cooktop.
- Page 41 PROBLEM POSSIBLE CAUSE SOLUTION Food does not broil The oven controls have been set • Press the BROIL pad. properly. incorrectly. The rack has not been properly • See the broiling guide on page 24. positioned. Cookware not suited for broiling. •...
- Page 42 PROBLEM POSSIBLE CAUSE SOLUTION Oven not clean after The oven controls were not set • See the section on self-cleaning on page a self-cleaning cycle correctly. The oven was heavily soiled. • Wipe up heavy spillovers before starting the self-cleaning cycle. Heavily soiled ovens may need to self-clean again or for a longer period of time.
-
Page 43: Warranty _42
SAMSUNG will repair or replace this product, at our option and at no charge as stipulated herein, with new or reconditioned parts or products if found to be defective during the limited warranty period specified above. All replaced parts and products become the property of SAMSUNG and must be returned to SAMSUNG. - Page 44 Please be advised that the Samsung warranty does NOT cover service calls to explain product operation, correct improper installation, or perform normal cleaning or maintenance. www.samsung.com/ca (English) CANADA 1-800-SAMSUNG (726-7864) www.samsung.com/ca_fr (French) MEXICO 01-800-SAMSUNG (726-7864) U.S.A 1-800-SAMSUNG (726-7864) www.samsung.com Consumer Electronics U.S.A...
Need help?
Do you have a question about the FE-R300SX and is the answer not in the manual?
Questions and answers