Table of Contents
Advertisement
Quick Links
Advertisement
Table of Contents

Subscribe to Our Youtube Channel
Related Manuals for Ubiquiti NanoBeam NBE2ACN


Summary of Contents for Ubiquiti NanoBeam NBE2ACN
- Page 1 2.4 GHz airMAX ac CPE with ® Dedicated Wi-Fi Management Model: NBE-2AC-13...
-
Page 2: Package Contents
Quick Start with Mounting Bracket Guide TERMS OF USE: Ubiquiti radio devices must be professionally installed. Shielded Ethernet cable and earth grounding must be used as conditions of product warranty. TOUGHCable ™ designed for outdoor installations. It is the professional installer’s responsibility to follow local country regulations, including operation within legal frequency channels, output power, and Dynamic Frequency Selection (DFS) requirements. -
Page 3: Installation Requirements
AC ground of the PoE. We recommend that you protect your networks from harmful outdoor environments and destructive ESD events with industrial-grade, shielded Ethernet cable from Ubiquiti Networks. For more details, visit www.ubnt.com/toughcable • Surge protection should be used for all outdoor installations. -
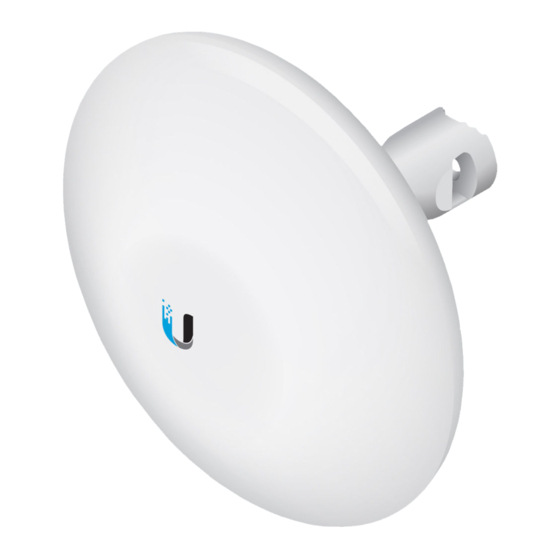
Page 4: Hardware Overview
This Gigabit Ethernet port is used to connect the power and should be connected to the LAN and DHCP server. Power can be provided by any of the following: • Gigabit PoE adapter (included) • Ubiquiti Networks EdgeSwitch® • Ubiquiti Networks EdgeRouter ™... - Page 5 LEDs Power The Power LED will light blue when the device is connected to a power source. Ethernet The Ethernet LED will light steady blue when an active Ethernet connection is made and flash when there is activity. Signal In airOS®, you can modify the threshold value for the wireless signal strength LEDs on the Wireless tab under Signal LED Thresholds.
-
Page 6: Hardware Installation
Hardware Installation The NanoBeam can be mounted on a pole or to a wall. Perform the steps for the appropriate installation: Note: The NanoBeam can also be mounted inside a window using the NanoBeam Window Mount, model NBE-19-WM (sold separately). For instructions, see the NanoBeam Window Mount Quick Start Guide. - Page 7 3. Wrap the Metal Strap around the pole. Use a 7 mm socket wrench to turn the screw clockwise and securely fasten the clamp to the pole. 4. Attach the NanoBeam to the Ball Joint Mount and turn the Lock Ring to secure it. Keep the Lock Ring loose enough to allow the NanoBeam to pivot for aiming.
- Page 8 Wall-Mount The NanoBeam must be mounted directly to a wood stud or other structurally stable surface to avoid damage to the mounting hole when you adjust the aim. Optional Accessory To enhance stability, you can use the NanoBeam Wall Mount Kit, model NBE-WMK (sold separately).
- Page 9 4. If you are using the optional NanoBeam Wall Mount Kit, then skip to step b. a. To attach the Ball Joint Mount to the wall, insert a fastener (not included) through the center of the ball joint, and into the wall. Securely tighten the fastener. Proceed to step 5.
- Page 10 5. Attach the NanoBeam to the Ball Joint Mount and turn the Lock Ring to secure it. Keep the Lock Ring loose enough to allow the NanoBeam to pivot for aiming. Aiming 1. Ensure the opening of the Ethernet cable is pointed towards the ground.
-
Page 11: Connecting Power
Connecting Power 1. Remove the port cover by pressing down the center of the cover and sliding the cover out. Polarity Align 2.4 GHz 2. Connect an Ethernet cable to the Ethernet port. Polarity Align 2.4 GHz M/N: NBE-2AC-13 24V 0.5A GigE PoE FCC ID: SWX-NBE2ACN IC: 6545A-NBE2ACN RoHS... - Page 12 4. Connect the power using one of the following options: • Using the included Gigabit PoE Adapter: Go to Connecting to the PoE Adapter. • Using a separate PoE switch: Connect the Ethernet cable from the NanoBeam’s Ethernet port to a PoE-enabled Ethernet port on the switch.
- Page 13 Accessing airOS via Wi-Fi Verify connectivity in the airOS Configuration Interface. There are two methods, the U Mobile App and Web Portal. Both are available for 15 minutes immediately after you power on the NanoBeam. If necessary, you can power cycle the NanoBeam to re-enable its Wi-Fi.
- Page 14 5. Tap Connect on the Login screen. 8 : 08 100 % Login Connect Name NanoBeam 2AC 13 CONNECTION Address 192.168.172.1 Port Require HTTPS CREDENTIALS Username ubnt Password NBE-2AC-13: F09FC71EXXXX 6. Select your Country and tap Done. *640-00181-08* 640-00181-08...
- Page 15 7. Customize your settings as needed. 8 : 09 100 % NanoBeam 2AC 13 Apply Backup Wireless Network System Wireless Mode Station PtP WIRELESS SSID www.ubnt.com Select SSID... Security None RADIO Country United Kingdom Channel Width Auto - 20/40/80 MHz Control Frequency List ANTENNA Antenna...
-
Page 16: Web Portal
Web Portal 1. Connect your device’s Wi-Fi to the NanoBeam SSID named: NBE-2AC-13:<MAC Address> Note: Ensure that your Wi-Fi connection has DHCP enabled. 2. Launch a web browser and go to: http://setup.ubnt.com 3. Enter ubnt in the Username and Password fields. Select your Country and Language. -
Page 17: Installer Compliance Responsibility
Installer Compliance Responsibility Devices must be professionally installed and it is the professional installer's responsibility to make sure the device is operated within local country regulatory requirements. The Output Power field is provided to the professional installer to assist in meeting regulatory requirements. -
Page 18: Specifications
Specifications NBE-2AC-13 Dimensions (Mount Included) 189 x 189 x 125 mm (7.44 x 7.44 x 4.92") Weight (Mount Included) 530 g (1.17 lb) Gain 13 dBi Networking Interface (1) 10/100/1000 Ethernet Port Enclosure Outdoor UV Stabilized Plastic Max. Power Consumption 7.5W Power Supply 24V, 0.5A Gigabit PoE Adapter (Included) -
Page 19: Safety Notices
Safety Notices Read, follow, and keep these instructions. Heed all warnings. Only use attachments/accessories specified by the manufacturer. WARNING: Do not use this product in a location that can be submerged by water. WARNING: Avoid using this product during an electrical storm. -
Page 20: Limited Warranty
(VI) has no original Ubiquiti MAC label, or is missing any other original Ubiquiti label(s); or (VII) has not been received by Ubiquiti within 30 days of issuance of the RMA. -
Page 21: Limitation Of Liability
SUBJECT TO LIMITATIONS, INTERRUPTIONS, DELAYS, CANCELLATIONS AND OTHER PROBLEMS INHERENT IN THE USE OF COMMUNICATIONS FACILITIES. UBIQUITI NETWORKS, ITS AFFILIATES AND ITS AND THEIR THIRD PARTY PROVIDERS ARE NOT RESPONSIBLE FOR ANY INTERRUPTIONS, DELAYS, CANCELLATIONS, DELIVERY FAILURES, DATA LOSS, CONTENT CORRUPTION, PACKET LOSS, OR OTHER DAMAGE RESULTING FROM ANY OF THE FOREGOING. - Page 22 Note Some countries, states and provinces do not allow exclusions of implied warranties or conditions, so the above exclusion may not apply to you. You may have other rights that vary from country to country, state to state, or province to province. Some countries, states and provinces do not allow the exclusion or limitation of liability for incidental or consequential damages, so the above limitation may not apply to you.
- Page 23 ISED Canada CAN ICES-3(A)/NMB-3(A) This device complies with ISED Canada licence-exempt RSS standard(s). Operation is subject to the following two conditions: This device may not cause interference, and This device must accept any interference, including interference that may cause undesired operation of the device. This radio transmitter (IC: 6545A-NBE2ACN) has been approved by ISED Canada.
- Page 24 RF Exposure Warning The antennas used for this transmitter must be installed to provide a separation distance of at least 41 cm from all persons and must not be located or operating in conjunction with any other antenna or transmitter. Les antennes utilisées pour ce transmetteur doivent être installé...
-
Page 25: Rohs/Weee Compliance Statement
RoHS/WEEE Compliance Statement English European Directive 2012/19/EU requires that the equipment bearing this symbol on the product and/or its packaging must not be disposed of with unsorted municipal waste. The symbol indicates that this product should be disposed of separately from regular household waste streams. - Page 26 Español La Directiva 2012/19/UE exige que los equipos que lleven este símbolo en el propio aparato y/o en su embalaje no deben eliminarse junto con otros residuos urbanos no seleccionados. El símbolo indica que el producto en cuestión debe separarse de los residuos domésticos convencionales con vistas a su eliminación.
-
Page 27: Declaration Of Conformity
Íslenska [Icelandic] Hér með lýsir UBIQUITI NETWORKS yfir því að NBE-2AC-13 er í samræmi við grunnkröfur og aðrar kröfur, sem gerðar eru í tilskipun 2014/53/EU. Fullur texti ESB samræmisyfirlýsing er að finna á eftirfarandi netfangi: www.ubnt.com/compliance... -
Page 28: Online Resources
Español [Spanish] Por la presente, UBIQUITI NETWORKS declara que el tipo de equipo radioeléctrico NBE-2AC-13 es conforme con la Directiva 2014/53/UE. El texto completo de la declaración UE de conformidad está disponible en la dirección Internet siguiente: www.ubnt.com/compliance...
Need help?
Do you have a question about the NanoBeam NBE2ACN and is the answer not in the manual?
Questions and answers