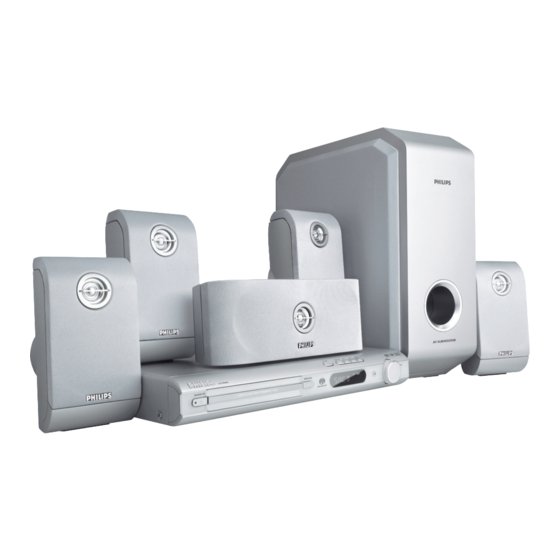
Philips LX3900SA Manual
Dvd video / sacd home theatre system
Hide thumbs
Also See for LX3900SA:
- Manual (49 pages) ,
- Quick use manual (3 pages) ,
- Technical specifications (2 pages)

Related Manuals for Philips LX3900SA


Summary of Contents for Philips LX3900SA
- Page 1 DVD HOME DVD HOME DVD VIDEO / SACD THEATRE THEATRE HOME THEATRE SYSTEM SYSTEM SYSTEM LX3900SA • LX3950W LX3900SA LX3950W 001-039-LX39-93-EngFinal 08/04/2004, 01:48 PM...
-
Page 2: Language Code
Language Code Abkhazian 6566 Inupiaq 7375 Pushto 8083 Afar 6565 Irish 7165 Russian 8285 Afrikaans 6570 Íslenska 7383 Quechua 8185 Amharic 6577 Italiano 7384 Raeto-Romance 8277 Arabic 6582 Ivrit 7269 Romanian 8279 Japanese 7465 Rundi 8278 Armenian 7289 Assamese 6583 Javanese 7486 Samoan... - Page 3 PROBLEMS, IT IS RECOMMENDED THAT THE USER common and will be easy to complete. SWITCH THE CONNECTION TO THE ‘STANDARD Go to www. p4c.philips.com for software upgarde. DEFINITION’ OUTPUT. IF THERE ARE QUESTIONS REGARDING OUR TV SET COMPATIBILITY WITH THIS MODEL 525p AND 625p DVD PLAYER, PLEASE CONTACT OUR CUSTOMER SERVICE CENTRE’.
-
Page 4: Table Of Contents
Contents Step 3: Setting language preferences ..16 Language Code ........On-Screen Display (OSD) language . 16 Audio, Subtitle and Disc menu General Information languages ..........16 Supplied accessories ........6 Step 4: Setting the speakers’ channels .. 17 Care and safety information ..... 6 Disc Operations Connections Playable discs .......... - Page 5 Setting the analogue output ....27 Using the remote to operate your Speaker Setup ........27 ‘Philips’ television ........35 Night mode – turning on/ off .... 27 Recording to an external device .... 35 Video Setup Menu ........28 Setting the Sleep timer ......
-
Page 6: General Information
Remote control (4 inches) of free space all around the and two batteries player for adequate ventilation. (12nc: 3139 258 70031) 10 cm (4 inches) PHILIPS 10 cm 10 cm (4 inches) (4 inches) DVD Home Cinema System Speaker brackets... -
Page 7: Connections
Connections Step 1: Placing the speakers Step 2: Connecting speakers and subwoofer and subwoofer Front Right Front Left DVD System Centre speaker Centre Front Speaker Front Speaker (Right) (Left) TV IN AUX IN LINE OUT Rear speaker Rear speaker Subwoofer Rear Left Rear Right (Left) -
Page 8: Step 3: Connecting Tv
Connections Step 3: Connecting TV Option 2 Option 1 TV IN AUX IN LINE OUT TV IN AUX IN LINE OUT IMPORTANT! IMPORTANT! – You only need to make one video The progressive scan video quality is connection from the following only possible when using Y Pb Pr, and options, depending on the a progressive scan TV is required. -
Page 9: Using S-Video Jack
DVD playback on the TV. See your electronics retailer or Using S-Video jack contact Philips for details on RF modulator availability and operations. Use an S-video cable (not supplied) to connect the DVD system’s S-VIDEO... -
Page 10: Step 4: Connecting Fm/Mw Antennas
Connections Step 4: Connecting FM/MW Step 5: Connecting the antennas power cord fix the claw into the slot TV IN AUX IN LINE OUT ➠ antenna antenna ~ AC MAINS Connect the supplied MW loop antenna After everything is connected to the MW jack. -
Page 11: Connections (Optional)
Connections (Optional) Connecting a VCR or Connecting digital audio Cable/Satellite Box equipment (for example) CD Recorder VCR or Cable/ Satellite Box TV IN AUX IN LINE OUT TV IN AUX IN LINE OUT Viewing and listening to the playback Listening to the playback Connect the VCR or Cable/Satellite Box Connect the DVD system’s DIGITAL to the TV as shown. -
Page 12: Functional Overview
– DISC: switches to DISC source mode. – TV: switches to TV source mode and/or DISC MENU (DISC source mode only) *to turn on the Philips TV (only on the – Enters or exits disc contents menu. remote control). – For VCD version 2.0 only;... - Page 13 ∞ SETUP – Switches to Eco Power standby mode. – Enters or exits system setup menu. – In TV mode, *switches Philips TV on/off. § ZOOM – Enlarges a picture on the TV screen. * = Press and hold the button for more than two seconds.
-
Page 14: Getting Started
Getting Started Step 1: Inserting batteries into Step 2: Setting the TV the remote control IMPORTANT! Make sure you have completed all the necessary connections. (See pages 8-9 “Connecting TV”). DISC Press SOURCE control until “ ” appears on the display panel (or press DISC on the remote). -
Page 15: Selecting The Colour System That Corresponds To Your Tv
Getting Started Selecting the colour system that Setting the TV Display corresponds to your TV Set the aspect ratio of the DVD Player In order for a DVD to play on this DVD according to the TV you have connected. system, the colour system of the DVD, The format you select must be available the TV and the DVD player should match. -
Page 16: Step 3: Setting Language Preferences
Getting Started Step 3: Setting language Audio, Subtitle and Disc menu languages preferences You can select your preferred language Press Ç twice to stop playback (if any), settings so that this DVD system will then press SETUP. automatically switch to the language for Press 2 repeatedly to select you whenever you load a disc. -
Page 17: Step 4: Setting The Speakers' Channels
Getting Started Press 34 to highlight one of the options Step 4: Setting the speakers’ below at a time, then press 2. channels {SPEAKERS VOLUME} – Volume level You can adjust the delay times (centre setting for individual speakers (-6dB ~ and surround only) and volume level for +6dB). -
Page 18: Disc Operations
Disc Operations IMPORTANT! Region Codes – If the inhibit icon (ø or X) appears DVDs must be labelled for ALL on the TV screen when a button is regions or Region 6 in order to pressed, it means the function is not play on this DVD system. -
Page 19: Auto Eco Power Standby Mode
Disc Operations Selecting various repeat/ Auto Eco Power standby mode shuffle functions This is a power-saving feature, the system will automatically switch to Eco Power standby mode if you do not press any Repeat play mode buttons within 30 minutes after a disc has While playing a disc, press REPEAT stopped playing. -
Page 20: Other Operations For Video Playback (Dvd/Vcd/Svcd)
Disc Operations Other operations for video Using the OSD menu playback (DVD/VCD/SVCD) OSD menu shows the disc playback information (for example, title or chapter number, elapsed playing time, audio/ subtitle language), a number of operations can be done without interrupting disc playback. -
Page 21: Resuming Playback From The Last Stopped Point
Disc Operations Resuming playback from the last Changing subtitle language (DVD stopped point only) Resume playback of the last 10 discs is This operation works only on DVDs with possible, even if the disc was ejected or multiple subtitle languages, you can the power switched off. -
Page 22: Playback Control (Pbc) (Vcd Only)
Disc Operations Track Digest Playback Control (PBC) (VCD only) This function will minimise the picture of PBC playback allows you to play Video every track in order to display every six CDs interactively, following the menu on of these tracks on the screen to help you the display. -
Page 23: Playing Mp3/Jpeg/Divx/ Mpeg-4 Disc
Disc Operations Press REPEAT continuously to access Playing MP3/JPEG/DivX/ different ‘Play Mode’. MPEG-4 disc ➜ REPEAT FOLDER: all files in one folder being played repeatedly. This player can playback DivX, MPEG-4, ➜ REPEAT ONE: one file being played MP3, JPEG, VCD & SVCD files on a repeatedly. -
Page 24: Playing Super Audio Cd (Sacd)
Disc Operations Playing Super Audio CD (SACD) Preview Function This function shows the content of the There are three types of SACD discs : current folder or the whole disc. single layer, double layer or hybrid disc. The hybrid disc contains both Super During playback, press Ç. -
Page 25: Dvd Setup Menu Options
DVD Setup Menu Options This DVD system setup is carried out via Dimming system’s display panel the TV, enabling you to customise the You can select different levels of DVD system to suit your particular brightness for the display screen. requirements. -
Page 26: Osd Language
DivX VOD registration code track/chapter number. ® Philips provide you the DivX (Video On Demand) registration code If you want to remove a track that allows you to rent and purchase Use 1 2 3 4 keys to move the cursor to ®... -
Page 27: Audio Setup Menu
DVD Setup Menu Options Audio Setup Menu Speaker Setup This menu contains setup options for In disc mode, press SETUP. your audio output which makes the Press 1 2 to select ‘Audio Setup’ icon. speaker setup system reproduce high quality surround sound. For details, see Press OK to confirm. -
Page 28: Video Setup Menu
DVD Setup Menu Options IMPORTANT! Video Setup Menu Before enable the progressive scan function, you must ensure : In disc mode, press SETUP. 1) Turn on your TV progressive scan Press 1 2 to select ‘Video Setup’ icon. function (refer to your TV owner’s Press OK to confirm. -
Page 29: Preference Setup Menu
DVD Setup Menu Options PERSONAL Preference Setup Menu Select this to personalise your picture Press Ç twice to stop playback (if any), colour by adjusting the brightness, contrast, tint and colour (saturation). then press SETUP. Press 1 2 to select the ‘Preference Setup’ Press 34 to select a setting and press icon. -
Page 30: Pbc
DVD Setup Menu Options In ‘PREFERENCE PAGE’, press 34 to Helpful Hints: highlight {PARENTAL}, then press 2. – VCD, SVCD, CD have no level indication, so parental control has no effect on these type of discs. This also applies to most illegal DVDs. -
Page 31: Changing The Password
DVD Setup Menu Options Enter the new six-digit password a Changing the Password second time to confirm. The same password is used for both ➜ The new six-digit password will now Parental Control and Disc Lock. Enter take effect. your six-digit password to play a Press OK to confirm. -
Page 32: Tuner Operations
Tuner Operations IMPORTANT! Press 2; on the front panel to start Make sure the FM and MW installation. ➜ "INSTALL TUNER" appears. antennas are connected. ➜ Once completed, sı] last tuned radio station will play. Tuning to radio stations ➜ FM followed by MW bands will be Press TUNER on the remote (or press stored. -
Page 33: Manual Presetting
Tuner Operations Manual presetting You can choose to store only your favourite radio stations. Tune to your desired radio station (see “Tuning to radio stations”). Press PROG. Press 1 2 to select a preset number. Press PROG again to store. Selecting a preset radio station Press 1 2 or use the numeric keypad... -
Page 34: Sound And Volume Controls
Sound and Volume Controls Sound Control Selecting digital sound effects Select a preset digital sound effects that IMPORTANT! matches your disc’s content or that For proper surround sound, make optimises the sound of the musical style sure the speakers and subwoofer are you are playing. -
Page 35: Other Functions
Helpful Hint: Using the remote to operate – Refer to the owner’s manual of the connected equipment for details. your ‘Philips’ television Setting the Sleep timer The sleep timer enables the system to switch to Eco Power standby mode automatically at a preset time. -
Page 36: Troubleshooting
– Moisture has condensed inside the system. Remove the disc and leave the system turned on for about an hour. Visit us at www.p4c.philips.com for service support 001-039-LX39-93-EngFinal 08/04/2004, 01:49 PM... - Page 37 The DVD system does not work. – Disconnect the power cord from the power outlet for a few minutes. Reconnect the power cord and try to operate again as usual. Visit us at www.p4c.philips.com for service support 001-039-LX39-93-EngFinal 08/04/2004, 01:49 PM...
-
Page 38: Specifications
MW 531 – 1602 kHz (9 kHz) REAR SPEAKERS 26 dB Quieting Sensitivity FM 20 dB System 2-way, closed box system MW 4 µV/m 4 Ω Impedance (LX3900SA) Image Rejection Radio FM 25 dB 8 Ω Impedance (LX3950W) MW 28 dB Speaker drivers... -
Page 39: Glossary
Glossary Analogue: Sound that has not been turned into MP3: A file format with a sound data compression numbers. Analogue sound varies, while digital sound system. “MP3” is the abbreviation of Motion Picture has specific numerical values. These jacks send Experts Group 1 (or MPEG-1) Audio Layer 3. - Page 40 LX3900SA 12nc: 3139 115 23311 First connect ... Front Speaker Front Speaker P r / C r (right) (left) Scart cable MW loop Centre Speaker antenna FM antenna FM/MW ANTENNA VIDEO OUT AUDIO CVBS FM 75 FRONT CENTER FRONT REAR...
- Page 41 Playing a disc SUPER VIDEO Make sure your DVD system and TV are connected and turned on! Press DISC on the remote control. You can also press the SOURCE button on the front panel until “DISC” appears on the display panel. No picture? Turn on the TV and select the correct Video In mode.
Need help?
Do you have a question about the LX3900SA and is the answer not in the manual?
Questions and answers