Advertisement
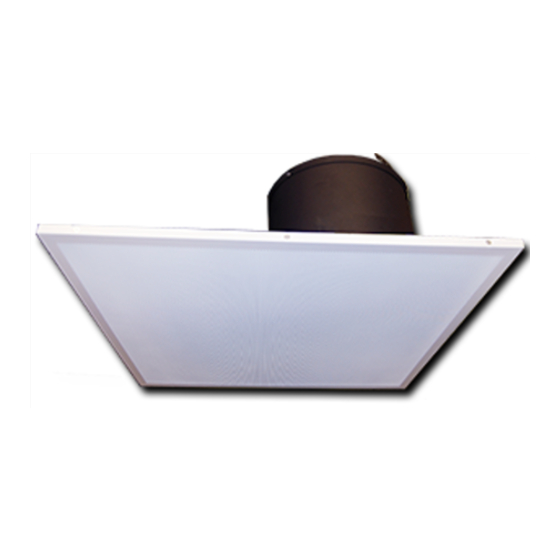
This set up guide contains installation instruction of the AMK DT61-A series of AMK's
Dante System enabled network self amplified speaker. This speaker is designed to
use in plenum rated ceiling spaces and can be dropped into standard square (2' x 2' or
600mm by 600mm) or rectangular (2' x 4" or 600mm by 1200mm) false ceiling tile
space with a tile bridge.
Important Safety Instructions.
WARNING: May result in serious injury. Installation and service must be performed by
authorized personnel only
1. Read these instructions
2. Keep these instructions
3. Heed all warnings
4. Follow all instructions.
5. Do not use this speakers near water
6. Clean only with dry cloth.
7. Do not block any ventilation openings. Install in accordance with manufacturer's
instructions.
8. Do not install these speakers near any heat sources such as radiators, heat
registers, stoves, or other apparatus (including amplifiers) that produce heat.
9. Use only attachments/accessories specified by manufacturer
10.
If the speakers have not been used for some time, unplug the speakers.
Or when there is a lightning storms, please unplug the speakers for safety.
Parts Check List.
2x2 lay in PoE+ self amplified network speaker (1)
Handy Box Cover (1)
Installation Manual
DT61-A
Dante System Network Enabled Speaker
12407 Mukilteo Speedway, Ste. 130
Lynnwood, WA 98087
p. 800.438-4026 f. 877.721.8107
tech@amkspeakers.com
www.amkspeakers.com
Advertisement
Table of Contents

Related Manuals for AMK DT6 Series


Summary of Contents for AMK DT6 Series
- Page 1 Dante System Network Enabled Speaker www.amkspeakers.com This set up guide contains installation instruction of the AMK DT61-A series of AMK’s Dante System enabled network self amplified speaker. This speaker is designed to use in plenum rated ceiling spaces and can be dropped into standard square (2’ x 2’ or 600mm by 600mm) or rectangular (2’...
- Page 2 For Suspended Ceiling Installations Remove the ceiling tile from the selected speaker location that is to be cut from the ceiling, and an adjacent ceiling tile for access. Installation 1. Make sure that all the power is removed. 2. Remove and cut ceiling tile as sown below. If the tile is 2’ x 4’, then you will need to cut the tile into half.
- Page 3 Main Active Speaker Wire Connection: Connect the audio wires connecting active speakers to three passive speakers through conduit. Pre terminate the wire and connect the Phoenix plug to the wire. Punch the knockout on the side of the handy box. After the connection is made, make sure to close the handy box with the cover provided.
- Page 4 Warranty The speakers should be not open, altered, tampered without the consulting with AMK, otherwise you will lose the warranty on the speaker. If the speaker is a need for additional support for seismic mounting, please consult with AMK.
Need help?
Do you have a question about the DT6 Series and is the answer not in the manual?
Questions and answers