Table of Contents
Advertisement
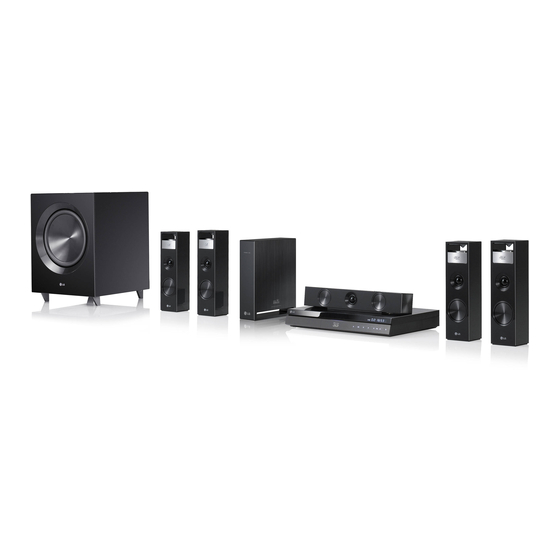
OWNER'S MANUAL
SMART Blu-ray™
Home Theater System
Please read this manual carefully before operating
your set and retain it for future reference.
BH9220BW (BH9220BW, S92B1-S, S92T1-C, S92B1-W, T2, W2)
BH9420PW (BH9420PW, S92T1-S, S92B1-S, S92T1-C, S92T1-W, T2, W2)
BH9520TW (BH9520TW, S92T1-S/W, S92T1-C, T2, W2)
P/NO : SAC35493501
Advertisement
Table of Contents

Related Manuals for LG BH9220BW


Summary of Contents for LG BH9220BW
-
Page 1: Home Theater System
Home Theater System Please read this manual carefully before operating your set and retain it for future reference. BH9220BW (BH9220BW, S92B1-S, S92T1-C, S92B1-W, T2, W2) BH9420PW (BH9420PW, S92T1-S, S92B1-S, S92T1-C, S92T1-W, T2, W2) BH9520TW (BH9520TW, S92T1-S/W, S92T1-C, T2, W2) P/NO : SAC35493501... - Page 2 Getting Started Safety Information CAUTION RISK OF ELECTRIC SHOCK DO NOT OPEN CAUTION: TO REDUCE THE RISK OF ELECTRIC SHOCK DO NOT REMOVE COVER (OR BACK) NO USER-SERVICEABLE PARTS INSIDE REFER SERVICING TO QUALIFIED SERVICE PERSONNEL. This lightning flash with arrowhead symbol within an equilateral triangle is intended to alert the user to the presence of uninsulated dangerous...
-
Page 3: Getting Started 34
CAUTION: Regulations of the FCC and FAA prohibit airborne operation of radio-frequency wireless devices because their signals could interfere with critical aircraft instruments. Responsible Party : LG Electronics USA, Inc.1000 Sylvan Avenue Englewood Cliffs, NJ 07632 TEL. : +1-800-243-0000... - Page 4 Getting Started Notes on Copyrights y Because AACS (Advanced Access Content System) is approved as content protection system for Blu-ray Disc format, similar to use of CSS (Content Scramble System) for DVD format, certain restrictions are imposed on playback, analog signal output, etc., of AACS protected contents.
-
Page 5: Important Safety
IMPORTANT SAFETY INSTRUCTIONS 1. Read these instructions. 2. Keep these instructions. 3. Heed all warnings. 4. Follow all instructions. 5. Do not use this apparatus near water. 6. Clean only with dry cloth. 7. Do not block any ventilation openings. Install in accordance with the manufacturer’s instructions. -
Page 6: Table Of Contents
Table of Contents Getting Started Safety Information Introduction – Playable Discs and symbols used in this manual – About the “7” Symbol Display – Compatibility Notes – File requirement – AVCHD (Advanced Video Codec High Definition) – About DLNA – Certain System Requirements –... - Page 7 – Presetting the Radio Stations – Deleting a saved station – Deleting all the saved stations – Improving poor FM reception Using the Premium Using the LG Apps – Signing in – Managing my Apps – Searching online content Using Bluetooth technology –...
-
Page 8: Getting Started
Getting Started Introduction Playable Discs and symbols used in this manual Media/Term Logo Blu-Ray DVD-ROM DVD-R DVD-RW DVD+R DVD+RW (12 cm) DVD-RW (VR) (12 cm) Audio CD (12 cm) CD-R/RW (12 cm) Note – Caution – Symbol y Discs such as movies that can be purchased or rented. -
Page 9: About The "7" Symbol Display
LG players when formatting rewritable discs. When setting the option to Live System, you cannot use it on LG player. (Mastered/Live File System : Disc format system for windows Vista) Getting Started About the “7” Symbol Display “7”... -
Page 10: File Requirement
Getting Started File requirement Movie files File File Location Extension “.avi”, “.mpg”, “.mpeg”, “.mkv”, Disc, “.mp4”, “.asf”, “.wmv”, “.m4v” (DRM free), “.vob”, “.3gp” “.avi”, “.mpg”, “.mpeg”, “.mkv”, “.mp4”, “.asf”, DLNA “.wmv”, ".m4v (DRM free) Music files File File Location Extension Disc, “mp3”, “.wma”, “.wav”, “.m4a”... -
Page 11: Avchd (Advanced Video Codec High Definition)
Note y The file name is limited to 180 characters. y Maximum files/folder: Less than 2 000 (total number of files and folders) y Depending on the size and number of the files, it may take several minutes to read the contents on the media. -
Page 12: About Dlna
Getting Started About DLNA This Player is a DLNA Certified digital media player that can display and play movie, photo and music content from your DLNA-compatible digital media server (PC and Consumer Electronics). The Digital Living Network Alliance (DLNA) is a cross-industry organization of consumer electronics, computing industry and mobile device companies. -
Page 13: Remote Control
• • • • • • d • • • • • Colored (R, G, Y, B) buttons: - Use to navigate BD-ROM menus. They are also used for [MOVIE], [PHOTO], [MUSIC], [Premium] and [LG Apps] menu. - B button: Selects mono/ stereo in FM mode. SUBTITLE: Selects a subtitle language. -
Page 14: Front Panel
Getting Started Front panel a Disc Slot b Display Window c Remote Sensor d PORT. IN e iPod/ iPhone/ iPad/ USB Port f Operation buttons R (OPEN/CLOSE) T (PLAY / PAUSE) I (STOP) F (Function) Changes the input source or function. VOL. -
Page 15: Rear Panel
Rear panel a AC power cord b Speakers connectors c Cooling Fan d OPTICAL IN e WIRELESS connector f Antenna Connector g AUX (L/R) INPUT Getting Started h LAN port i HDMI IN 1/2 j HDMI OUT TO TV k VIDEO OUT... -
Page 16: Connecting
Connecting Positioning the system The following illustration shows an example of positioning the system. Note that the illustrations in these instructions differ from the actual unit for explanation purposes. For the best possible surround sound, all the speakers other than the subwoofer should be placed at the same distance from the listening position ( Front left speaker (L)/... -
Page 17: Speaker Connection
Speaker Connection Attaching the speakers to the player 1. Connect speaker cords to the player. Each speaker connector is color-coded. Use matching color connector for corresponding speakers. When connecting speaker cords to the player, insert the connector until it clicks. Connector Speaker Position... -
Page 18: Wireless Speakers Connection
Connecting Wireless speakers connection LED indicator of wireless receiver LED Color Operation Blue or yellow The wireless receiver is receiving the signal of the wireless TX. The Wireless Receiver is in standby mode. Off (No The power cord of wireless display) receiver is disconnected. -
Page 19: How To Attach The Ferrite Core
Connecting About Ferrite Core (for EMI only) About Ferrite Core (for EMI only) Be sure to attach the ferrite core to the power cord (for connecting to this unit and wireless receiver). Be sure to attach the ferrite core to the speaker This ferrite core can reduce noises. -
Page 20: Connecting To Your Tv
Connecting Connecting to Your TV Make one of the following connections, depending on the capabilities of your existing equipment. y HDMI connection (page 20) y Video connection (page 22) Note y Depending on your TV and other equipment you wish to connect, there are various ways you could connect the player. -
Page 21: What Is Simplink
4.5 m(15 ft.)). What is SIMPLINK? Some functions of this unit are controlled by the TV’s remote control when this unit and LG TV’s with SIMPLINK are connected through HDMI connection. Controllable functions by LG TV’s remote control;... -
Page 22: Video Connection
Connecting Video Connection Connect the VIDEO OUT jack on the player to the video in jack on the TV using a video cable. You can hear the sound through the system’s speakers. Rear of the unit Video cable Resolution Setting The player provides several output resolutions for HDMI OUT jack. -
Page 23: Antenna Connection
Note y If your TV does not accept the resolution you have set on the player, you can set resolution to 480p as follows: 1. Press HOME ( ) to disappear the HOME menu. 2 Press Z (STOP) for more than 5 seconds. y When you set the resolution to 480i with HDMI connection, actual resolution is outputted to 480p. -
Page 24: Connections With External Device
Connecting Connections with external device AUX Connection You can enjoy the sound from an external component through the speakers of this system. Connect the analog audio output jacks of your component into the AUX L/R (INPUT) on this unit. And then select the [AUX] option by pressing FUNCTION and ENTER (b). -
Page 25: Optical In Connection
OPTICAL IN connection You can enjoy the sound from your component with a digital optical connection through the speakers of this system. Connect the optical output jack of your component into the OPTICAL IN jack on the unit. And then select the [OPTICAL] option by pressing FUNCTION and ENTER (b). -
Page 26: Connecting To Your Home Network
Connecting Connecting to your Home Network This player can be connected to a local area network (LAN) via the LAN port on the rear panel or the internal wireless module. By connecting the unit to a broadband home network, you have access to services such as software updates, BD-LIVE interactivity and on-line content services. -
Page 27: Wired Network Setup
Wired Network Setup If there is a DHCP server on the local area network (LAN) via wired connection, this player will automatically be allocated an IP address. After making the physical connection, a small number of home networks may require the player’s network setting to be adjusted. -
Page 28: Wireless Network Connection
Connecting Wireless Network Connection Another connection option is to use an Access Point or a wireless router. The network configuration and connection method may vary depending on the equipment in use and the network environment. Wireless Communication Access Point or Wireless Router Broadband service... -
Page 29: Advanced Setting
Note y WEP security mode generally have 4 keys available on an access point setting. If your access point or wireless router use WEP security, enter the security code of the key “No.1” to connect on your home network. y An Access Point is a device that allows you to connect to your home network wirelessly. -
Page 30: Notes On Network Connection
Connecting Notes on Network Connection: y Many network connection problems during set up can often be fixed by re-setting the router or modem. After connecting the player to the home network, quickly power off and/ or disconnect the power cable of the home network router or cable modem. -
Page 31: Usb Device Connection
USB device connection This player can play movie, music and photo files contained in the USB device. Playback content in the USB device 1. Insert a USB device to the USB port until it fits into place. When you connect the USB device on the HOME menu, the player plays a music file contained in the USB storage device automatically. -
Page 32: System Setting
System Setting Settings Initial Setup When you turn on the unit for the first time, the initial setup wizard appears on the screen. Set the display language, network settings and speaker setup on the initial setup wizard. 1. Press 1 (POWER). The initial setup wizard appears on the screen. - Page 33 6. Select [Next] and press ENTER (b) to apply network settings. Network connection status is displayed on the screen. For details on network settings, refer to "Connecting to your Home Network" on page 7. Select [Next] and press ENTER (b). Read and prepare the preparations for the wireless speaker setting.
-
Page 34: Adjust The Setup Settings
System Setting Adjust the Setup Settings You can change the settings of the player in the [Setup] menu. 1. Press HOME ( ). 2. Use A/D to select the [Setup] and press ENTER (b). The [Setup] menu appears. 3. Use W/S to select the first setup option, and press D to move to the second level. -
Page 35: Hdmi Color Setting
Resolution Sets the output resolution of the HDMI video signal. Refer to page 22 for details about the resolution setting. [Auto] If the HDMI OUT jack is connected to TVs providing display information (EDID), automatically selects the resolution best suited to the connected TV. -
Page 36: [Language] Menu
System Setting [LANGUAGE] Menu Display Menu Select a language for the [Setup] menu and on- screen display. Disc Menu/Disc Audio/ Disc Subtitle Select the language you prefer for the audio track (disc audio), subtitles, and the disc menu. [Original] Refers to the original language in which the disc was recorded. -
Page 37: Speaker Setup
Speaker Setup To obtain the best possible sound, use the speaker setup display to specify the volume of the speakers you have connected and their distance from your listening position. Use the test to adjust the volume of the speakers to the same level. [Speaker] Select a speaker that you want to adjust. -
Page 38: [Lock] Menu
System Setting [LOCK] Menu The [LOCK] settings affect only BD-ROM and DVD playback. To access the any features in [LOCK] settings, you must enter the 4-digit security code you have created. If you have not entered a password yet, you are prompted to do so. -
Page 39: [Network] Menu
Vudu account. Premium/LG Apps [Country Setting] Select your area for displaying proper services and contents on the [Premium] and [LG Apps] feature. Device Name You can make a network name using virtual keyboard. This player will be recognised by the name you are entering on your home network. -
Page 40: [Others] Menu
System Setting [OTHERS] Menu Network Play This function allows you to control the playback of media streamed from DLNA media server by a DLNA certified smartphone. Most DLNA certified smartphone has a function to control the playback media on your home network. Set this option to [On] for allowing your smartphone to control this unit. -
Page 41: Sound Effect
Sound Effect You can select a suitable sound mode. Press SOUND EFFECT repeatedly until the desired mode appears on the front panel display or the TV screen. The displayed items for the equalizer maybe different depending on sound sources and effects. [Natural Plus]: You can enjoy the natural sound effect same as 5.1 channel. -
Page 42: Operating
[Photo] - Plays photo contents. [Premium] - Displays the Premium Home screen. e [LG Apps] - Displays the [LG Apps] screen. f [Input] - Changes input mode. g [Setup] - Adjusts the system settings. [Search] - Searching an on-line content by inputting a keyword on the search menu. -
Page 43: Playing Blu-Ray 3D Disc
Playing Blu-ray 3D disc This player can play the Blu-ray 3D discs which contains separate views for the left and right eyes. Preparation In order to playback Blu-ray 3D title in stereoscopic 3D mode, you need to: y Check your TV is 3D capable and has HDMI input(s). -
Page 44: Playing A File On A Network Server
Operating Playing a file on a network server This player can play video, audio and photo files located in a DLNA server through your home network. 1. Check the network connection and settings (page 26). 2. Press HOME ( ). 3. - Page 45 Note When you connect this unit from other Wi-Fi Direct™ devices, PIN connection method is not available. 6. Select a server that shared from the connected Wi-Fi Direct™ device using W/S, and press ENTER (b) to navigate the server. To select a server from the device list, files or folders must be shared by DLNA server from the connected Wi-Fi Direct™...
-
Page 46: Basic Operations For Video And Audio Content
Operating 8. Select a server that shared from the connected Wi-Fi device using W/S, and press ENTER (b) to navigate the server. To select a server from the device list, files or folders must be shared by DLNA server from the connected device. -
Page 47: Basic Operations For Photo Content
Basic operations for photo content To play a slide show Press d (PLAY) to start slide show. To stop a slide show Press Z (STOP) while slide show. To pause a slide show Press M (PAUSE) while slide show. Press d (PLAY) to re-start the slide show. To skip to the next/previous photo While viewing a photo in full screen, press A or D to go to the previous or next photo. -
Page 48: Advanced Playback
Operating Advanced Playback Repeat Playback erotu During playback, press REPEAT (h) repeatedly to select a desired repeat mode. Blu-ray Disc / DVD / Movie files jA- – Selected portion will be repeated continually. jChapter – The current chapter will be played back repeatedly. -
Page 49: Changing Content List View
Changing content list view On the [Movie], [Music] or [Photo] menu, you can change the content list view. Method 1 Press red (R) colored button repeatedly. Method 2 1. On the content list, press INFO/MENU (m) to display the option menu. 2. -
Page 50: Options While Viewing A Photo
Operating Options while viewing a photo You can use various options during viewing a photo in full screen. 1. While viewing a photo in full screen, press INFO/ MENU (m) to display the option menu. 2. Select an option using W/S. a Current photo/Total number of photos –... -
Page 51: On-Screen Display
On-Screen display You can display and adjust various information and settings about the content. Displaying content information on-screen eroy 1. While playback, press INFO/MENU (m) to show various playback information. a Title – current title number/total number of titles b Chapter – current chapter number/total number of chapters c Time –... -
Page 52: Playing From Selected Time
Operating Playing from selected time eroy 1. Press INFO/MENU (m) during playback. The time search box shows the elapsed playing time. 2. Select the [Time] option and then input the required start time in hours, minutes, and seconds from left to right. For example, to find a scene at 2 hours, 10 minutes, and 20 seconds, enter “21020”. -
Page 53: Changing The Tv Aspect Ratio
Changing the TV Aspect Ratio You can change the TV aspect ratio setting while playback. 1. During playback, press INFO/MENU (m) to display the On-Screen display. 2. Use W/S to select the [TV Aspect Ratio] option. 3. Use A/D to select desired option. 4. -
Page 54: Audio Cd Recording
This equipment should not be used for such purposes. LG expressly disclaims any responsibility for illegal distribution or use of unauthorized content in commercial purpose. Be Responsible... -
Page 55: Playing The Ipod
Playing the iPod You can enjoy the sound with your iPod. For details about iPod, refer to the iPod’s User Guide. Preparation Before connecting the iPod, turn this unit off and reduce the volume of this unit to its minimum. Note Use the iPod cable supplied with your iPod. - Page 56 Operating Note y An error message “CHECK” or “Connected iPod model is not supported. ” appears when: - your iPod is not available for the function to be operated. y An error message “CHECK” or “Please update your iPod’s software. ” appears when: - your iPod has an old software version.
-
Page 57: Radio Operations
Radio Operations Be sure that the antennas are connected. (Refer to the page 23) Listening to the radio 1. Press FUNCTION until TUNER (FM) appears in the display window. The last received station is tuned in. 2. Press and hold TUNING (-/+) for about two seconds until the frequency indication starts to change. -
Page 58: Using The Premium
1. Check the network connection and settings (page 26). 2. Press HOME ( ). 3. Select the [LG Apps] using A/D, and press ENTER (b). 4. Select a category using A/D, and press ENTER (b). 5. Use W/S/A/D to select an application, and press ENTER (b) to display the information. -
Page 59: Signing In
Signing in To use the [LG Apps] feature, you need to sign in with your account. 1. On the [LG Apps] or [My Apps] screen, press red (R) colored button. 2. Fill the [ID] and [Password] field using the virtual keyboard. -
Page 60: Using Bluetooth Technology
Bluetooth device, a list of the devices found may appear in the Bluetooth device display depending on the type of Bluetooth device.Your unit appears as “LG Audio”. 3. When this unit successfully paired with your Bluetooth device, Bluetooth LED of this unit lights up and "BTPAIRED"... - Page 61 Note y The sound may be interrupted when the connection interfered by the other electronic wave. y You cannot control the Bluetooth device with this unit. y Pairing is limited one Bluetooth device per one unit and multi-pairing is not supported. y Although the distance between your Bluetooth and the set is less than 10m, there are obstacles between both, your Bluetooth...
-
Page 62: Troubleshooting
Troubleshooting Troubleshooting General Symptom The Power does not turned on. The unit does not start playback. The angle cannot be changed. Cannot play movie, photo or music files. The remote control does not work properly. The unit is plugged in, but the power will not turn on or off. -
Page 63: Network
Network Symptom BD-Live feature does not work. Streaming video services (such as YouTube™, etc.) are often stopped or “buffer” during playback. Shared folder or files from your PC or a Media servers are not displayed on the device list. Cannot connect the player to the access point or wireless LAN router. -
Page 64: Picture
You can update the Player using the latest software to enhance the products operation and/or add new features. To obtain the latest software for this player (if updates have been made), please visit http://www.lg.com/global/support or contact LG Electronics customer care centre. Open source software notice To obtain the corresponding source code under GPL, LGPL, MPL and other open source licenses, please visit http://opensource.lge.com. -
Page 65: Appendix
Controlling a TV with the Supplied Remote Control You can control your TV using the buttons below. By pressing You can 1 (TV POWER) Turn the TV on or off. Switch the TV’s input source AV/INPUT between the TV and other input sources. -
Page 66: Network Software Update
Appendix Network Software Update Network update notification From time to time, performance improvements and/or additional features or services may be made available to units that are connected to a broadband home network. If there is new software available and the unit is connected to a broadband home network, the player will inform you about the update as follows. - Page 67 The Software Update function may not work properly depending on your internet environment. In this case, you can obtain the latest software from the authorized LG Electronics Service Centre then update your player. Refer to “Customer Support” on page Appendix...
-
Page 68: About Nero Mediahome 4 Essentials
Internet services and Apple iTunes y The supplied Nero MediaHome 4 Essentials software can be downloaded at http://www. lg.com/global/support. Find the download link on the web page of this product. y This manual explains operations with the English version of Nero MediaHome 4 Essentials as examples. -
Page 69: Installing Nero Mediahome 4
Installing Nero MediaHome 4 Essentials Windows Start up your computer, and insert the supplied CD- ROM disc into your computer’s CD-ROM drive. An installation wizard will walk you through the quick and uncomplicated installation process. To install Nero MediaHome 4 Essentials, proceed as follows: 1. -
Page 70: Area Code List
Appendix Area Code List Choose an area code from this list. Area Code Area Afghanistan Argentina Australia Austria Belgium Bhutan Bolivia Brazil Cambodia Canada Chile China Colombia Congo Costa Rica Croatia Czech Republic Denmark Ecuador Egypt El Salvador Ethiopia Code Area Fiji Monaco Finland... -
Page 71: Language Code List
Language code List Use this list to input your desired language for the following initial settings: [Disc Audio], [Disc Subtitle] and [Disc Menu]. Language Code Language Afar 6565 French Afrikaans 6570 Frisian Albanian 8381 Galician Amharic 6577 Georgian Arabic 6582 German Armenian 7289... -
Page 72: Trademarks And Licenses
Appendix Trademarks and Licenses Blu-ray Disc™, Blu-ray™, Blu-ray 3D™, BD-Live™, BONUSVIEW™ and the logos are trademarks of the Blu-ray Disc Association. “DVD Logo” is a trademark of DVD Format/Logo Licensing Corporation. Java is a trademark of Oracle and/or its affiliates. HDMI, the HDMI logo and High-Definition Multimedia Interface are trademarks or registered trademarks of HDMI Licensing LLC in the United... - Page 73 Bluetooth® wireless technology. The Bluetooth® word mark and logos are owned by the Bluetooth® SIG, Inc. and any use of such marks by LG Electronics is under license. Other trademarks and trade names are those of their respective owners. Cinavia Notice...
-
Page 74: Audio Output Specifications
Appendix Audio Output Specifications Jack/Setting Source PCM Stereo Dolby Digital Dolby Digital Plus Dolby TrueHD DTS-HD Linear PCM 2ch Linear PCM 5.1ch Linear PCM 7.1ch *1 The secondary and interactive audio may not be included in the output bitstream if [Digital Output] option is set to [BitStream]. -
Page 75: Specifications
Specifications General Power requirements Power consumption Dimensions (W x H x D) Net Weight (Approx.) Operating temperature Operating humidity Inputs/Outputs VIDEO OUT HDMI IN/OUT (video/audio) ANALOG AUDIO IN DIGITAL IN (OPTICAL) PORT. IN Tuner FM Tuning Range Amplifier Power output (4 Ω/ 3 Ω), (RMS), THD 10 % Total Front Center... - Page 76 Appendix System Laser Wavelength Signal system Frequency response Harmonic distortion Dynamic range LAN port Wireless LAN (internal antenna) Bus Power Supply (USB) Speakers (BH9520TW) Front speaker (Left/ Right) Type 2 Way 3 Speaker Impedance Rated 4 Ω Input Power 140 W Rear speaker (Left/ Right) Type 2 Way 3 Speaker...
- Page 77 Speakers (BH9420PW) Front speaker (Left/ Right) Type 2 Way 3 Speaker Impedance Rated 4 Ω Input Power 140 W Rear speaker (Left/ Right) Type 2 Way 2 Speaker Impedance Rated 4 Ω Input Power 180 W Center speaker Type 2 Way 3 speaker Impedance Rated 4 Ω...
- Page 78 Appendix Speakers (BH9220BW) Front speaker (Left/ Right) Type 2 Way 2 Speaker Impedance Rated 4 Ω Input Power 140 W Rear speaker (Left/ Right) Type 2 Way 2 Speaker Impedance Rated 4 Ω Input Power 180 W Center speaker Type...
-
Page 79: Maintenance
Maintenance Handling the Unit When shipping the unit Please save the original shipping carton and packing materials. If you need to ship the unit, for maximum protection, re-pack the unit as it was originally packed at the factory. Keeping the exterior surfaces clean Cleaning the unit To clean the player, use a soft, dry cloth. -
Page 80: Important Information Relating To Network Services
Appendix Important Information Relating to Network Services All information, data, documents, communications, downloads, files, text, images, photographs, graphics, videos, webcasts, publications, tools, resources, software, code, programs, applets, widgets, applications, products and other content (“Content”) and all services and offerings (“Services”) provided or made available by or through any third party (each a “Service Provider”) is the sole responsibility of the Service Provider from whom it... - Page 81 Appendix...
Need help?
Do you have a question about the BH9220BW and is the answer not in the manual?
Questions and answers