
Related Manuals for AEG SANTO S86378-KG


Summary of Contents for AEG SANTO S86378-KG
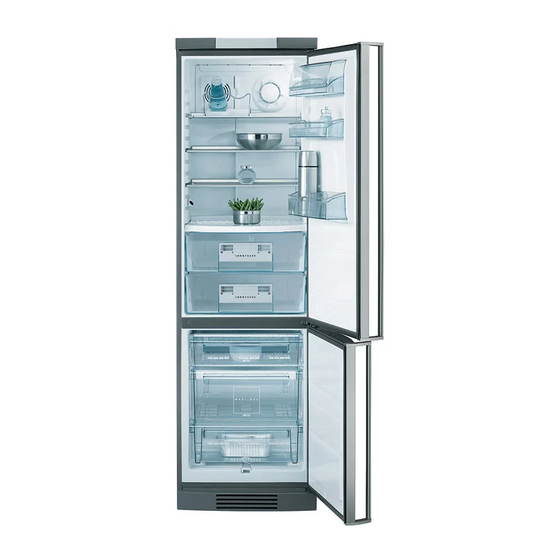
- Page 1 SANTO 86378-KG Electronic Refrigerator/Freezer Operating Instructions 818 34 54-00/1...
- Page 2 "What to do if ...". If these instructions should not be sufficient, please contact your local AEG Service Force Centre. Printed on paper manufactured with environmentally sound processes. he who thinks ecologically acts accordingly ...
-
Page 3: Table Of Contents
Contents Important Safety Instructions ........5 Environmental Information . - Page 4 Contents “Open door” warning ..........25 Temperature warning .
-
Page 5: Important Safety Instructions
Important Safety Instructions These warnings are provided in the interests of your safety. Ensure that you understand them all before installing or using this appliance. Your safety is of paramount importance. If you are unsure about any of the meanings of these warnings contact the Customer Care Department. - Page 6 • Under no circumstances should you attempt to repair the appliance yourself. Repairs carried out by inexperienced persons may cause injury or serious malfunctioning. Contact your local AEG Service Force Centre. 818 34 54-00/1...
-
Page 7: Environmental Information
Environmental Information Packaging All transit packaging materials are environmentally compatible and can be reused. Wood is un-treated. The plastics can be recycled and are identified as follows: >PE< for polyethylene, e.g. the outer covering and the bags in the interior. >PS<... -
Page 8: Before Use
2. In order to push the appliance into its final position, press carefully at the top of the door and tip the appliance back slightly. The weight is thus transferred to the back wheels and the appliance can be easily pushed. -
Page 9: Fitting The Door Handles
Remove the transport fittings from the storage shelves: 4. Slide the fittings securing the shelf forward to the thicker section on the edge of the storage shelf. 5. Slide the storage shelf far enough forward so that it can be hinged downwards and the fittings can be removed from the guides. -
Page 10: Installation
Installation Installation Location The appliance should be installed in a well ventilated, dry room. Energy use and efficient performance of the appliance is affected by the ambient temperature. The appliance should therefore – not be exposed to direct sunlight; – not be installed next to radiators, cookers or other sources of heat; –... -
Page 11: The Refrigerator/Freezer Needs Ventilation
Installation The refrigerator/freezer needs ventilation Air is fed under the door through the vent slots in the base and is exhausted upwards along the back wall. To ensure proper air circulation never cover or alter the vent openings. Important! If the appliance is installed under a hanging cabinet, a clearance of at least 10 cm between the top of the appliance and the cabinet above it must... -
Page 12: Electrical Connection
Installation Electrical Connection Any electrical work required to install this appliance should be carried out by a qualified electrician or competent person. WARNING – THIS APPLIANCE MUST BE EARTHED The manufacturer declines any liability should these safety measures not be observed. Before switching on, make sure the electricity supply voltage is the same as that indicated on the appliance rating plate. -
Page 13: Installation Of The Carbon Filter
Installation of the carbon filter On delivery the carbon filter is placed in a plastic bag to secure the length of life of the carbon filter. The filter should be placed behind the grill before the cabinet is turned on. 1. -
Page 14: Appliance Description
Appliance Description View of Appliance (various models) á Control panel à Butter and cheese compartment with lid â Door storage compartments ä Bottle compartment ã LONGFRESH 0 °C cold zone å Shelves ç Quick chill shelf é Bottle and can holder è... -
Page 15: Freezer Tray
Appliance Description Freezer tray A freezer tray is included below the upper drawer in the freezer compartment. Berries and vegetables, for example, can be pre-frozen on the freezer tray. Advantage: The berries are not squeezed and maintain their natural form. The frozen berries can then be stored in compartments or drawers packaged in individual portions. -
Page 16: Control Panel
Appliance Description Control Panel ON/OFF button Temperature display for refrigerator (not for LONGFRESH 0 °C cold zone) Temperature setting buttons for refrigerator MODE button for setting the operating mode Text display RESET button Temperature display for freezer compartment Temperature setting buttons for freezer compartment Temperature setting buttons The temperature is adjusted using the „+“... -
Page 17: Temperature Displays
Appliance Description Once the COOLMATIC- or the FROSTMATIC function has been switched on the DESIRED temperature that was set originally for the fridge or the freezer cannot be changed. Temperature Displays The temperature displays shows several types of information. • During normal operation, the temperature currently present in the fridge or the freezer compartment (ACTUAL temperature) is displayed. -
Page 18: Text Display
Appliance Description 1. Press MODE button once. In the display the operating mode SHOPPING will flash. 2. After approx. 4 seconds the display stops flashing, the operating mode SHOPPING is set. 3. If another operating mode is to be set, before 4 seconds have elapsed, press the MODE button repeatedly until the desired mode is shown in the display. -
Page 19: Prior To Initial Start-Up
Prior to Initial Start-Up Before connecting the appliance to the mains and putting it into ope- ration for the first time, leave the appliance to stand for 30 minutes if was transported upright. After transport on its side, the appliance must be left to stand for 2 hours before putting it into operation. -
Page 20: Temperature Adjustment
Temperature Adjustment With the individual temperature setting buttons the desired temperatures in the refrigerator and in the freezer compartment can be adjusted independently of one another. In the LONGFRESH 0 °C cold zone the temperature is automatically controlled. It remains constant at about 0 °C, no setting is required. Note: Your appliance is equipped with a dynamic circulating air cooling function. -
Page 21: Operating Modes
Operating modes SHOPPING The SHOPPING function is suitable for quickly cooling larger quantities of refrigerated foods in the fridge section, as well as for smaller amounts of frozen foods in the freezer section, e. g. after a big shop. This automatically sets a desired temperature of +3 °C for the fridge section for 6 hours. - Page 22 Operating modes COOLMATIC The COOLMATIC operating mode is suitable for quickly cooling larger quantities of refrigerated foods in the fridge section, e. g. drinks, salads for a party or wedding. 1. Press the MODE button repeatedly until COOLMATIC is flashing in the display.
-
Page 23: Switching The Appliance Off
HOLIDAY In the operating mode HOLIDAY (holiday setting) the desired tempera- ture value for the fridge section is +14 °C. In the holiday mode it is therefore possible to leave the door of the empty refrigerator closed during periods of extended absence. Advantage: Unintentional closing of the door, or accidental closing of the door by persons who have access to your home during your absence, is no longer possible. - Page 24 Switching the Appliance Off Switching off the fridge section: 1. Press and hold down the “+”and the “-” buttons for the fridge section at the same time until “OF” appears in the temperature display. After that the indicator stops flashing and the fridge section switches itself off.
-
Page 25: Control And Information Systems
Control and Information Systems The control and information systems consist of temperature displays, an optical warning display and an acoustic warning. The system warns: – when there is a power cut; – when the appliance doors are open – if the temperature in the refrigerator or freezer compartment is too high;... -
Page 26: Temperature Warning
Control and Information Systems Temperature warning For the fridge section: An alarm sounds and the TEMPERATURE indicator and a red back light flash, as soon as the temperature in the fridge section rises above 12 °C. In addition the temperature display for the fridge section flashes. 1. -
Page 27: Function Errors
A rise in temperature may be caused by: – frequent door opening for long periods of time; – loading with large quantities of warm foods; – high ambient temperature; – an error with the appliance. Function Errors If the appliance’s electronics recognise a technical problem that has to be remedied by the your local Service Force Engineer, an alarm sounds and the SERVICE indicator appears back lit with a flashing red light. -
Page 28: Interior Accessories
Interior Accessories Storage Shelves A storage shelf must be inserted into the lower guide track above the fruit and vegetable drawer. It must always remain in this position, so that fruits and vegetables remain fresh longer. The remaining storage shelves can be adjusted to various heights: 1. -
Page 29: Quick Chill Shelf
Interior Accessories Setting the air moisture The two drawers can be used independently of one another with higher or lower air moisture according to the storage conditions required. The air moisture can be set with the aid of the slide control on the front of each drawer. -
Page 30: Dismantling Of The Bottle- And Can Holder
Interior Accessories Dismantling of the Bottle- and Can Holder 1. Take out the quick chill shelf with holder from the cabinet. 2. To loosen the holder from the shelf, bend the hooks/brackets that surround the backside of the shelf. Quick chill The quick chill function can be used for the fast cooling of drinks in cans or bottles in the fast cool storage tray or of larger amounts of room-temperature food. -
Page 31: Correct Storage
Correct storage A fan provides for quick cooling of the food and an even temperature distribution in the fridge zone and in the LONGFRESH 0 °C cold zone. Foods with different perishability can therefore be arranged on the shelves as you like, without having to take into account the different temperature zones which usually occur. - Page 32 Correct storage Guidelines for storage times Some foods in the LONGFRESH 0 °C cold zone: Dry storage: Food Storage period Butter up to 30 days Cheese, soft up to 30 days Milk, fresh up to 7 days Sausage, sliced up to 7 days Fish up to 4 days Shellfish...
- Page 33 Correct storage Fruit Storage period Apricots up to 14 days Pears up to 120 days Blackberries up to 8 days Dates (fresh) up to 60 days Strawberries up to 5 days Blueberries up to 14 days Raspberries up to 5 days Cherries up to 14 days Peaches...
-
Page 34: Freezing
Freezing Except for the bottom drawer, which serves only for storage purposes, all compartments and drawers in the freezer compartment are suitable for freezing fresh food. Warning! • Before foods are frozen, the actual temperature in the freezer compartment must be -18 °C or colder. •... -
Page 35: Frozen Storage
• The following are suited for sealing bags and wraps: plastic clips, rubber bands or adhesive tape. • Press air out of bags and wraps before sealing, because air encourages drying of frozen goods. • Make flat packages, because these freeze more quickly. •... -
Page 36: Defrosting
Defrosting Fridge zone and LONGFRESH 0 °C cold zone defrost automatically The electronics start the defrosting cycle in the refrigerator every time the compressor stops. The water collects in the discharge trough at the back wall of the refrigerator, and is fed through the discharge opening in the catch tray at the compressor where it is evaporated. -
Page 37: Maintenance And Cleaning
4. Remove all the drawers. Place the bottom drawer directly in front of the appliance to collect the water from defrosting. Take out the water drain spout from its resting position at the bottom of the freezer compartment and place it as shown. -
Page 38: Internal Cleaning
Maintenance and Cleaning Internal Cleaning If the refrigerator only is to be cleaned, set the operating mode to FROSTMATIC several hours in advance, in order to build up sufficient chill reserve in the freezer compartment for the interruption in service. Do not open the freezer compartment door. -
Page 39: Replacing The Light Bulb
Maintenance and Cleaning Use a normal household stainless steel cleaner to clean the stainless steel surface. This cleaner simultaneously forms a protective film against finger marks. Caution: Do not allow the stainless steel cleaner to come into contact with plastic parts, e.g. the end caps on the doors, as it will damage them. -
Page 40: Change Of The Carbon Filter
Maintenance and Cleaning Change of the carbon filter To maintain the best performance the carbon filter should be chan- ged once a year with normal usage. New carbon filters can be purcha- sed from your local Sevice Force Centre. 1. The filter is placed behind the grill and can be reached by opening the cover. -
Page 41: Hints And Tips
Hints and Tips Normal Operating Sounds • You may hear faint gurgling or bubbling sounds when the refrigerant is pumped through the coils or tubing at the rear, to the cooling plate/evaporator. • When the compressor is on, the refrigerant is being pumped round and you will hear a whirring sound or pulsating noise from the compressor. -
Page 42: What To Do If
What to do if ... Before contacting your local Service Force Centre, check the following points. Symptom Solution Check there is power at the socket Check there is not a power cut by No power to the appliance. checking the household lights. Check the fuse has not blown. - Page 43 If after the above checks there is still a fault, call your local AEG Service Force Centre. In-guarantee customers should ensure that the above checks have been made as the engineer will make a charge if the fault is not a mechanical or electrical breakdown.
-
Page 44: Regulations, Standards, Guidelines
Regulations, Standards, Guidelines This appliance was designed for household use and was manufactured in accordance with the appropriate standards. The necessary measures in accordance with appliance safety legislation regulations (GSG), accident prevention regulations for refrigeration appliances (VBG 20) and the regulations of the German Society of Electrical Engineers (VDE) were observed in the manufacture of this appliance. -
Page 45: Technical Terminology
Technical Terminology • Refrigerant Liquids that can be used to a generate a cooling effect are known as refrigerants. They have a relatively low boiling-point, indeed so low, that the warmth from the food stored in the fridge or freezer can cause the refrigerant to boil and vaporise. -
Page 46: Guarantee Conditions
Guarantee Conditions Standard Guarantee Conditions We, AEG, undertake that if within 12 months of the date of the purchase this AEG appliance or any part thereof is proved to be defective by reason only of faulty workmanship or materials, we will, at our discretion repair or replace the same FREE OF CHARGE for labour, materials or carriage on condition that: •... -
Page 47: Service & Spare Parts
Please note that a valid purchase receipt or guarantee documentation is required for in-guarantee service calls. Customer Care For general enquiries concerning your AEG appliance or for further information on AEG products please contact our Customer Care Department by letter or telephone at the address below or visit our website at www.aeg.co.uk. - Page 48 USD 14 billion in more than 150 countries around the world. AEG Hausgeräte GmbH Postfach 1036 D-90327 Nürnberg http://www.aeg.hausgeraete.de © Copyright by AEG 818 3454 – 00/1 - 0404 Subject to change without notice...
- Page 49 This file has been downloaded from: www.UsersManualGuide.com User Manual and User Guide for many equipments like mobile phones, photo cameras, monther board, monitors, software, tv, dvd, and othes.. Manual users, user manuals, user guide manual, owners manual, instruction manual, manual owner, manual owner's, manual guide, manual operation, operating manual, user's manual, operating instructions, manual operators, manual operator, manual product, documentation manual, user maintenance, brochure, user reference, pdf manual...
Need help?
Do you have a question about the SANTO S86378-KG and is the answer not in the manual?
Questions and answers