
Related Manuals for LG TM2792S-SR.AEU


Summary of Contents for LG TM2792S-SR.AEU
- Page 1 OWNER’S MANUAL LED LCD TV (CINEMA 3D TV) Please read this manual carefully before operating the your TV and retain it for future reference. LED LCD TV (CINEMA 3D TV) MODEL TM2792S www.lg.com...
-
Page 2: Table Of Contents
TABLE OF CONTENTS TABLE OF CONTENTS LICENSES REMOTE CONTROL INSTALLATION PROCEDURE MAGIC REMOTE CONTROL FUNCTIONS Registering Magic Remote Control ASSEMBLING AND PREPARING How to use Magic Remote Control Unpacking Precautions to Take when Using the - Separate purchase Magic Remote Control Parts and buttons Lifting and moving the TV USING THE USER GUIDE... - Page 3 LICENSES LICENSES Supported licenses may differ by model. For more information of the licenses, visit www.lg.com. Manufactured under license from Dolby Laboratories. “Dolby “and the double-D symbol are trademarks of Dolby Laboratories. HDMI, the HDMI logo and High-Definition Multimedia Interface are trademarks or registered trademarks of HDMI Licensing LLC.
-
Page 4: Installation Procedure
INSTALLATION PROCEDURE INSTALLATION PROCEDURE Open the package and make sure all the accessories are included. Attach the stand to the TV. Connect an external device to the TV. NOTE Image shown may differ from your TV. Your TV’s OSD (On Screen Display) may differ slightly from that shown in this manual. The available menus and options may differ from the input source or product model that you are using. -
Page 5: Assembling And Preparing
ASSEMBLING AND PREPARING ASSEMBLING AND PREPARING Unpacking Check your product box for the following items. If there are any missing accessories, contact the local dealer where you purchased your product. The illustrations in this manual may differ from the actual product and accessories. - Page 6 ASSEMBLING AND PREPARING Remote control. Magic Remote Control. CD (Owner's Manual). Batteries (AAA). Batteries (AA). Cards. TriDef 3D Game Software CD / RGB Cable. Power Cord. Quick Installation Guide AC-DC Adapter. Cable holder. Stand Base. Screws for Assembly. Component video cable Composite video cable 3 EA 3D Glasses(Normal type / Clip type)
-
Page 7: Separate Purchase
ASSEMBLING AND PREPARING Separate purchase Dual play glasses AG-F2**DP, AG-F3**DP NOTE The illustrations in this manual may differ from the actual product and accessories. Separate purchase items can be changed or modified for quality improvement without any notification. Contact your dealer to buying these items. The model name or design may be changed depending on the upgrade of product functions,manufacturer’s circumstances or policies. -
Page 8: Parts And Buttons
ASSEMBLING AND PREPARING Parts and buttons Remote Control Sensor Standby Light Lighting On: Turned off Lighting Off: Turned on Touch Buttons Connection panel (See p.16) Touch button Description Scrolls through the saved programmes. Adjusts the volume level. Selects the highlighted menu option or confirms an input. SETTINGS Accesses the main menus, or saves your input and exits the menus. -
Page 9: Lifting And Moving The Tv
ASSEMBLING AND PREPARING Lifting and moving the TV When holding the TV, the screen should face away from you to prevent the screen from scratches. When moving or lifting the TV, read the following to prevent the TV from being scratched or damaged and for save transportation regardless of its type and size. -
Page 10: Setting Up The Tv
ASSEMBLING AND PREPARING Setting up the TV Attach the stand base from the TV by 3 screws. Attaching the Stand Place the TV with the screen side down on a flat and cushioned surface. CAUTION Tighten the screws firmly to prevent the TV from tilting forward. -
Page 11: Mounting On A Table
ASSEMBLING AND PREPARING Mounting on a table Lift and tilt the TV into its upright position on a table. Leave a 10 cm (4 inches) (minimum) space from the wall for proper ventilation. 10 cm 10 cm 10 cm 10 cm Connect the AC-DC Adapter and Power Cord to a wall outlet. -
Page 12: Tidying Cables
ASSEMBLING AND PREPARING WARNING When you adjust the angle, do not hold the buttom of the TV frame as shown on the following illustration, as may injure your fingers. CAUTION Tidying cables Disconnect the power cord first, and then move Gather and bind the cables with the supplied or install the TV. -
Page 13: Detaching The Stand
ASSEMBLING AND PREPARING Detaching the Stand Using the Kensington security system The Kensington security system connector is located at the back of the TV. For more information Place the TV with the screen side down on a of installation and using, refer to the manual flat and cushioned surface. -
Page 14: Watching Tv
WATCHING TV WATCHING TV Turning the TV on for the first time When you access the TV for the first time, the initial setting screen appears. Select a language and customize the basic settings. Connect the power cord to a power outlet. Press on the TV or power button on the remote control to turn the TV on. - Page 15 WATCHING TV When the basic settings are complete, press OK. NOTE If you do not complete the initial setting, it will appear whenever you access the TV. To turn the TV off, press on the TV. The Standby Light is turned on. CAUTION Disconnect the power cord from the power outlet when you do not use the TV for a long period of time.
-
Page 16: Making Connections
MAKING CONNECTIONS MAKING CONNECTIONS Connect various external devices to the TV and switch input modes to select an external device. For more information about an external device’s connection, refer to the manual supplied with each device. Available external devices are: HD receivers, DVD players, VCRs, audio systems, USB storage devices, PC, camcorders or cameras, gaming devices, and other external devices. -
Page 17: Satellite Connection
MAKING CONNECTIONS Satellite connection Connect the TV to a satellite dish to a satellite socket with a satellite RF cable (75 Ω). (Not Provided) -
Page 18: Connecting To A Hd Receiver, Dvd, Vcr Player Or Gaming Device
MAKING CONNECTIONS Connecting to a HD receiver, DVD, VCR player or Gaming device Connect a HD receiver, DVD, VCR player or Gaming device to the TV and select an appropriate input mode. HDMI connection HDMI is the best way to connect a device. Transmits the digital video and audio signals from an external device to the TV. -
Page 19: Hdmi To Dvi Connection
MAKING CONNECTIONS HDMI to DVI connection Transmits the digital video signal from an external device to the TV. Connect the external device and the TV with the HDMI to DVI cable as shown in the following illustration. To transmit an audio signal, connect an optional audio cable. -
Page 20: Component Connection
MAKING CONNECTIONS Component connection Transmits the analog video and audio signals from an external device to the TV. Connect the external device and the TV with the component cable as shown on the following illustration. To display images by using progressive scan, make sure to use the component cable. NOTE If cables are installed incorrectly, it could case the image to display in black and white or with distorted color. -
Page 21: Composite Connection
MAKING CONNECTIONS Composite connection Transmits the analog video and audio signals from an external device to the TV. Connect the external device and the TV with the composite cable as shown on the following illustration. NOTE Check to ensure the cable are matched with the corresponding color connection. (Use the composite video cable provided.) (Not Provided) -
Page 22: Euro Scart Connection
MAKING CONNECTIONS Euro Scart connection Transmits the video and audio signals from an external device to the TV. Connect the external device and the TV with the Euro Scart cable as shown on the following illustration. To display images by using progressive scan, make sure to use the Euro Scart cable. -
Page 23: Connecting To An Audio System
MAKING CONNECTIONS Connecting to an audio system Use an optional external audio system instead of the built-in speaker. Digital optical audio connection Transmits the digital audio signal from the TV to an external device. Connect the external device and the TV with the optical audio cable as shown on the following illustration. -
Page 24: Headphone Connection
MAKING CONNECTIONS Headphone connection Transmits the headphone signal from the TV to an external device. Connect the TV with the headphone as shown on the following illustration. NOTE AUDIO menu items are disabled when connecting a headphone. When changing AV MODE with a headphone connected, the change is applied to video but not to audio. -
Page 25: Connecting To A Usb
MAKING CONNECTIONS Connecting to a USB Connect a USB storage device such as s USB flash memory, external hard drive, MP3 player or a USB memory card reader to the TV and access the USB menu to use various multimedia files. NOTE To use a USB Hub device, make sure that it is connected to the USB IN 2 USB Hub port. -
Page 26: Connecting To A Ci Module
MAKING CONNECTIONS Connecting to a CI Module View the encrypted (pay) services in digital TV mode. This feature is not available in all countries. NOTE Check if the CI module is inserted into the PCMCIA card slot in the right direction. If the module is not inserted properly, this can cause damage to the TV and the PCMCIA card slot. -
Page 27: Mhl Connection
MAKING CONNECTIONS MHL connection Mobile High-definition Link (MHL) is an interface for transmitting digital audiovisual signals from mobile phones to television sets. NOTE Connect the mobile phone to the HDMI IN 2(DVI/MHL) port to view the phone screen on the TV. The MHL passive cable is needed to connect the TV and a mobile phone. -
Page 28: Connecting To A Pc
MAKING CONNECTIONS Connecting to a PC Your TV supports the Plug & Play* feature and has the built-in speakers. * Plug & Play: The function when a PC recognizes a connected device that users connect to a PC and turn on, without device configuration or user intervention. -
Page 29: Hdmi Connection
MAKING CONNECTIONS HDMI connection Transmits the digital video and audio signals from your PC to the TV. Connect the PC and the TV with the HDMI cable as shown in the following illustrations. You should set PC as an input label to connect the PC to the TV with an HDMI connection. -
Page 30: Hdmi To Dvi Connection
MAKING CONNECTIONS HDMI to DVI connection Transmits the digital video signal from your PC to the TV. Connect the PC and the TV with the HDMI to DVI cable as shown the following illustrations. To transmit an audio signal, connect an optional audio cable. NOTE If you want to use HDMI-PC mode, you must set the input label to PC mode. -
Page 31: Rgb Connection
MAKING CONNECTIONS RGB connection Transmits the analog video signal from your PC to the TV. Connect the PC and the TV with the D-sub 15 pin cable as shown the following illustrations. To transmit an audio signal, connect an optional audio cable. NOTE If you do not use an optional external speaker, connect the PC to the TV with the optional audio cable. -
Page 32: Remote Control
REMOTE CONTROL REMOTE CONTROL The descriptions in this manual are based on the buttons of the remote control. Please read this manual carefully and use the TV correctly. To replace batteries, open the battery cover, replace batteries (1.5 V AAA) matching ends to the label inside the compartment, and close the battery cover. - Page 33 REMOTE CONTROL .,;@ pqrs wxyz LIST Q.VIEW MY APPS HOME Shows the list of Apps. Accesses the HOME menu. MUTE Selects menus or options SETTINGS SETTINGS MY APPS and confirms your input. Accesses the main menu. Navigation buttons Scrolls through menus or options. (BACK) EXIT Returns to the previous level.
-
Page 34: Magic Remote Control Functions
MAGIC REMOTE CONTROL FUNCTIONS MAGIC REMOTE CONTROL FUNCTIONS When the message “Magic Remote Control battery is low. Change the battery.” is displayed, replace the battery. To replace batteries, open the battery cover, replace batteries (1.5 V AA) matching and ends to the label inside the compartment, and close the battery cover. Be sure to point the remote control toward the remote control sensor on the TV. -
Page 35: Registering Magic Remote Control
MAGIC REMOTE CONTROL FUNCTIONS Registering Magic Remote Precautions to Take when Control Using the Magic Remote Control It is necessary to ‘pair’ (register) the magic remote control to your TV before it will work. Use the Magic Remote Control within the maximum communication distance (10 m). -
Page 36: Using The User Guide
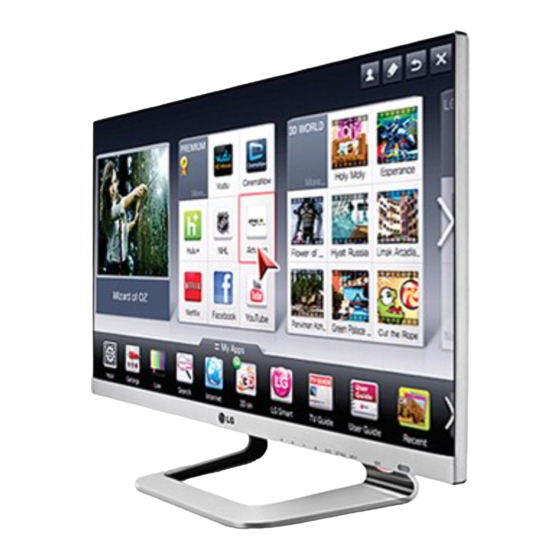
Selects a language for the display text. My Apps [In Digital Mode Only] When watching a digital broadcast containing several audio Audio Language languages, you can select the language you want. LG Smart World Programme Input List Settings Live TV Search Internet... -
Page 37: Maintenance
MAINTENANCE MAINTENANCE Cleaning Your TV Clean your TV regularly to keep the best performance and to extend the product lifespan. CAUTION Make sure to turn the power off and disconnect the power cord and all other cables first. When the TV is left unattended and unused for a long time, disconnect the power cord from the wall outlet to prevent possible damage from lightning or power surges. -
Page 38: Preventing "Image Burn" Or "Burn-In" On Your Tv Screen
MAINTENANCE Preventing “Image burn” or “Burn-in” on your TV screen If a fixed image displays on the TV screen for a long period of time, it will be imprinted and become a permanent disfigurement on the screen. This is “image burn” or “burn-in” and not covered by the warranty. -
Page 39: Troubleshooting
TROUBLESHOOTING TROUBLESHOOTING General Problem Resolution y Check the remote control sensor on the product and try again. Cannot control the TV with the remote control. y Check if there is any obstacle between the product and the remote control. y Check if the batteries are still working and properly installed ( y Check if the product is turned on. -
Page 40: Specifications
SPECIFICATIONS SPECIFICATIONS Product specifications may be changed without prior notice due to upgrade of product functions. Wireless LAN module(TWFM-B003D) specification Standard IEEE802.11a/b/g/n 2400 to 2483.5 MHz Frequency Range 5150 to 5250 MHz 5725 to 5850 MHz Modulation CCK / OFDM / MIMO 802.11a: 11 dBm 802.11b: 15 dBm Output Power... - Page 41 19 V 3.0 A Power Consumption On Mode : 38 W (typ.) Off Mode 0.5 W AC/DC Adapter Manufacturer: LG Innotek, Model PSAB-L206A Tilt Tilt Range -5 to 20° Dimensions (Width x Depth x Height) With Stand Weight 622.3 mm x 196.0 mm x 449.0 mm 5.9 kg...
- Page 42 SPECIFICATIONS Component supported mode RGB (PC) / HDMI (PC) supported mode Horizontal Vertical Horizontal Vertical Resolution Resolution Frequency(kHz) Frequency(Hz) Frequency(kHz) Frequency(Hz) 720 x 480 15.730 59.940 640 x 350 31.468 70.090 720 x 480 15.750 60.000 720 x 400 31.469 70.080 720 x 576 15.625...
- Page 43 SPECIFICATIONS NOTE Avoid keeping a fixed image on the set’s screen for prolonged periods of time. The fixed image may become permanently imprinted on the screen. Use a screen saver when possible. There may be interference relating to resolution, vertical pattern, contrast or brightness in PC mode. Change the PC mode to another resolution or change the refresh rate to another rate or adjust the brightness and contrast on the menu until the picture is clear.
- Page 44 SPECIFICATIONS 3D supported mode Video, which is input as below media contents is switched into the 3D screen automatically. 3D supported mode automatically Horizontal Vertical Input Signal Playable 3D video format Frequency (kHz) Frequency (Hz) Top & Bottom, 31.469 / 31.5 Side by Side(Half), Side by Side(Full) 640 X 480 Frame Packing, Line Alternative...
- Page 45 SPECIFICATIONS For models supporting WiDi, you can set the 3D mode in the same way as in RGB (PC) mode. 3D supported mode manually Horizontal Vertical Input Signal Playable 3D video format Frequency (kHz) Frequency (Hz) 37.50 2D to 3D, Side by Side(Half), Top & Bottom, 720p Single Frame Sequential 45.00...
-
Page 46: Antenna Isolator Installation Guide
ANTENNA ISOLATOR INSTALLATION GUIDE ANTENNA ISOLATOR INSTALLATION GUIDE * Depending on the country Use this to install TV in a place where there is a voltage difference between GND of power and GND of antenna signal. If there is a voltage difference between GND of power and GND of antenna signal, the antenna contact might be heated and excessive heat might cause an accident. - Page 48 The model and serial number of the TV is LG Electronics will also provide open source located on the back and one side of the code to you on CD-ROM for a charge covering TV.