
Related Manuals for Aspire GABR Series

Summary of Contents for Aspire GABR Series
- Page 1 OUTDOOR COOKING Grill with Rotisserie GABR / GSBR / GMBR Use & Care Manual Installation & Operation...
- Page 2 HESTAN OUTDOOR, MOST POWERFUL, VERSATILE AND RELIABLE RESIDENTIAL GRILL AVAILABLE.
- Page 3 Message from Hestan: Outdoor cooking is a perfectionist’s pursuit, and with your new investment, you’ve now taken the ultimate step forward. We sincerely welcome you to the Hestan Family. We’ve engineered and built our products so that your guests will rave about your meal, but deep down, our customers know it could’ve been just a little more tender, juicier –...
- Page 4 DANGER DANGER If you smell gas: 1. Do not store or use gasoline or other flammable liquids or vapors 1. Shut off gas to the appliance. in the vicinity of this or any other 2. Extinguish any open flame. appliance. 2.
-
Page 5: Table Of Contents
TABLE OF CONTENTS MODEL NUMBERS RATING LABELS PRECAUTIONS REGULATORY / CODE REQUIREMENTS PORTABLE LP CYLINDERS LOCATION AND ASSEMBLY INSTALLATION GAS CONNECTIONS ELECTRICAL SUPPLY LIGHTING INSTRUCTIONS USING YOUR GRILL CLEANING AND MAINTENANCE TROUBLESHOOTING WIRING SCHEMATICS PARTS LIST SERVICE WARRANTY ©2019 Hestan Commercial Corporation... - Page 6 MODEL NUMBERS Built-in Model Freestanding Model BUILT-IN MODELS Model No. Description GABR30-NG / -LP 30” BUILT-IN (ALL TRELLIS BURNERS) GMBR30-NG / -LP 30” BUILT-IN (SEAR AND TRELLIS BURNERS) GSBR30-NG / -LP 30” BUILT-IN (ALL SEAR BURNERS) GABR36-NG / -LP 36” BUILT-IN (ALL TRELLIS BURNERS) GMBR36-NG / -LP 36”...
- Page 7 GRILLING IS A PERFECTIONIST’S PURSUIT .
-
Page 8: Rating Labels
RATING LABEL The rating label contains important information about your Hestan appliance such as the model and serial number, gas type and manifold pressure, the BTU rating for each burner type, and the minimum installation clearances. Hestan Grill rating label is located on the underside of the drip pan. -
Page 9: Precautions
PRECAUTIONS - BEFORE YOU USE YOUR GRILL (continued) 10. Portable LP cylinders - Always shut off the main valve on the liquid propane (LP) cylinder after each use. Never use a dented or rusted LP cylinder. Never attach or disconnect an LP cylinder, or move or alter gas fittings when the grill is in operation or is hot. - Page 10 PRECAUTIONS - BEFORE YOU USE YOUR GRILL (continued) 23. The grill hood must be fully opened while lighting the grill. Opening the gas valves on a closed grill before lighting will not make it light sooner or more efficiently. It will only risk explosion and personal injury, or death.
-
Page 11: Regulatory / Code Requirements
REGULATORY / CODE REQUIREMENTS Installation of this cooking appliance must be made in accordance with local codes. In the absence of local codes, this unit should be installed in accordance with the National Fuel Gas Code ANSI Z223.1/NFPA 54 , Natural Gas and Propane Installation code CSA B149.1 , or Propane Storage and Handling Code B149.2 . - Page 12 LOCATING AND ASSEMBLING THE GRILL LOCATION When determining a suitable location for your grill, take into account concerns such as exposure to wind, rain, sprinklers, proximity to traffic paths, and keeping any gas supply line runs as short as possible. Locate the grill only in a well-ventilated area.
- Page 13 LOCATING AND ASSEMBLING THE GRILL (continued) Ensure that the burners are positioned correctly on their orifices, and are fully seated onto their rear hanger brackets (see Fig. 2). The burners should not move side-to-side or front-to-back if properly seated. Figure 2 Above each Trellis Burner is a stainless steel radiant tray containing specially shaped ceramic ™...
-
Page 14: Installation
INSTALLATION CLEARANCES: TO NON-COMBUSTIBLE CONSTRUCTION A minimum of 4” [10 cm] clearance from the back of the grill to non-combustible construction is required to allow the hood to be opened fully. TO COMBUSTIBLE CONSTRUCTION This appliance should NOT be installed over, under or next to unprotected combustible construction. - Page 15 INSTALLATION (continued) 2 OPENINGS FOR GAS & LAYOUT FOR ELECTRICAL FINISHED COMBUSTIBLE COUNTERTOP ENCLOSURE (ISLAND) MIN. 11.4 WITH INSULATION JACKET 30.0 76.2 36.0 18.8 91.4 47.8 REF. INSULATION JACKET MIN. 10 in² (64.5 cm²) MIN. VENTILATION OPENING ON OPENING FOR BOTH SIDES ACCESS DOORS AND REAR...
- Page 16 INSTALLATION (continued) SUPPLEMENTARY VENTILATION In certain installations, such as an island located against your home or other structure, or perhaps a short roof overhang above your grill, a “range-hood” style ventilation unit may be desirable to direct smoke and grease away from those structures. In these cases, a Hestan Pro Canopy vent hood is recommended.
-
Page 17: Gas Connections
GAS CONNECTIONS GAS SUPPLY The local gas authority or supplier should be consulted at the installation planning stage in order to establish the availability of an adequate supply of gas (NG or LP). If it is a new installation, have the gas authorities or supplier check the meter size and piping to assure that the unit is supplied with the necessary amount of gas supply and pressure to operate the unit(s). - Page 18 GAS CONNECTIONS (continued) GAS CONNECTION - NATURAL GAS (NG) NOTE: To ensure proper heating performance of this appliance, verify that the gas line supply pressure is adequate. Use only the gas pressure regulator supplied with this appliance. This regulator is set for a supply (inlet) pressure of 7-14 inch WC [1.74-3.48 kPa] to maintain 4 inch WC [1.00 kPa] nominal outlet (manifold) pressure.
- Page 19 GAS CONNECTIONS (continued) GAS CONNECTION - LIQUID PROPANE (LP) CYLINDER Your Hestan grill for use with LP gas is supplied with a two-stage regulator/hose assembly for connection to a standard 20 lb. LP gas cylinder. This assembly must be used WITHOUT alteration. If this assembly needs to be replaced, contact your Hestan dealer for genuine replacement P/N 014309.
- Page 20 GAS CONNECTIONS (continued) LP TANK RESTRAINT If you purchased a Hestan Grill on a cart, be sure to restrain the LP cylinder by securing it with the retention bolt on the slide-out tray as shown below. It is important the tank does not fall over or stretch the hose which could cause a gas leak.
- Page 21 GAS CONNECTIONS (continued) TO TEST • Make sure all control valves are in the “OFF” position. • Apply the soap solution described above to all fittings. • Turn the gas supply on. • Check all connections from the supply line, or LP cylinder up to and including the manifold pipe assembly.
- Page 22 GAS CONNECTIONS (continued) BURNER REMOVAL BEFORE AIR SHUTTER ADJUSTMENT Open your grill and remove the grates, radiant trays, and burners from the firebox area. Trellis burners are removed by lifting up the rear of the burner, and carefully twisting to clear the igniter shroud.
- Page 23 GAS CONNECTIONS (continued) VALVE ADJUSTMENTS The valves on your Hestan grill are preset at the factory for optimum performance. However, the low setting on these valves are adjustable if altitude, low-heat performance, converting from one gas to another, or other factors indicate an adjustment is needed. It is not recommended to adjust the Rotisserie or Sear Burner valves.
-
Page 24: Electrical Supply
GAS CONNECTIONS (continued) INFRARED BURNER FLAME ADJUSTMENT Infrared burners do not require adjustment and need only be checked visually for proper performance. On HIGH, an infrared burner should glow red evenly over its entire surface. A diminished red glow and/or a large blue “halo” of flame on the surface of the infrared burner indicates improper airflow or a blockage at the burner itself. - Page 25 ELECTRICAL SUPPLY (continued) 3. Do not operate any outdoor cooking gas appliance with a damaged cord or plug, or after the appliance malfunctions or has been damaged in any manner. Contact the manufacturer for repair. 4. Do not let the cord hang over the edge of a table or touch hot surfaces. 5.
- Page 26 ELECTRICAL SUPPLY (continued) ©2019 Hestan Commercial Corporation...
-
Page 27: Lighting Instructions
LIGHTING INSTRUCTIONS Hestan Grills feature hot-surface igniters for all Trellis Burners ™ , and infrared Rotisserie and Sear Burners. The hot-surface igniters feature a “time-extender” function which maintain the hot glow of the igniter for a longer period of time to ensure successful lighting of the burners. Note: The time extender feature applies to the main burners only, not the rotisserie. - Page 28 LIGHTING INSTRUCTIONS (continued) LIGHTING SIDE BURNERS 1. Read Use & Care Manual before lighting. Remove cover during lighting. 2. Stand as far away as possible when lighting. 3. Push and turn selected knob to “HIGH” position. Igniter will spark until flame is established. 4.
-
Page 29: Using Your Grill
USING YOUR GRILL Your Hestan Grill is a powerful and versatile cooking tool. Traditional grilling requires high heat for searing and proper browning. Many meats are initially cooked on “HIGH” to sear / brown the meat and lock in juices. After that, the temperature can be lowered to complete the cooking, such as with large pieces of meat or poultry. -
Page 30: Cleaning And Maintenance
USING YOUR GRILL (continued) THE SPIT & FORKS The rotisserie can handle large food items up to 50 lbs. You should prepare your food items and first mount it on the spit, then mount the forks. Push the pointed end of the spit through the food and center on the spit. - Page 31 CLEANING AND MAINTENANCE (continued) 1. After use, following the safety precautions detailed earlier in this manual, wipe the grill with a soft, damp, soapy cloth and rinse with clean, warm water. This should remove most substances encountered during the grilling process. 2.
- Page 32 CLEANING AND MAINTENANCE (continued) CARE OF PAINTED SURFACES (IF APPLICABLE) Hestan grills are available in standard stainless steel, or 11 optional colors. The tough powder- coating on these panels are commonly used on automotive parts, and commercial and residential appliances because of their excellent chip resistance, and resistance to a variety of chemicals. The finish should hold up well outdoors in most conditions.
- Page 33 CLEANING AND MAINTENANCE (continued) SEAR BURNER CLEANING When used correctly, it should not be necessary to clean Hestan Infrared Sear Burners. The hot screen and tiles vaporize anything that falls on them. However, if food debris or drippings were to fall on an unused (not lit) Sear Burner, you can remove the mesh screen and brush the screen and tiles with a stiff brush.
- Page 34 CLEANING AND MAINTENANCE (continued) Figure 10 Figure 11 LIGHT BULB REPLACEMENT 1. Disconnect the power to your grill before any service or light bulb replacement. Be sure the grill and the lights are completely cool. Halogen lights get extremely hot. 2.
- Page 35 TROUBLESHOOTING GUIDE Symptom Check Burner will not light Gas supply not on / shutoff valve closed LP gas cylinder empty Power cord not plugged in, or no power to receptacle, or blown fuse Low gas pressure to unit Burner ports near igniter are obstructed or dirty Burner not installed correctly on orifice Defective or clogged burner valve Incorrect orifice or clogged orifice...
-
Page 36: Wiring Schematics
WIRING SCHEMATIC ELECTRICAL BOX (30, 36 & 42”) ©2019 Hestan Commercial Corporation... - Page 37 WIRING SCHEMATIC (continued) HARNESS 30” ©2019 Hestan Commercial Corporation...
- Page 38 WIRING SCHEMATIC (continued) HARNESS 36” ©2019 Hestan Commercial Corporation...
- Page 39 WIRING SCHEMATIC (continued) HARNESS 42” ©2019 Hestan Commercial Corporation...
-
Page 40: Parts List
PARTS LIST Please visit the Hestan website to access the parts list for your Hestan Outdoor product: www.hestanhome.com. SERVICE All warranty and non-warranty repairs should be performed by qualified service personnel. To locate an authorized service agent in your area, contact your Hestan dealer, local representative, or the manufacturer. - Page 41 LIMITED WARRANTY (continued) EXTENSIONS TO ONE YEAR LIMITED WARRANTY PERIOD: In addition to the One-Year Limited Warranty, the following components have extended warranty coverage as specifically set forth below: 1. The Product’s stainless steel grill body, DiamondCut cooking grates and warming rack, stainless Trellis grill burners, Sear burners and rotisserie infrared burner (where applicable) are warranted to be free from defects in material and workmanship under normal non- commercial use and service for the lifetime of the original Purchaser.
- Page 42 LIMITED WARRANTY (continued) HCC SHALL NOT BE LIABLE FOR LOSS OF REVENUE OR PROFITS, FAILURE TO REALIZE SAVINGS OR OTHER BENEFITS, OR ANY OTHER SPECIAL, INCIDENTAL OR CONSEQUENTIAL DAMAGES CAUSED BY THE USE, MISUSE OR INABILITY TO USE THE PRODUCT, REGARDLESS OF THE LEGAL THEORY ON WHICH THE CLAIM IS BASED, AND EVEN IF HCC HAS BEEN ADVISED OF THE POSSIBILITY OF SUCH DAMAGES.
- Page 43 GRIL DE PLEIN AIR HESTAN, LE PLUS PUISSANT , POLYVALENT ET FIABLE DISPONIBLE.
- Page 44 Un message de Hestan La cuisine en plein air est le rêve du perfectionniste et, grâce à ce nouvel investissement, vous vous en êtes maintenant rapproché. Nous vous souhaitons une sincère bienvenue dans la famille Hestan. Nous avons conçu et fabriqué nos produits pour garantir que vos invités vous complimenteront à...
- Page 45 DANGER DANGER S’il Y a une odeur de gaz : Ne pas entreposer ni utiliser de I’essence ni d’autres vapeurs ou liquides inflammables Coupez I’admission de gaz de I’appariel. dans Ie voisinage de l’apparell, ni de tout autre appareil. 2. Éteindre toute flamme nue. Une bouteille de propane qui n’est pas 3.
- Page 46 TABLE DES MATIÈRES NUMÉROS DE MODÈLE PLAQUE SIGNALÉTIQUE PRÉCAUTIONS RESPECT DE LA RÉGLEMENTATION ET DES CODES EN VIGUEUR BOUTEILLES DE GPL PORTATIVES IMPLANTATION ET ASSEMBLAGE INSTALLATION BRANCHEMENTS POUR LE GAZ BRANCHEMENTS POUR L’ÉLECTRICITÉ INSTRUCTIONS D’ALLUMAGE UTILISATION DU GRIL NETTOYAGE ET ENTRETIEN GUIDE DE DÉPANNAGE SCHÉMAS DE CÂBLAGE LISTE DES PIÈCES...
-
Page 47: Numéros De Modèle
NUMÉROS DE MODÈLE Modèle encastré Modèle amovible MODÈLES ENCASTRÉS Numéro de Modèle Description GABR30-NG / -LP 30 po ENCASTRÉ (TOUS TRELLIS BURNERS) GMBR30-NG / -LP 30 po ENCASTRÉ (BRÛLEURS DE SAISIE ET TRELLIS BURNERS) GSBR30-NG / -LP 30 po ENCASTRÉ (TOUS BRÛLEURS DE SAISIE) GABR36-NG / -LP 36 po ENCASTRÉ... - Page 48 GRILLER EST CE À QUOI ASPIRE LE PERFECTIONNISTE.
-
Page 49: Plaque Signalétique
PLAQUE SIGNALÉTIQUE La plaque signalétique donne des informations importantes sur cet appareil Hestan telles que les numéros de série et de modèle, le type de gaz et la pression d’admission, la cote BTU pour chaque type de brûleur et les dégagements minima d’installation. La plaque signalétique de ce gril Hestan se trouve sur le... - Page 50 PRÉCAUTIONS À PRENDRE AVANT D’UTILISER CE GRIL (suite) Vérifier soigneusement le détendeur, les tuyaux, les orifices de combustion, l’obturateur d’air et la section venturi / clapet. Toujours couper le gaz à la source (bouteille ou conduite d’alimentation) avant d’examiner ces pièces. Lorsqu’on allume un brûleur, toujours faire très attention à...
- Page 51 PRÉCAUTIONS À PRENDRE AVANT D’UTILISER CE GRIL (suite) 21. Ne jamais toucher les grilles de cuisson, le couvercle ni les surfaces métalliques aux environs immédiats avec les mains nues quand on grille, car ces zones deviennent très chaudes et pourraient causer des blessures.
-
Page 52: Respect De La Réglementation Et Des Codes En Vigueur
RESPECT DE LA RÉGLEMENTATION ET DES CODES EN VIGUEUR L’installation de cet appareil de cuisson doit être effectuée conformément aux codes locaux. En l’absence de tels codes, installer cet appareil conformément au National Fuel Gas Code ANSI Z223.1/NFPA 54, au code Natural Gas and Propane Installation CSA B149.1 ou au Propane Storage and Handling Code B149.2. - Page 53 IMPLANTATION ET ASSEMBLAGE DU GRIL EMPLACEMENT Lors de la détermination d’un emplacement approprié pour le gril, tenir compte des préoccupations que représentent l’exposition au vent, la pluie, les arroseurs, la proximité par rapport aux voies de circulation et veiller à maintenir la conduite d’alimentation en gaz aussi courte que possible. Placez le gril uniquement dans un endroit bien aéré.
-
Page 54: Implantation Et Assemblage
IMPLANTATION ET ASSEMBLAGE DU GRIL (suite) S’assurer que les brûleurs sont dans la position correcte sur leurs orifices calibrés et qu’ils sont bien en place sur leurs attaches de suspension arrière (voir Fig. 2). Les brûleurs ne doivent pas bouger d’un côté à l’autre ni d’avant en arrière s’ils sont bien en place. -
Page 55: Installation
INSTALLATION DÉGAGEMENTS : PAR RAPPORT À UNE CONSTRUCTION NON COMBUSTIBLE Un dégagement minimum de 4 po [10 cm] entre l’arrière du gril et une construction non combustible est nécessaire pour permettre l’ouverture complète du couvercle. PAR RAPPORT À UNE CONSTRUCTION COMBUSTIBLE Ne PAS installer cet appareil au-dessus, en dessous ou à... - Page 56 INSTALLATION (suite) 2 OUVERTURES POUR GAZ ET CONFIGURATION POUR ELECTRICITÉ ENCEINTE COMBUSTIBLE (ÎLE) COMPTOIR FINI AVEC ENVELOPPE DE MIN. PROTECTION ISOLANTE 11,4 N° RÉF. MODELÉ DE ENVELOPPE DE GRIL PROTECTION (po) (cm) (po) (cm) (po) (cm) 30,0 ISOLANTE 76,2 GRIL 30 po 88,9 25,1 63,8...
- Page 57 INSTALLATION (suite) VENTILATION SUPPLÉMENTAIRE Dans certaines installations, telles par exemple que celles où le gril se trouve dans une île implantée contre une maison ou une autre construction, ou peut-être sous un petit surplomb au-dessus de votre gril; il peut s’avérer souhaitable de prévoir un système d’évacuation du type « hotte » pour détourner la fumée et la graisse de ces constructions.
-
Page 58: Branchements Pour Le Gaz
BRANCHEMENTS POUR LE GAZ ALIMENTATION EN GAZ Consulter les autorités locales responsables ou le fournisseur lors de la phase de planification de l’installation afin de vérifier qu’un approvisionnement suffisant en gaz (gaz naturel ou GPL) est disponible. S’il s’agit d’une nouvelle installation, demander aux autorités locales responsables ou au fournisseur de vérifier la capacité... - Page 59 BRANCHEMENTS POUR LE GAZ (suite) RACCORDEMENT DE GAZ – GAZ NATUREL REMARQUE : Pour faire en sorte que cet appareil chauffe bien, vérifier que la pression dans la conduite d’alimentation en gaz est suffisante. Utiliser uniquement le détendeur de pression de gaz fourni avec cet appareil.
- Page 60 BRANCHEMENTS POUR LE GAZ (suite) RACCORDEMENT DE GAZ – BOUTEILLE DE PROPANE LIQUIDE (GPL) Le gril Hestan fonctionnant au GPL est équipé d’un ensemble détendeur à deux étages / flexible permettant le raccordement à une bouteille de GPL standard de 20 lbs. Cet ensemble doit être utilisé SANS modification.
- Page 61 BRANCHEMENTS POUR LE GAZ (suite) RETENUE DE BOUTEILLE DE GPL Si le gril Hestan est monté sur un chariot, veiller à maintenir la bouteille de GPL en l’assujettissant au moyen du boulon de fixation sur le plateau coulissant comme indiqué ci-dessous. Il est important que la bouteille ne bascule pas ou n’étire pas le tuyau, ce qui pourrait causer une fuite de gaz.
- Page 62 BRANCHEMENTS POUR LE GAZ (suite) POUR EFFECTUER LE CONTRÔLE • S’assurer que tous les robinets de réglage sont en position « OFF ». • Appliquer de la solution savonneuse décrite plus haut sur tous les raccords. • Ouvrir l’arrivée de gaz. •...
- Page 63 BRANCHEMENTS POUR LE GAZ (suite) EXTRACTION DU BRÛLEUR AVANT LE RÉGLAGE DES OBTURATEURS D’AIR Ouvrir le gril puis retirer les grilles, les plateaux radiants et les brûleurs de la cuve. Retirer les Treillis Burners en soulevant leur partie arrière et en les faisant pivoter avec précaution pour dégager les couvercles d’allumeurs.
- Page 64 BRANCHEMENTS POUR LE GAZ (suite) RÉGLAGES DE ROBINETS Les robinets de ce gril Hestan sont préréglés à l’usine pour permettre des performances optimales. La position de feu doux de ces robinets est réglable si l’altitude, le rendement à feu doux, la conversion d’un gaz à...
-
Page 65: Branchements Pour L'électricité
BRANCHEMENTS POUR LE GAZ (suite) RÉGLAGE DE FLAMME DE BRÛLEUR À INFRAROUGE Les brûleurs à infrarouge n’exigent aucun réglage et il suffit de vérifier visuellement qu’ils fonctionnent bien. En position HIGH, un brûleur à infrarouge rougeoie uniformément sur l’ensemble de sa surface. Un rougeoiement diminué... - Page 66 BRANCHEMENTS POUR L’ÉLECTRICITÉ (suite) 3. Ne pas faire fonctionner un appareil à gaz de cuisson en plein air dont le cordon ou la fiche est endommagé ni après un dysfonctionnement ou endommagement quelconque de l’appareil. S’adresser au fabricant pour la réparation. 4.
-
Page 67: Instructions D'allumage
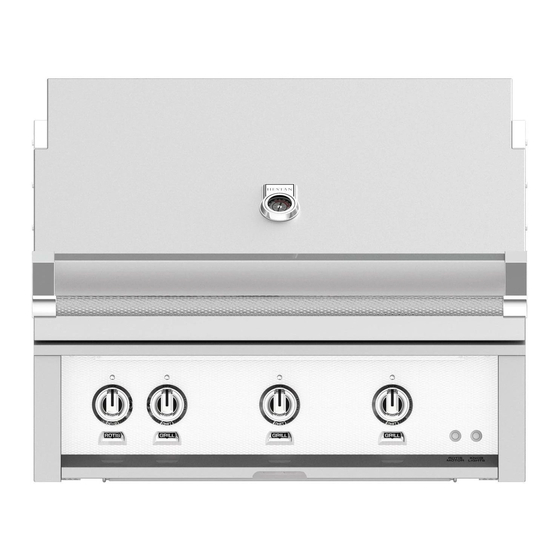
BRANCHEMENTS POUR L’ÉLECTRICITÉ (suite) INSTRUCTIONS D’ALLUMAGE Les grils Hestan sont équipés d’allumeurs à incandescence pour tous les Trellis Burners , ainsi que pour le tournebroche et les brûleurs de saisie. Les allumeurs à incandescence offrent une fonction de « prolongation de délai » qui maintient l’incandescence du brûleur pendant une période prolongée pour garantir un allumage réussi du brûleur. - Page 68 INSTRUCTIONS D’ALLUMAGE (suite) DISPOSITION DES BOUTONS DE RÉGLAGE Une disposition type (modèle de 36 po représenté, Fig. 6) des boutons de réglage est illustrée ci-dessous. La commande de tournebroche se trouve toujours tout à fait à gauche. Les témoins à LED du panneau de commande et les commandes du moteur de tournebroche se trouvent tout à...
- Page 69 INSTRUCTIONS D’ALLUMAGE (suite) 6. Si un brûleur ne réussit pas à s’allumer, voir le MANUEL D’UTILISATION ET D’ENTRETIEN pour des instructions d’allumage à l’aide d’une allumette. Remarque : le détecteur de flamme de l’allumeur à étincelles déclenchera ce dernier de façon répétée (en produisant un déclic) jusqu’à...
-
Page 70: Utilisation Du Gril
UTILISATION DU GRIL Ce gril Hestan est un appareil de cuisson puissant et polyvalent. Les grillades traditionnelles exigent une chaleur intense pour les saisir et les faire revenir comme il faut. On cuit de nombreuses viandes d’abord sur « HIGH » pour les saisir et les faire revenir et pour qu’elles restent juteuses. Il est ensuite possible d’abaisser la température pour finir de les cuire, comme c’est le cas pour les grosses pièces de viande ou les volailles. -
Page 71: Nettoyage Et Entretien
UTILISATION DU GRIL (suite) L’ENSEMBLE BROCHE / FOURCHETTES Le tournebroche peut accepter de grosses pièces de viande pesant jusqu’à 50 lbs. Préparer la viande et la monter sur la broche puis monter les fourchettes. Enfoncer le côté pointu de la broche dans la viande et centrer celle-ci sur la broche. - Page 72 NETTOYAGE ET ENTRETIEN (suite) Afin de maintenir l’aspect initial de ce gril Hestan, il convient de le nettoyer régulièrement en procédant comme suit : 1. Après avoir utilisé le gril et pris les mesures de sécurité décrites en détail plus haut dans ce manuel, l’essuyer avec un chiffon doux imbibé...
- Page 73 NETTOYAGE ET ENTRETIEN (suite) ENTRETIEN DES SURFACES PEINTES (LE CAS ÉCHÉANT) Les grils Hestan sont disponibles en standard en acier inoxydable ou offrent également 11 couleurs au choix. Les peintures en poudre résistantes appliquées sur ces panneaux sont communément utilisées sur les pièces automobiles, ainsi que sur les appareils électroménagers à...
- Page 74 NETTOYAGE ET ENTRETIEN (suite) AVIS : Éviter de faire couler de l’eau sur le brûleur de tournebroche car cela risquerait d’endommager les plaques de brûleur en céramique. Les dégâts causés par l’eau au brûleur de tournebroche ne sont pas couverts par la garantie. NETTOYAGE DES BRÛLEUR DE SAISIE Lorsqu’ils sont utilisés correctement, il ne devrait pas être nécessaire de nettoyer les brûleurs de saisie à...
- Page 75 NETTOYAGE ET ENTRETIEN (suite) Figure 10 Figure 11 REMPLACEMENT DES AMPOULES 1. Débrancher le gril avant de procéder à tout entretien ou remplacement d’ampoule. Veiller à ce que le gril et l’éclairage aient complètement refroidi. L’éclairage halogène devient très chaud. 2.
-
Page 76: Guide De Dépannage
GUIDE DE DÉPANNAGE Symptôme Contrôle Le brûleur ne s’allume pas Alimentation en gaz coupée / robinet d’arrêt fermé Bouteille de GPL vide Cordon d’alimentation débranché, prise hors tension ou fusible grillé Pression d’alimentation en gaz de l’appareil trop basse Les orifices de combustion proches de l’allumeur sont obstrués ou encrassés Le brûleur n’est pas bien place sur l’orifice calibré... -
Page 77: Schémas De Câblage
SCHÉMAS DE CÂBLAGE COFFRET ÉLECTRIQUE (30, 36 et 42 po) ©2019 Hestan Commercial Corporation... - Page 78 SCHÉMAS DE CÂBLAGE (suite) FAISCEAU 30 po ©2019 Hestan Commercial Corporation...
- Page 79 SCHÉMAS DE CÂBLAGE (suite) FAISCEAU 36 po ©2019 Hestan Commercial Corporation...
- Page 80 SCHÉMAS DE CÂBLAGE (suite) FAISCEAU 42 po ©2019 Hestan Commercial Corporation...
-
Page 81: Liste Des Pièces
LISTE DES PIÈCES Visiter le site Web Hestan pour consulter la liste des pièces de ce produit de plein air Hestan : www.hestanhome.com. SERVICE Toutes les réparations dans le cadre ou en dehors de la garantie doivent être effectuées par du personnel d’entretien qualifié. - Page 82 GARANTIE LIMITÉE (suite) ALLONGEMENTS AU-DELÀ DE LA PÉRIODE DE GARANTIE LIMITÉE D’UN AN: En plus de la Garantie limitée d’un an, les composants qui suivent bénéficient d’un prolongement de la garantie comme indiqué expressément ci-après : 1. Le corps de gril en acier inoxydable, les grilles de cuisson et celle de maintien au chaud Dia mondCut, les brûleurs Trellis Burner en acier inoxydable de gril, les brûleurs de saisie et le brûleur à...
- Page 83 GARANTIE LIMITÉE (suite) HCC N’ASSUME AUCUNE RESPONSABILITÉ POUR TOUT MANQUE À GAGNER, IMPOSSIBILITÉ DE RÉALISER DES ÉCONOMIES OU AUTRES AVANTAGES NI POUR TOUT AUTRE DOMMAGE PARTICULIER, DIRECT OU INDIRECT CAUSÉ PAR L’UTILISATION, L’USAGE ABUSIF OU L’INCAPACITÉ D’UTILISER CE PRODUIT, QUELLE QUE SOIT LA THÉORIE JURIDIQUE SUR LAQUELLE LA DEMANDE SE FONDE, MÊME SI HCC EST INFORMÉ...
- Page 84 RETAIN THIS MANUAL FOR FUTURE REFERENCE CONSERVEZ CE MANUEL POUR UNE RÉFÉRENCE FUTURE Hestan Commercial Corporation 3375 E. La Palma Ave. Anaheim, CA 92806 (888) 905-7463 ©2019 Hestan Commercial Corporation P/N 008980 REV G...
Need help?
Do you have a question about the GABR Series and is the answer not in the manual?
Questions and answers